# Welcome

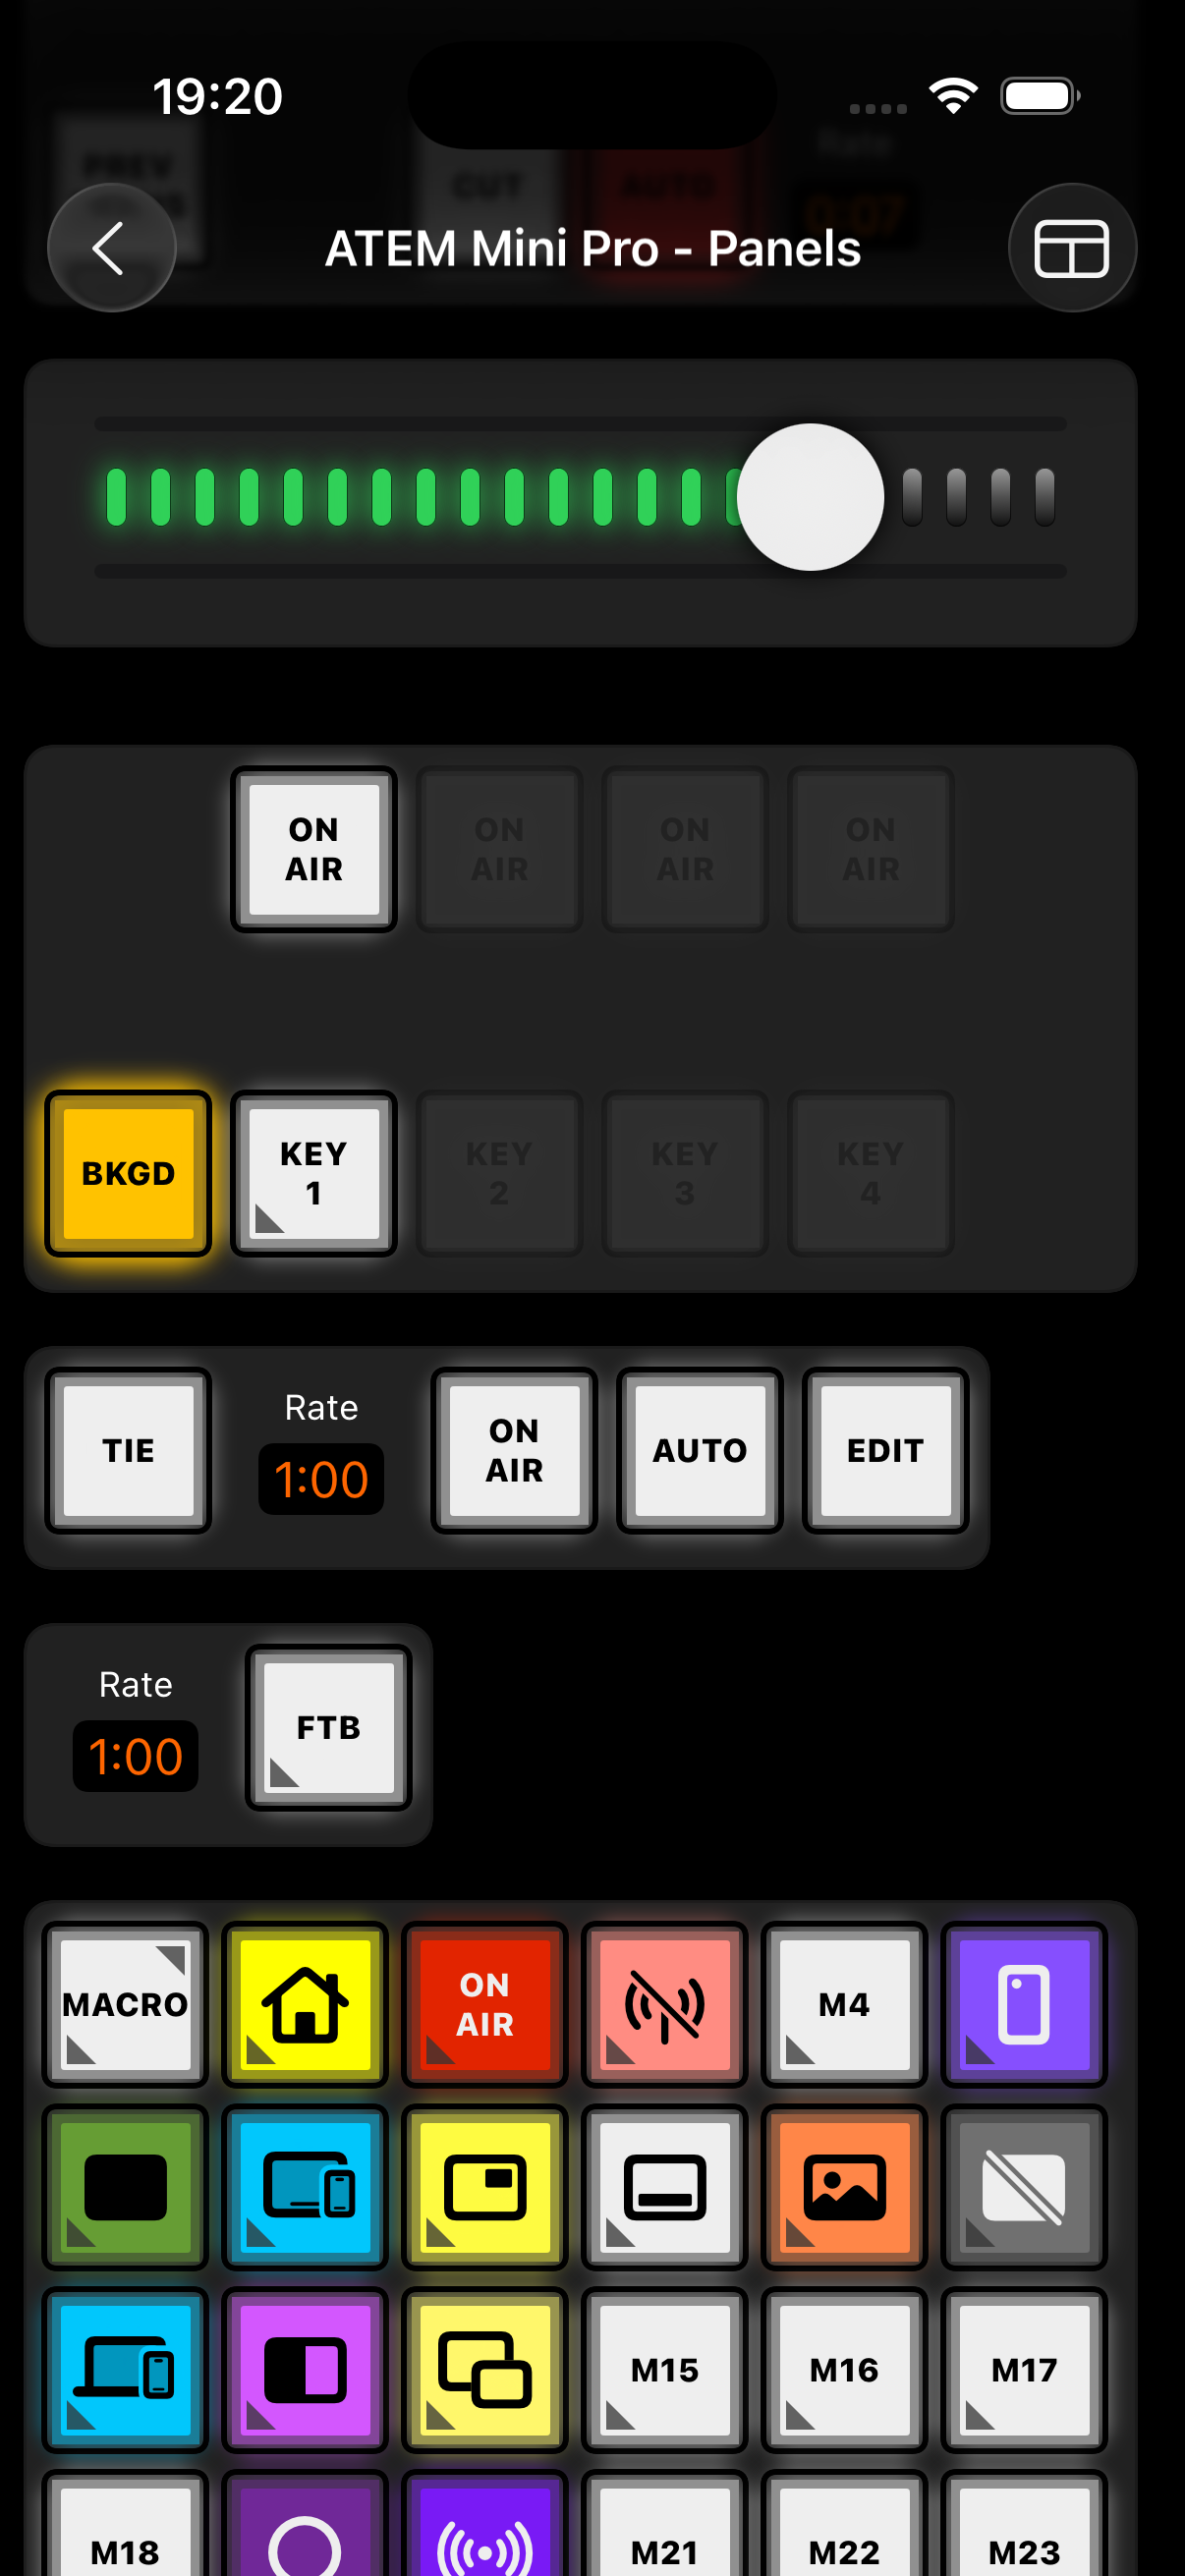
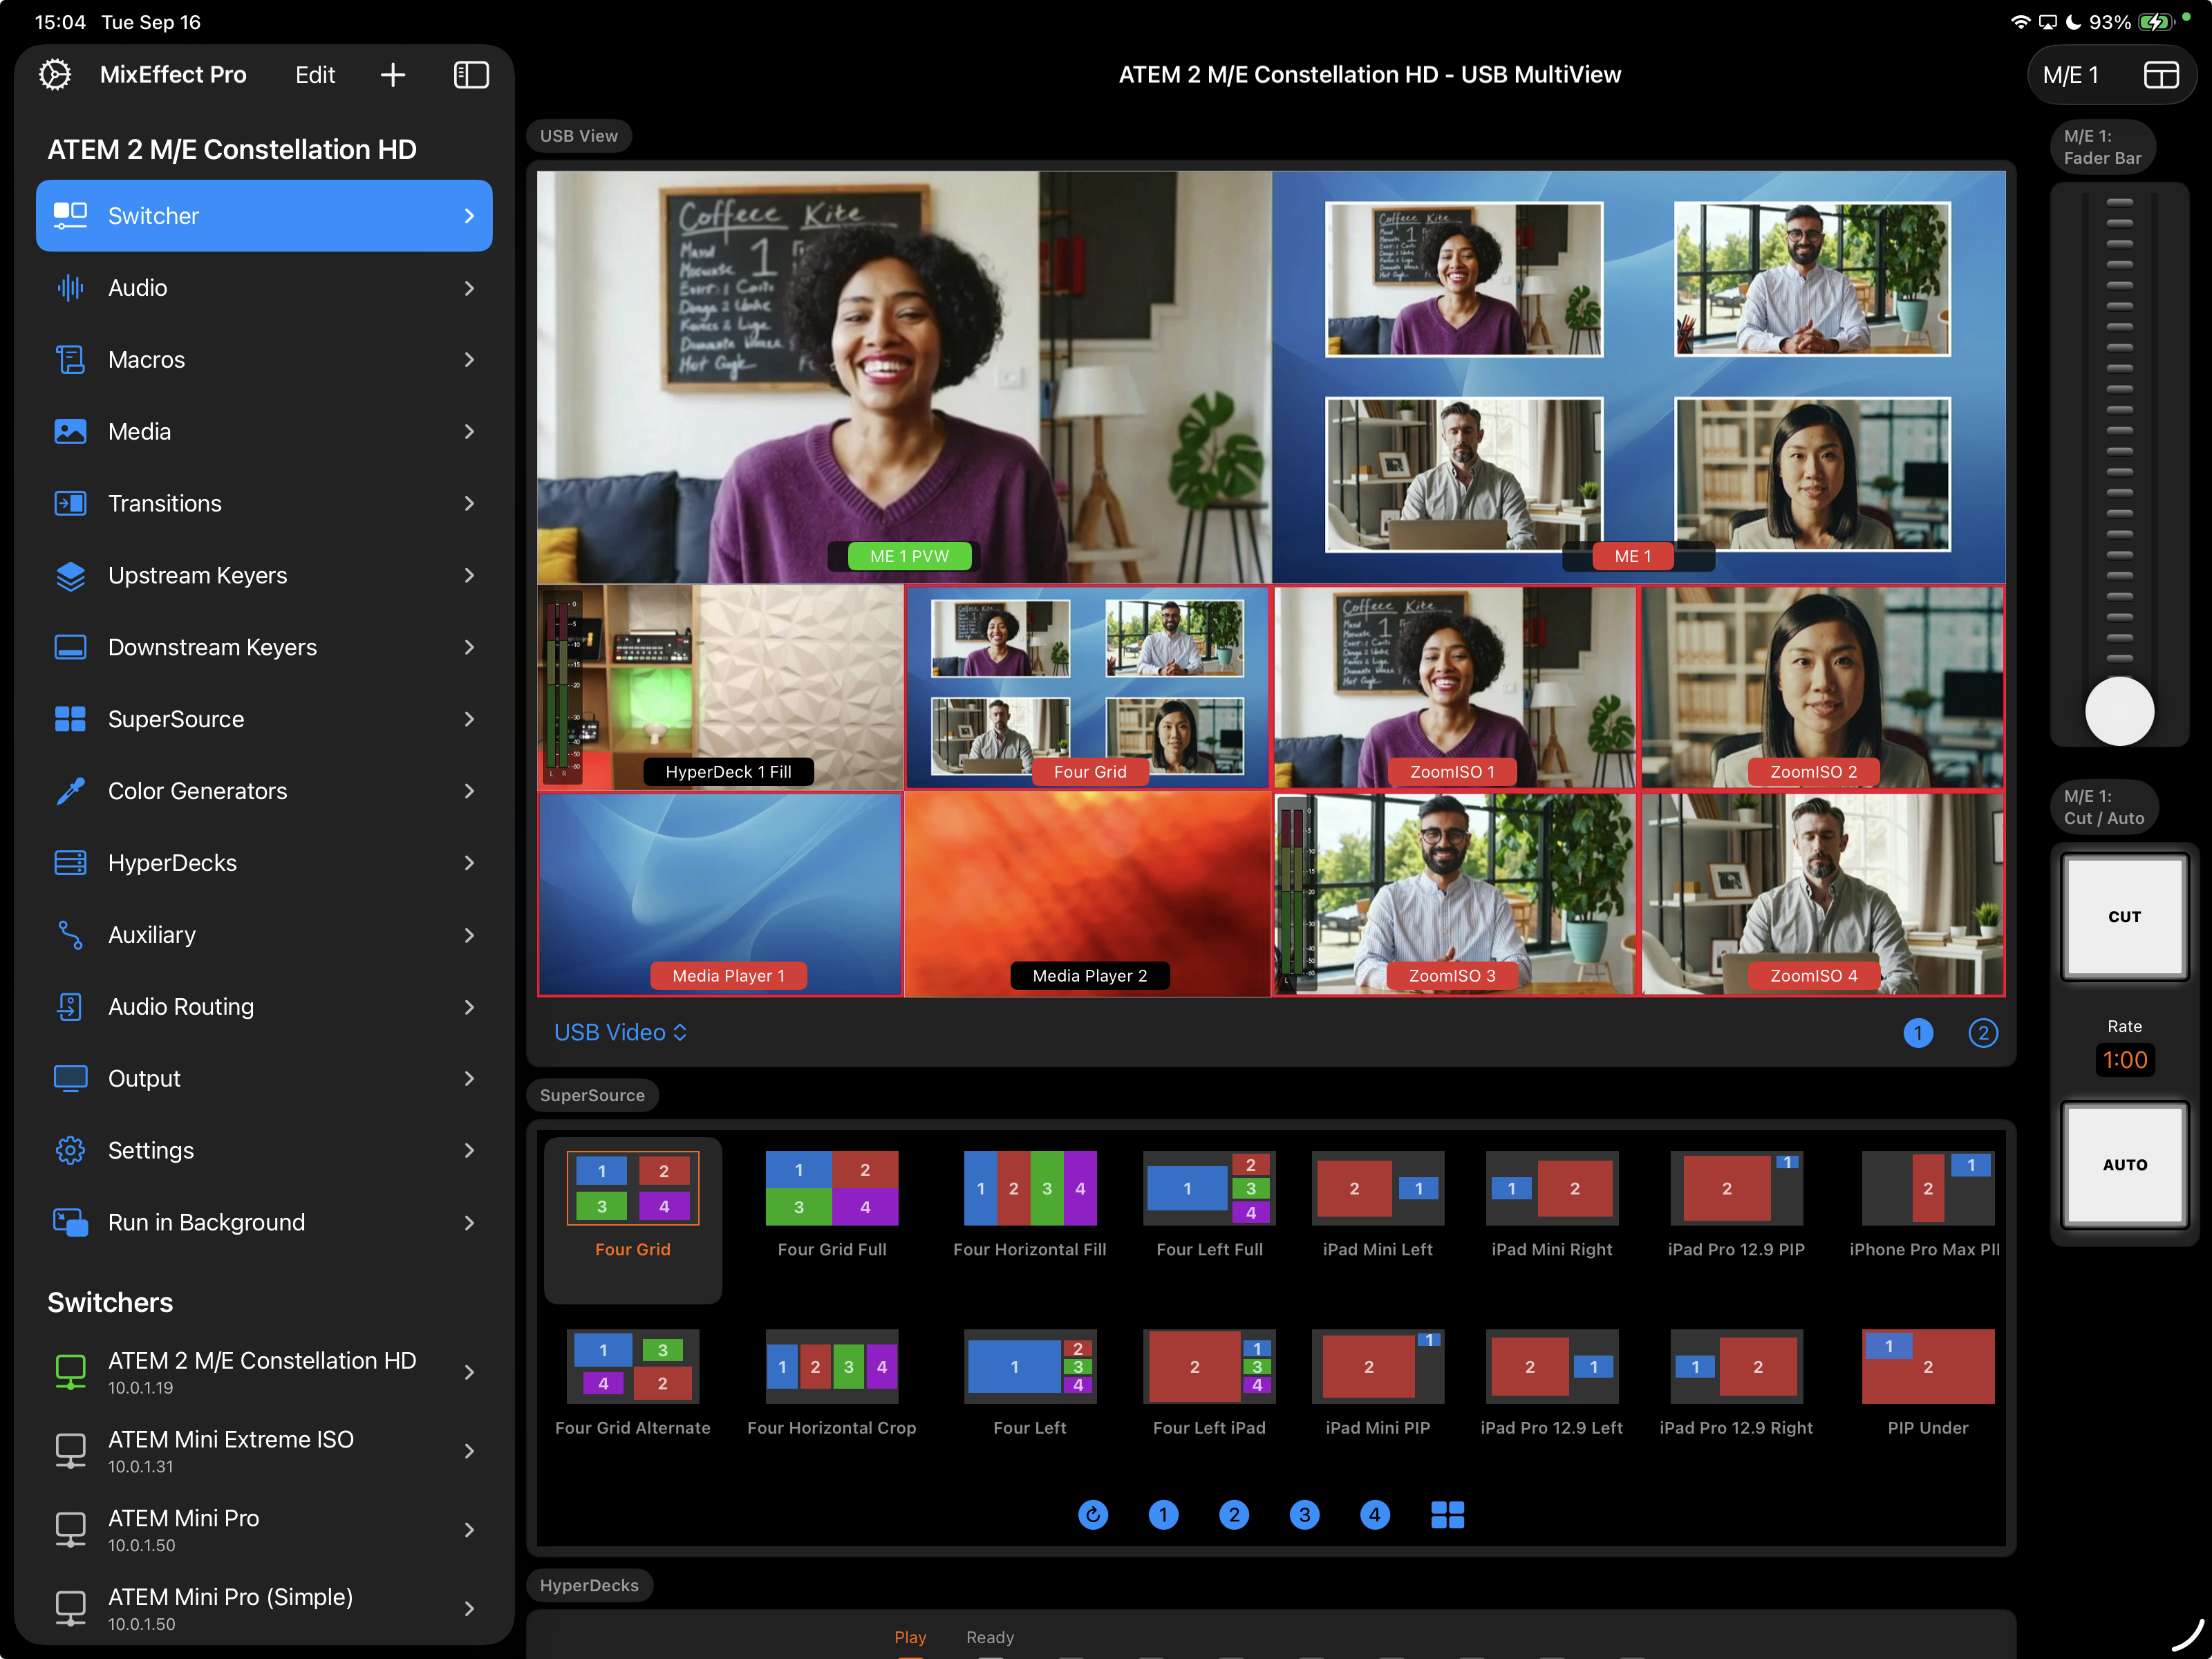
This is the documentation for MixEffect and MixEffect Pro, the professional tool for controlling Blackmagic ATEM switchers from your iPhone or iPad.

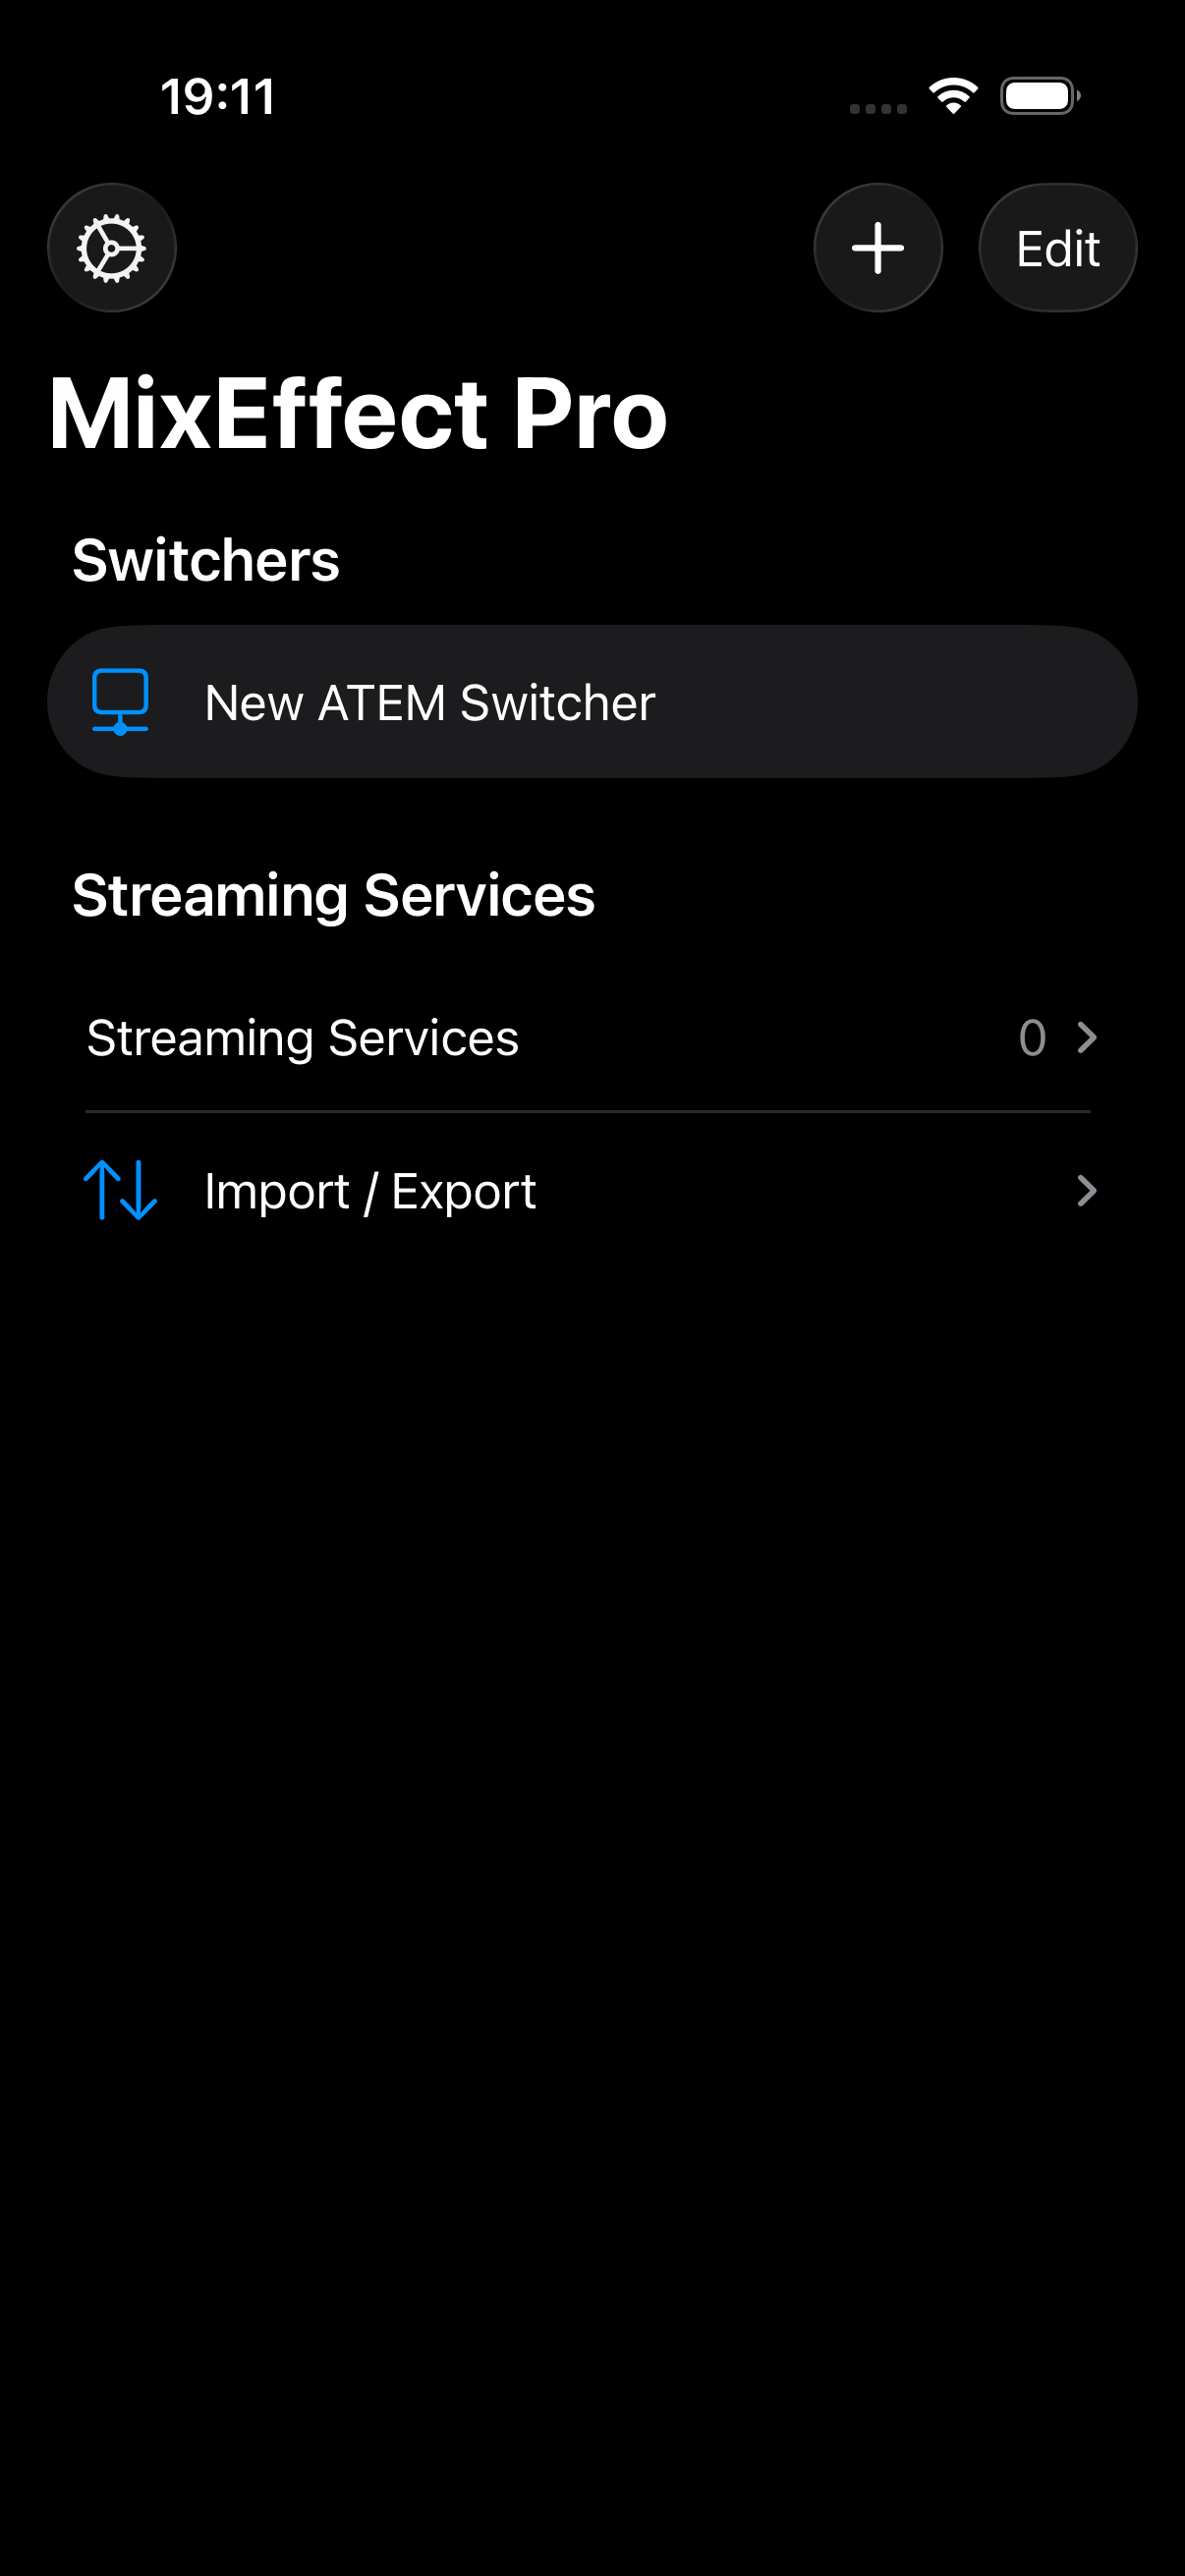
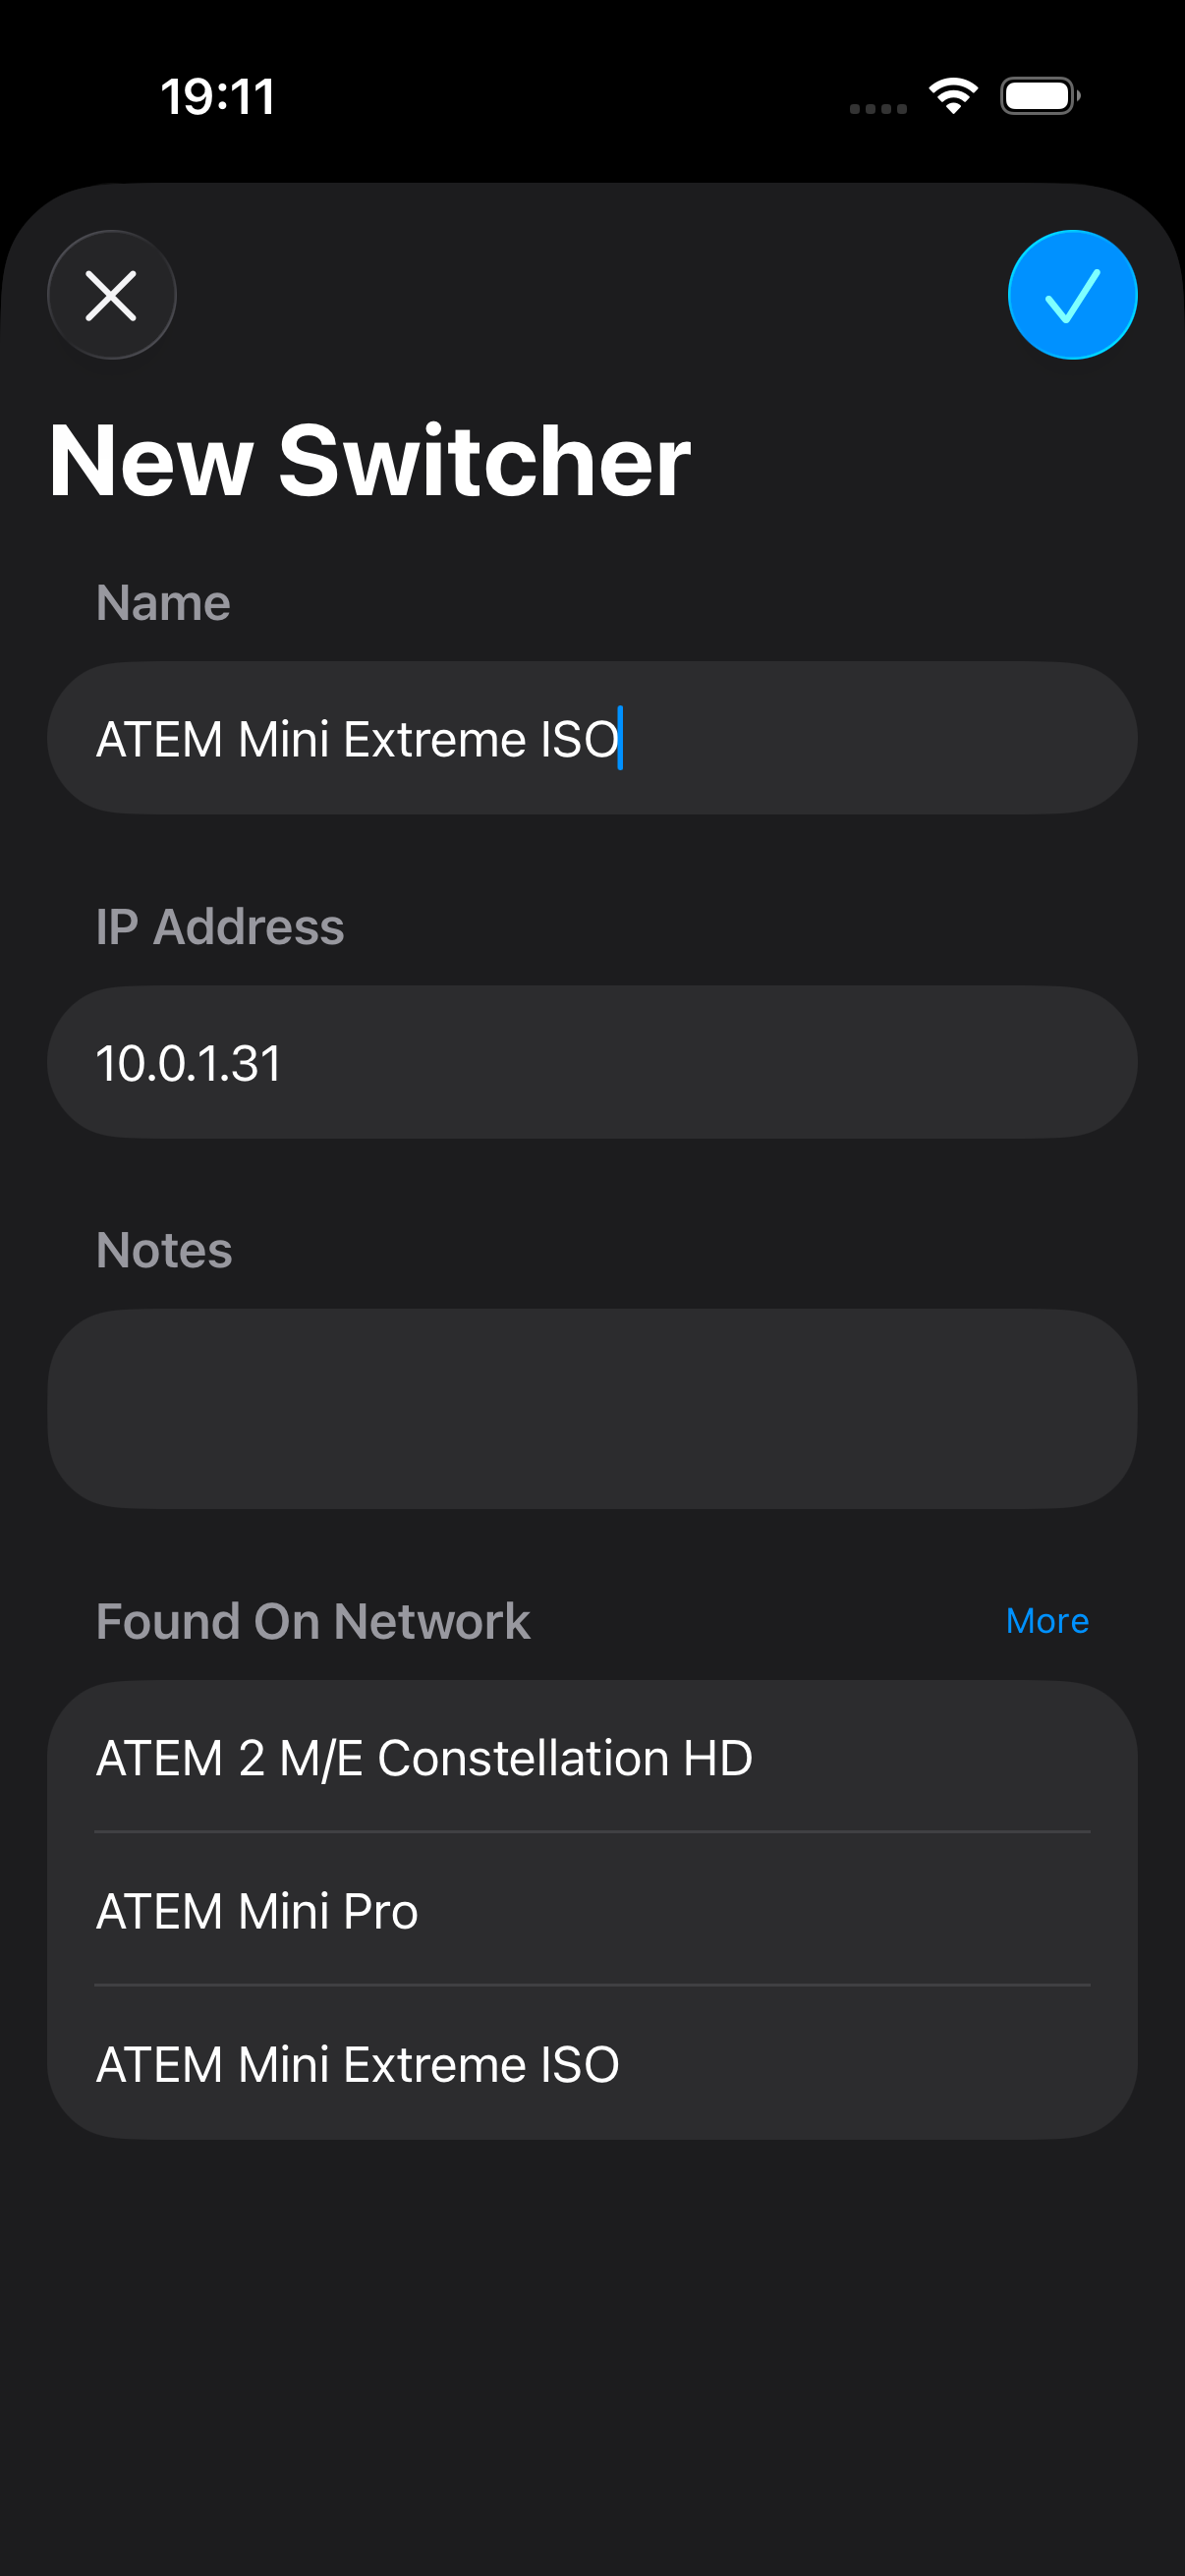
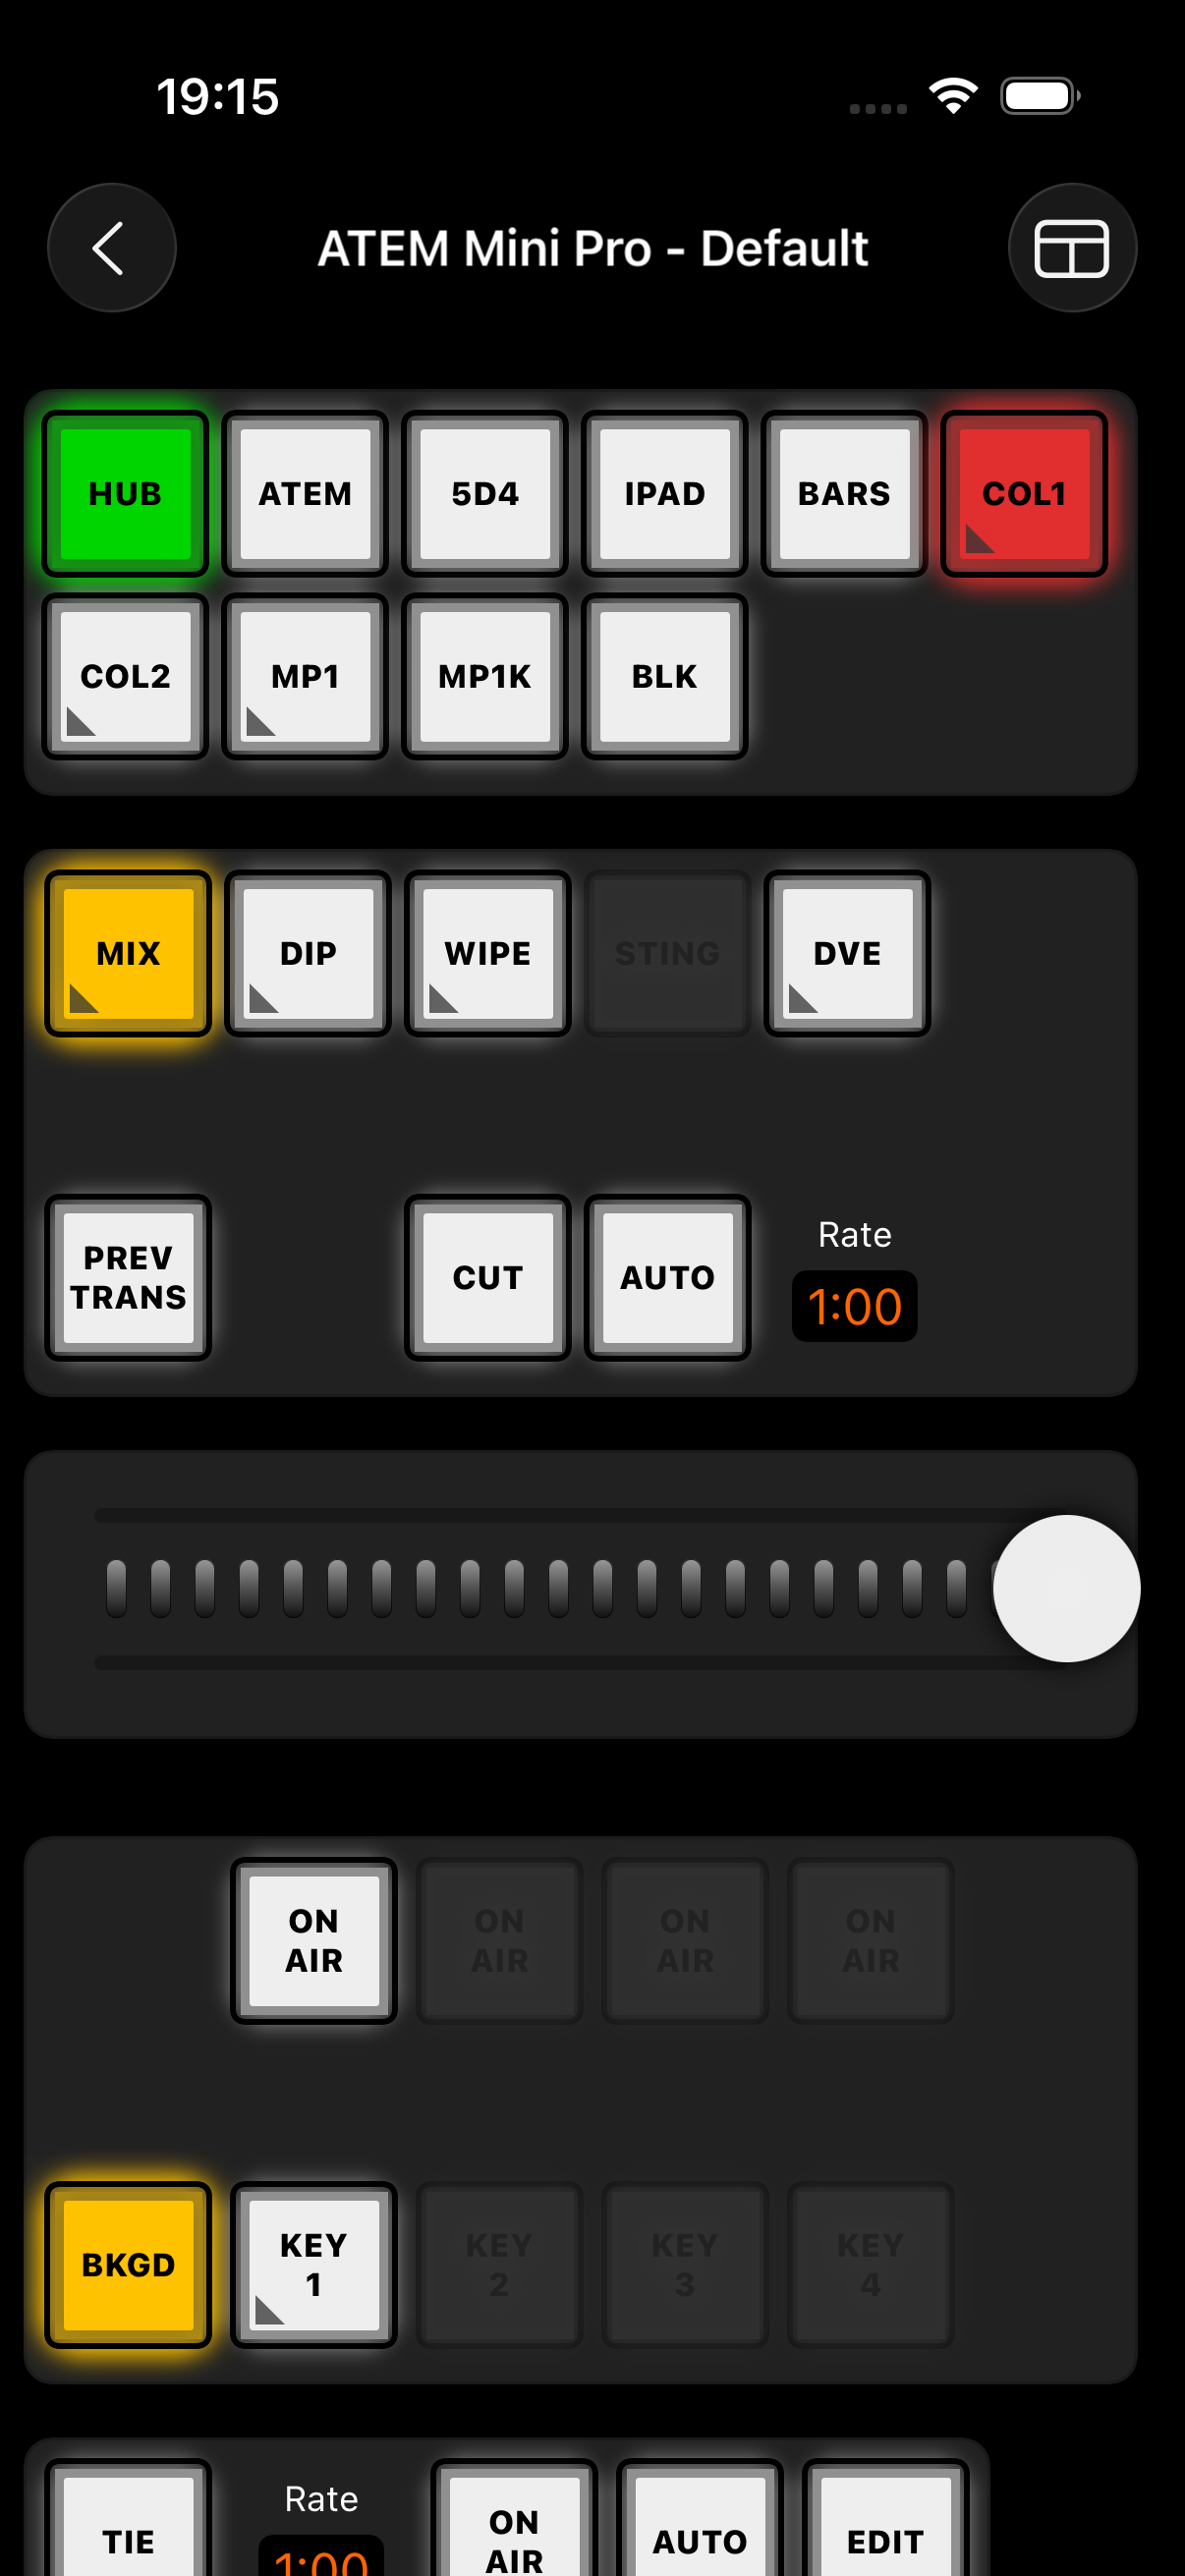
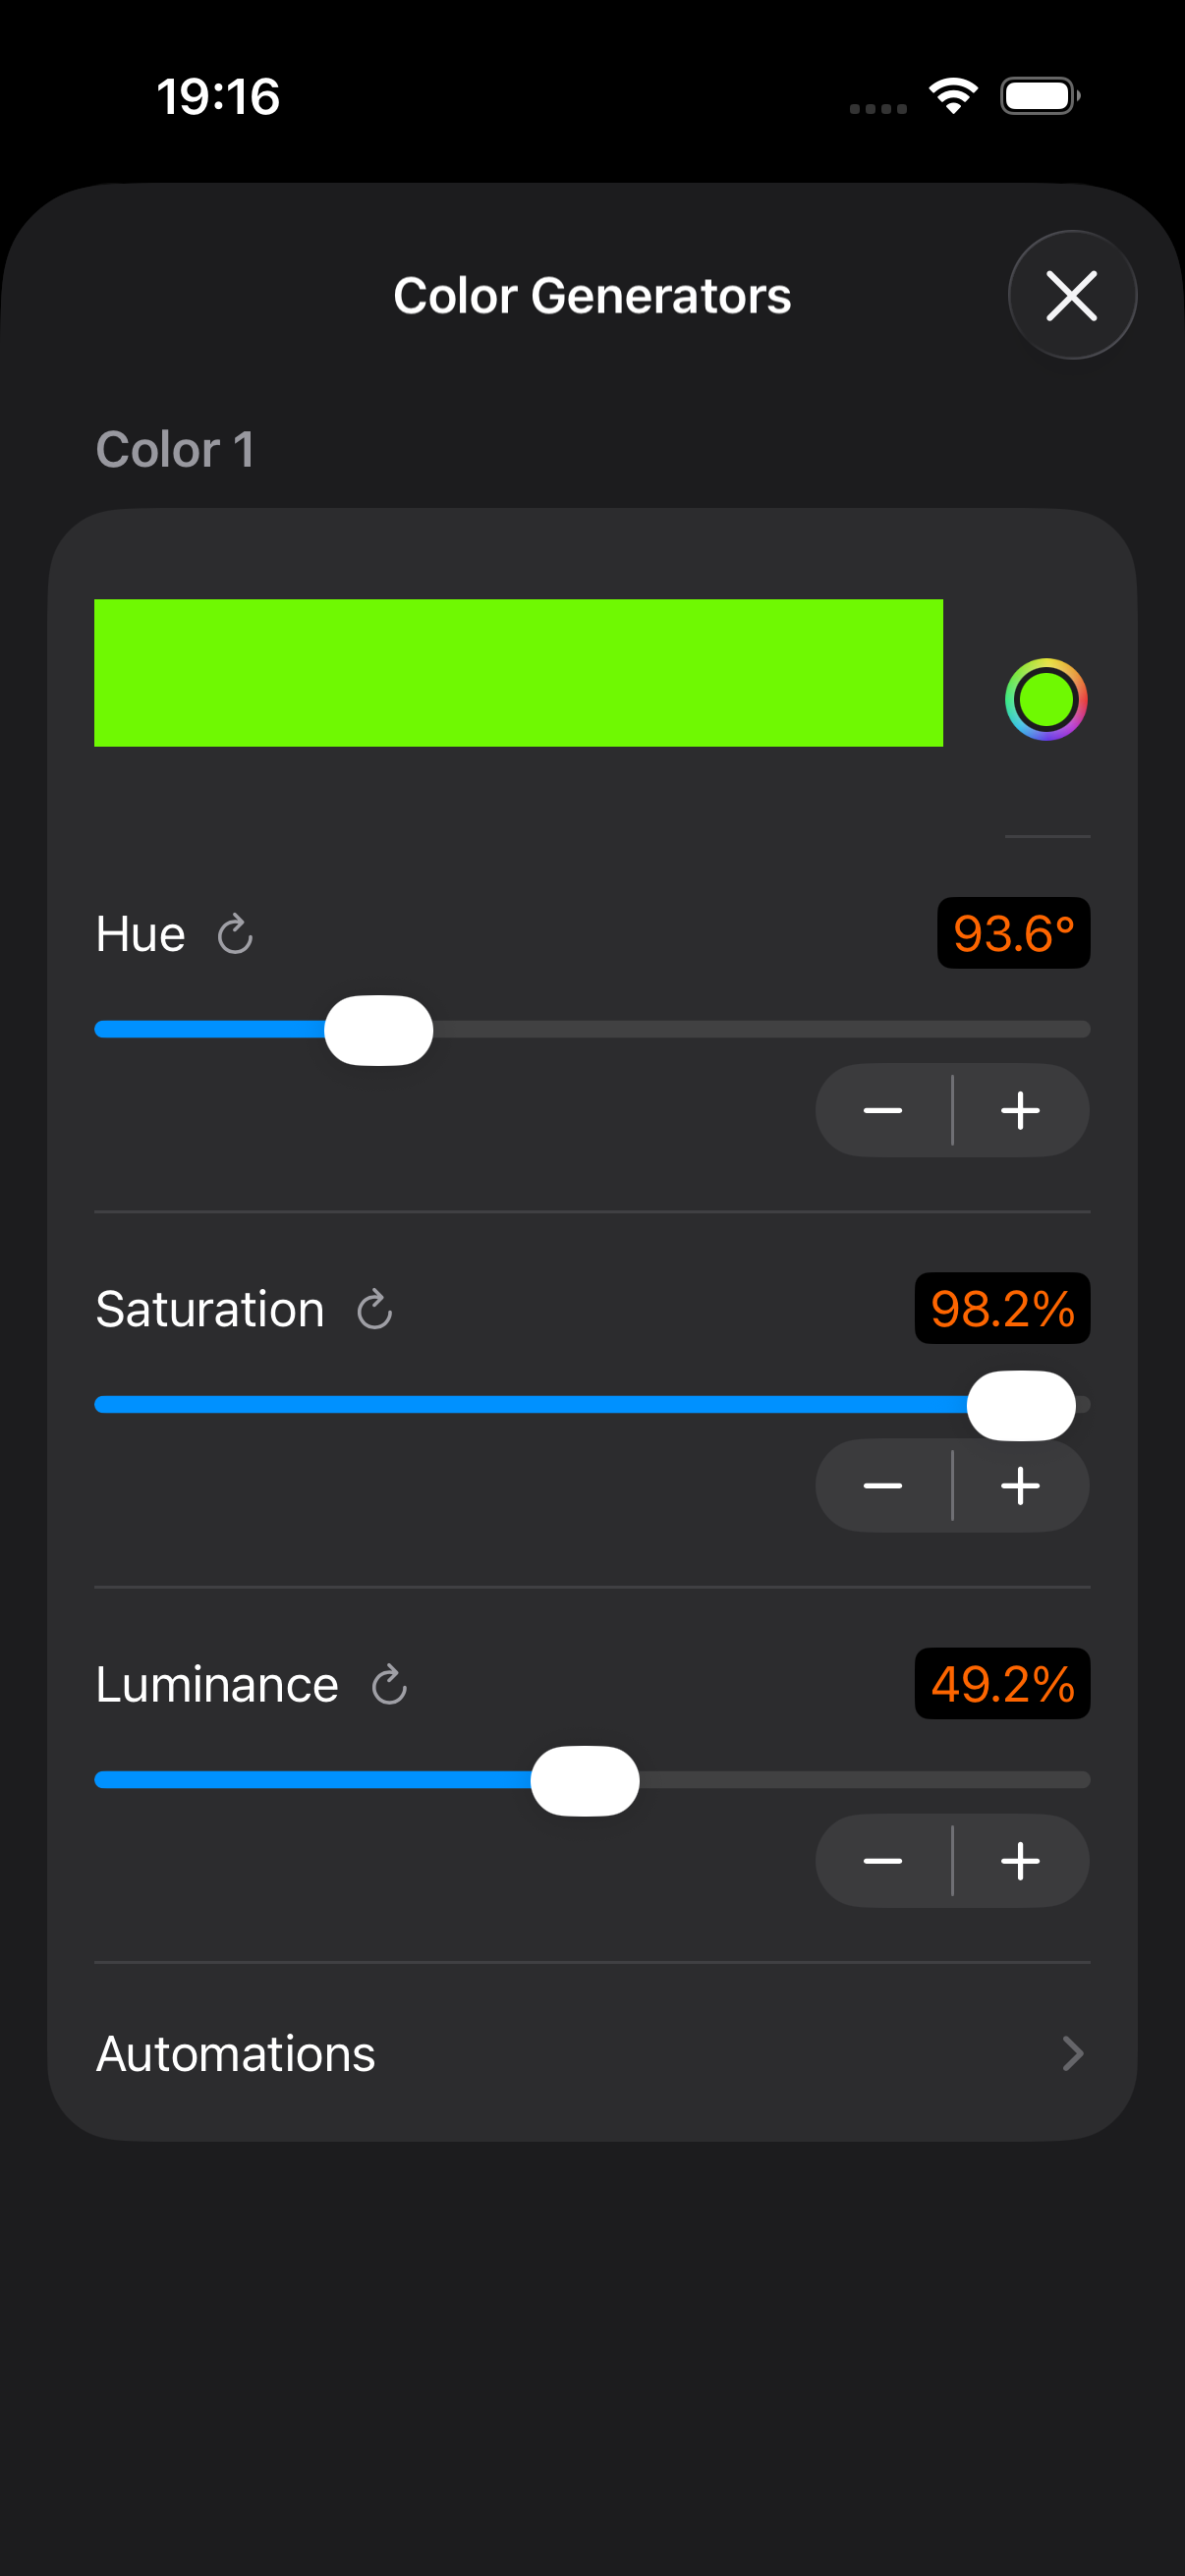
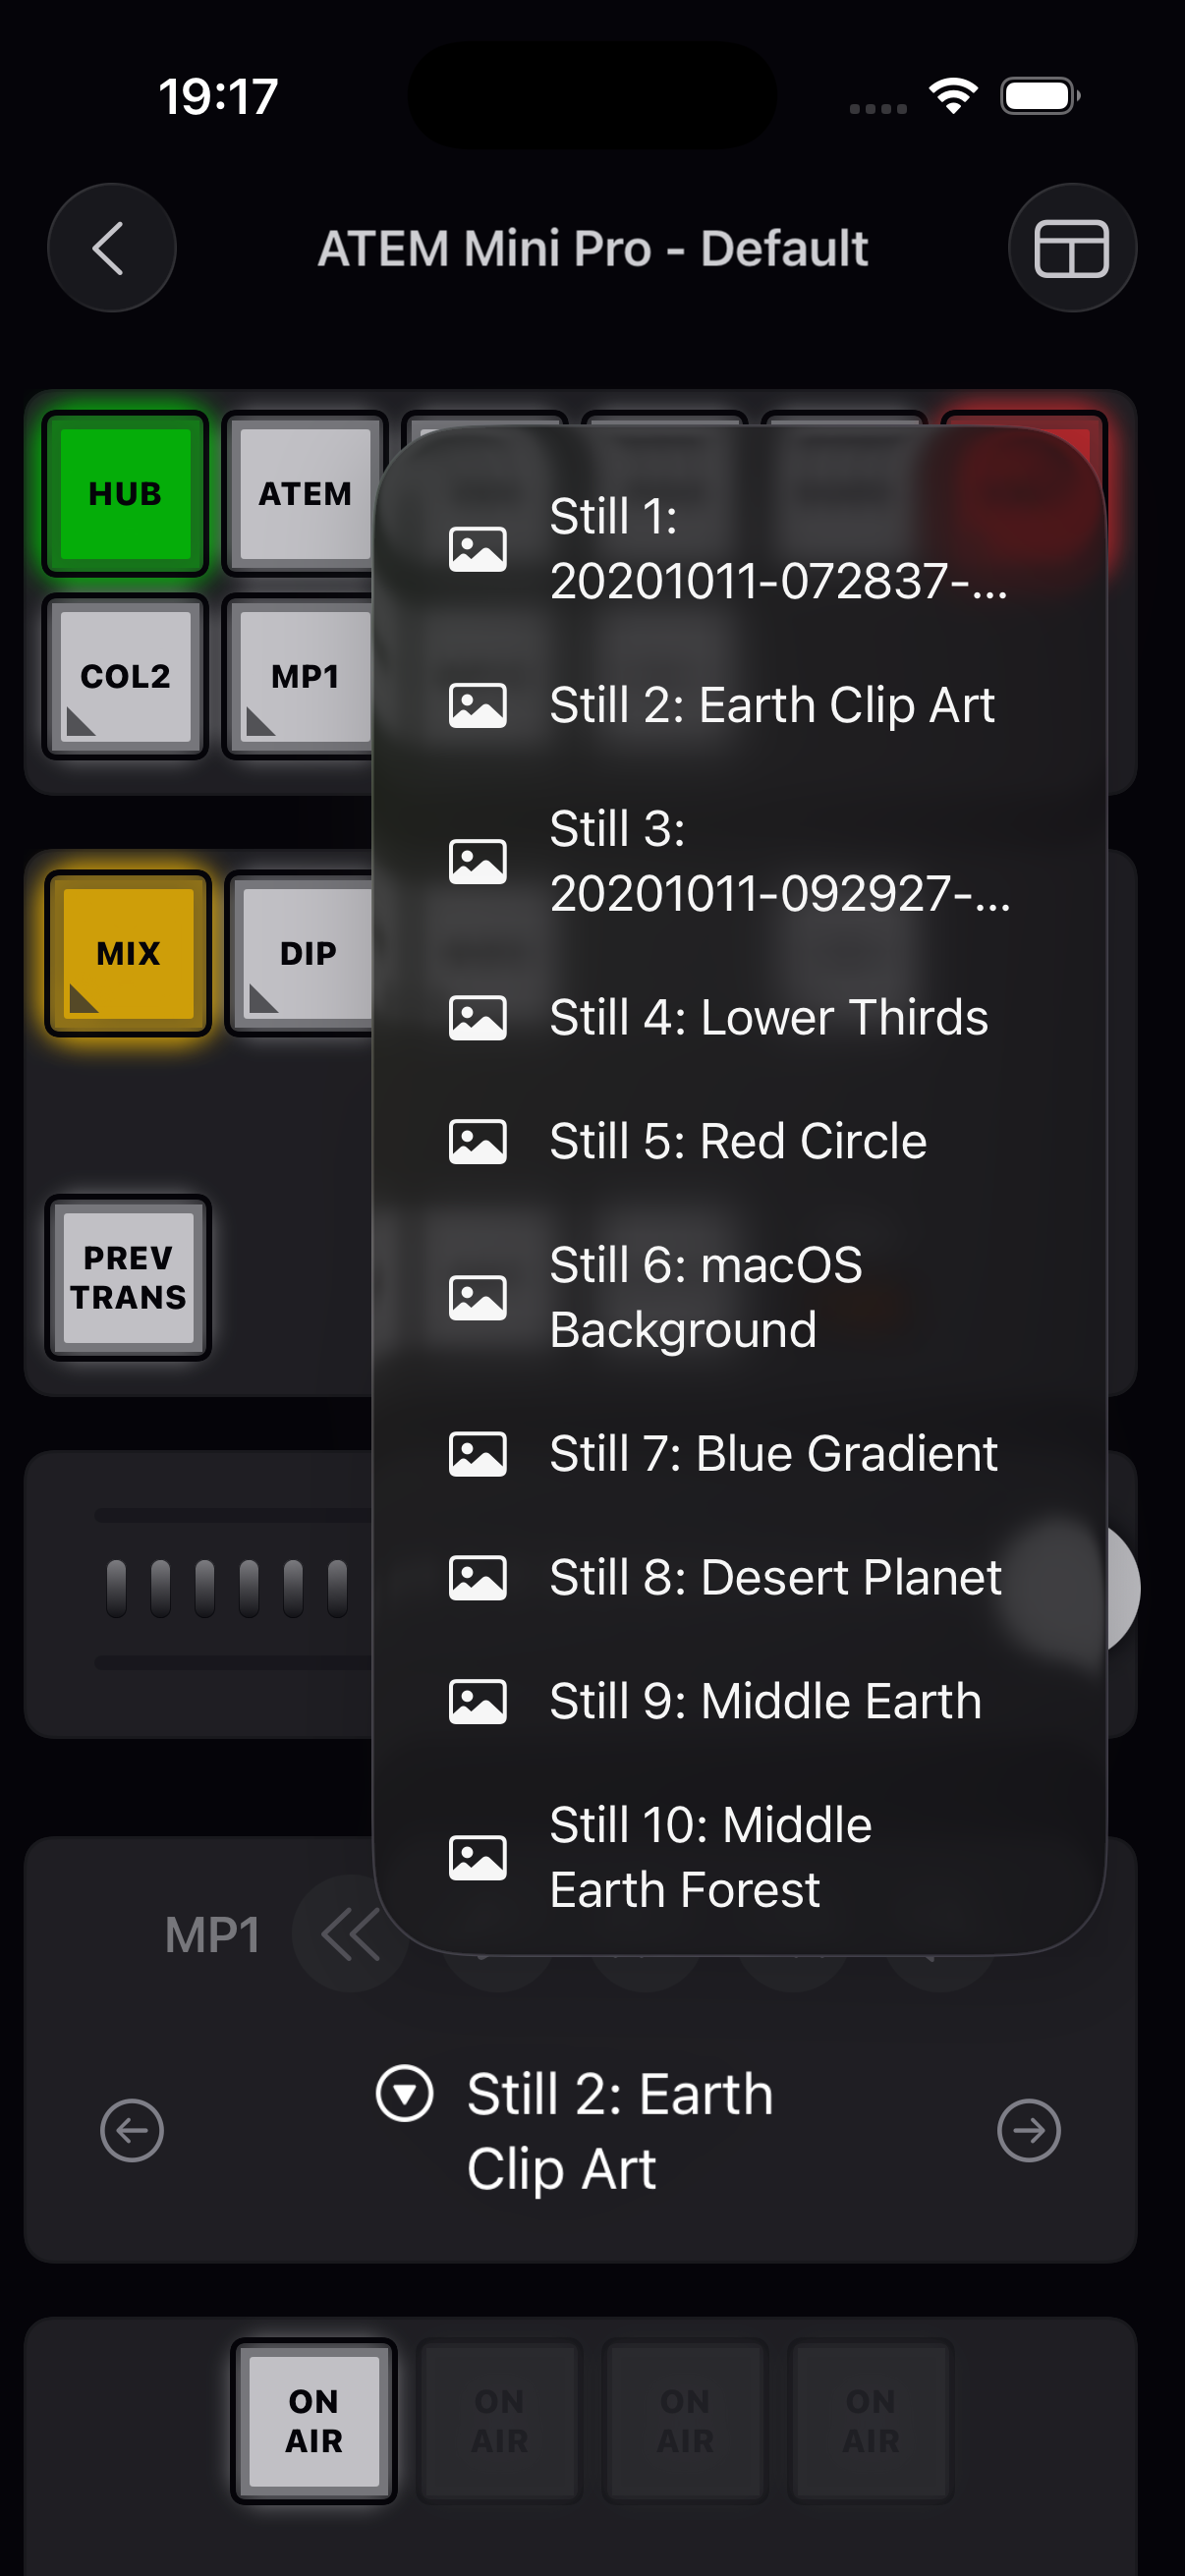
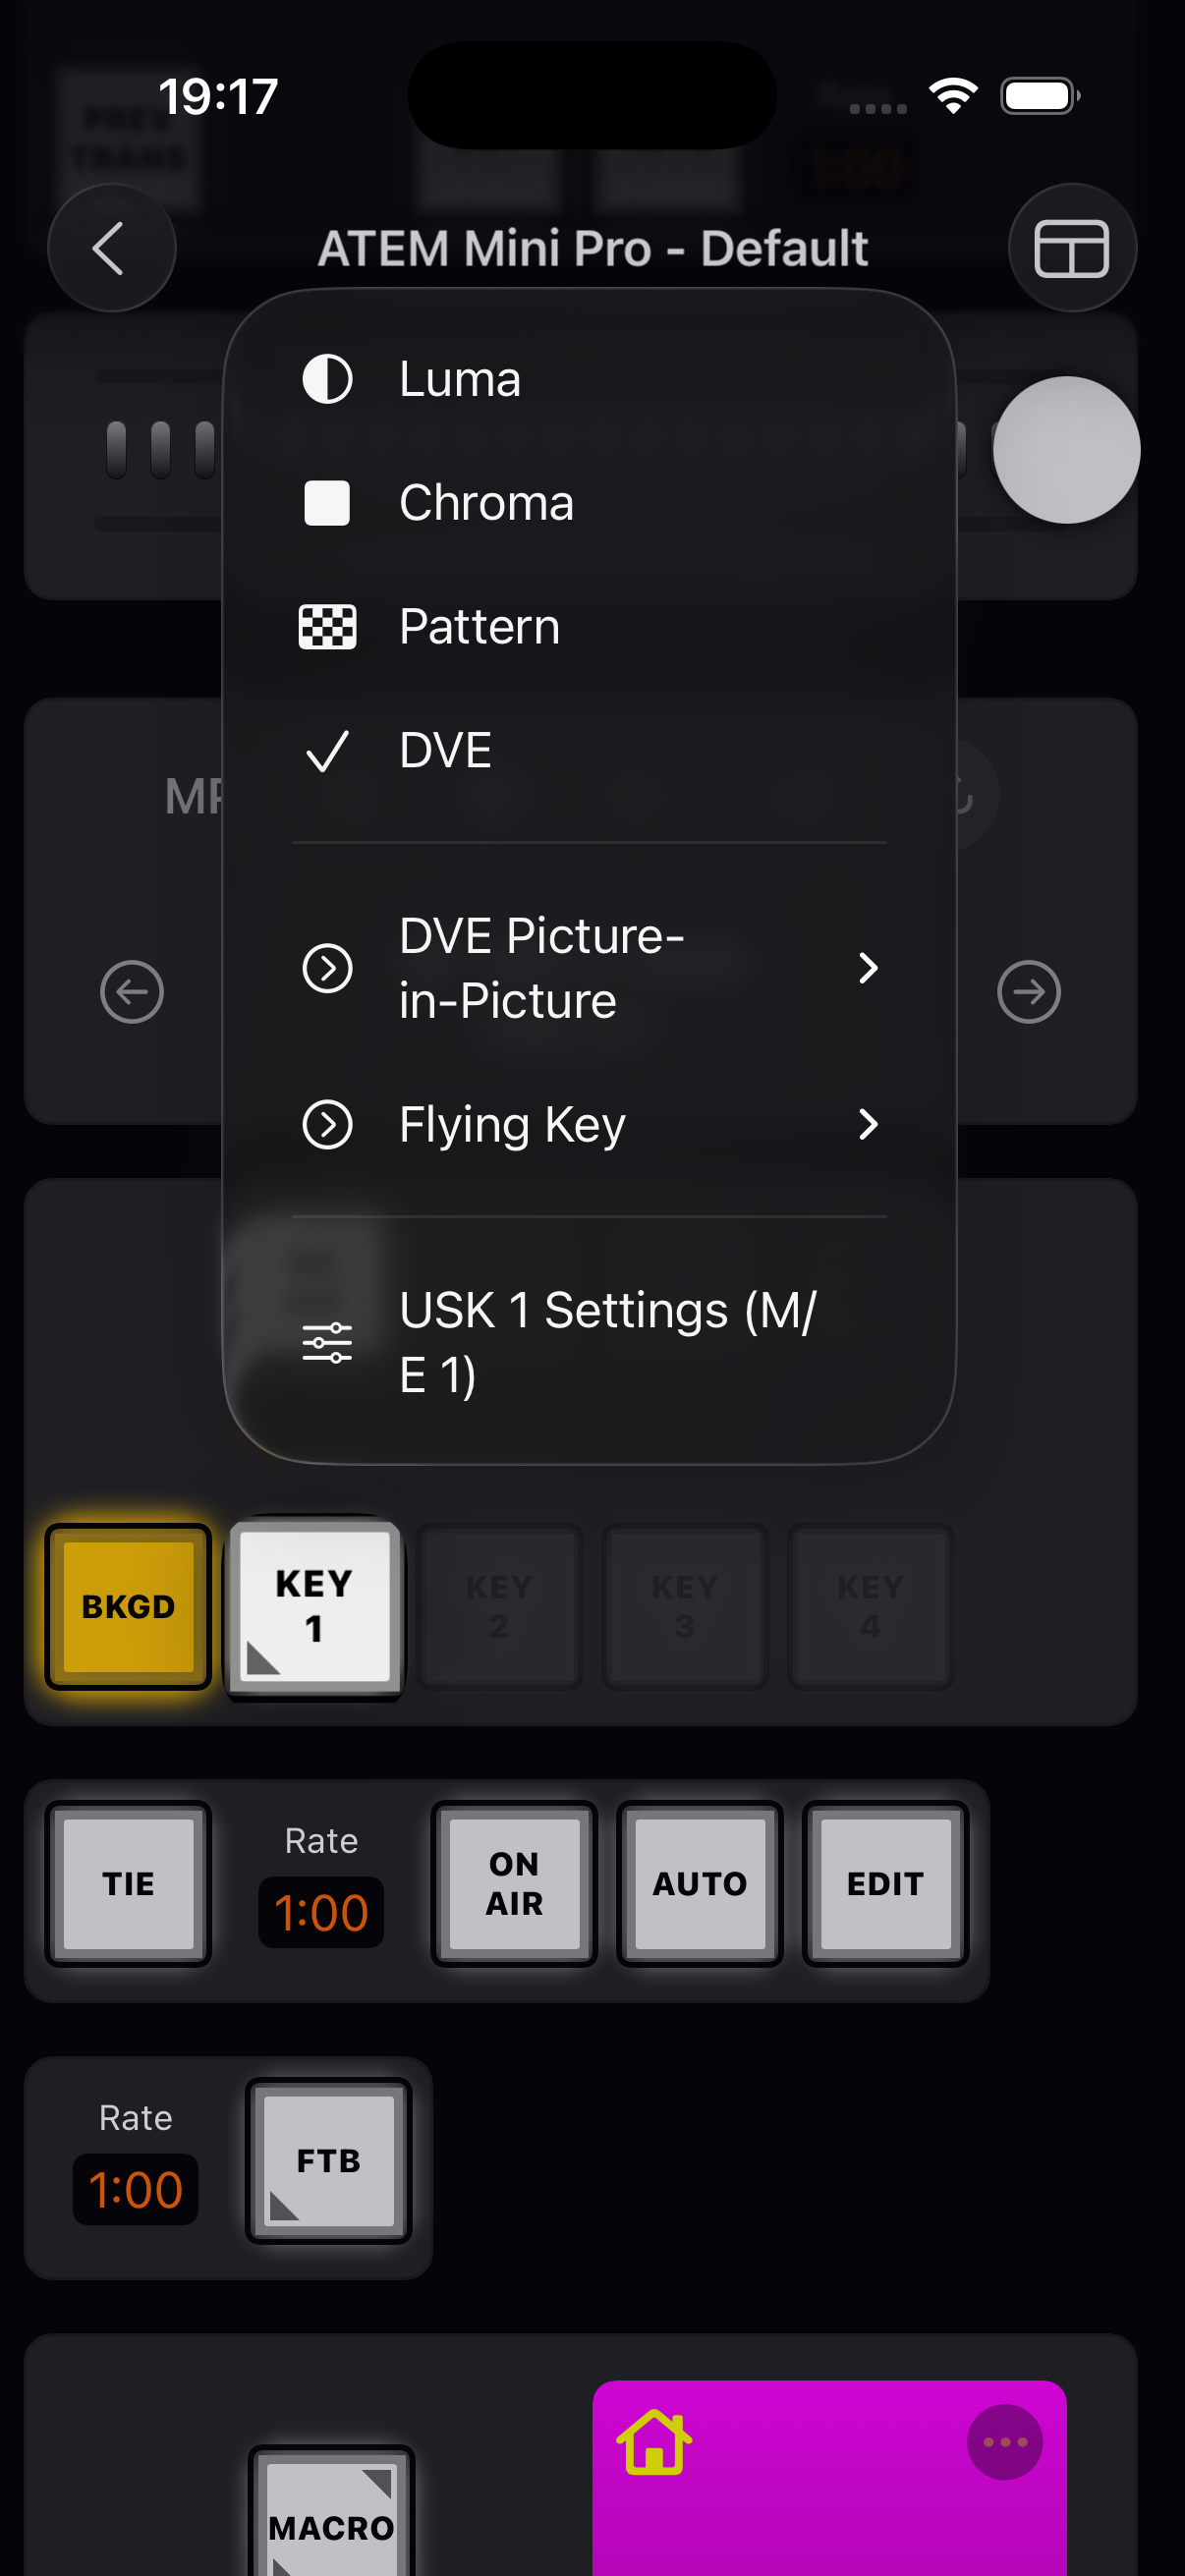
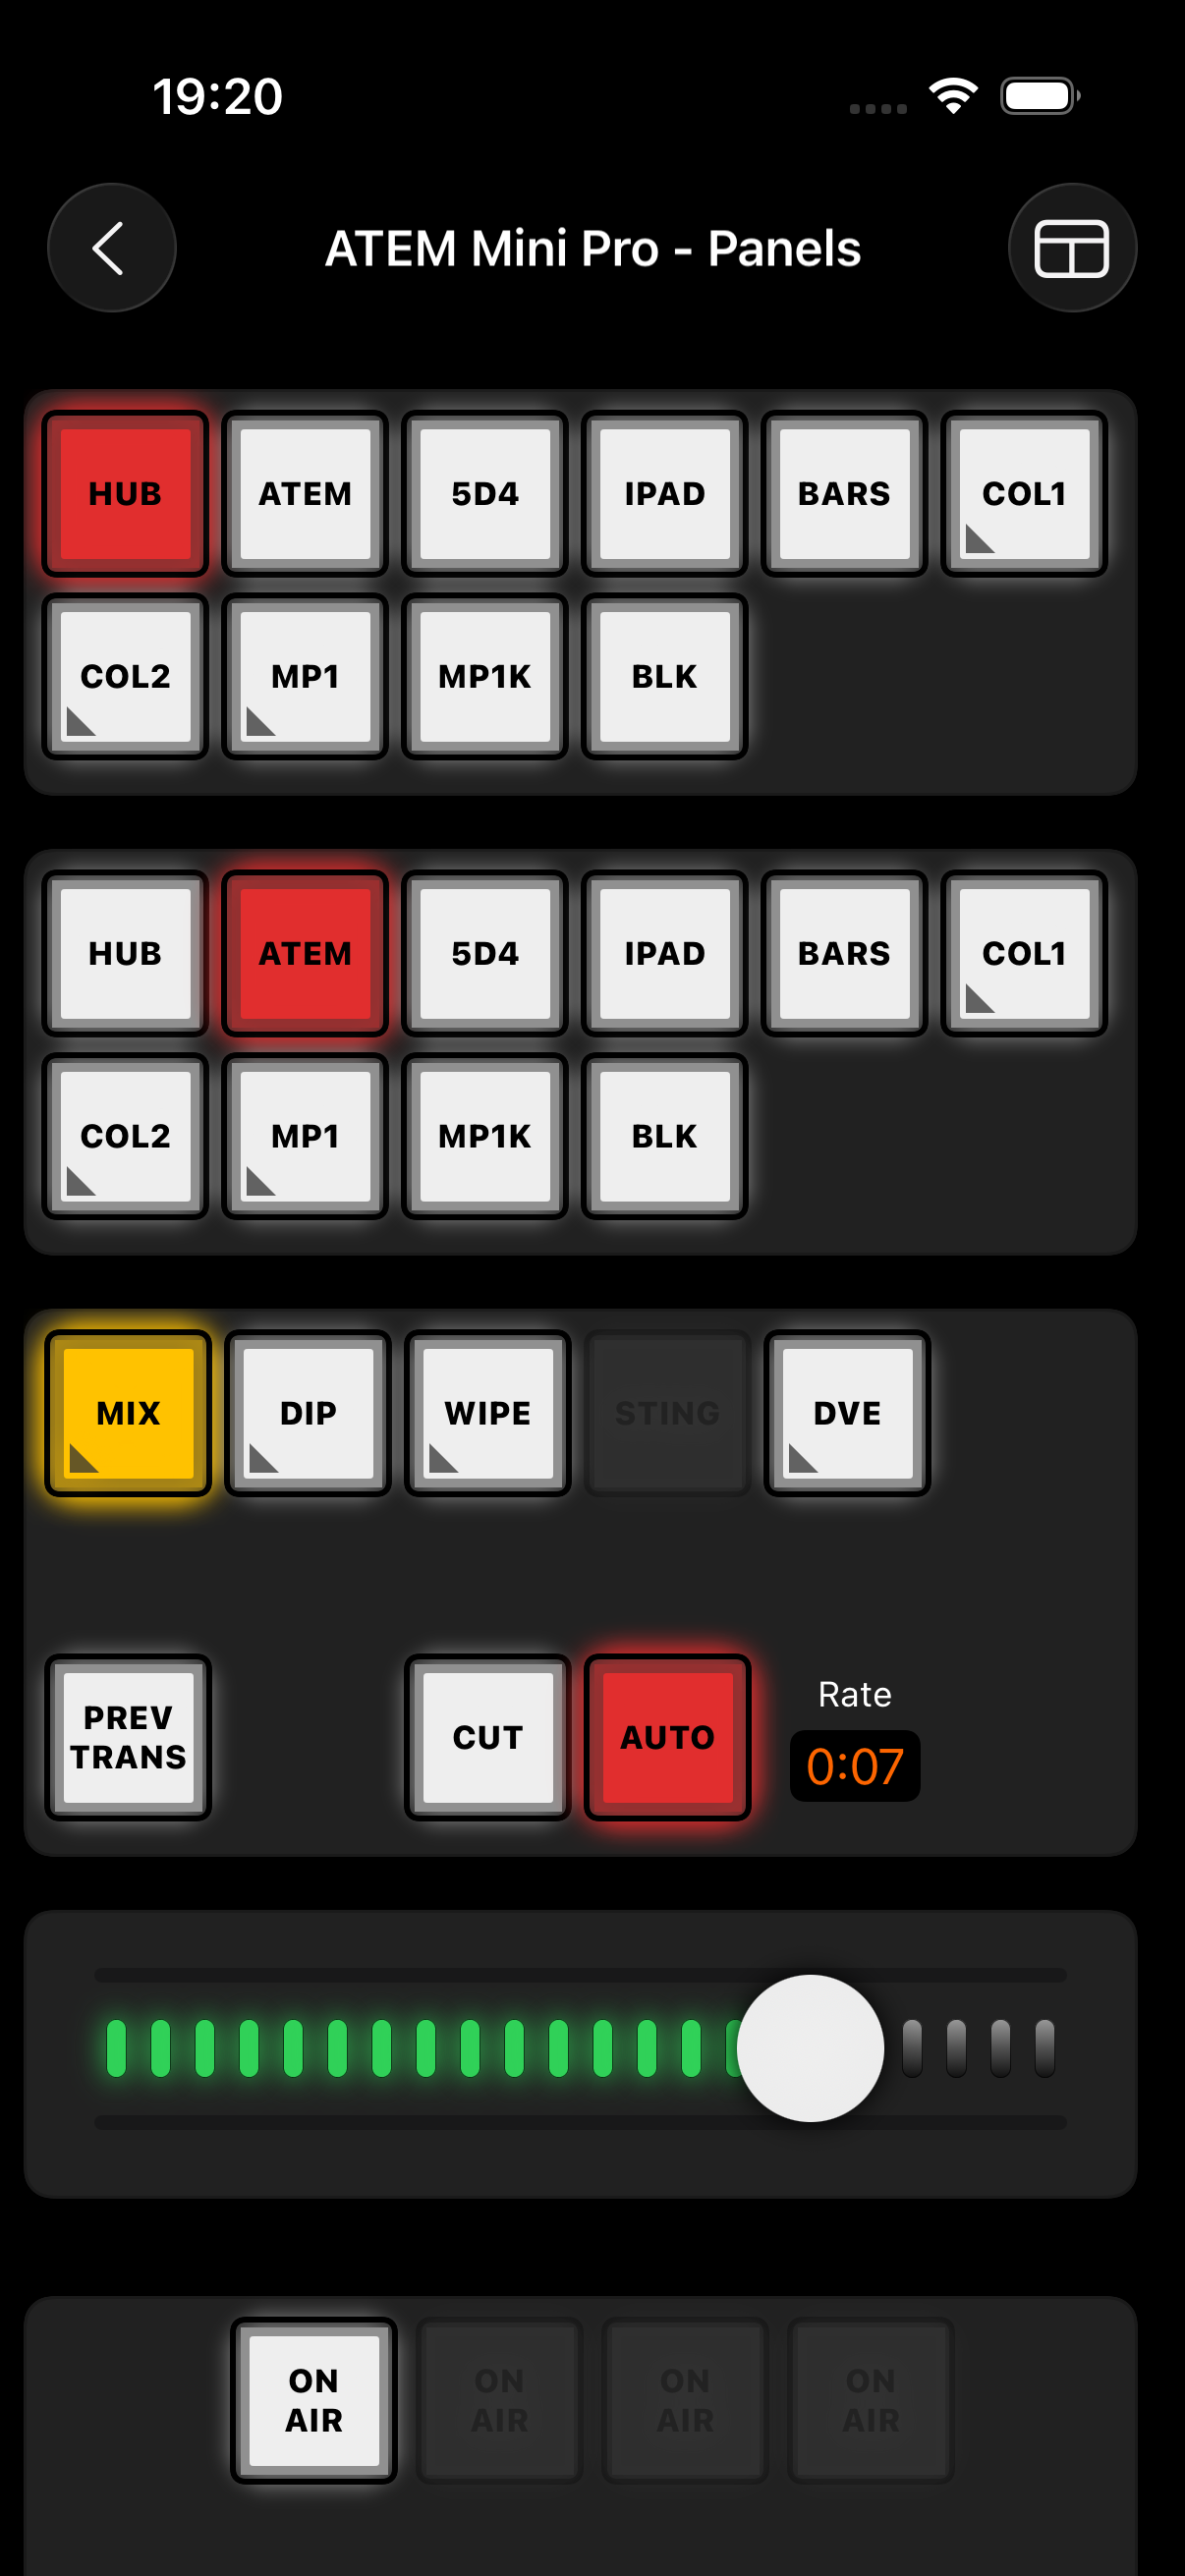
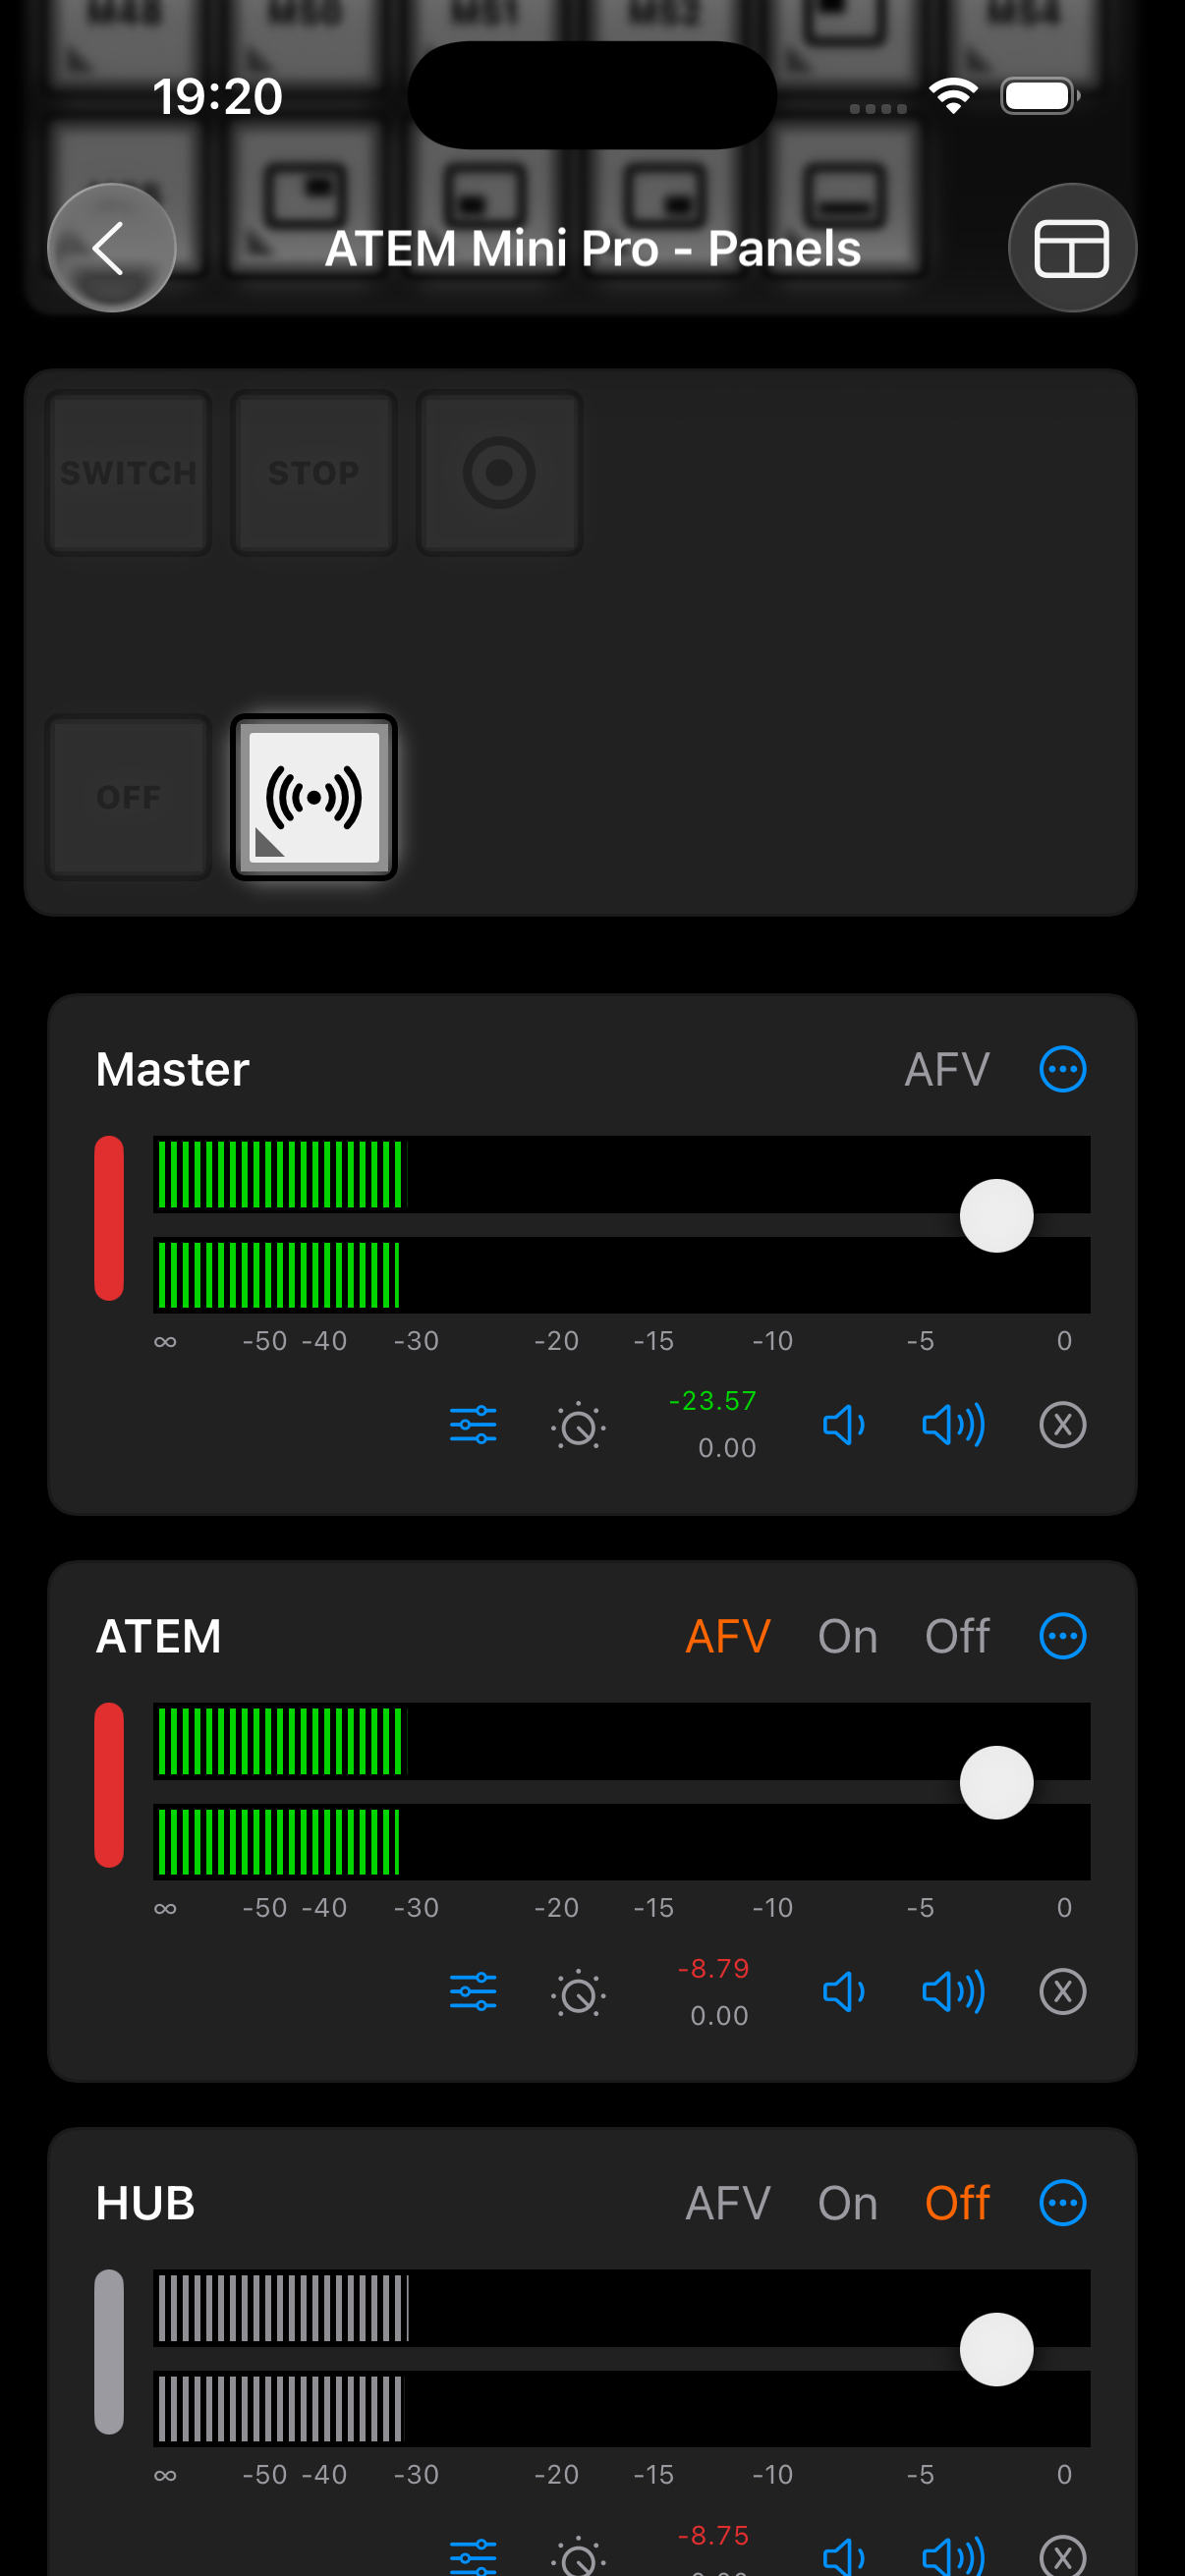
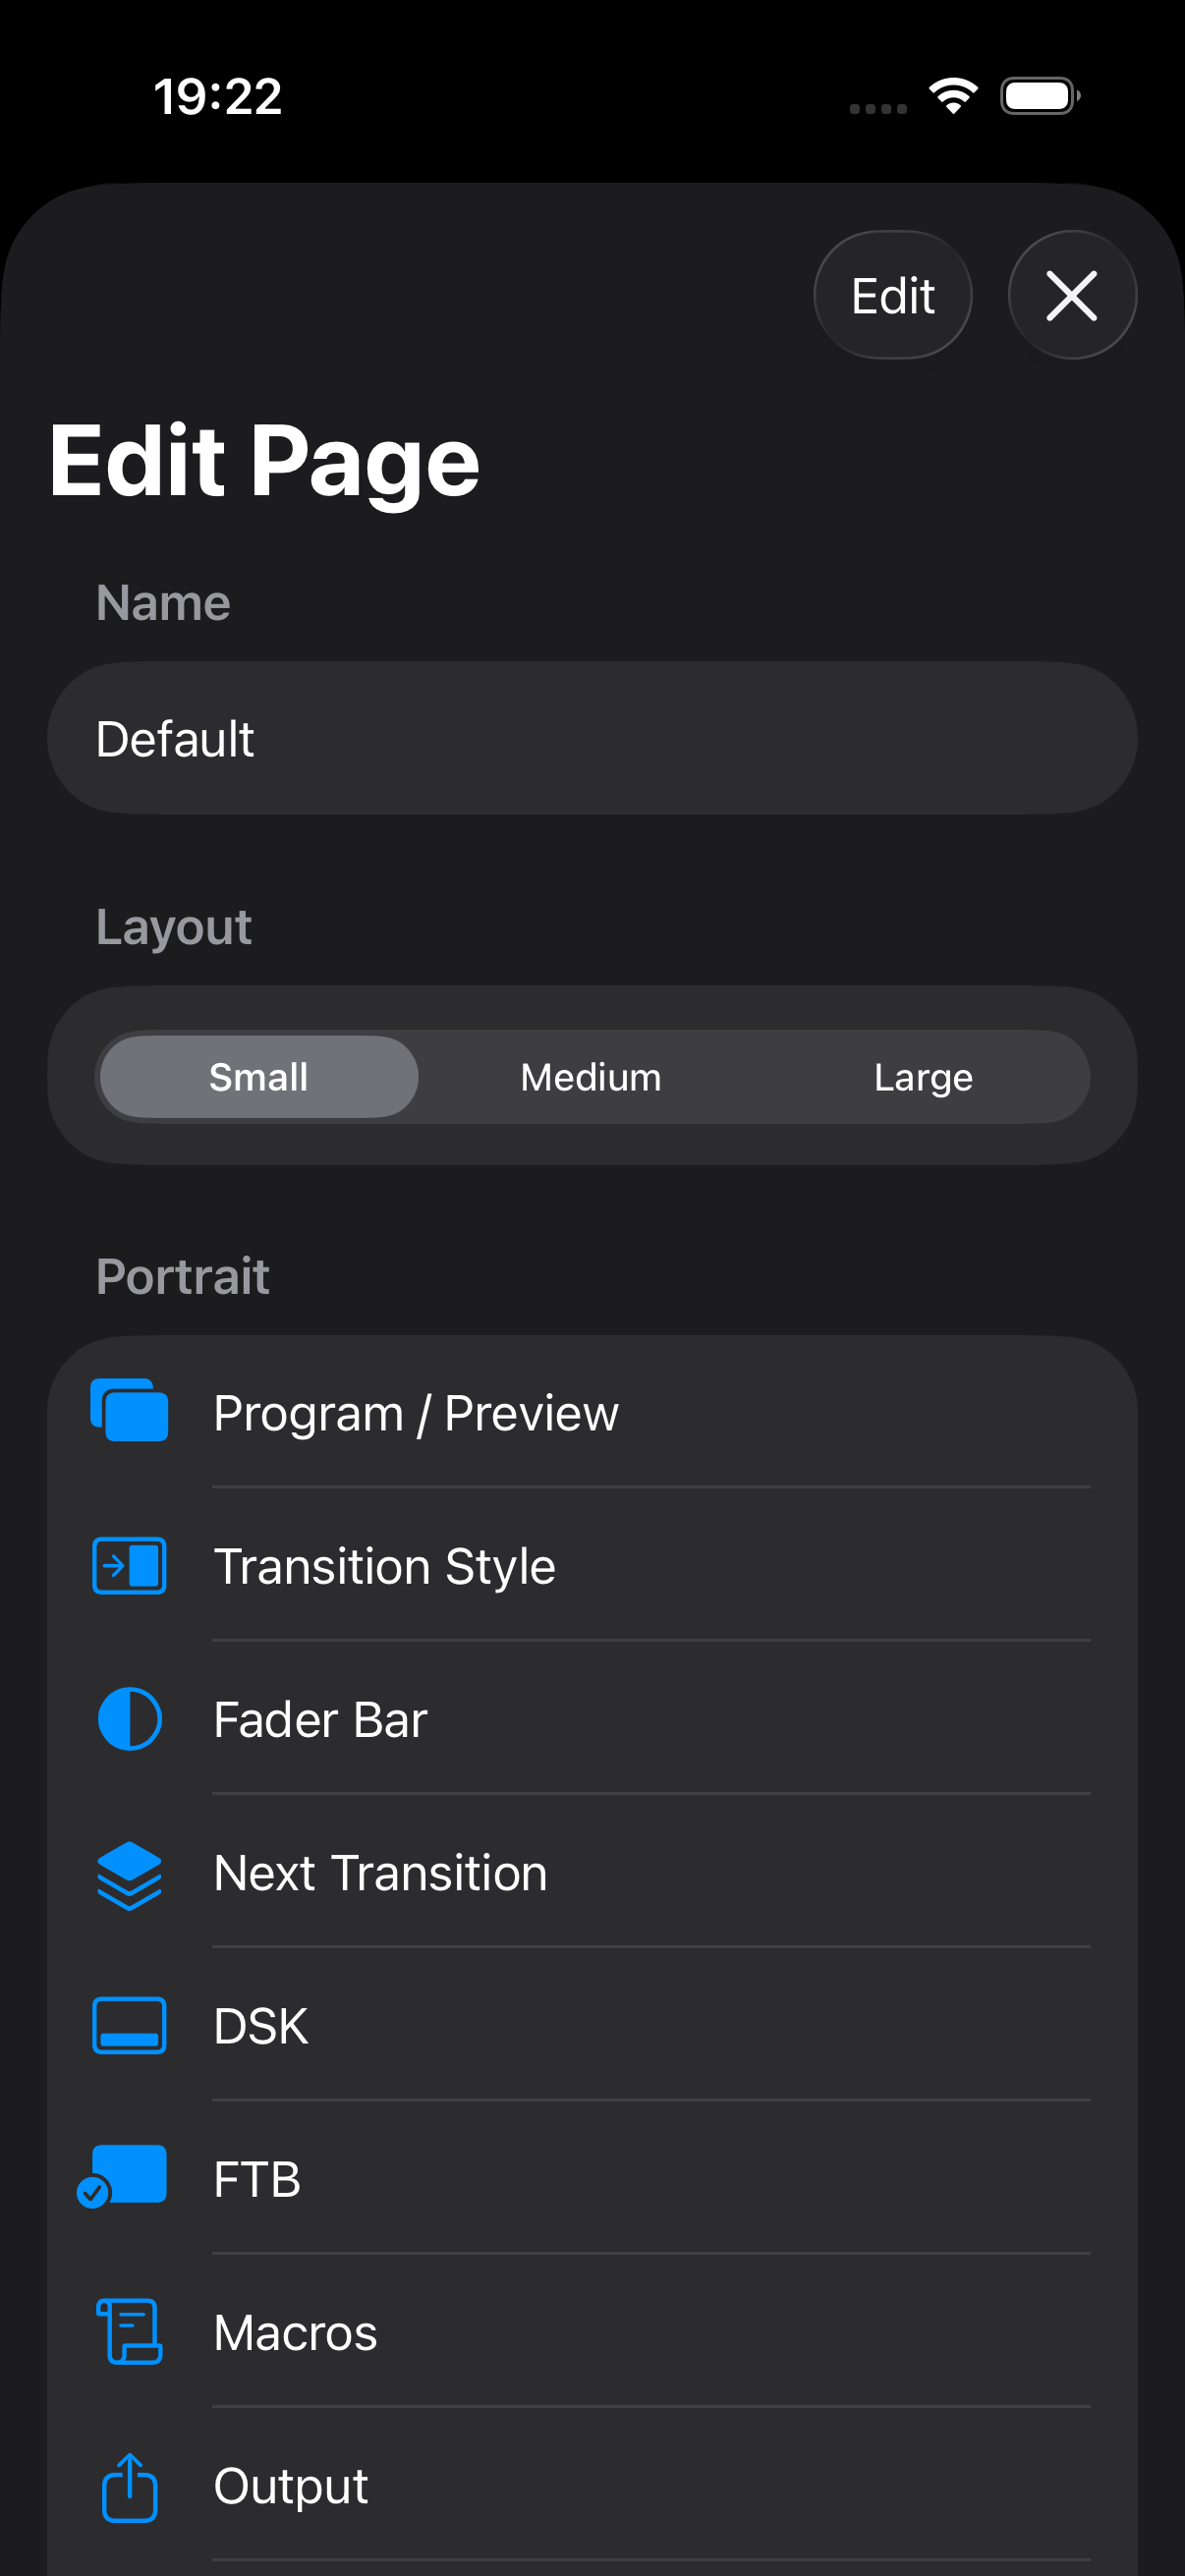
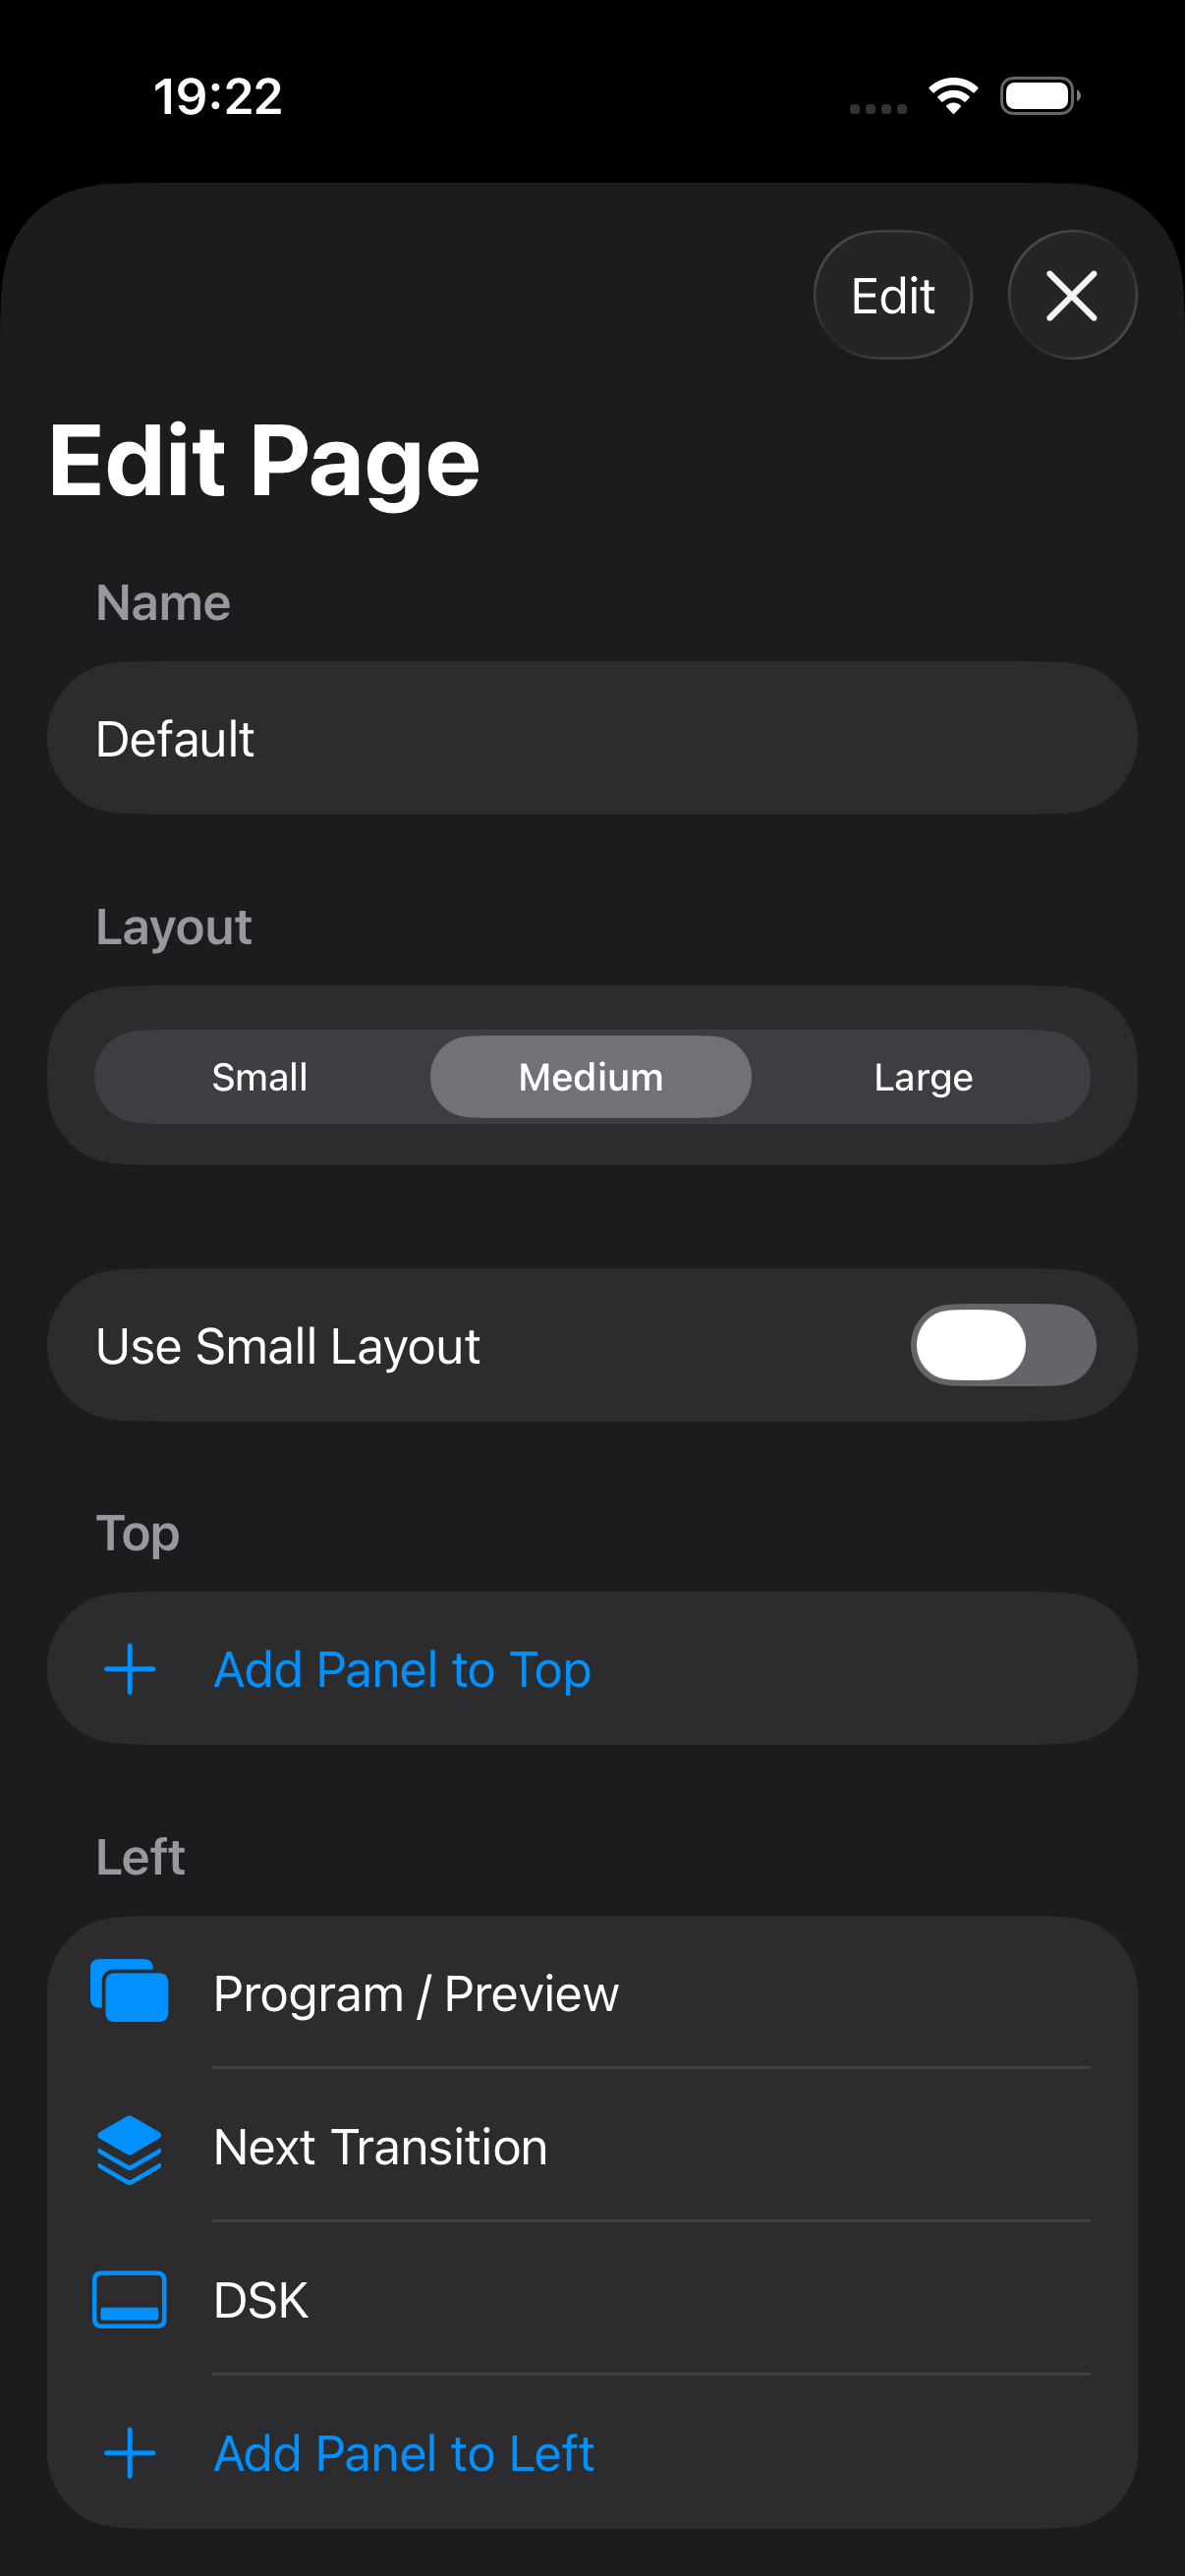
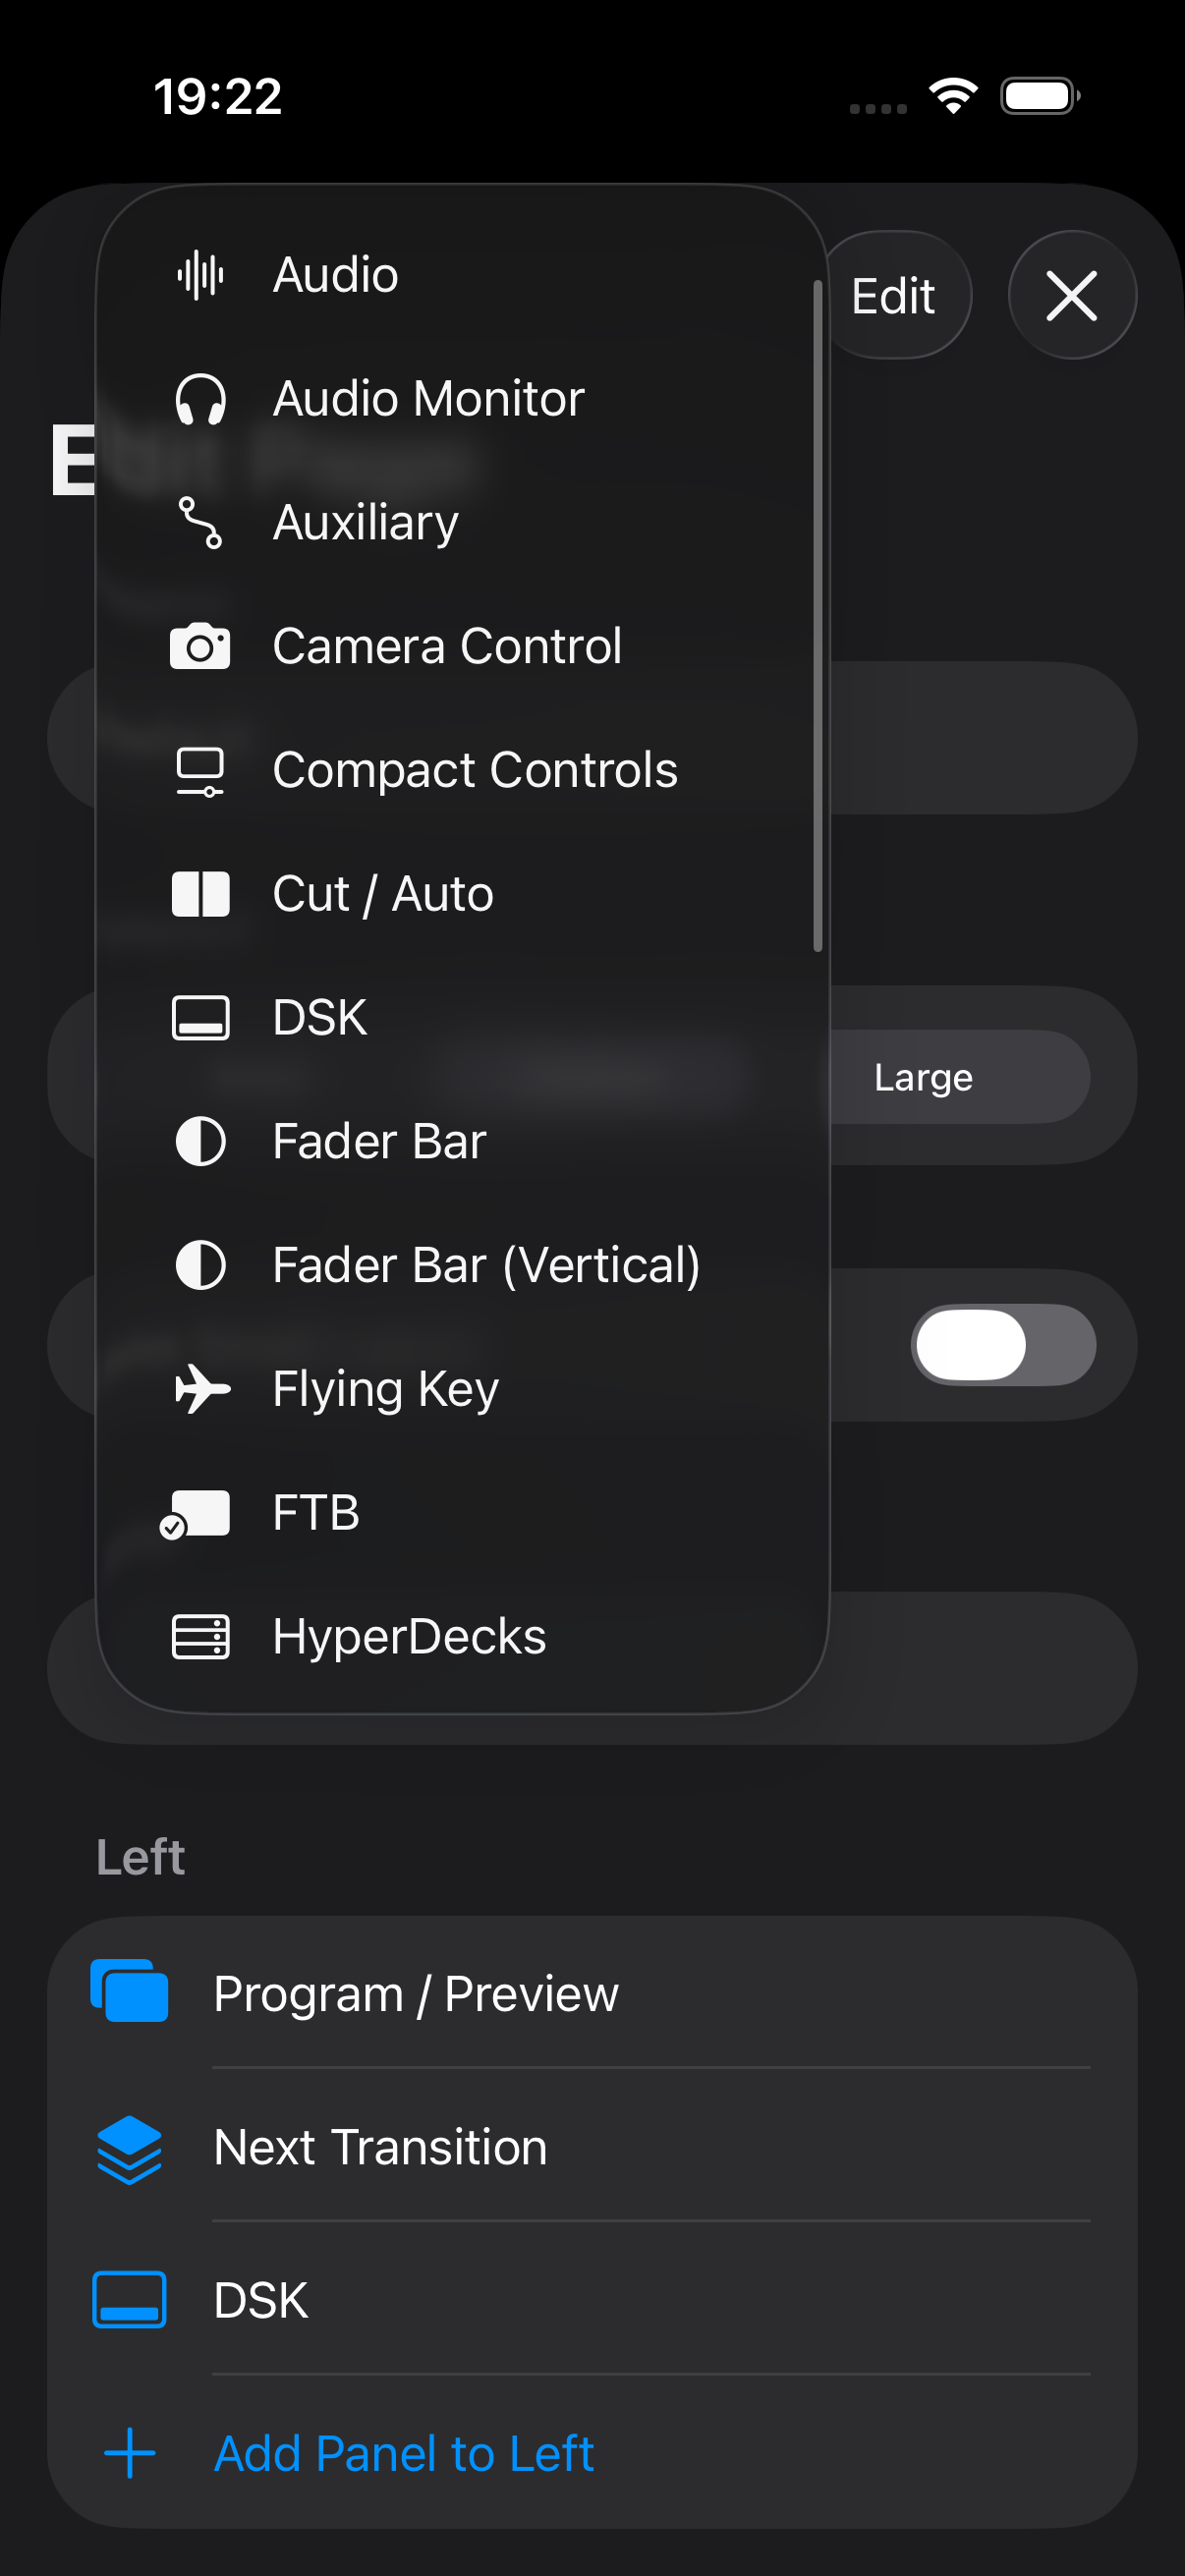
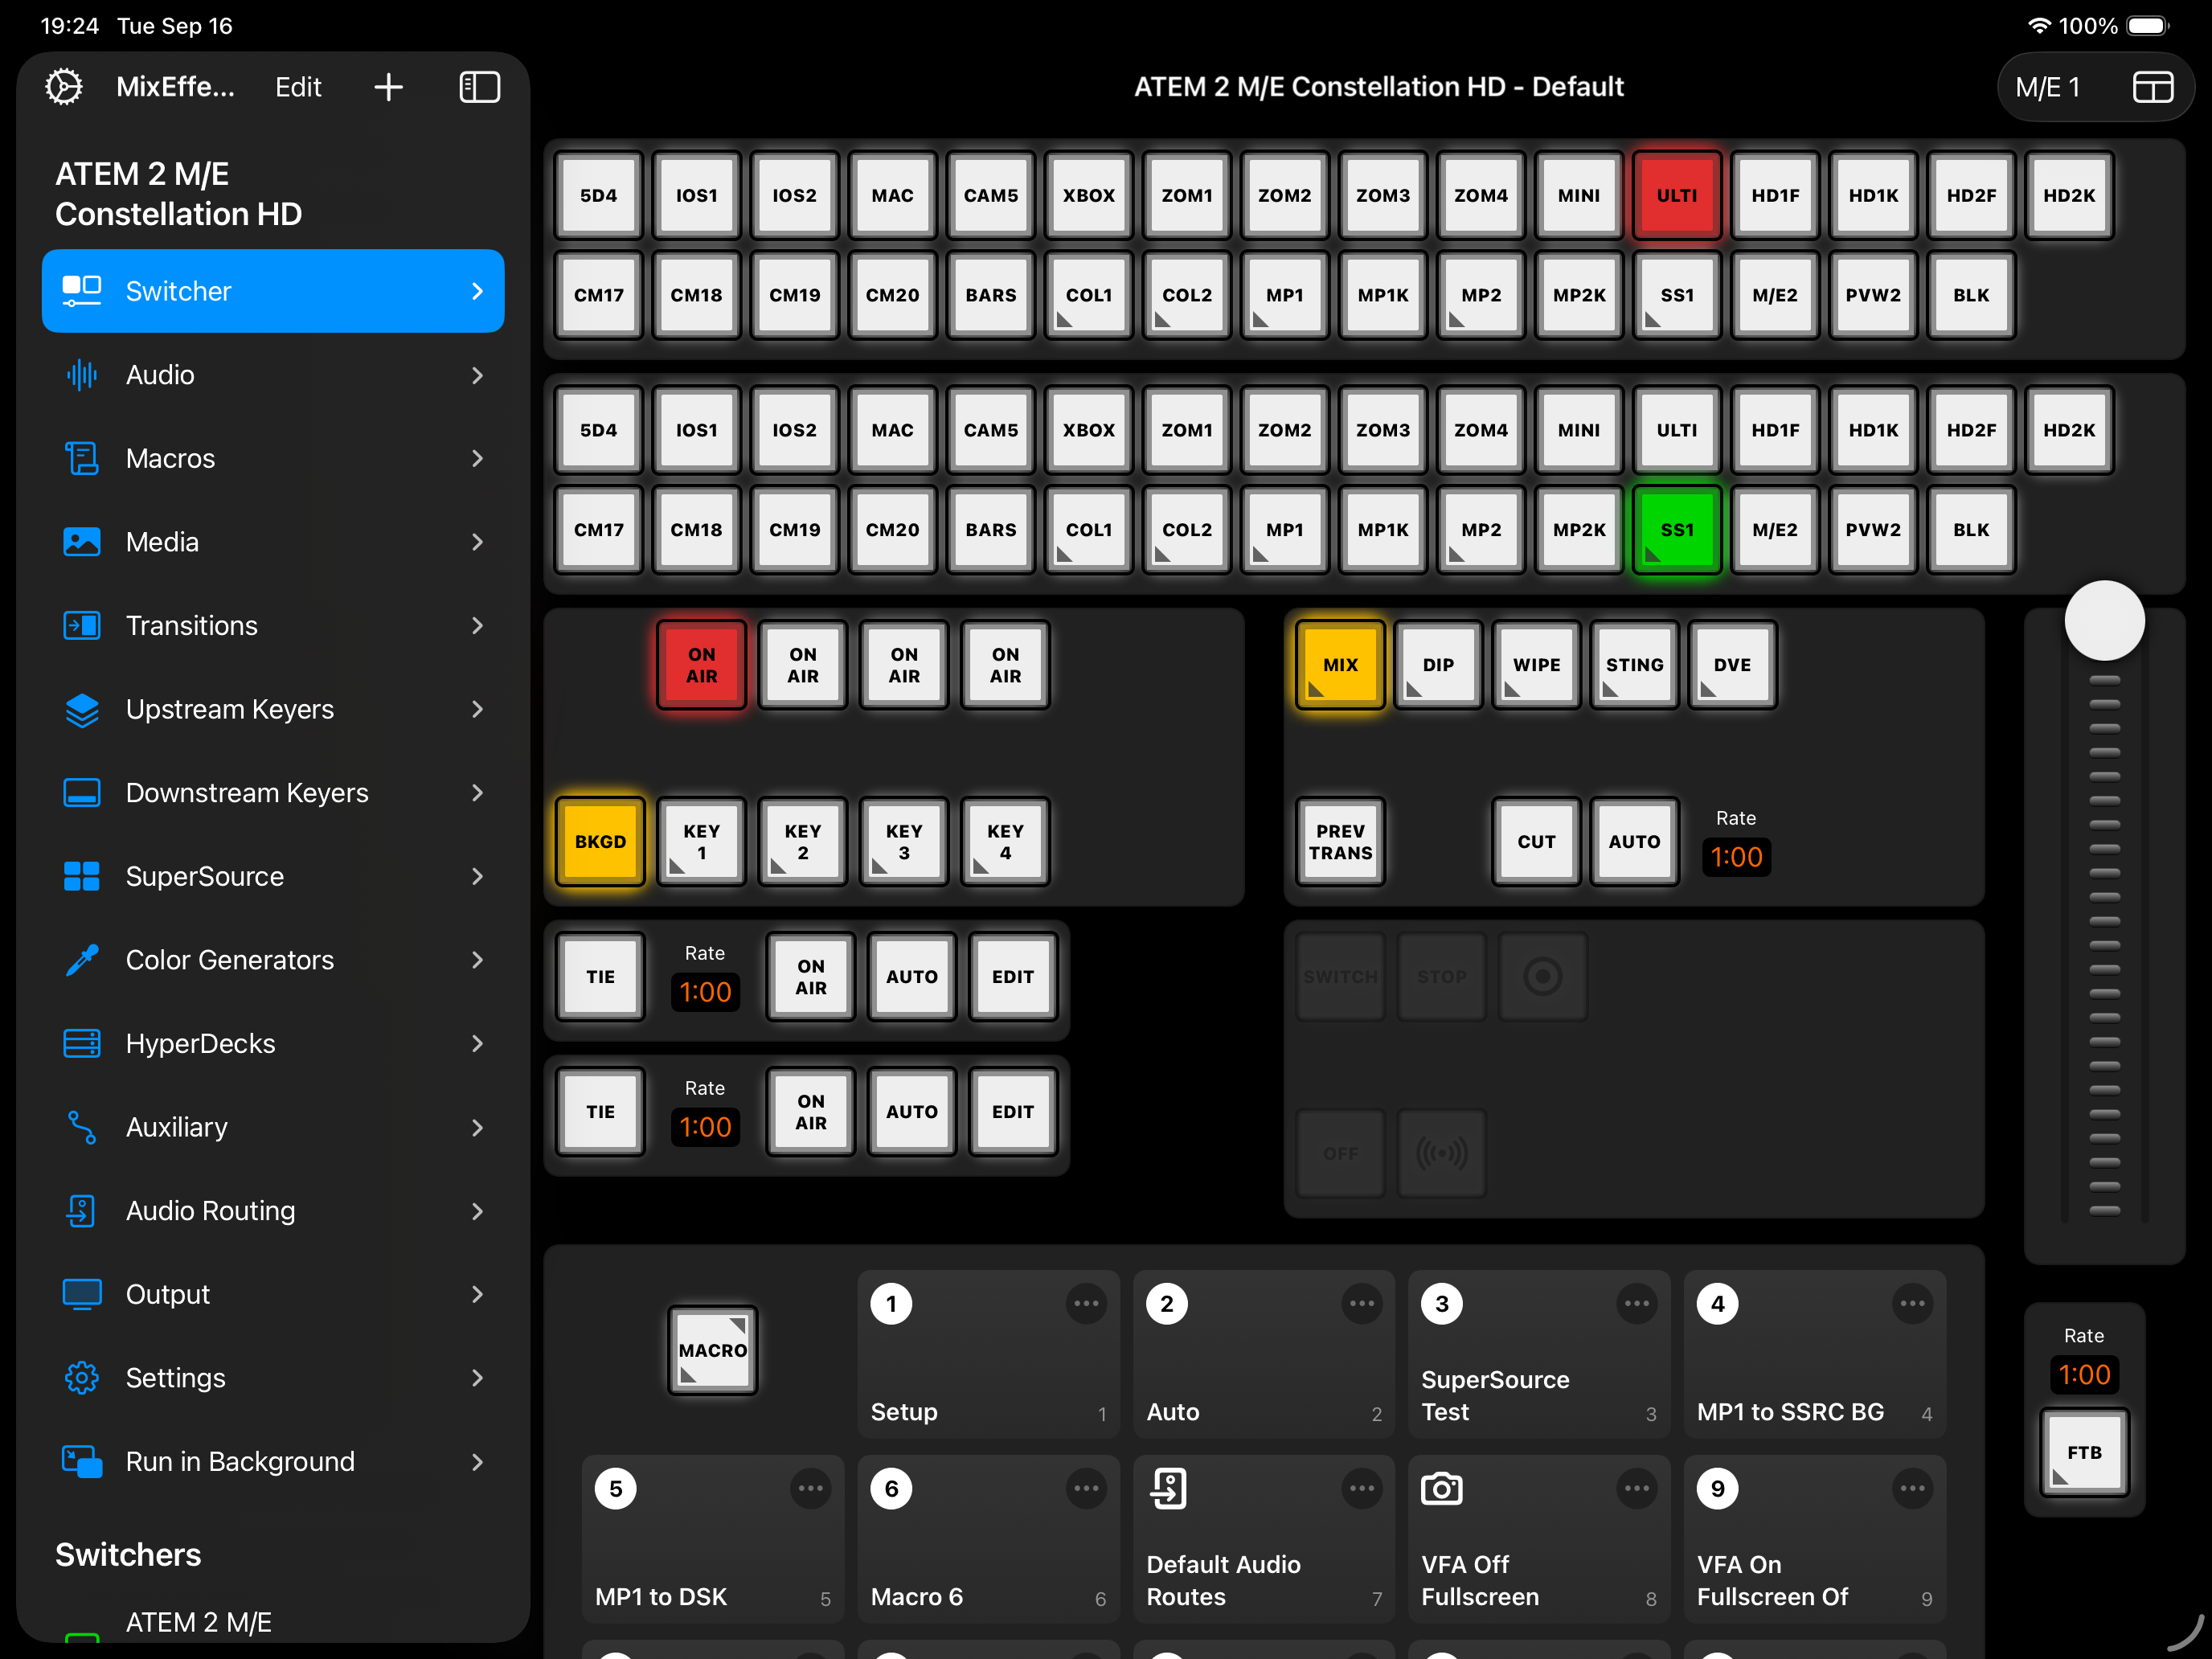
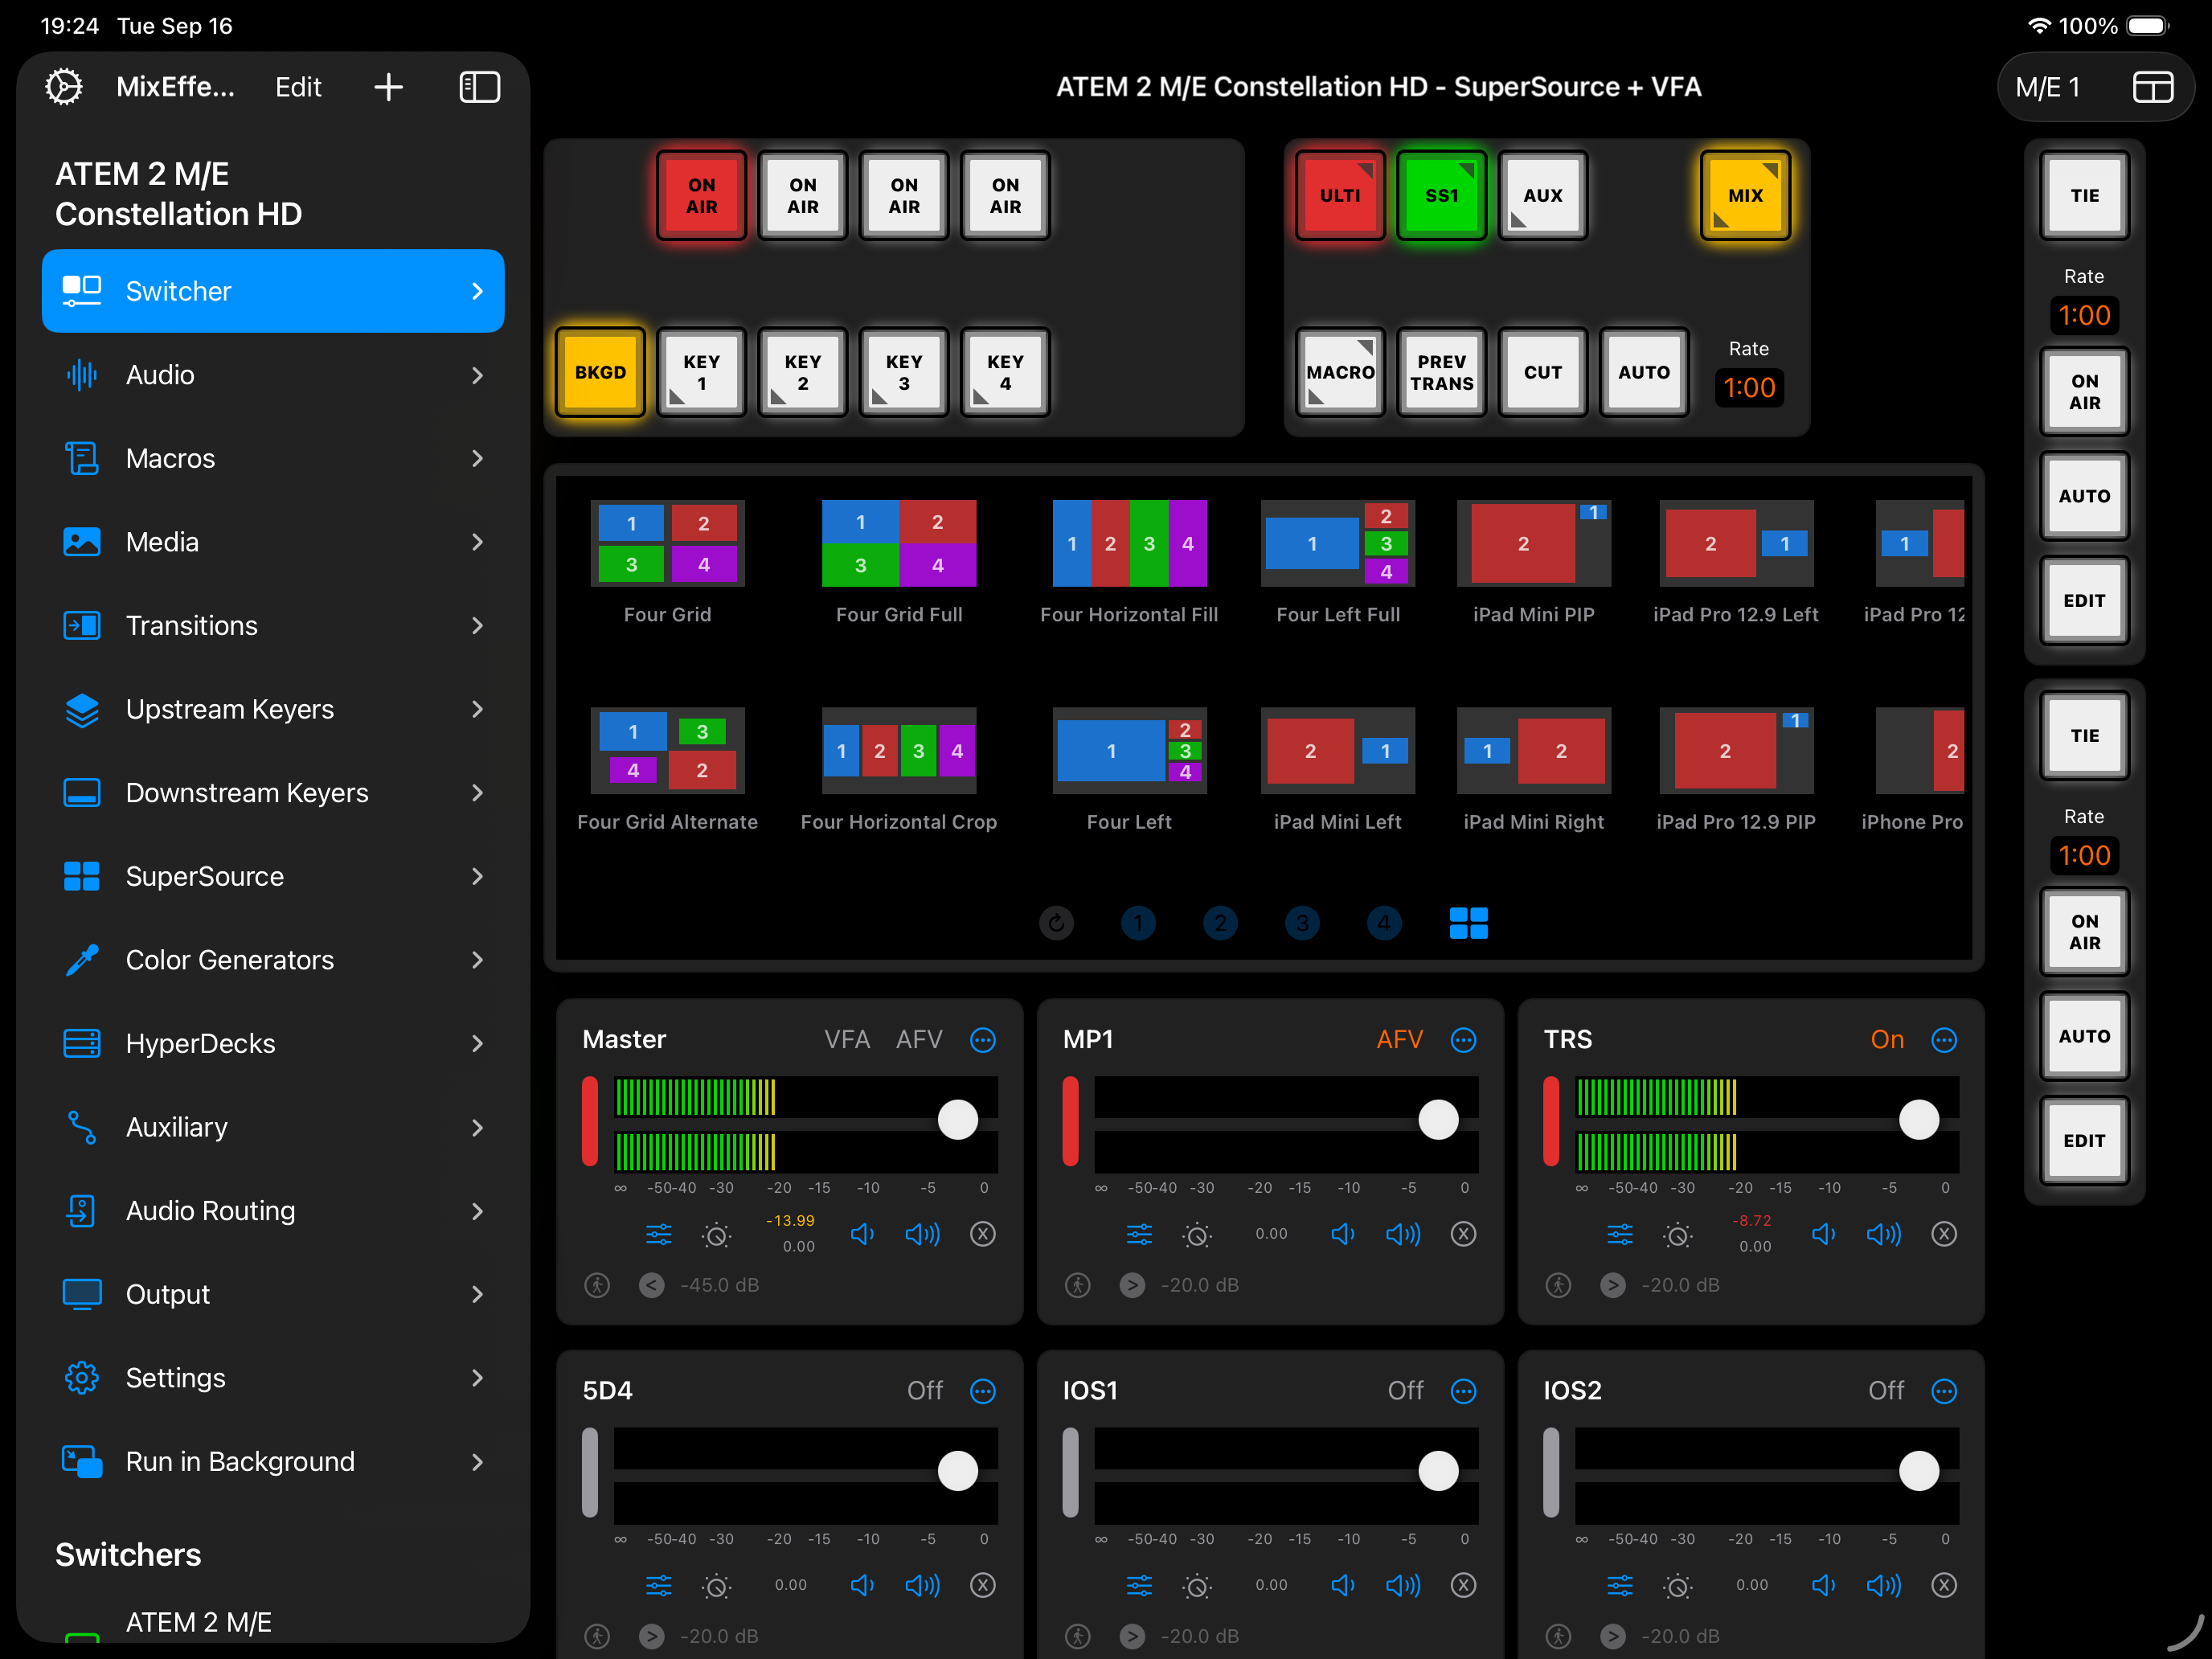
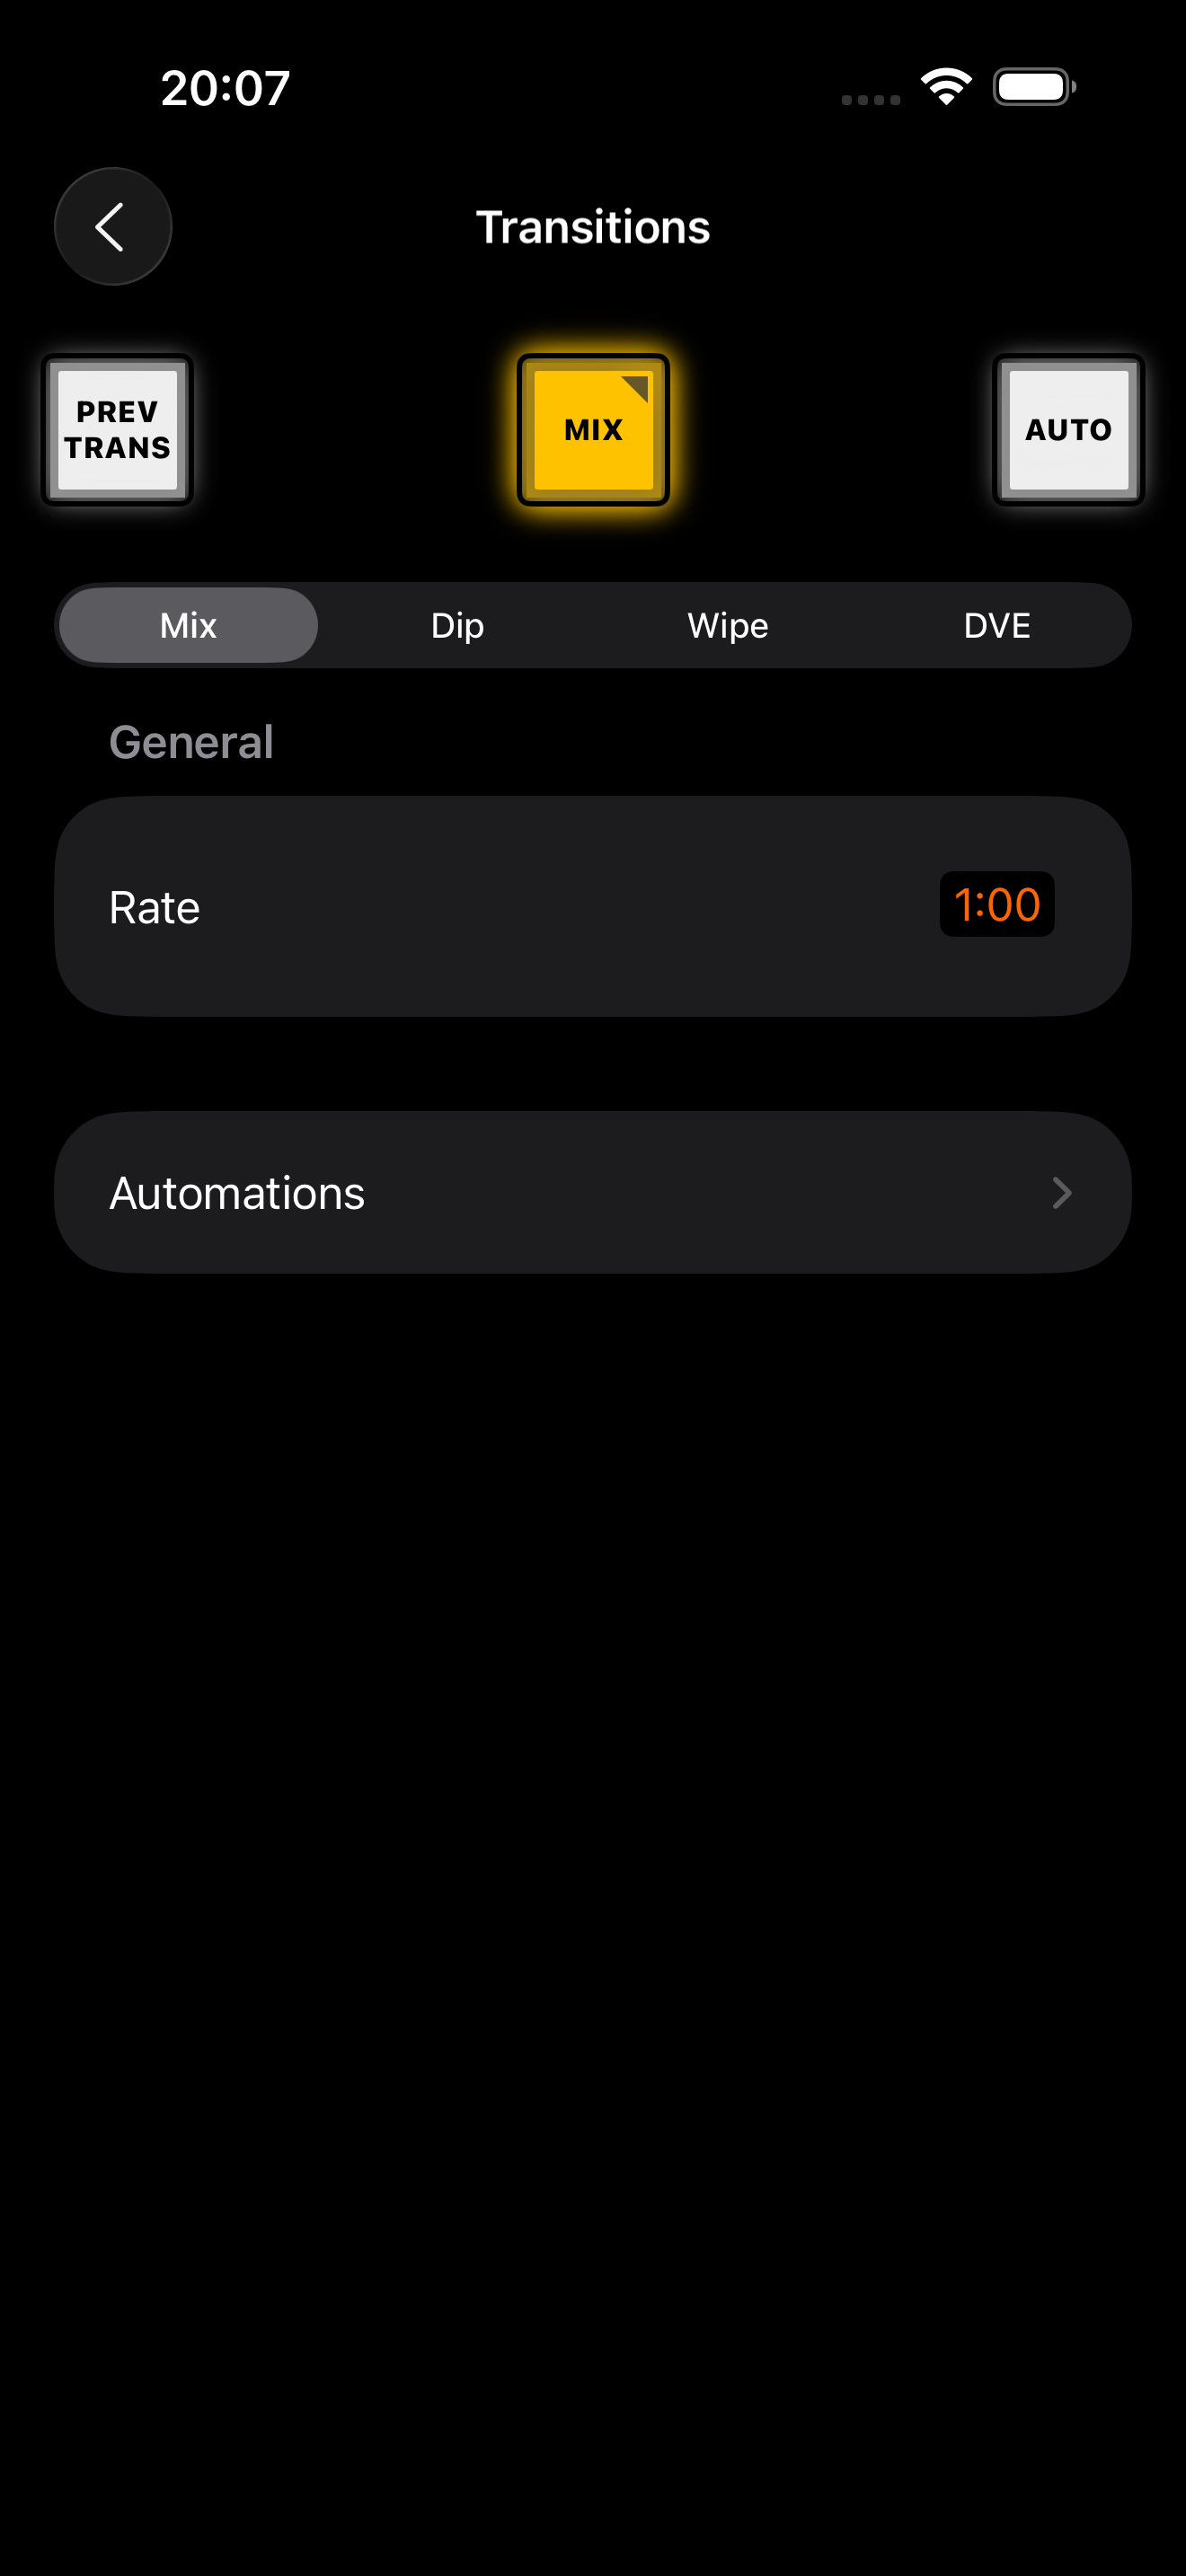
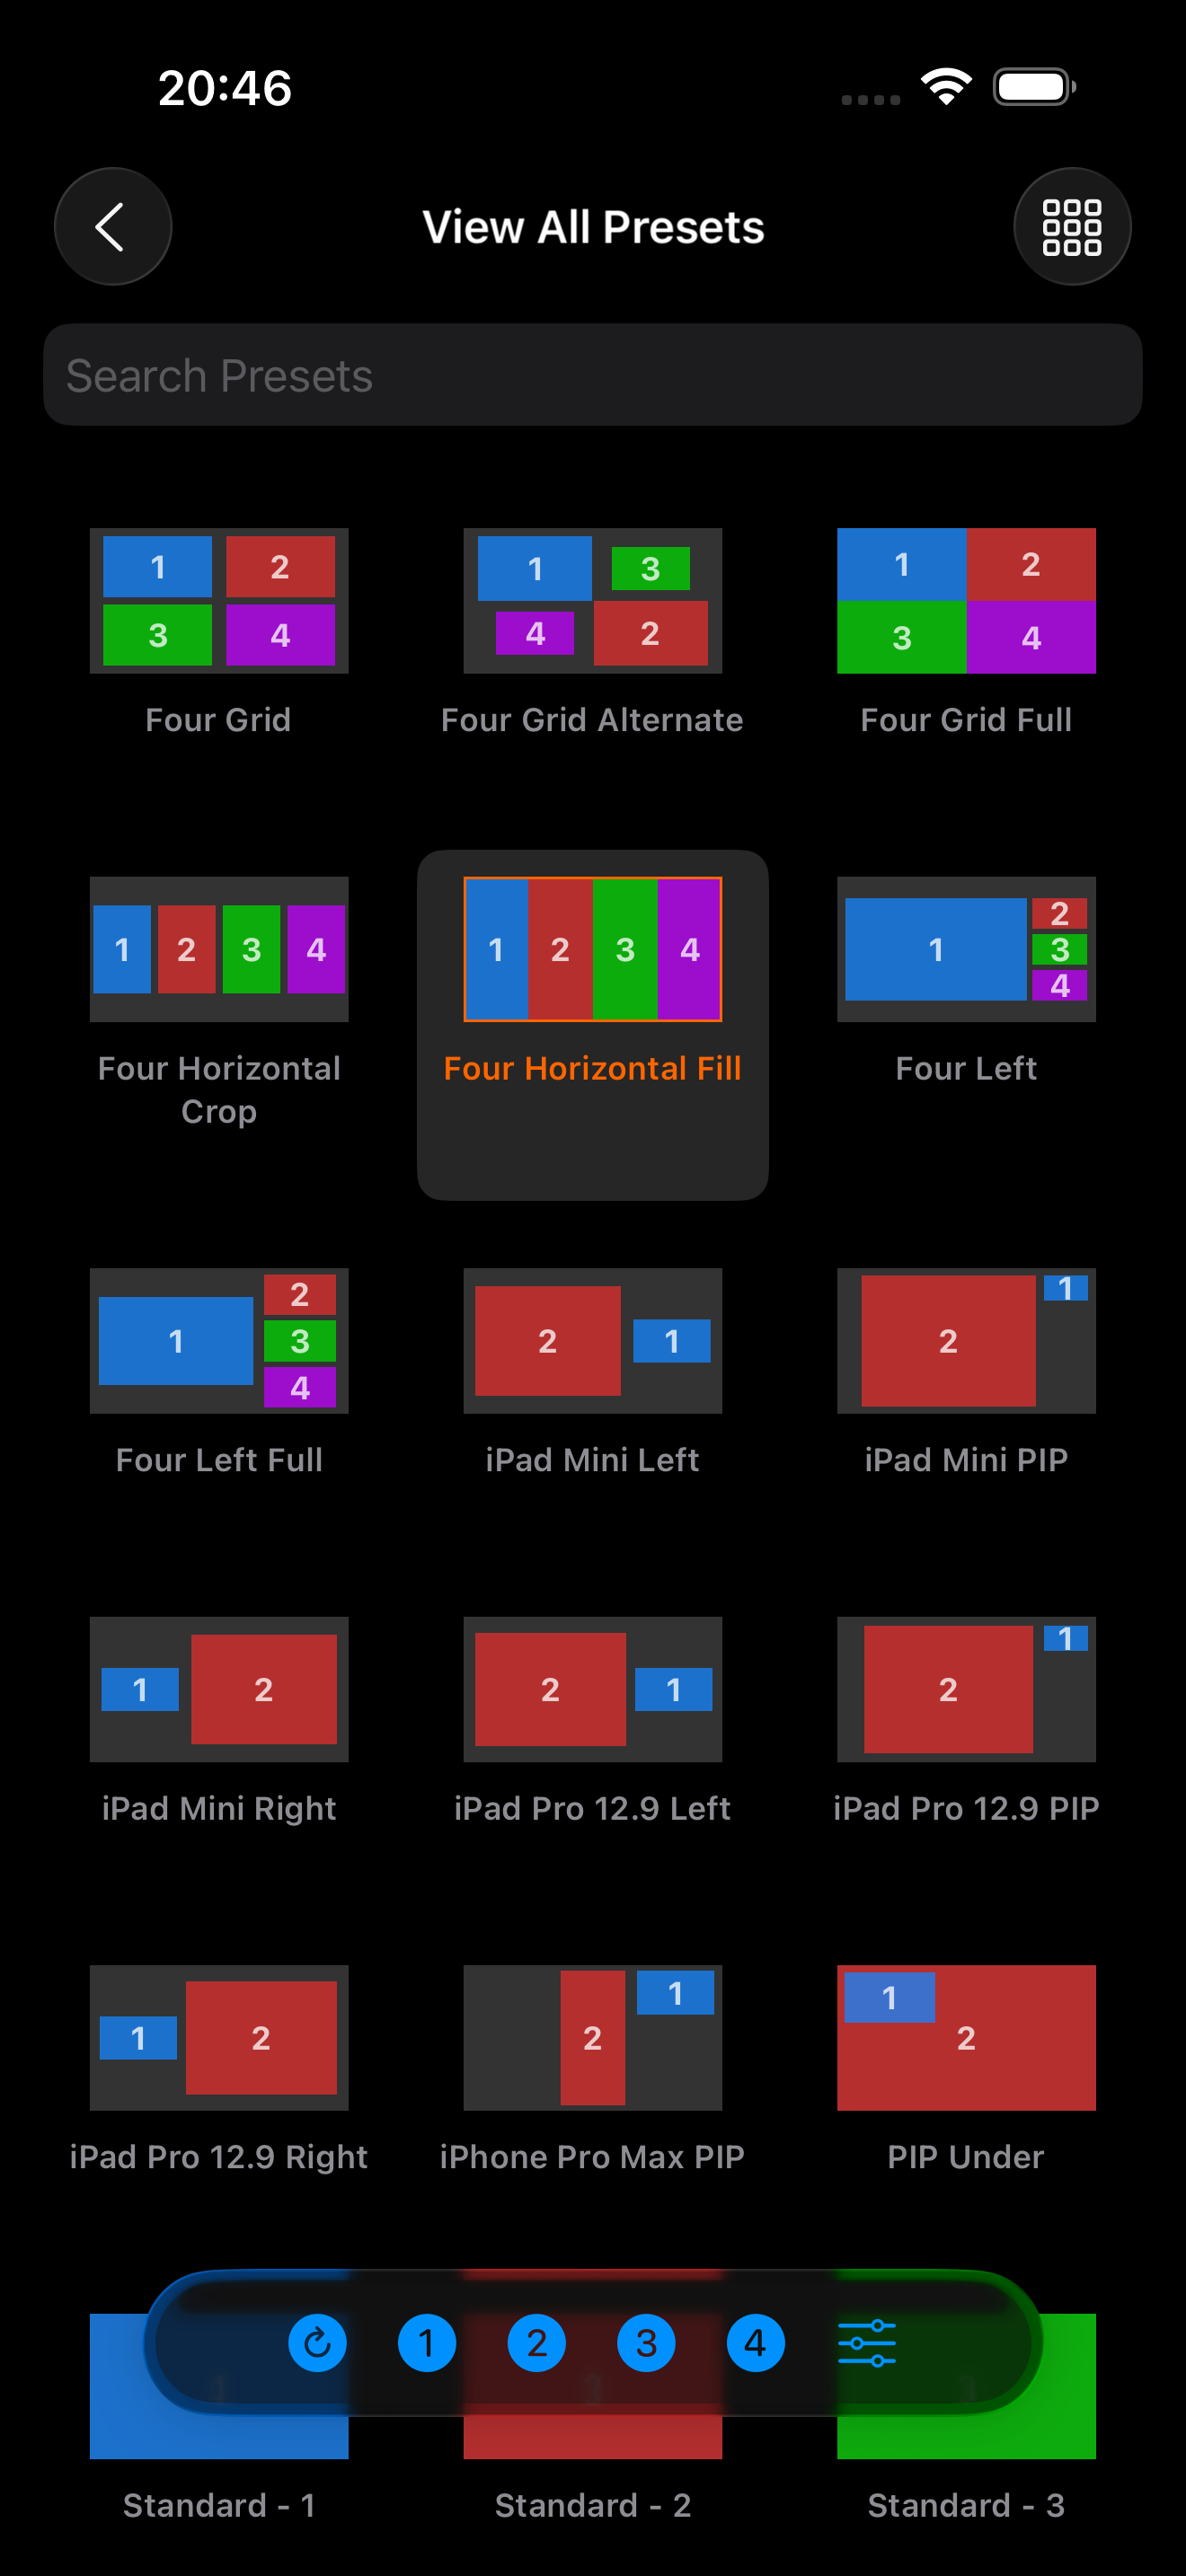
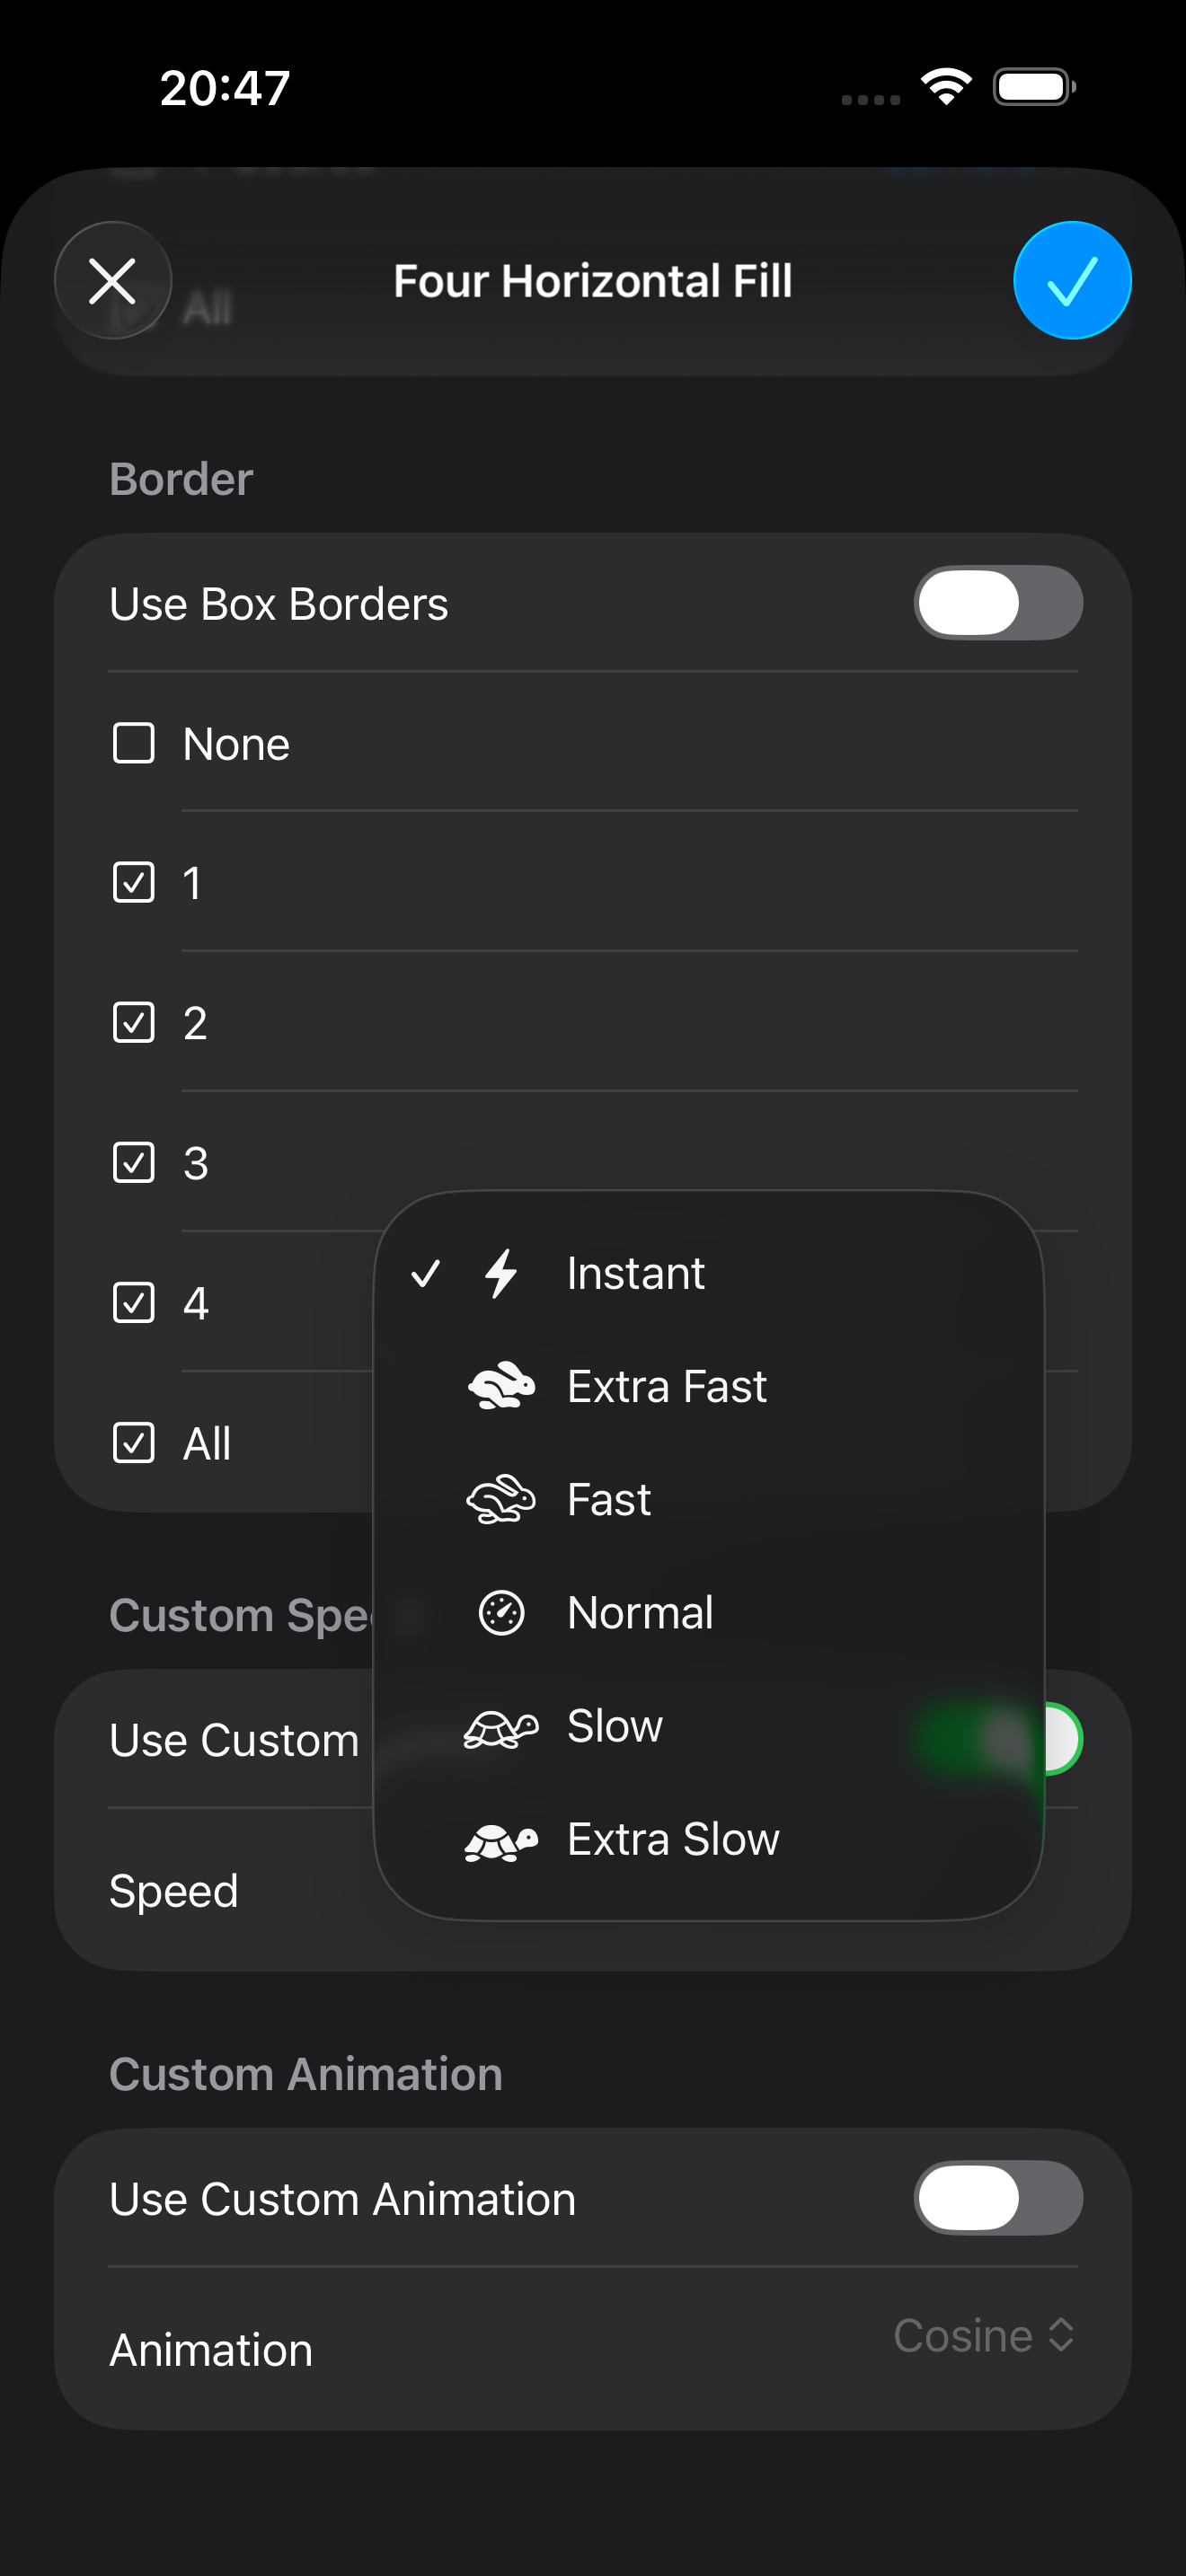
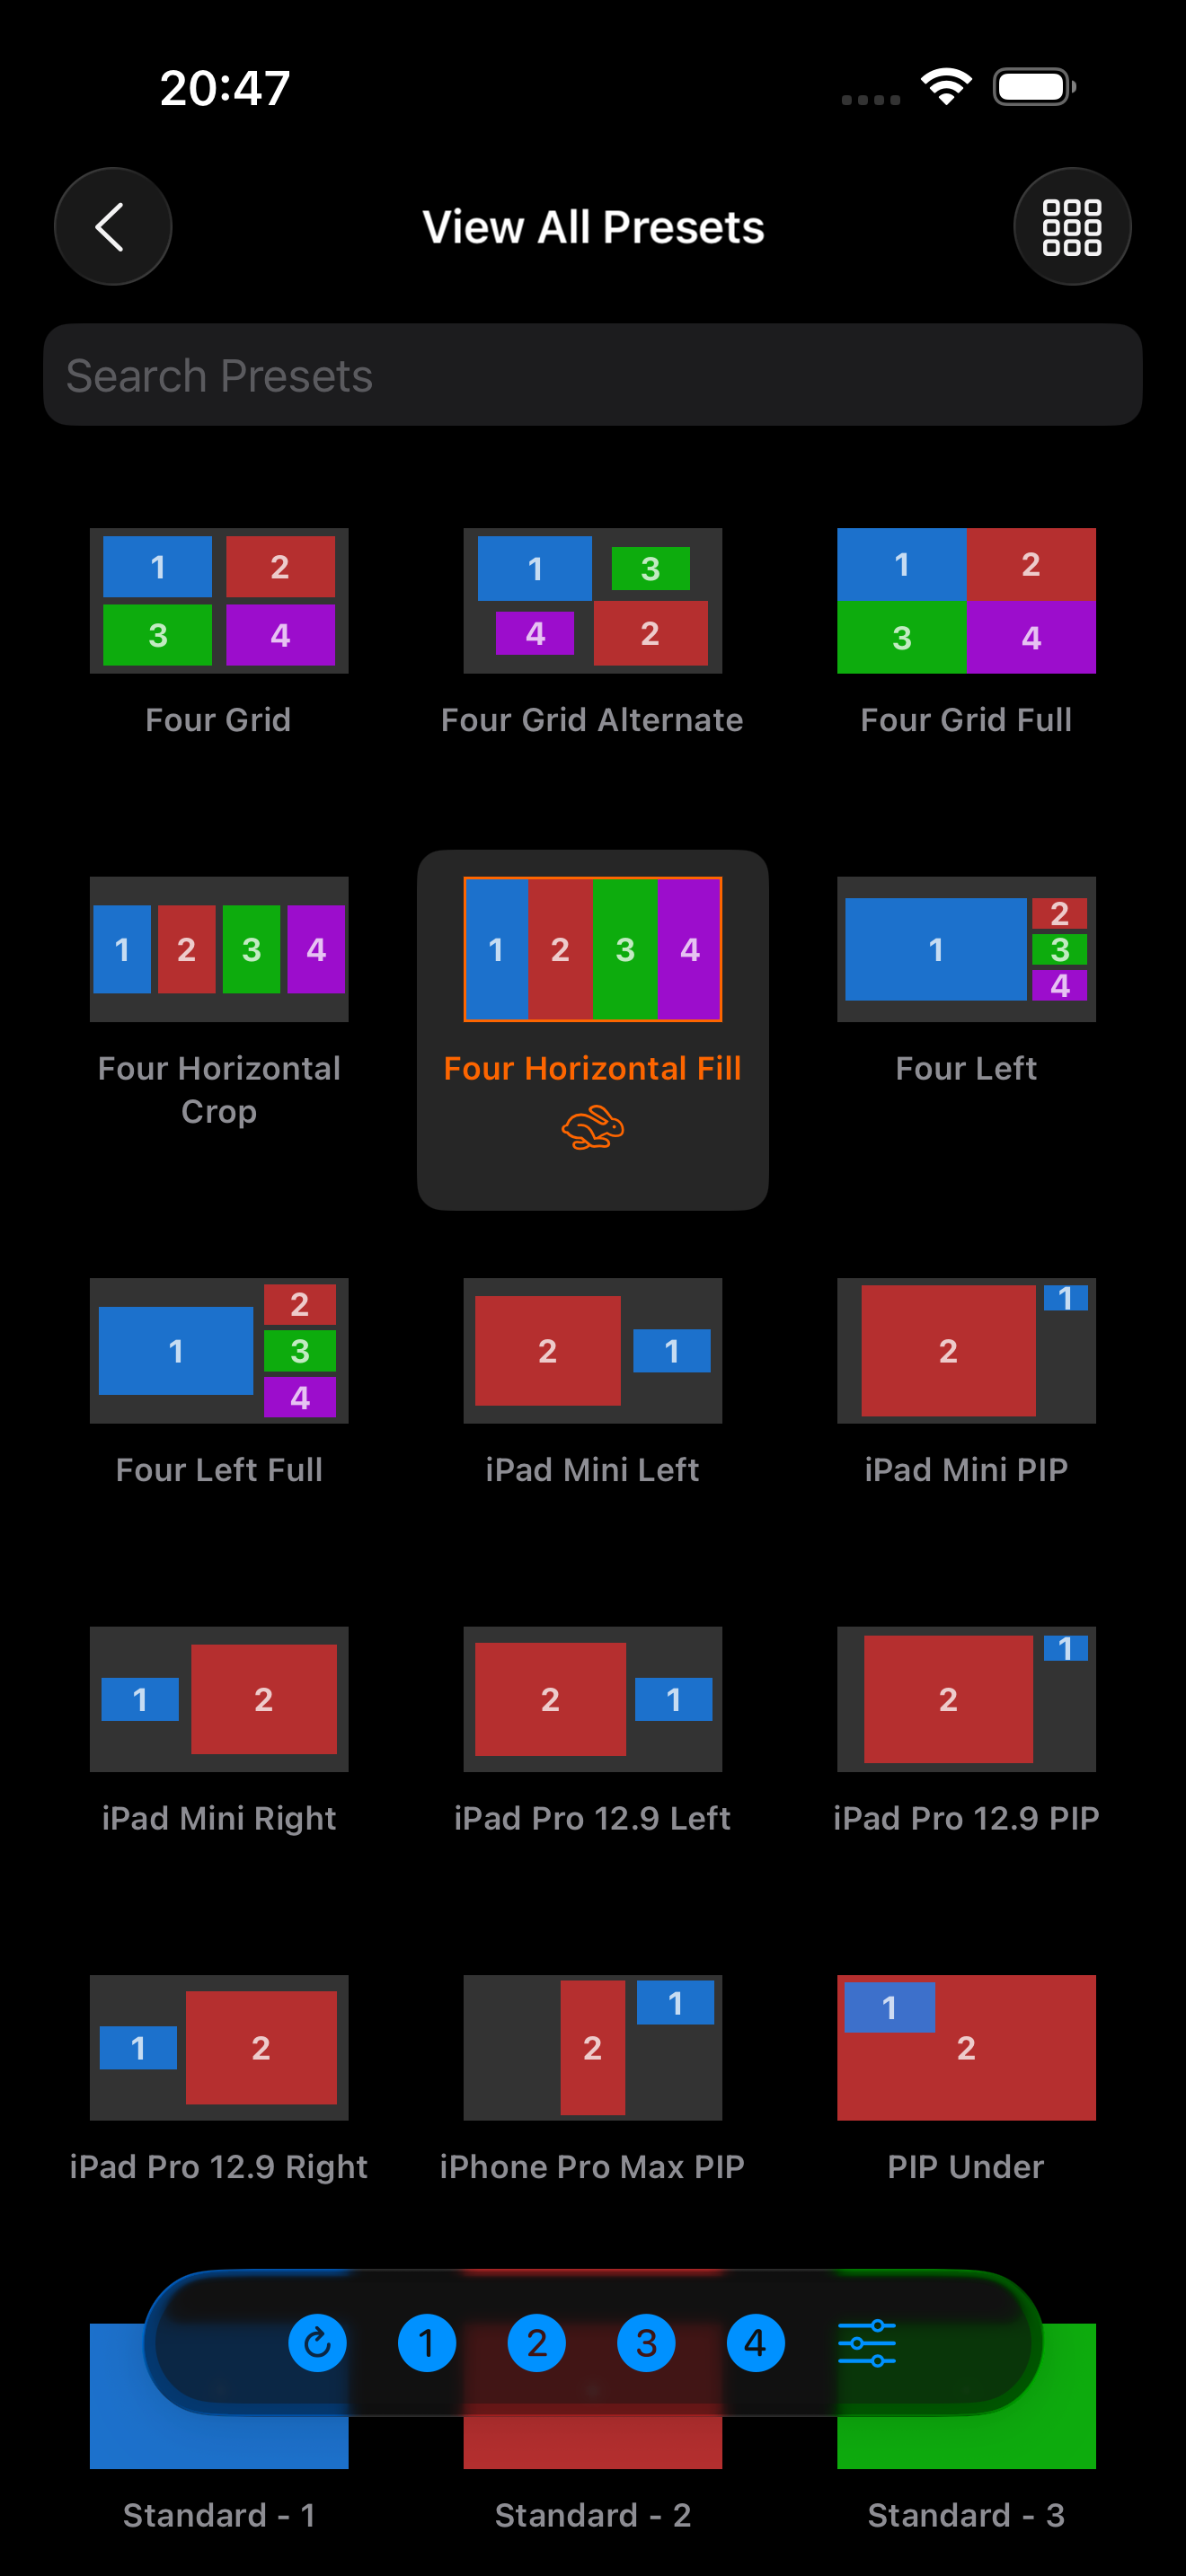
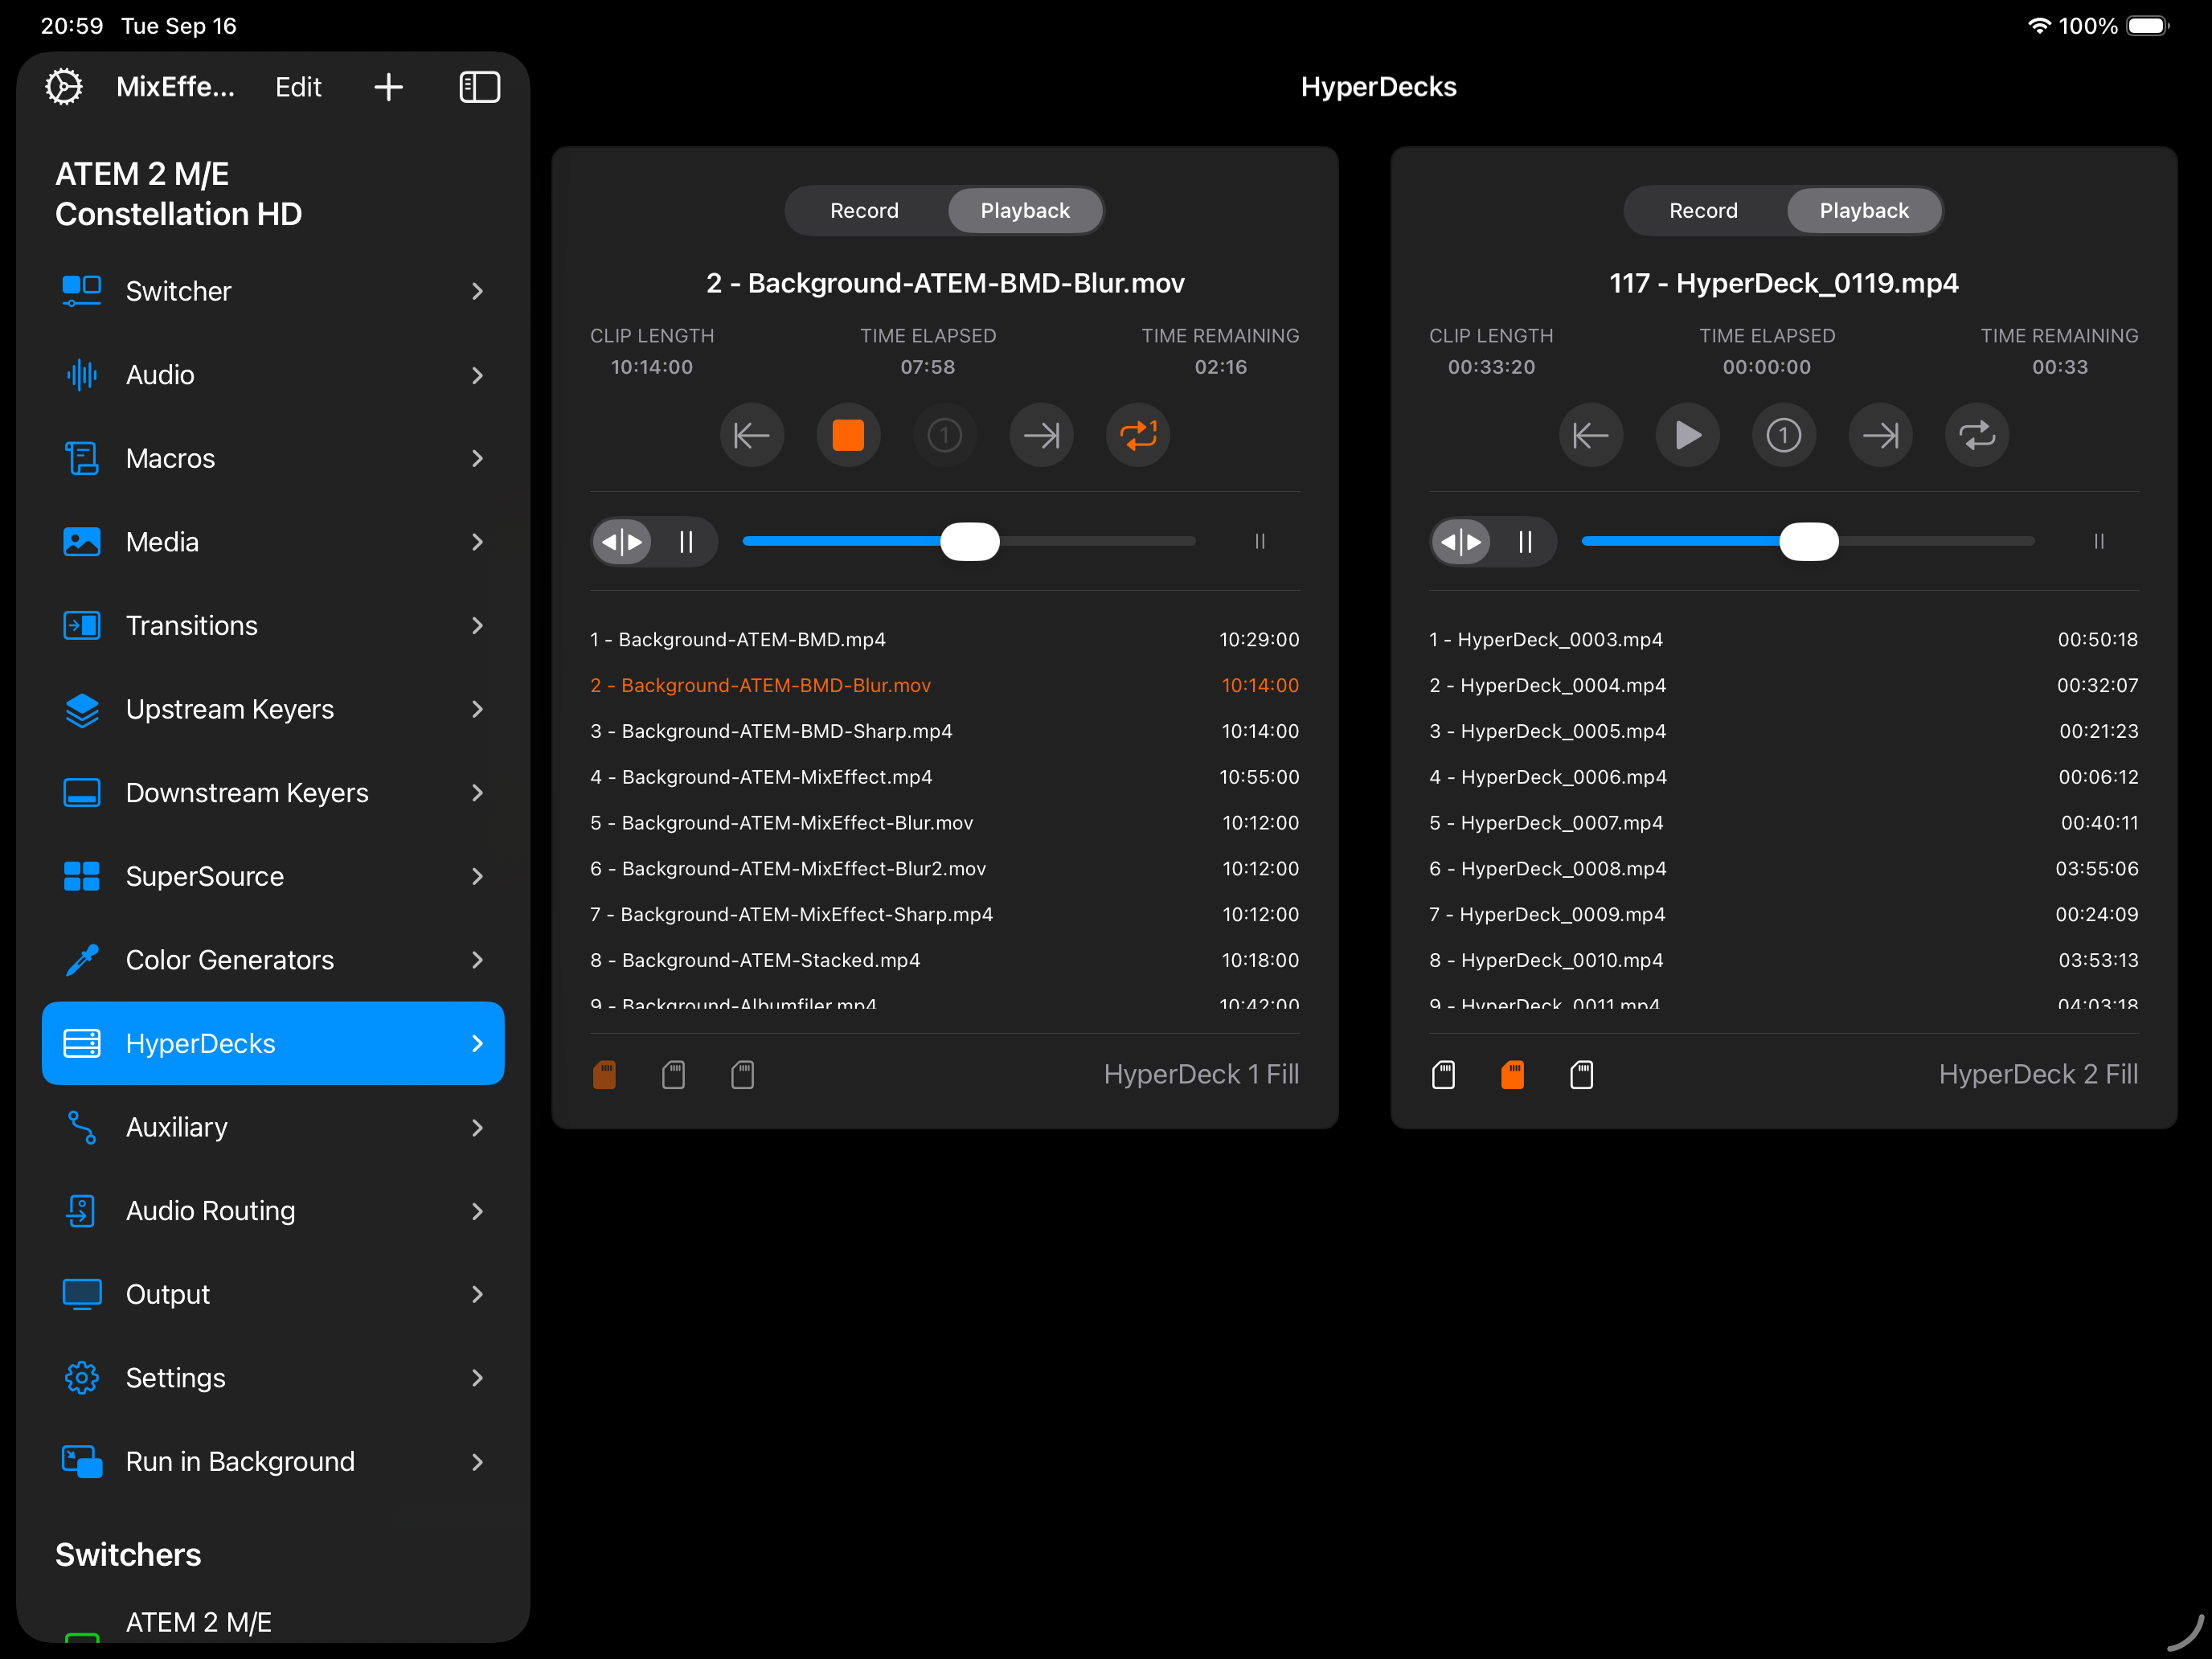
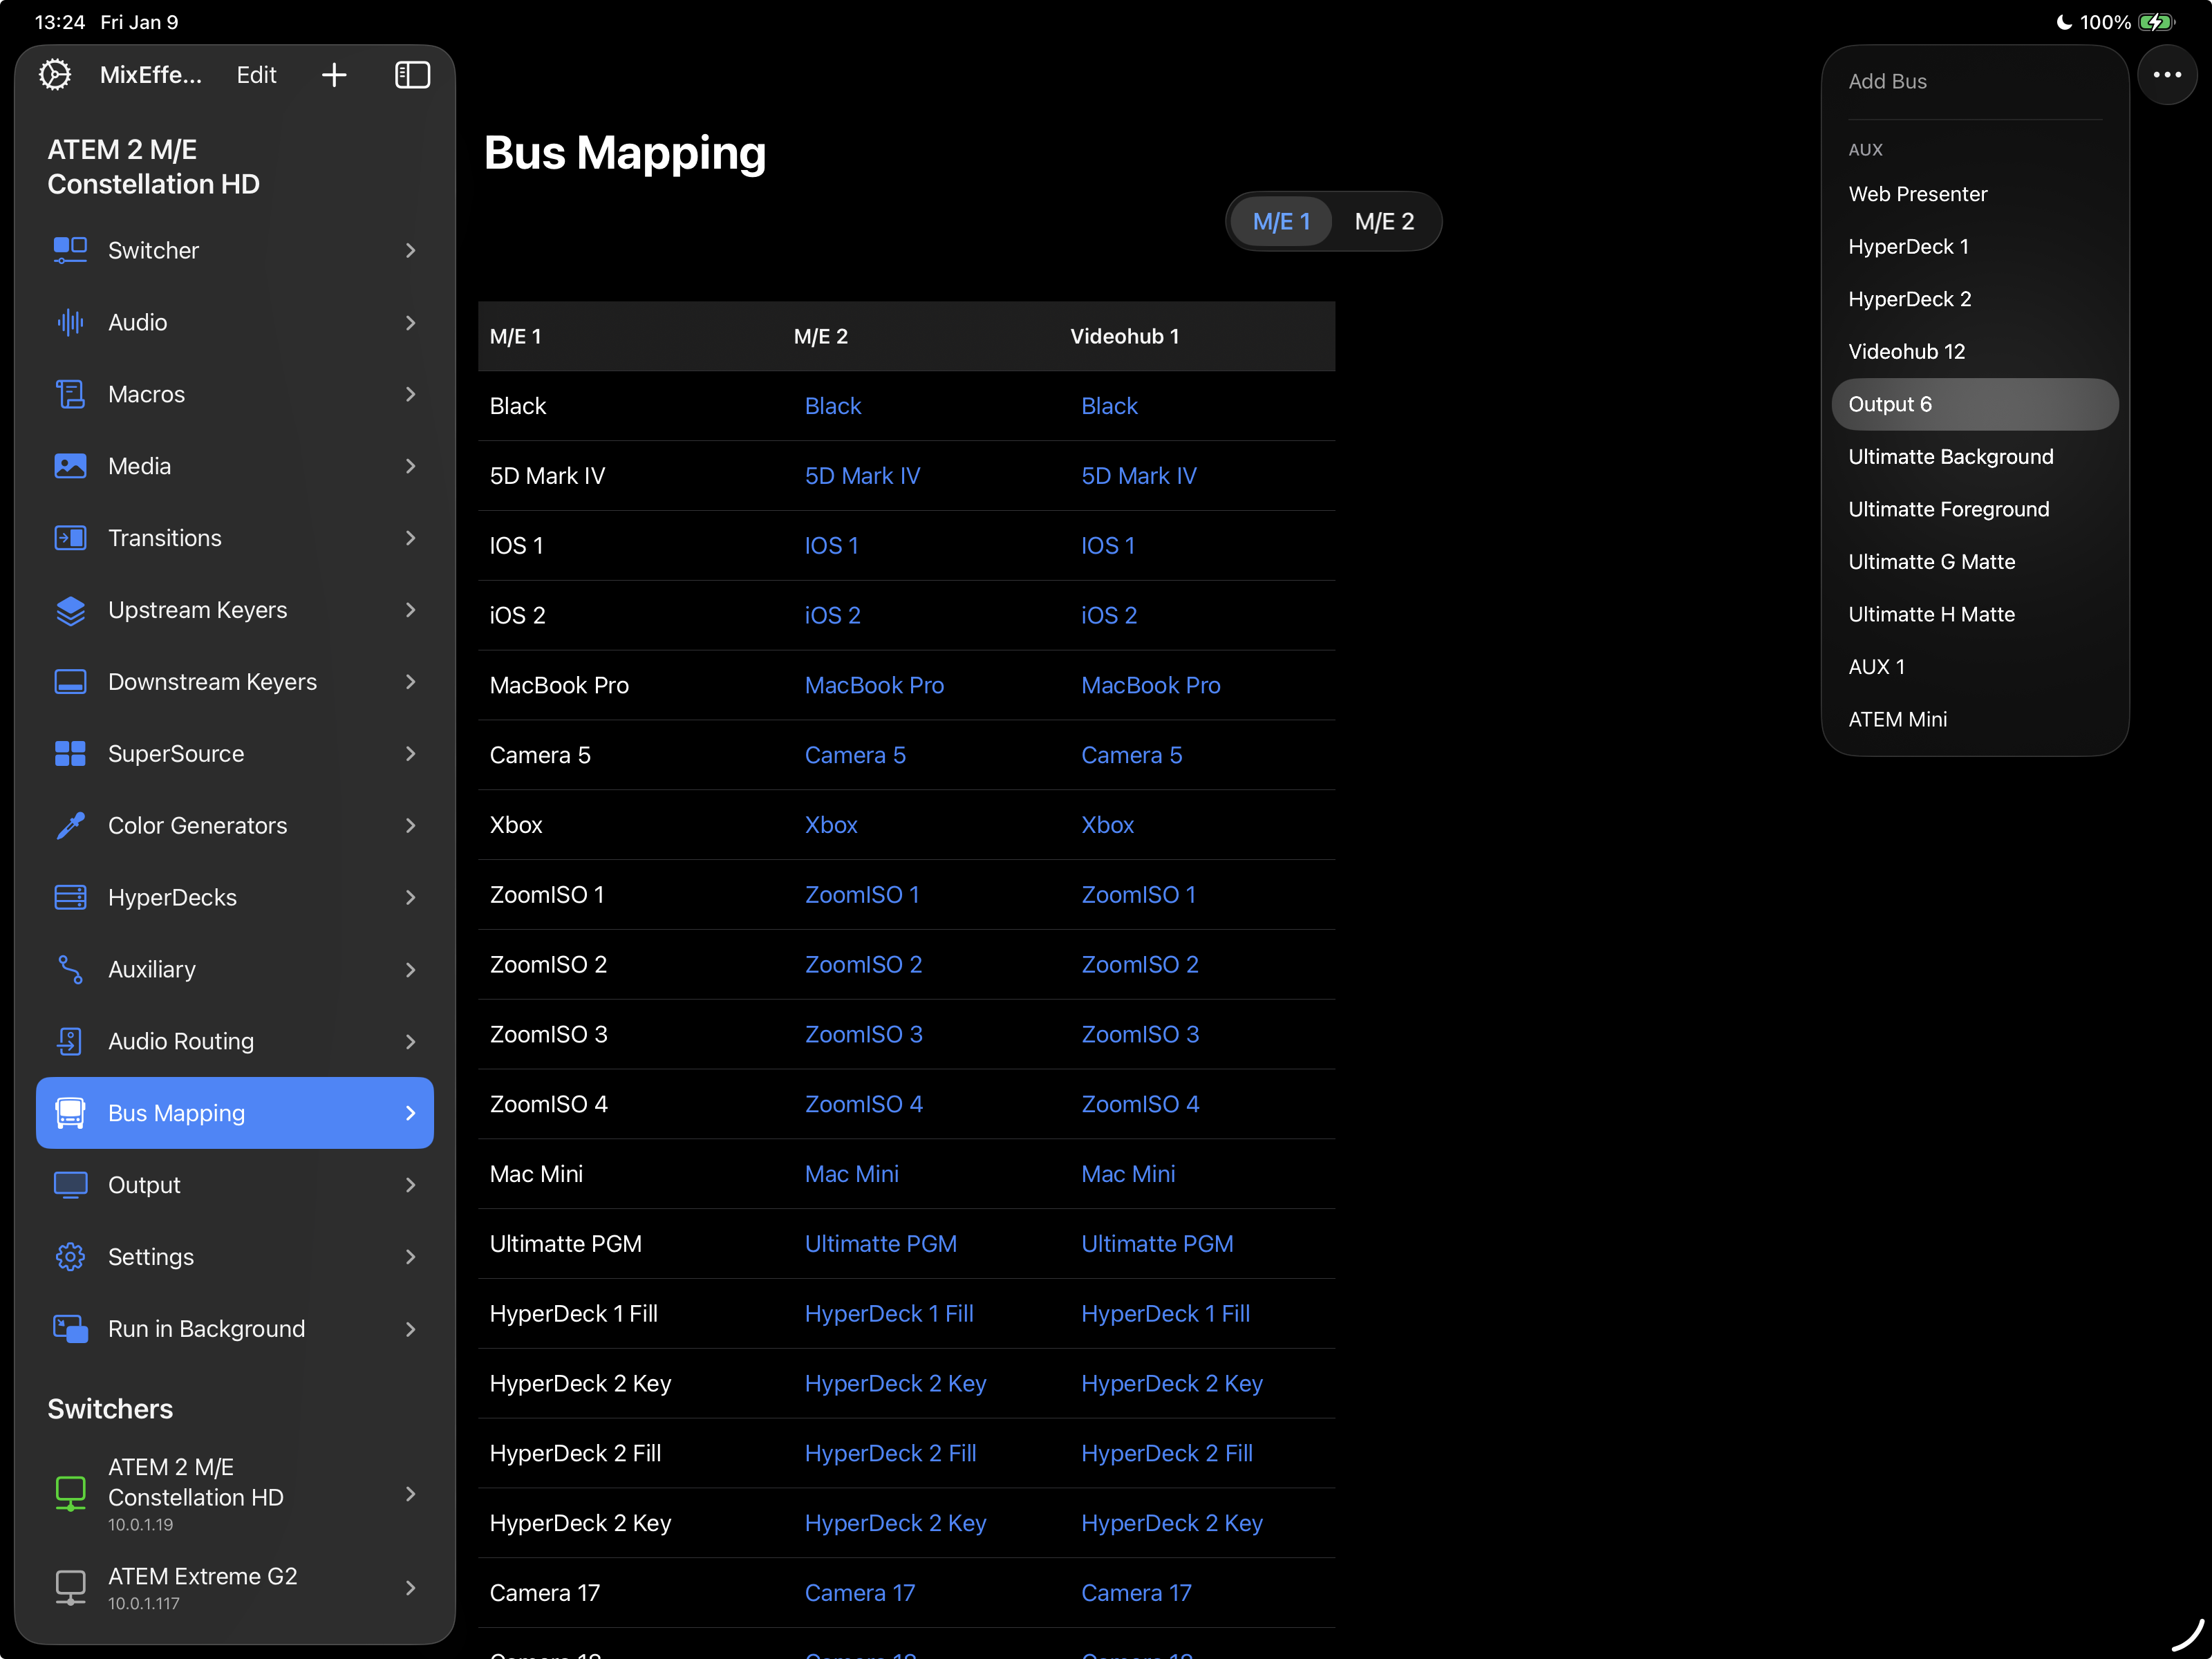
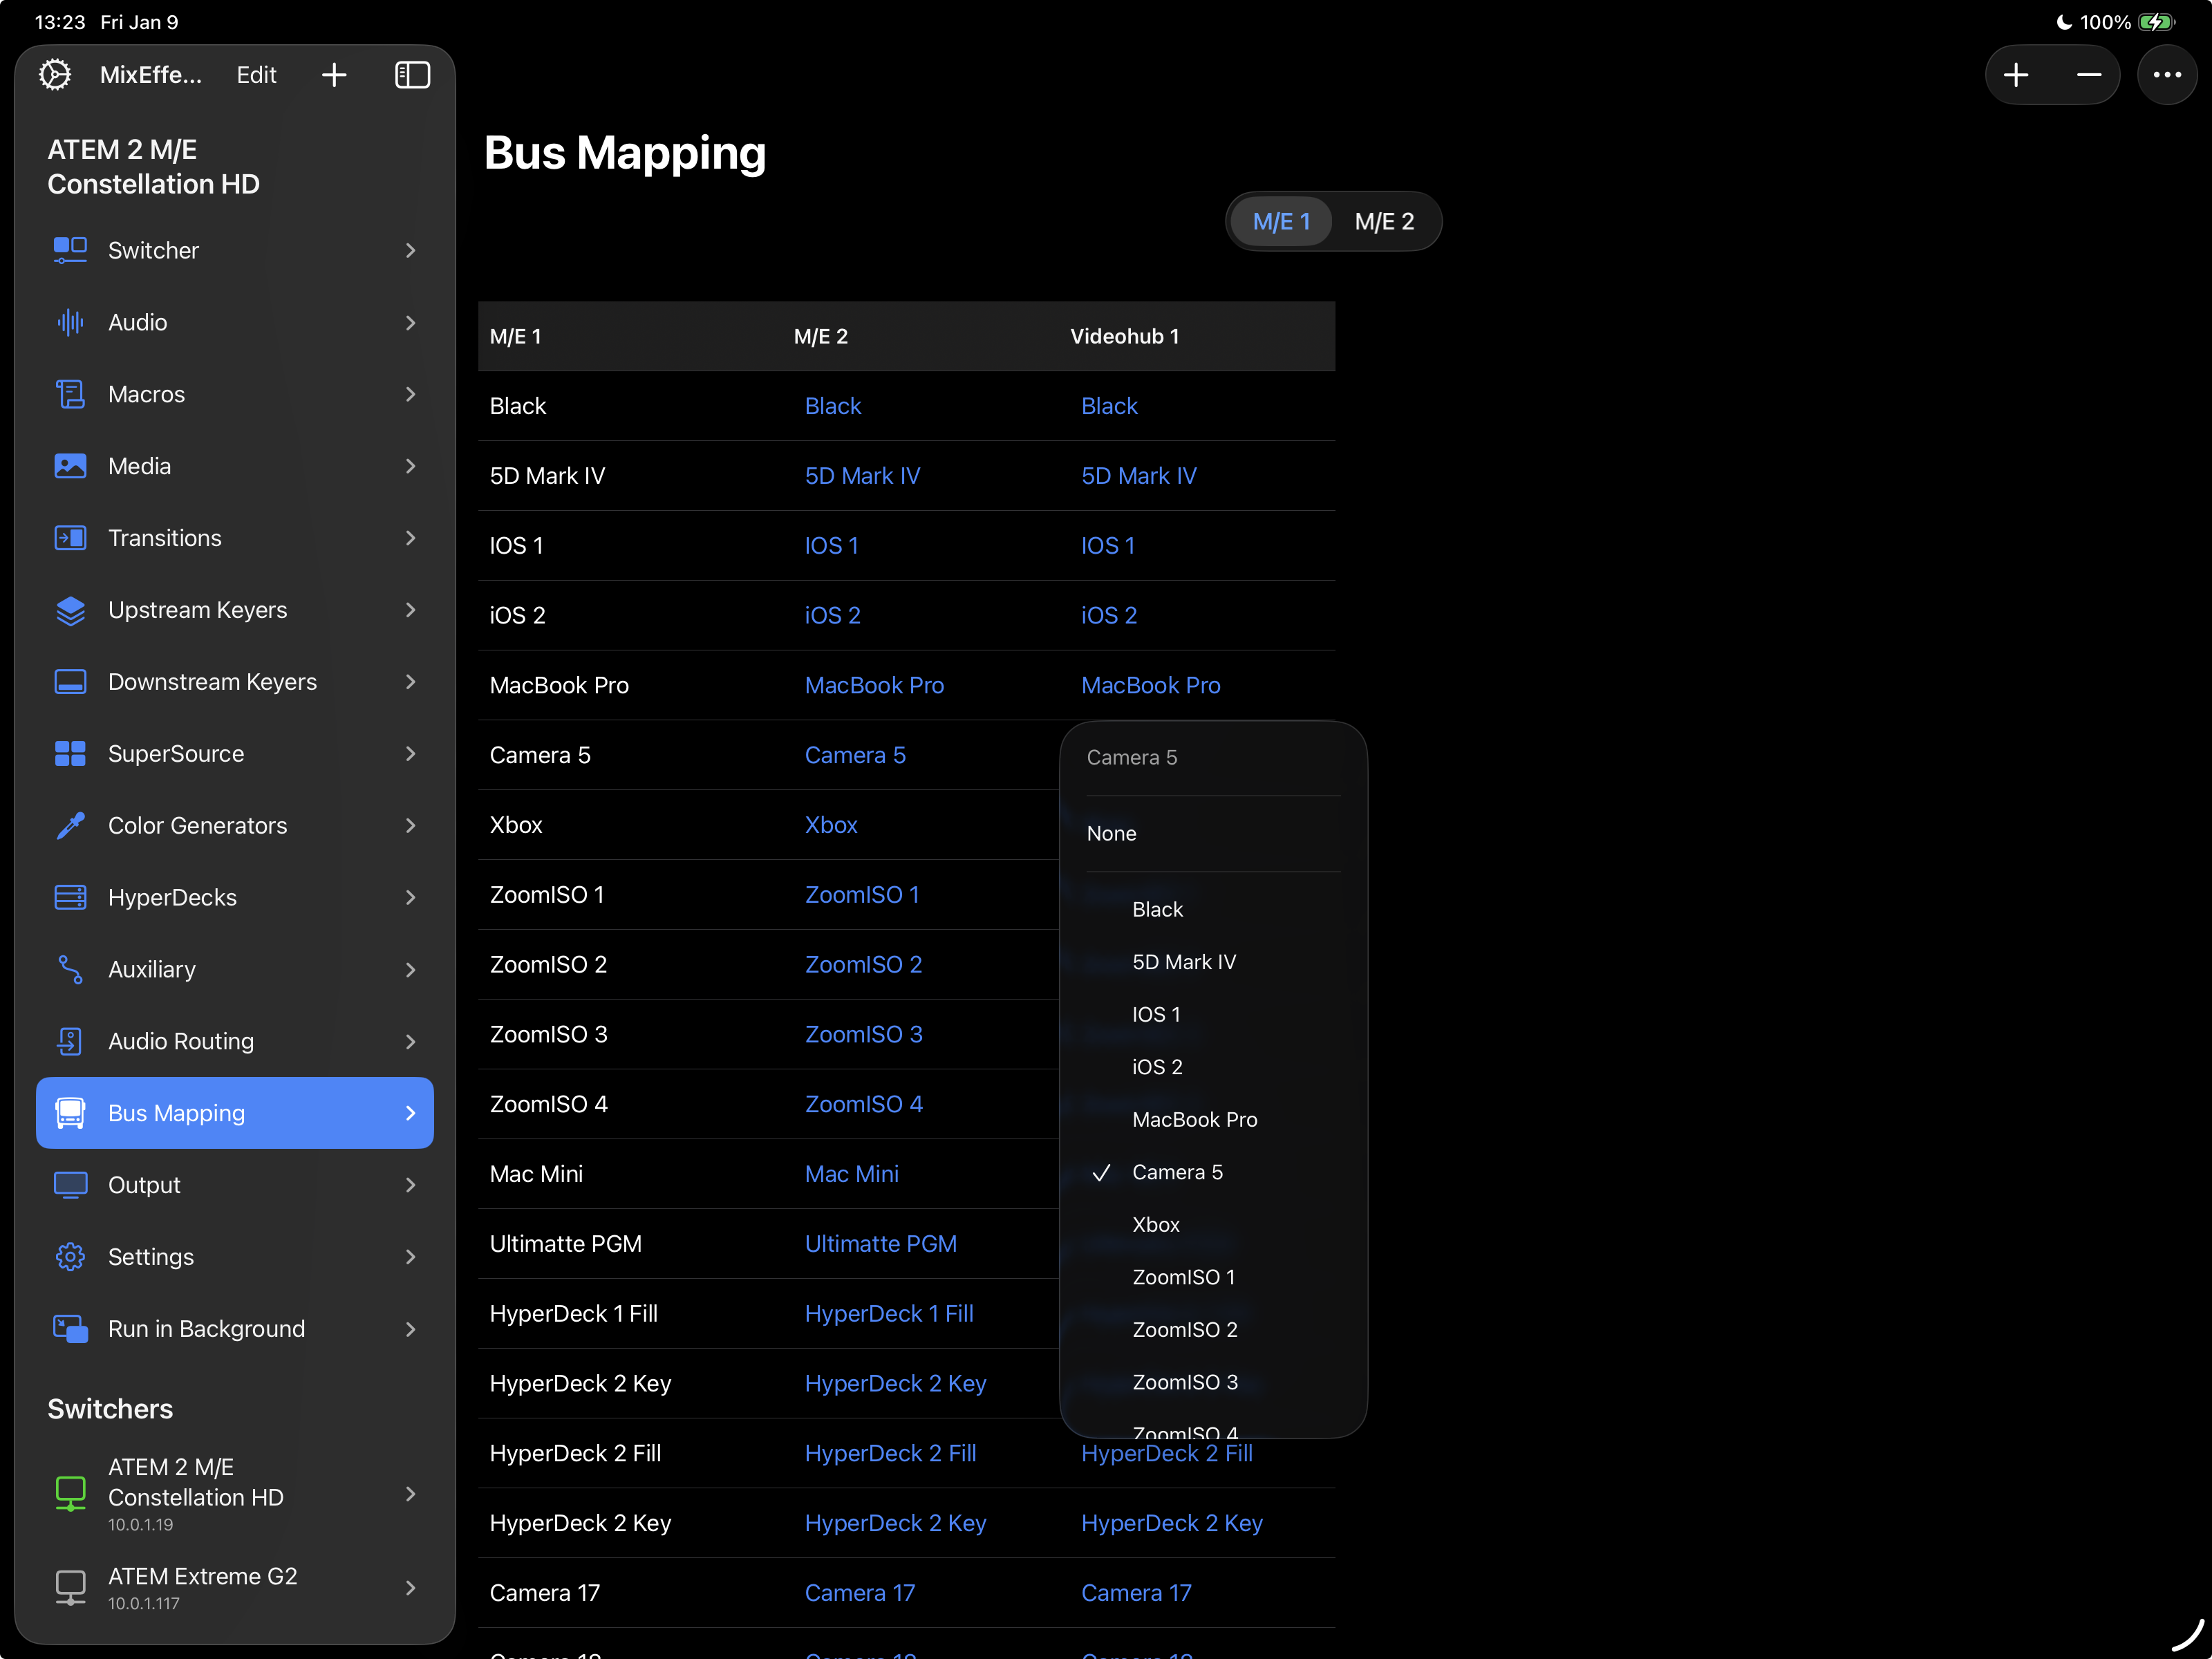
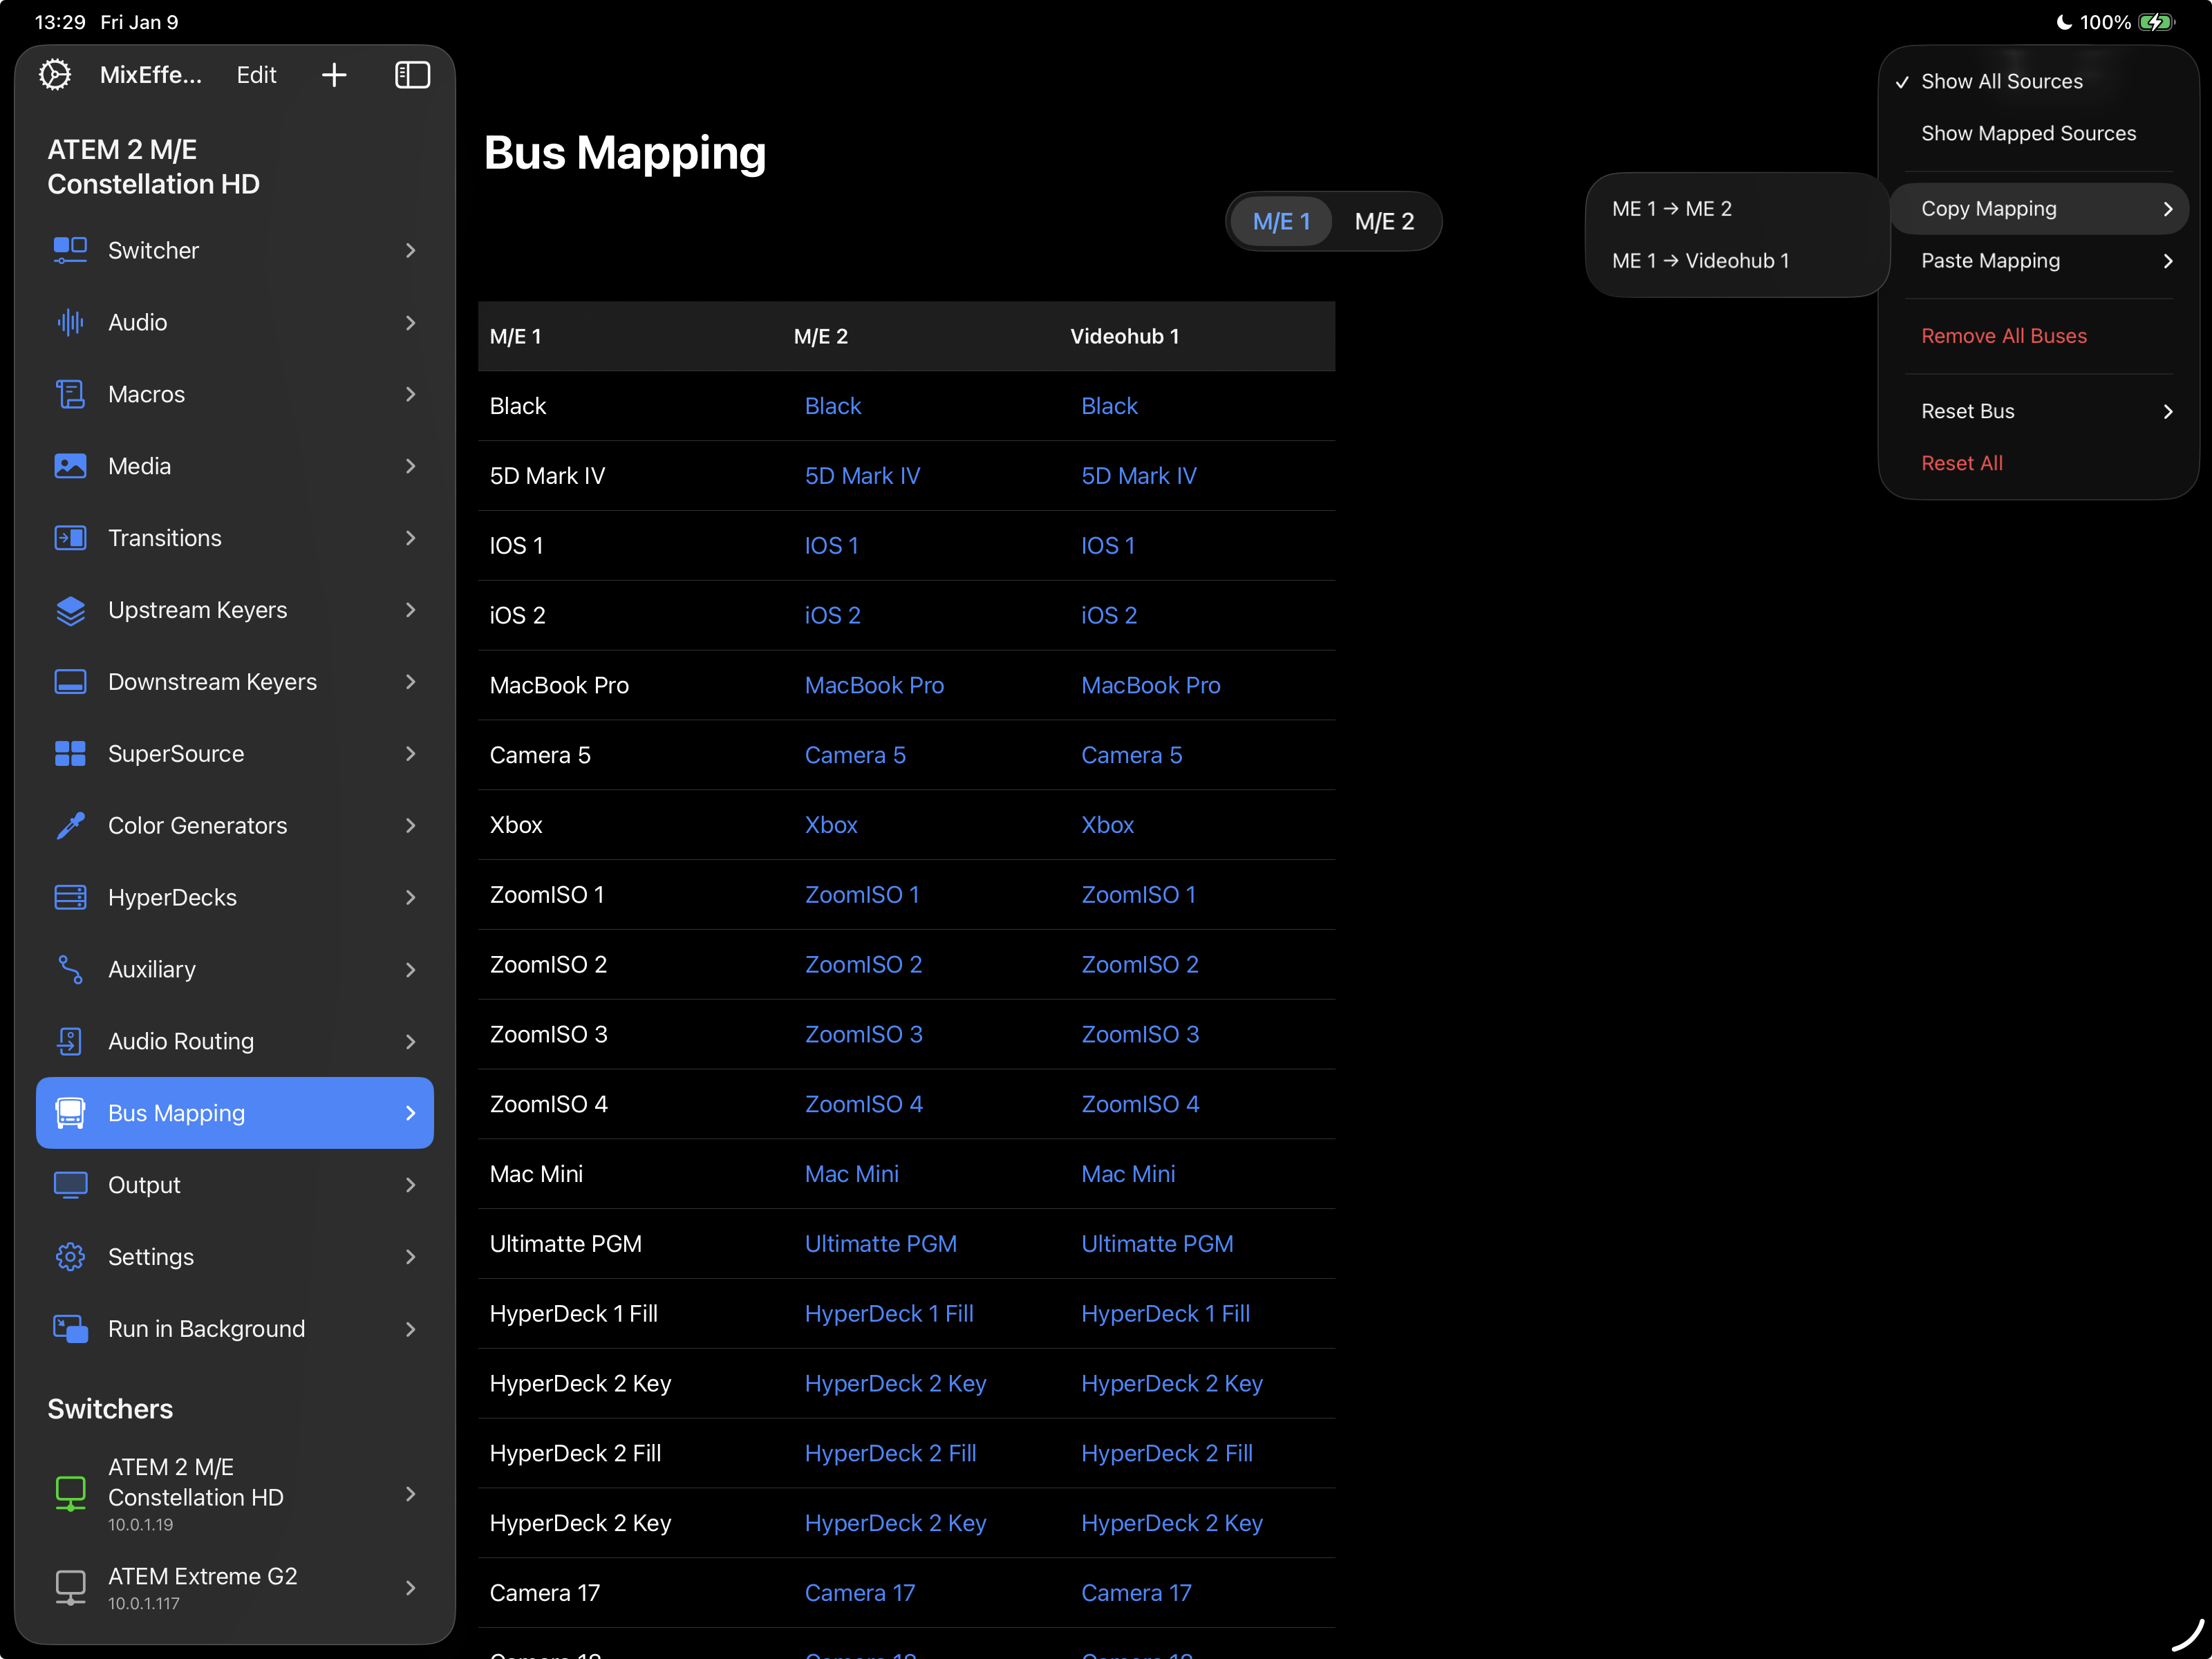
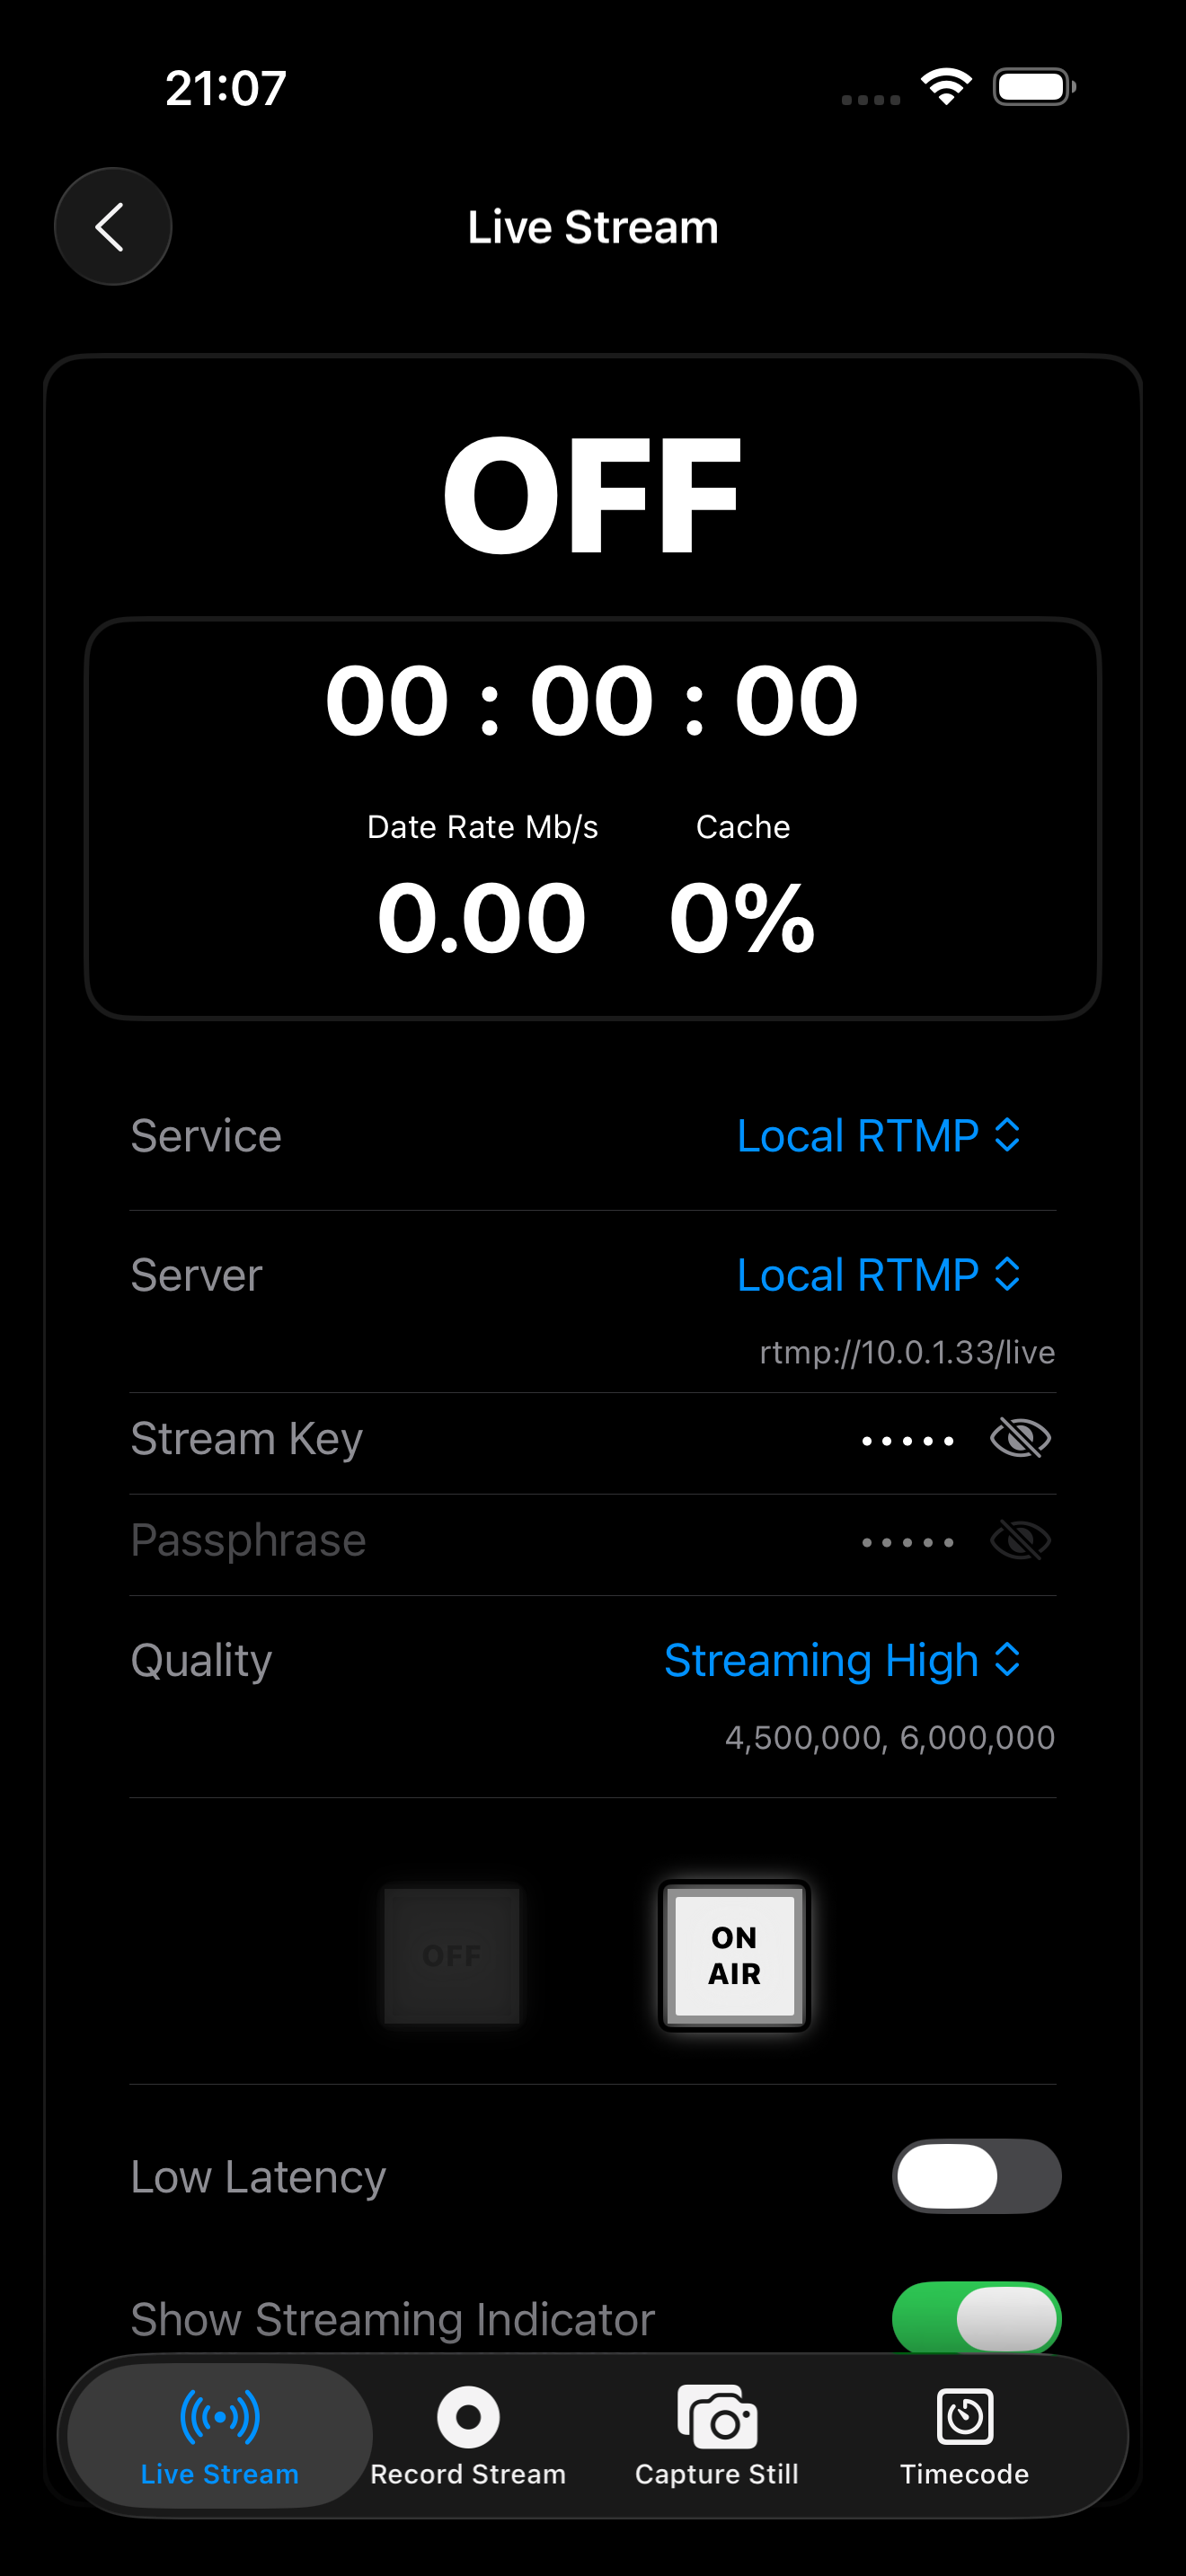
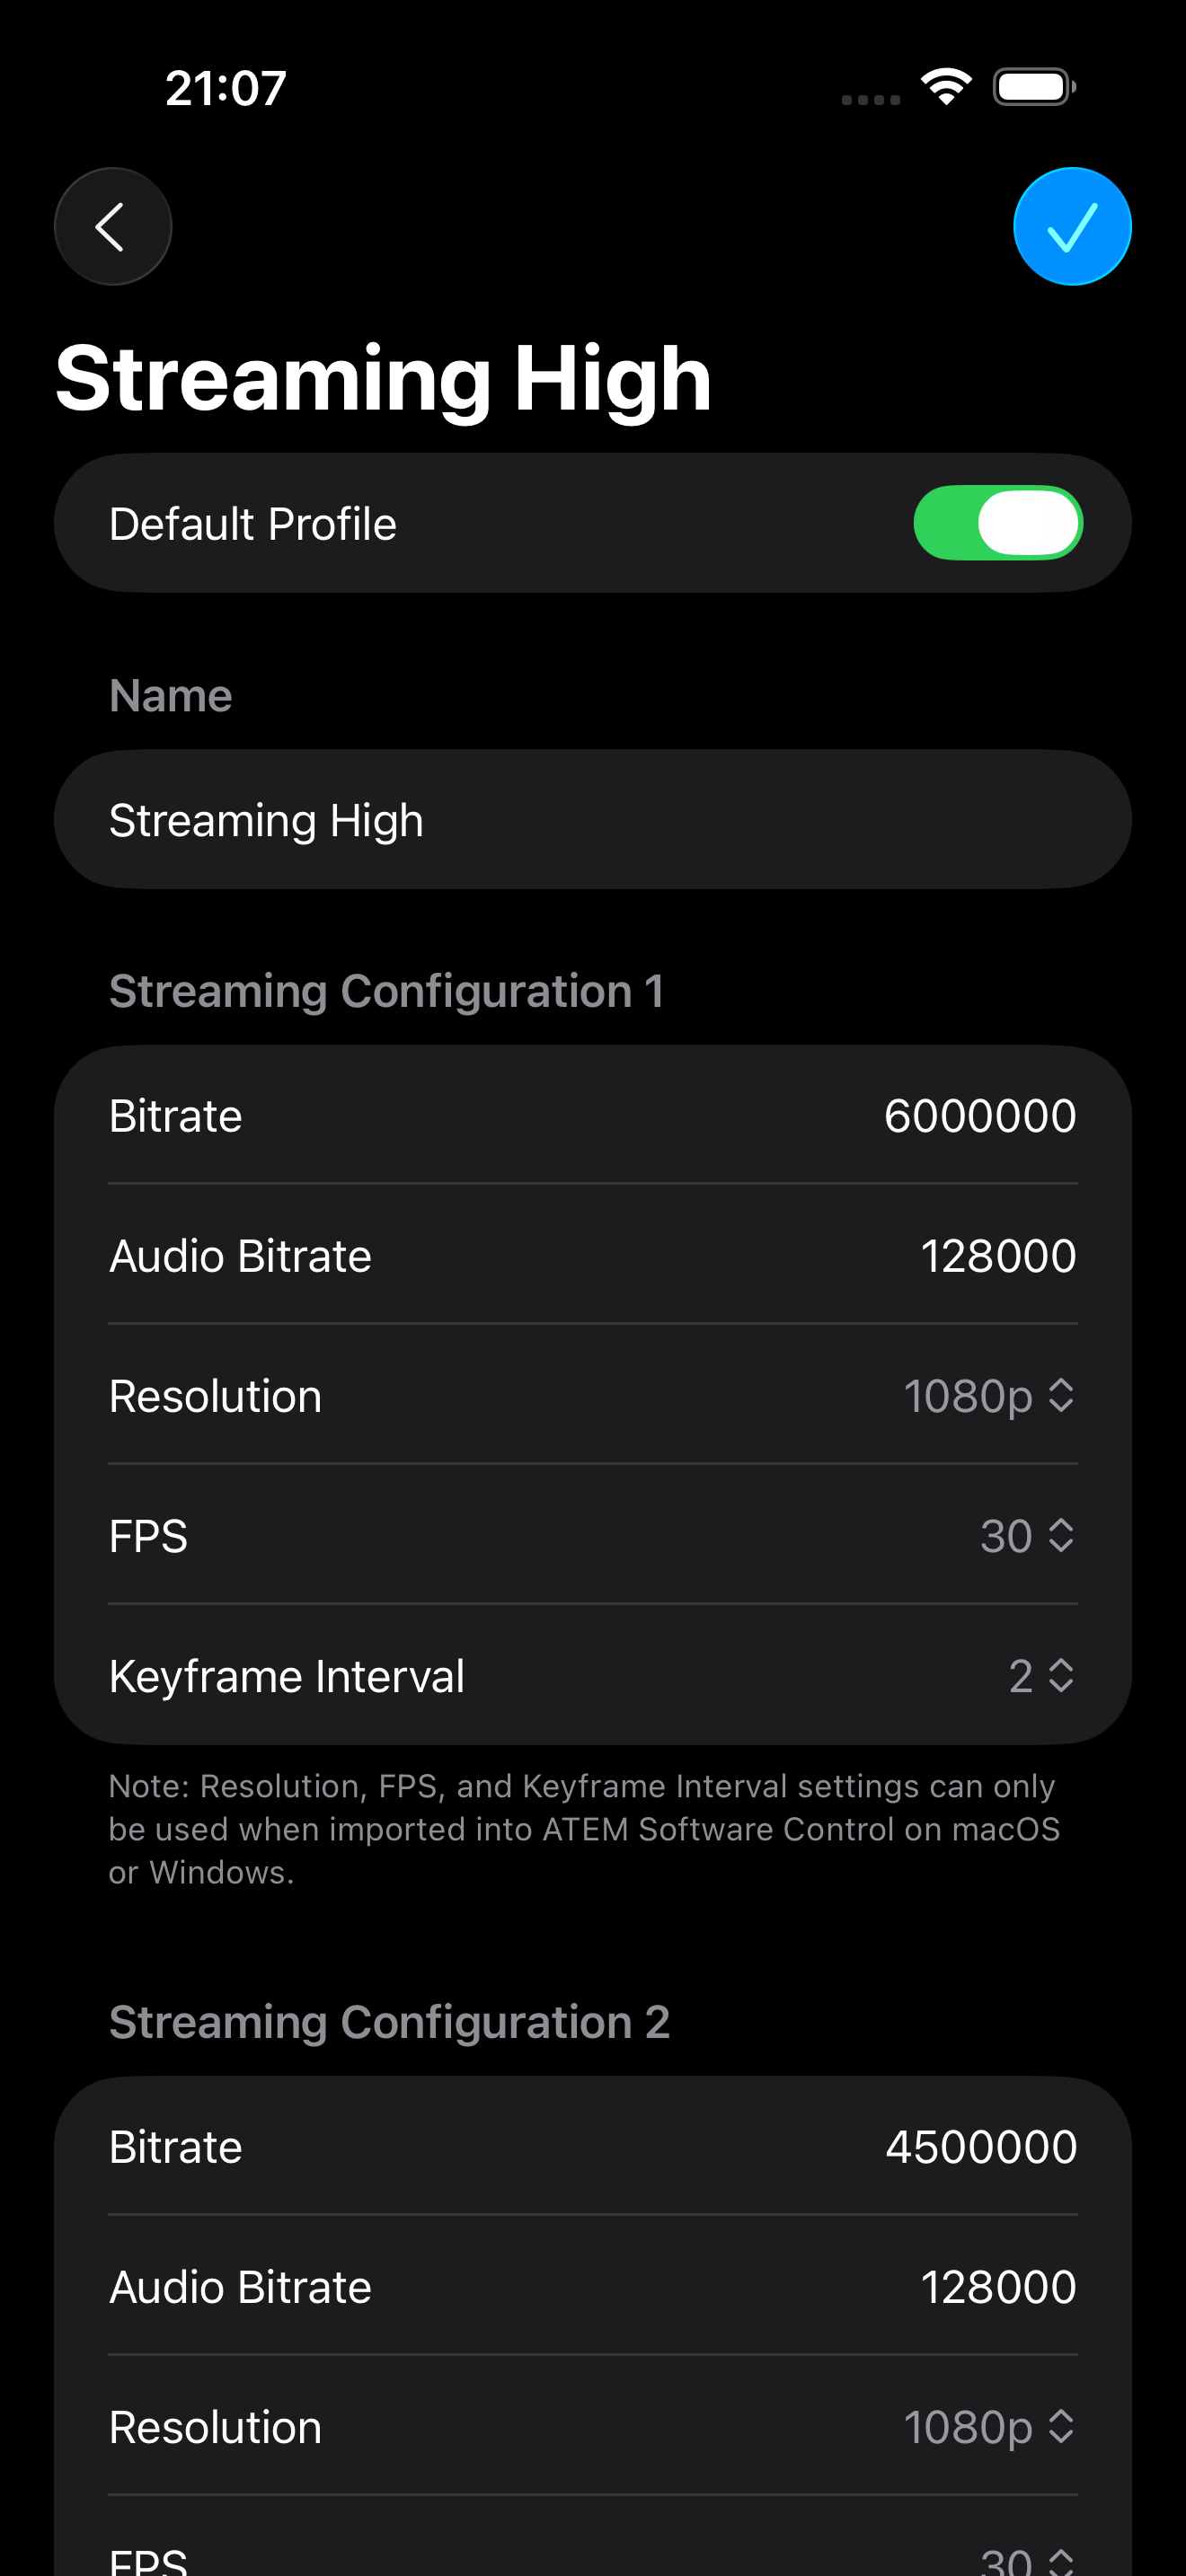
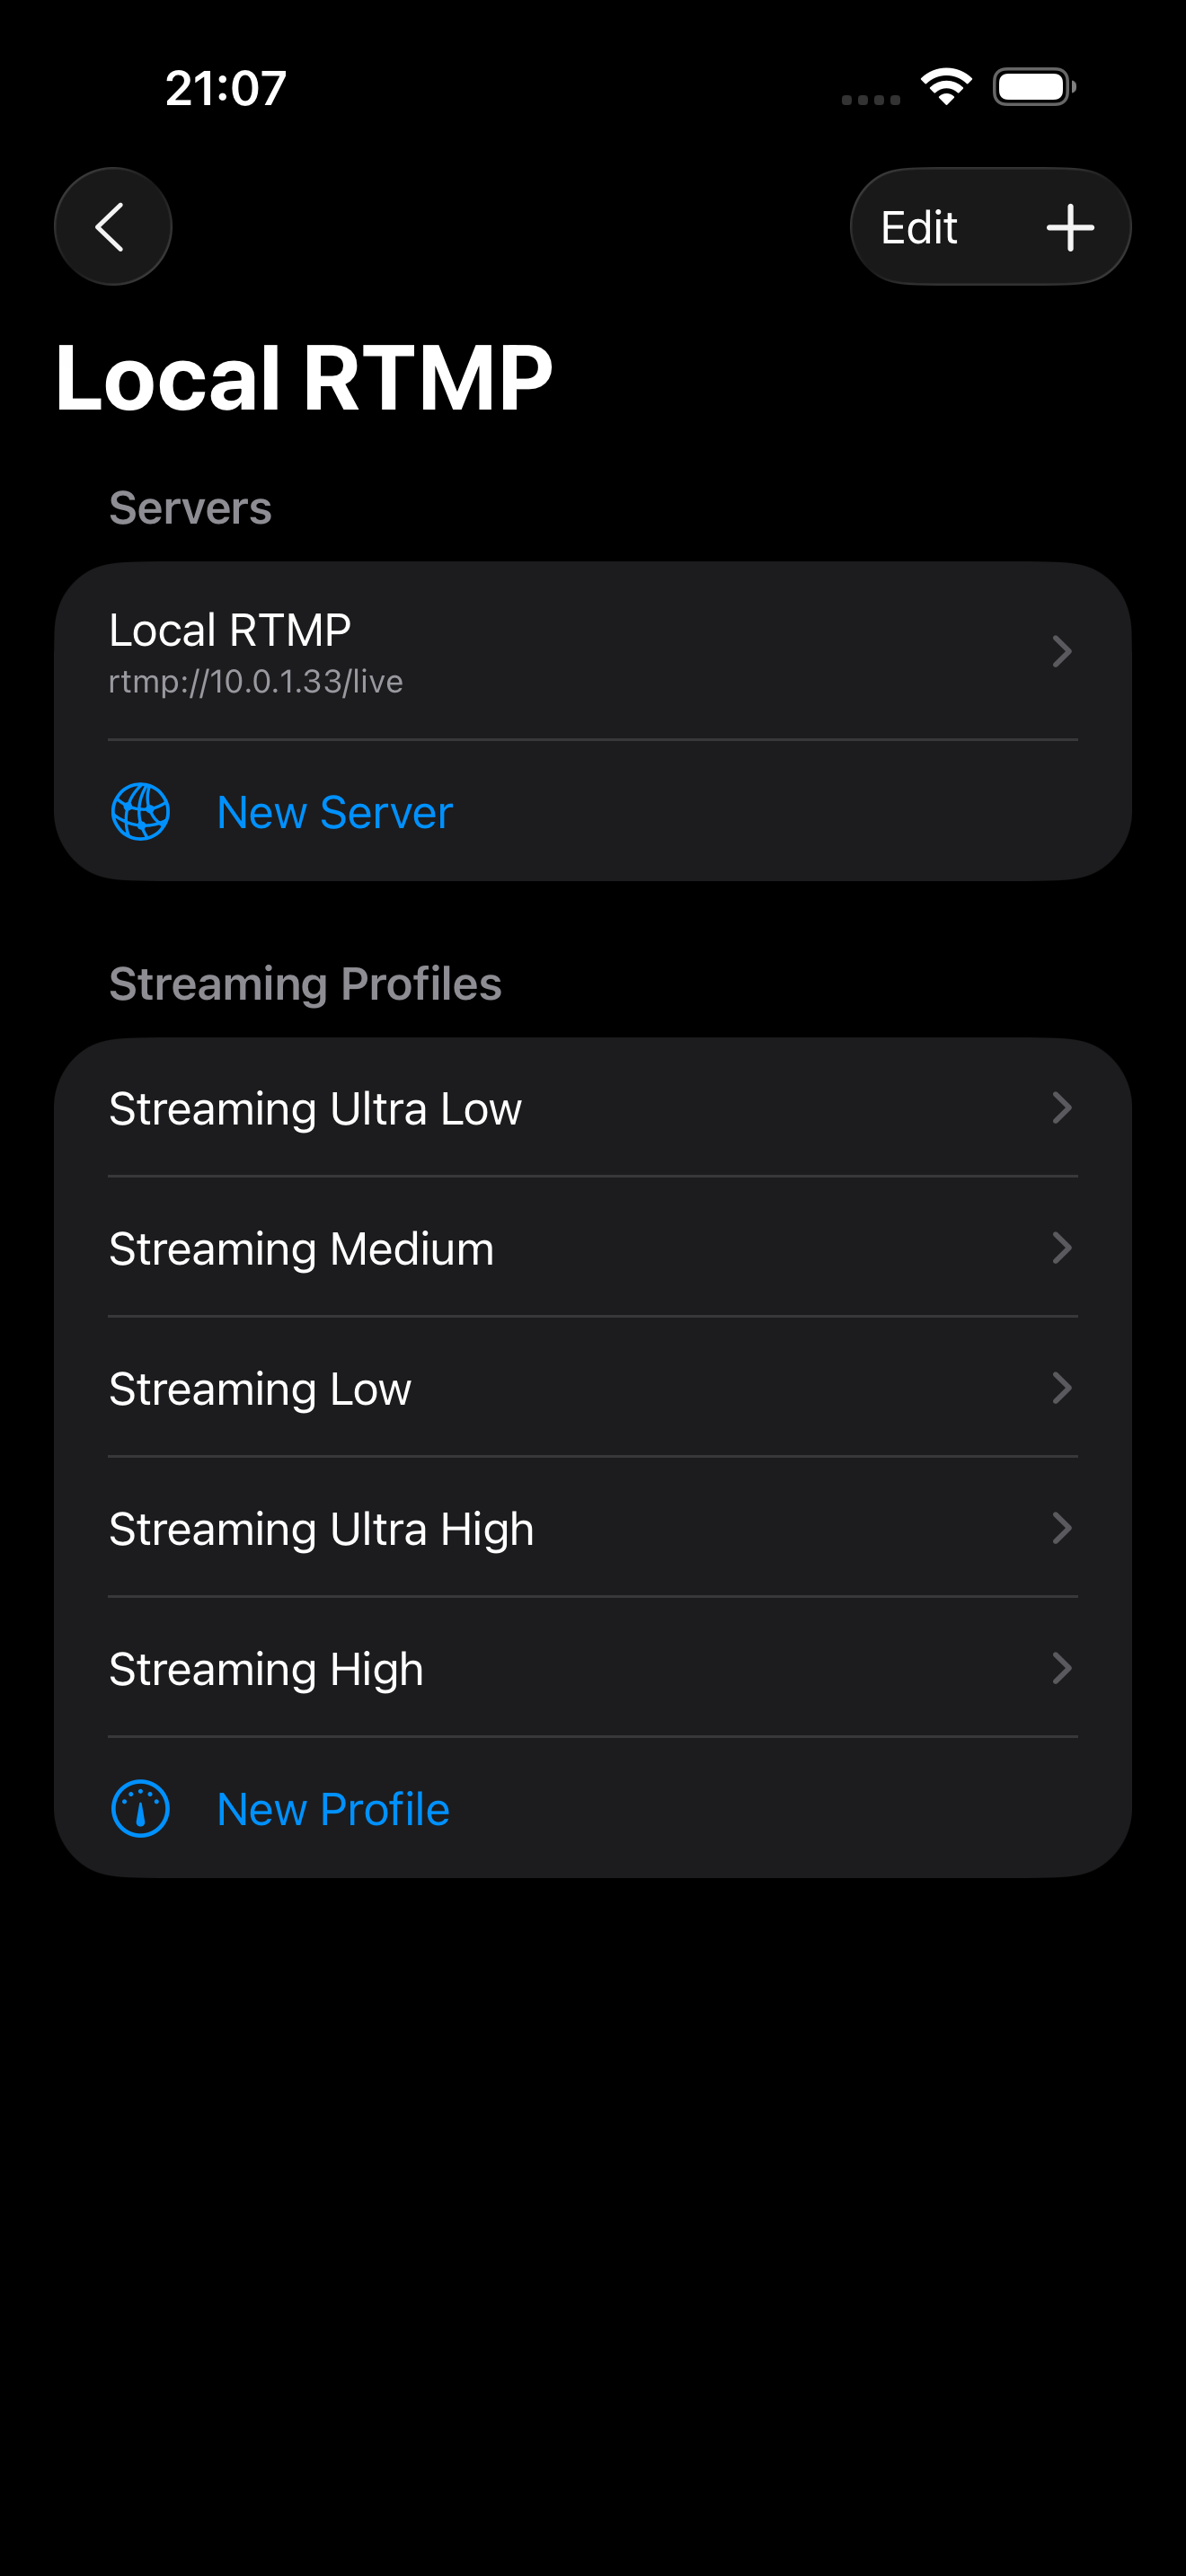
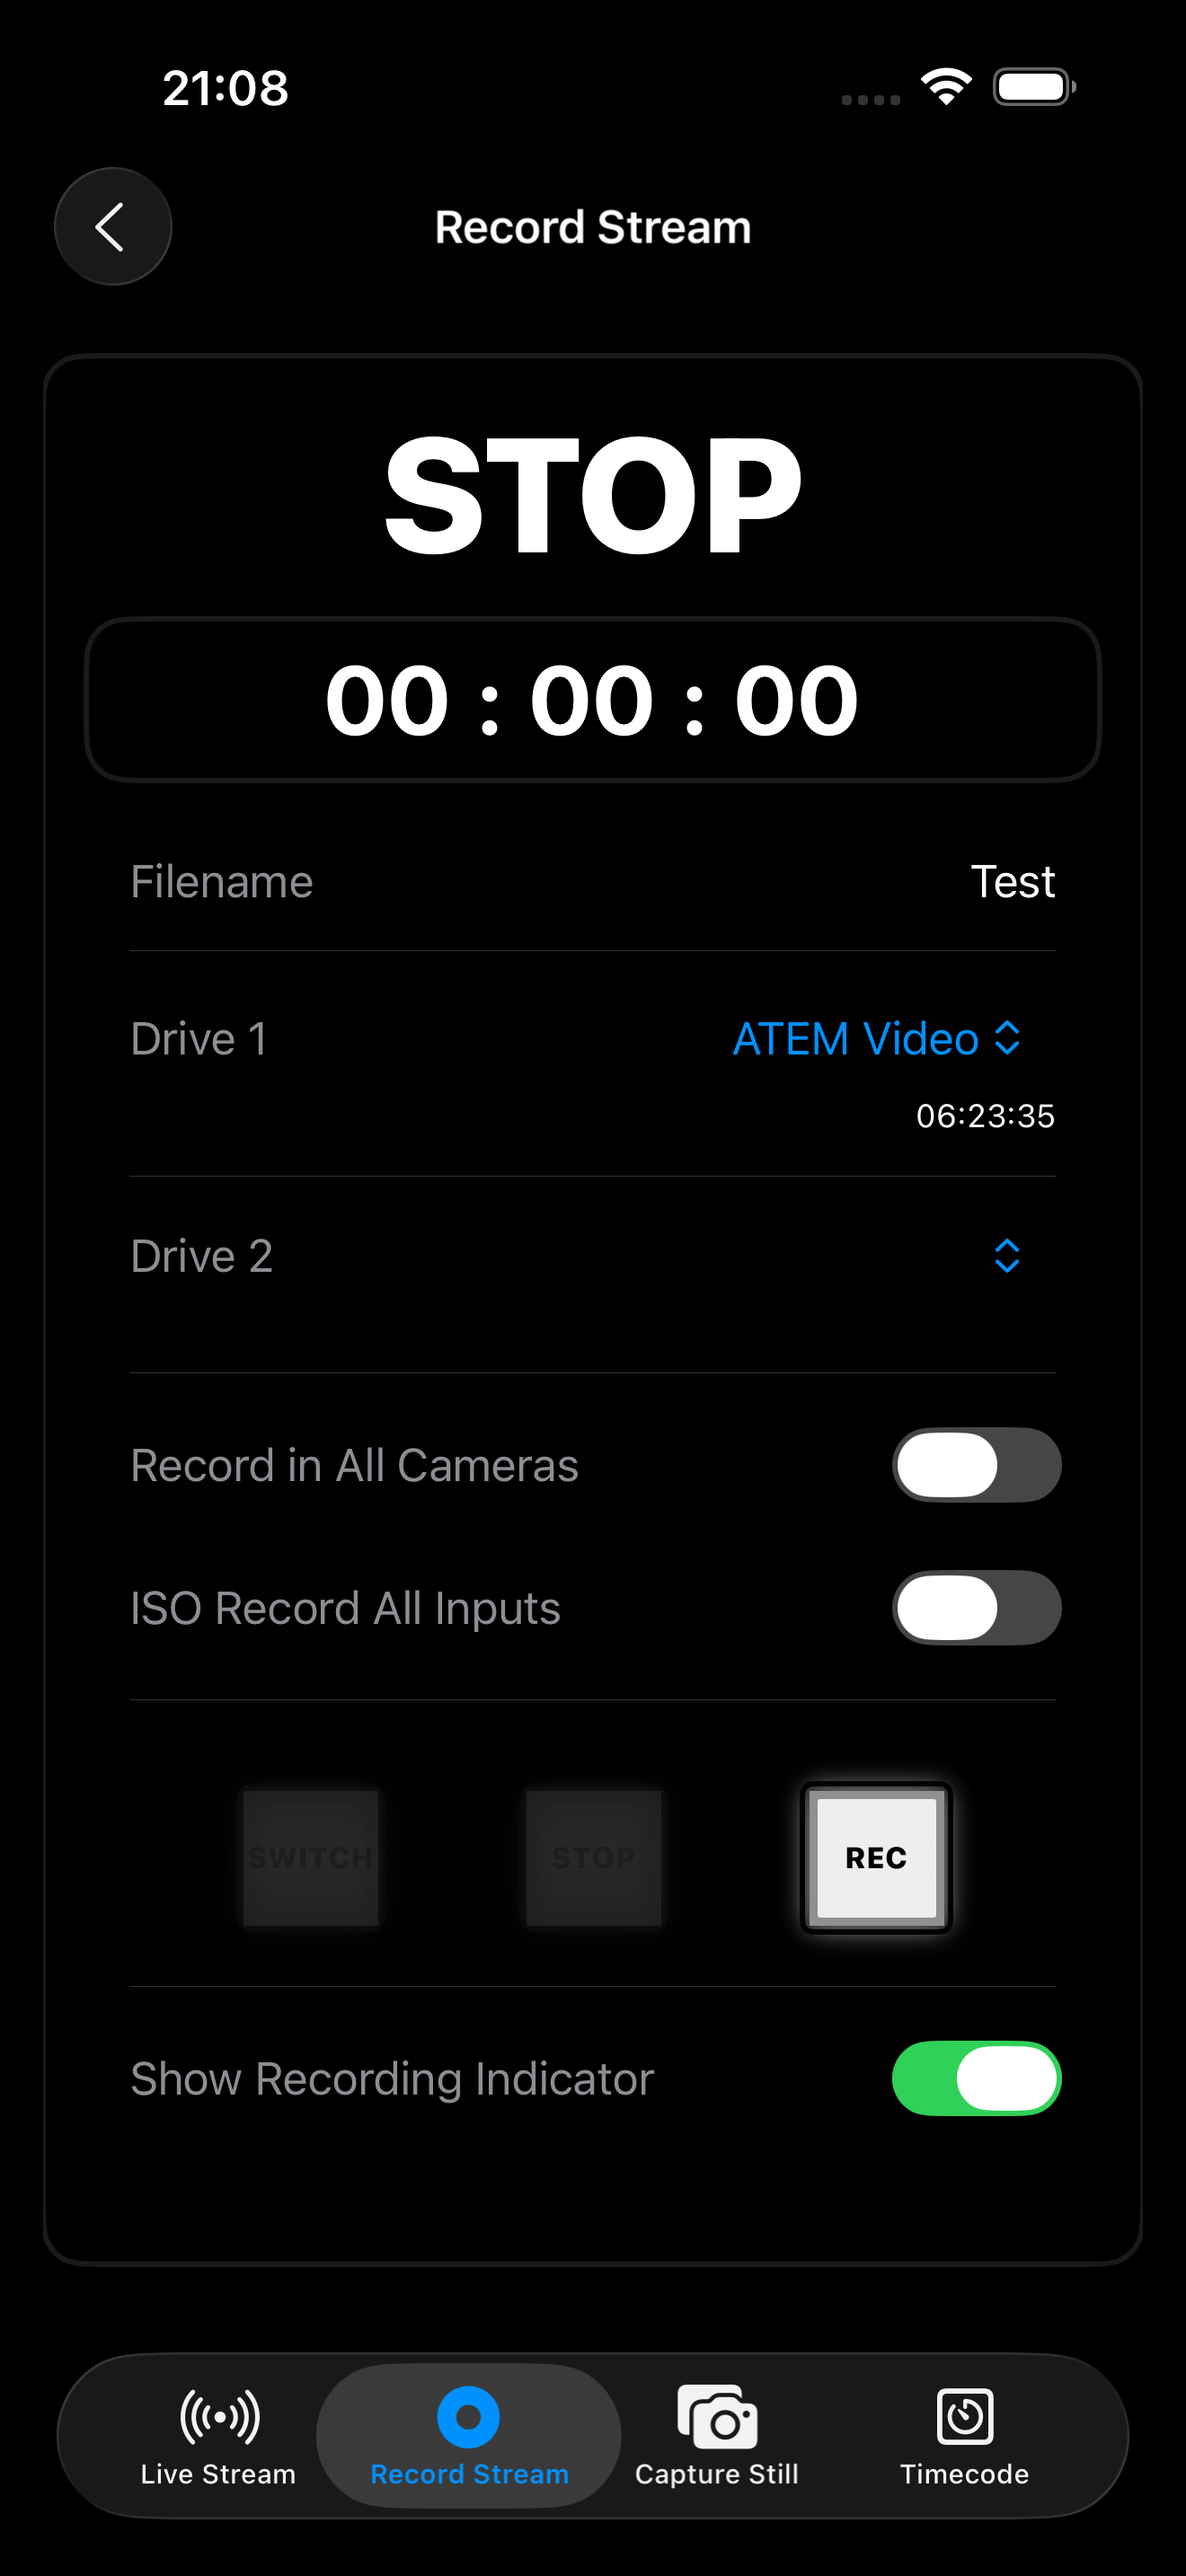
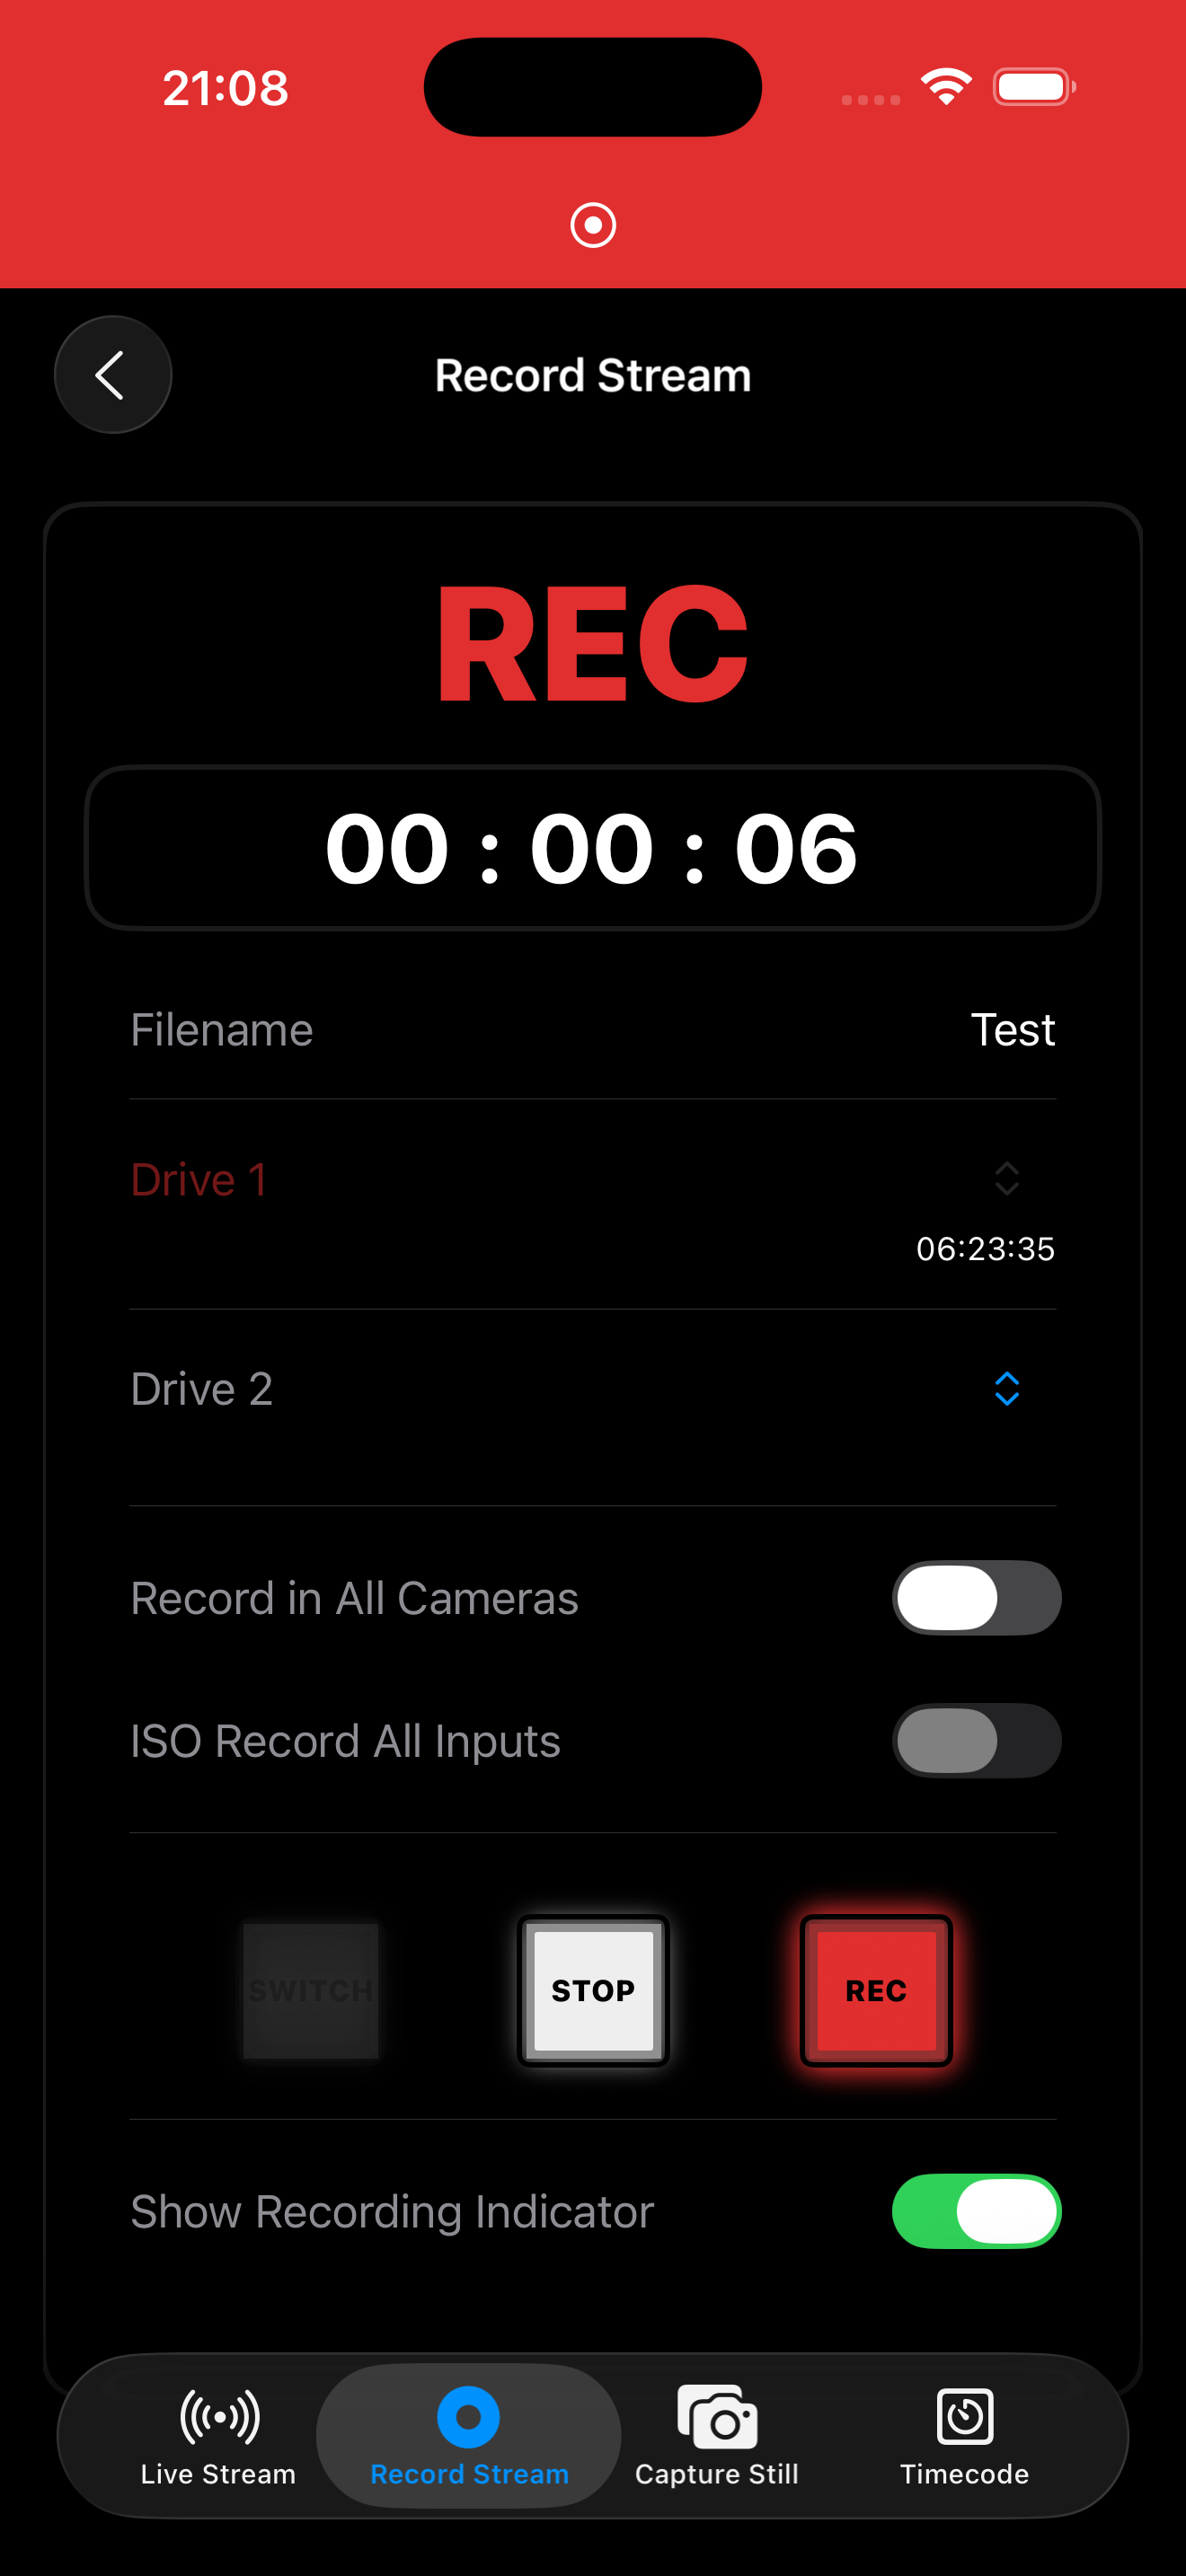
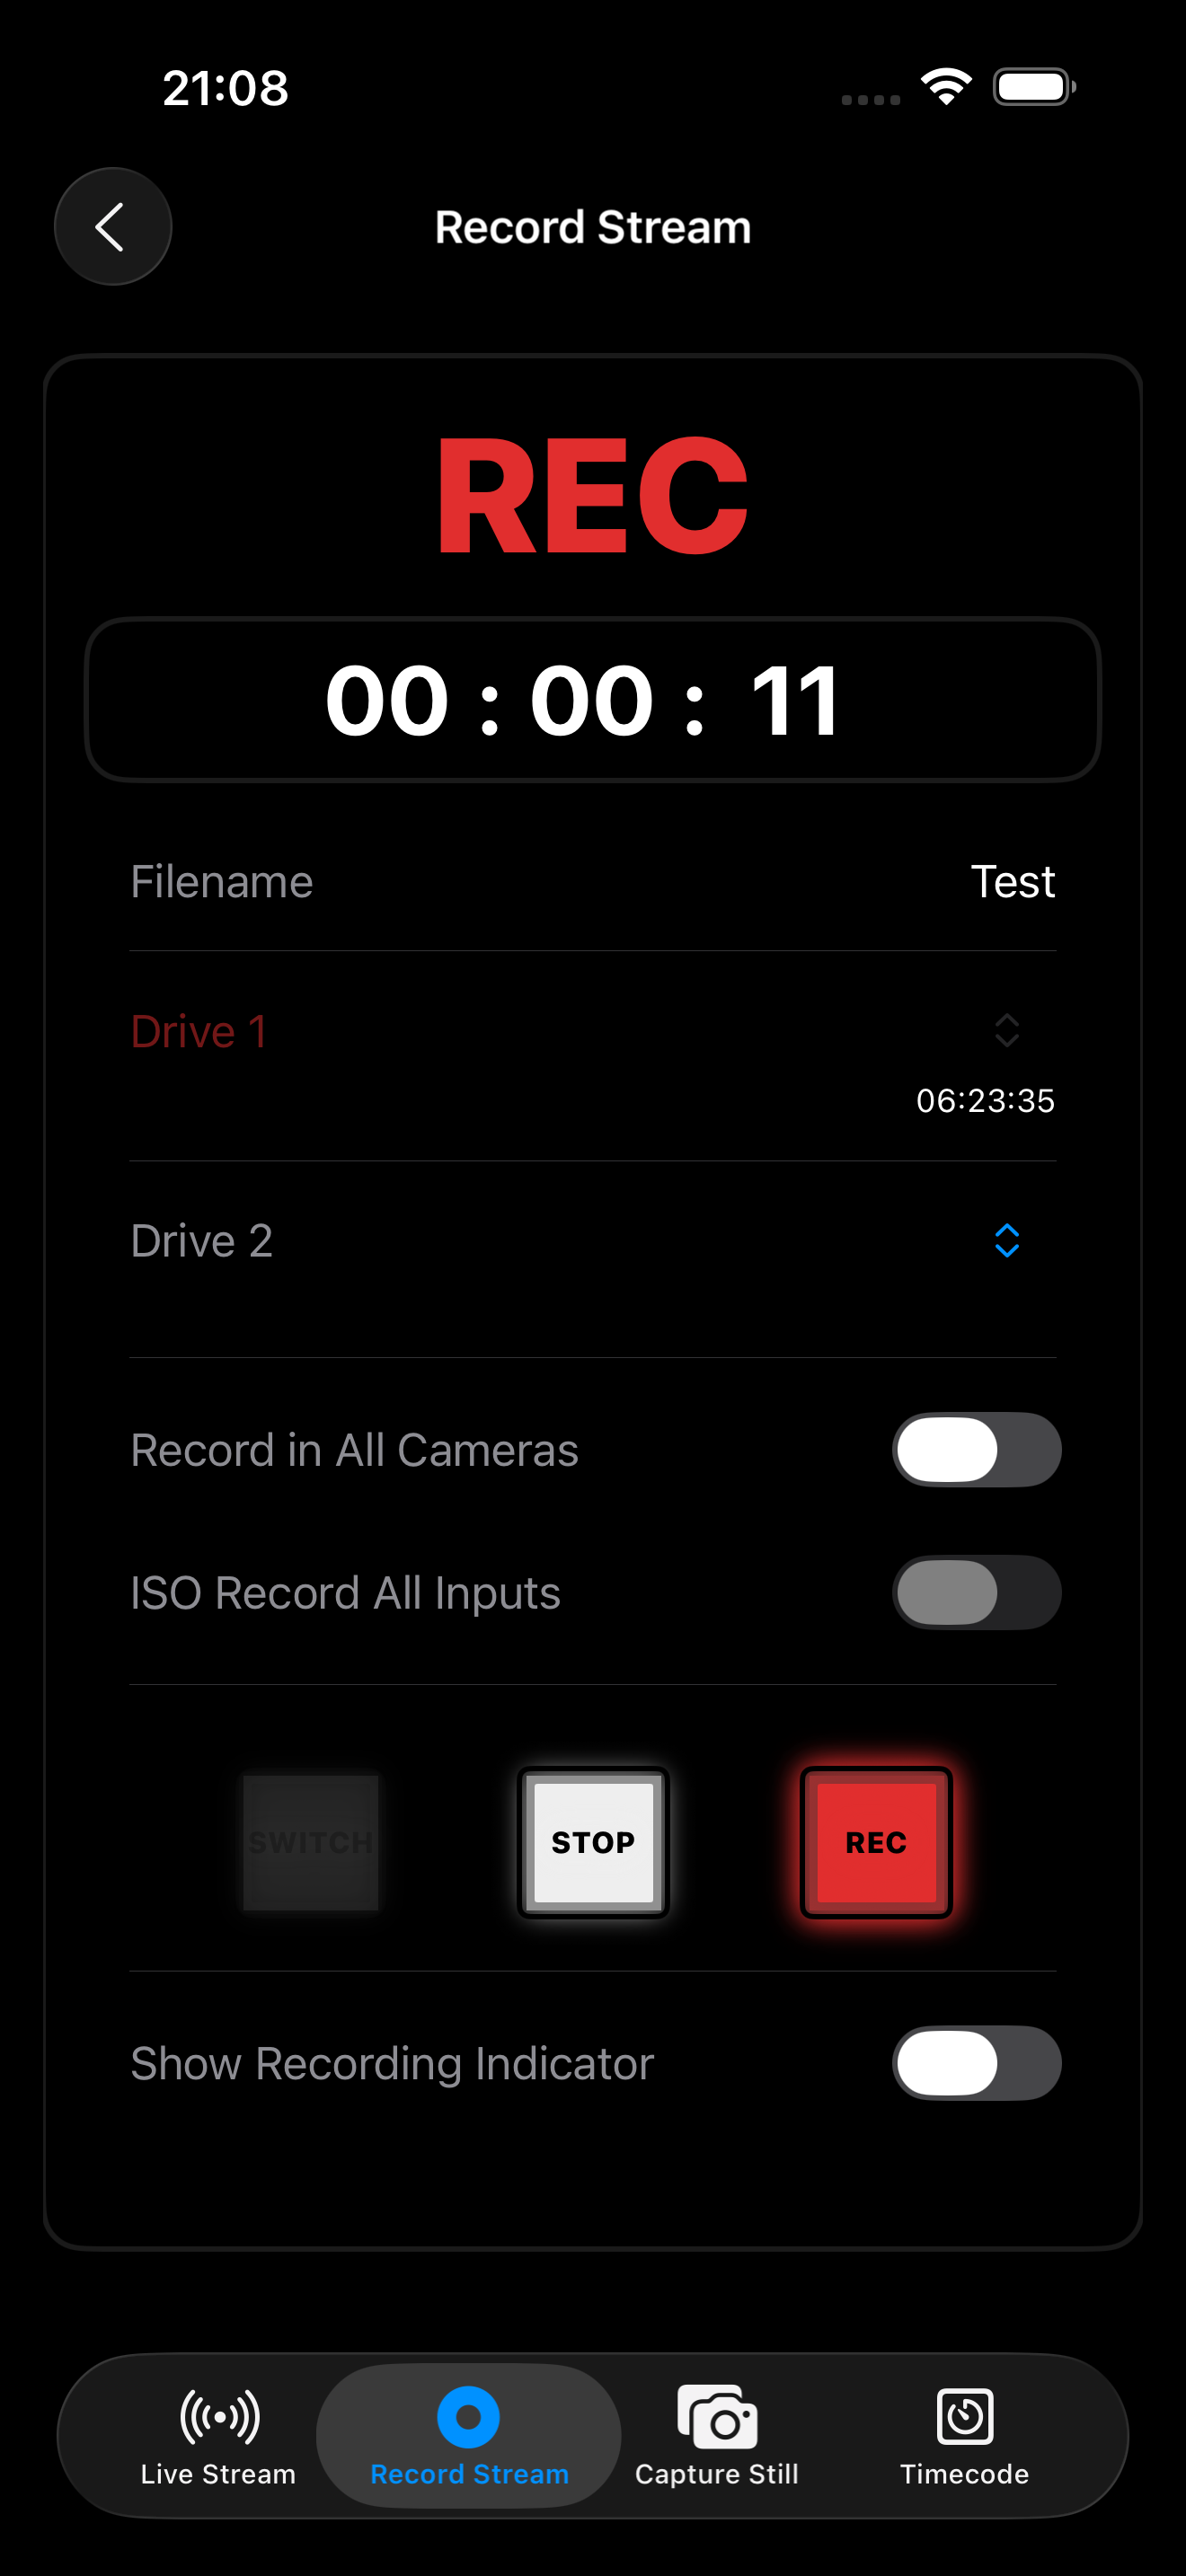
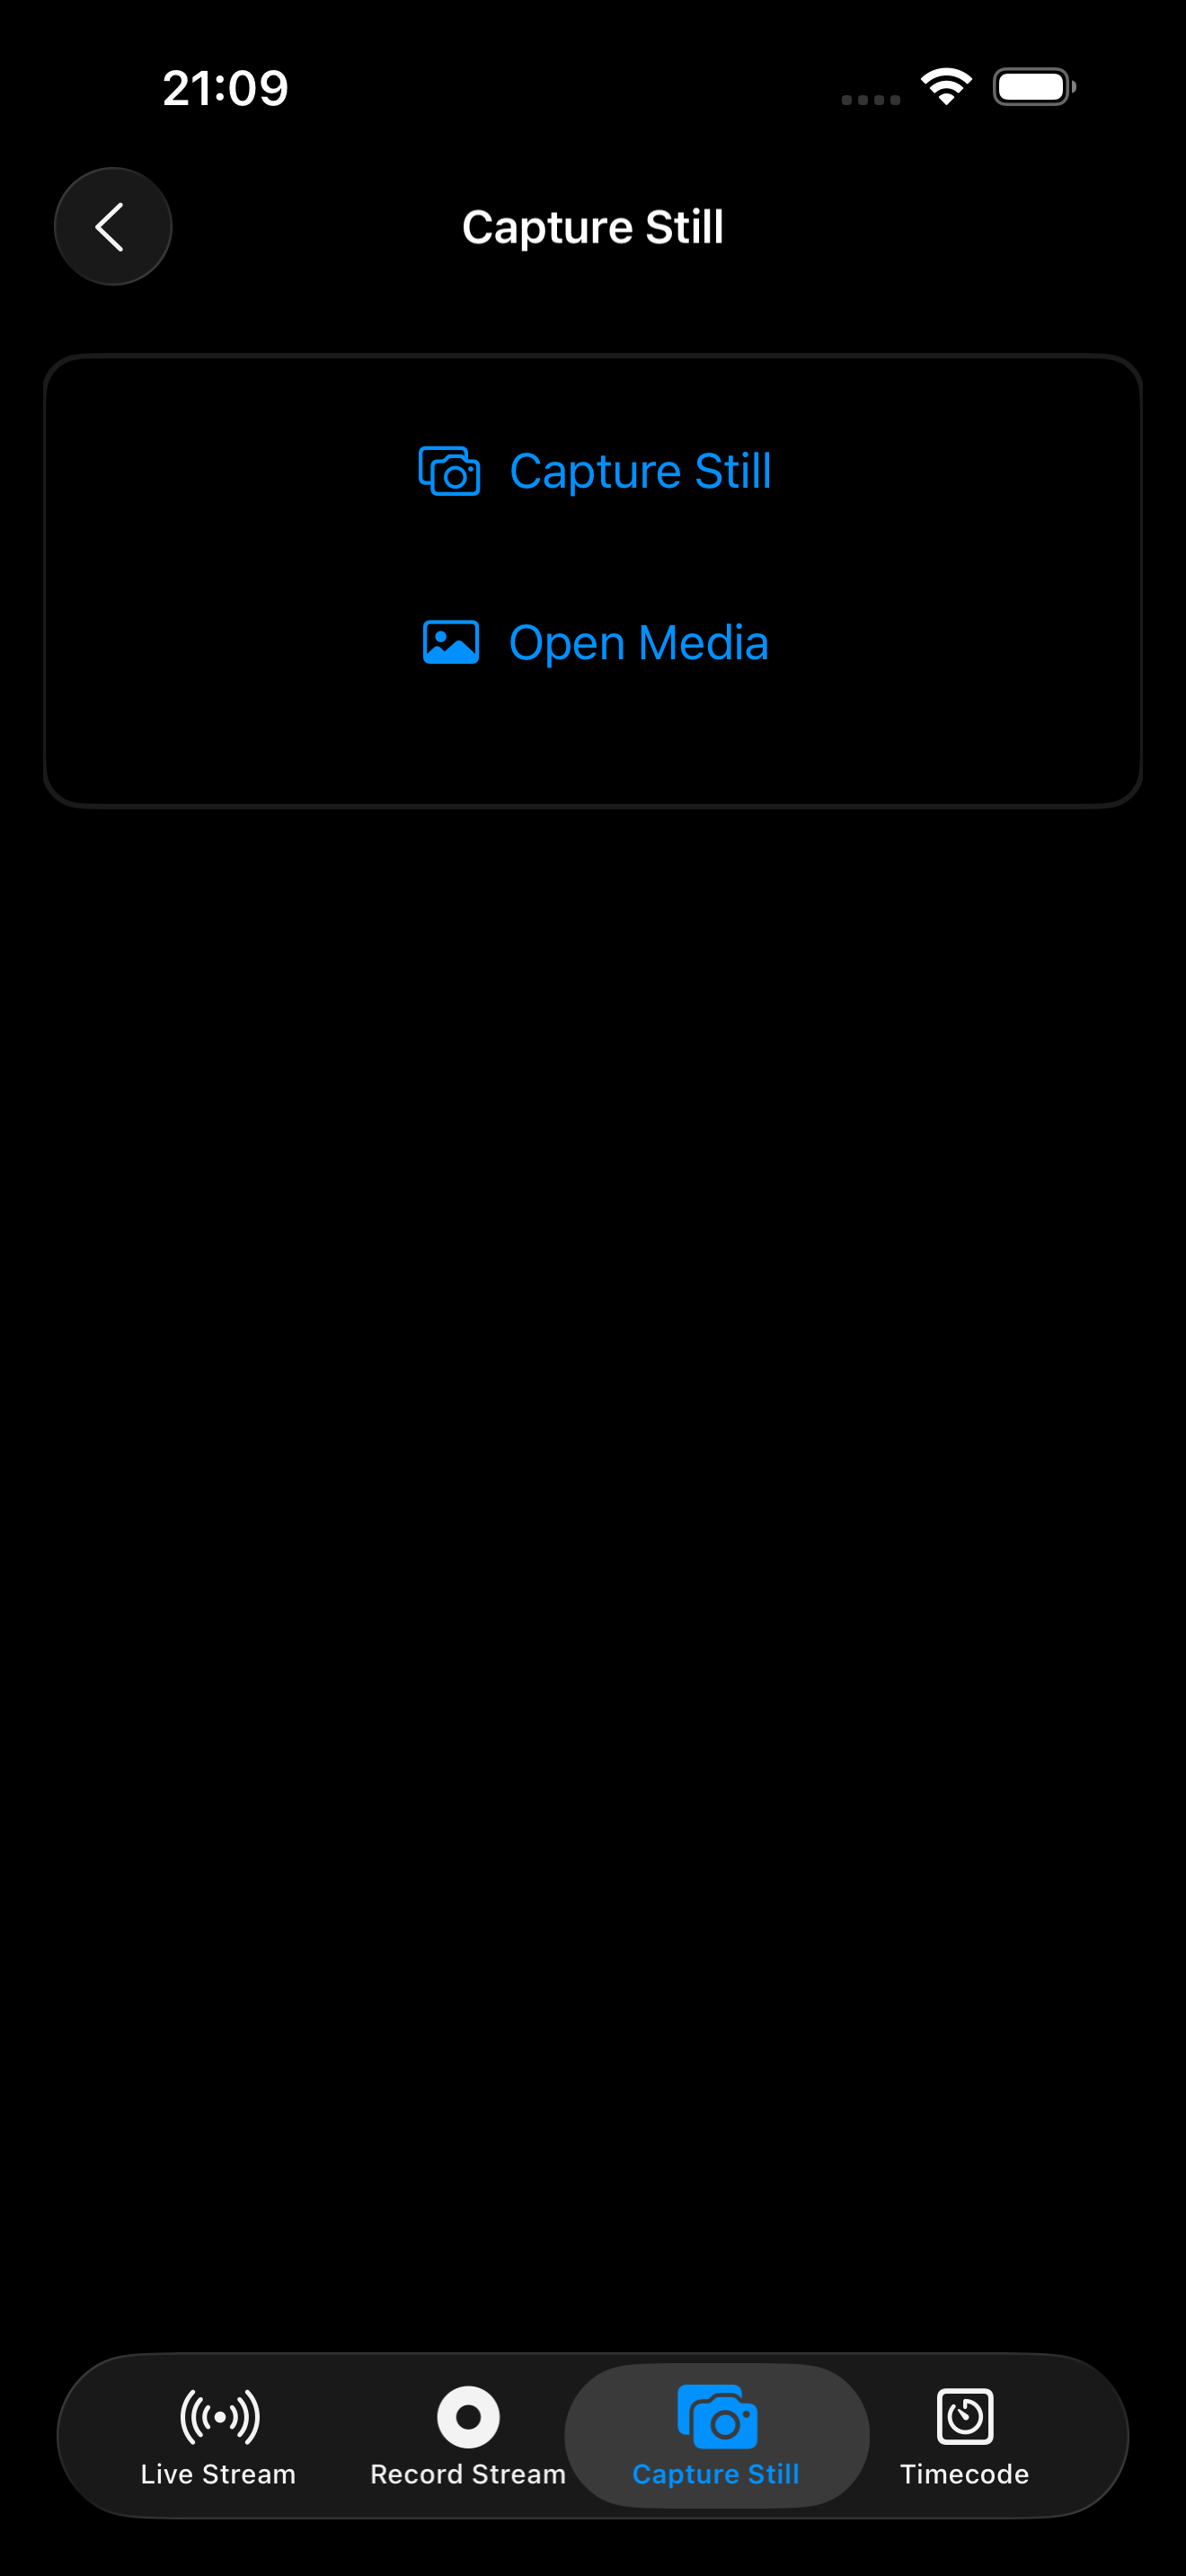
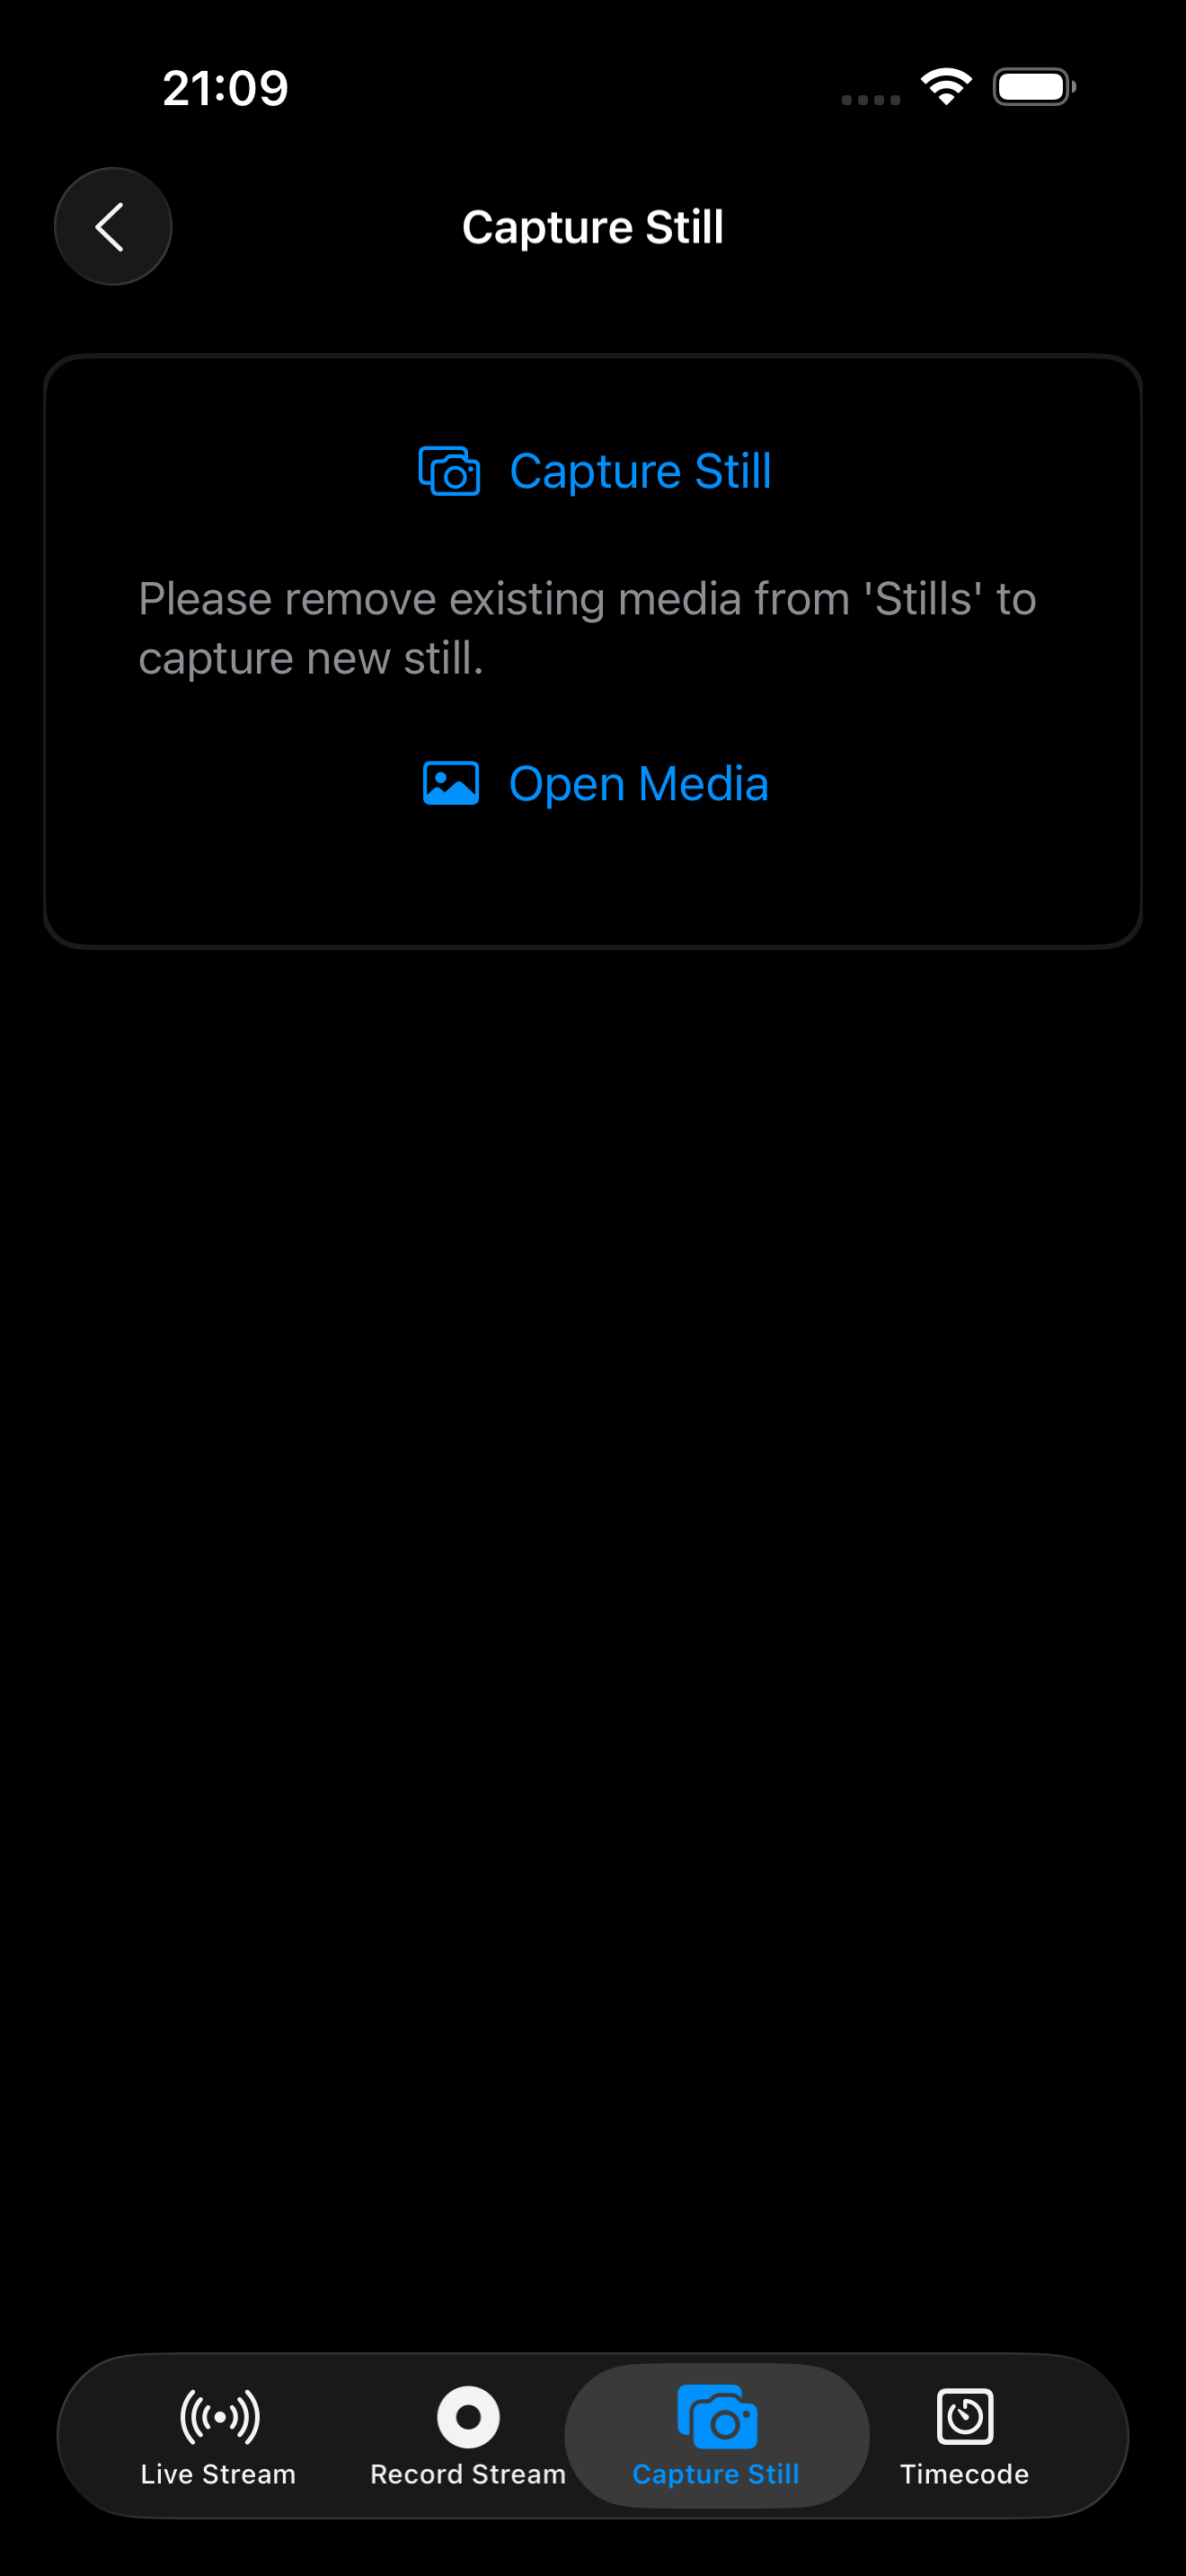
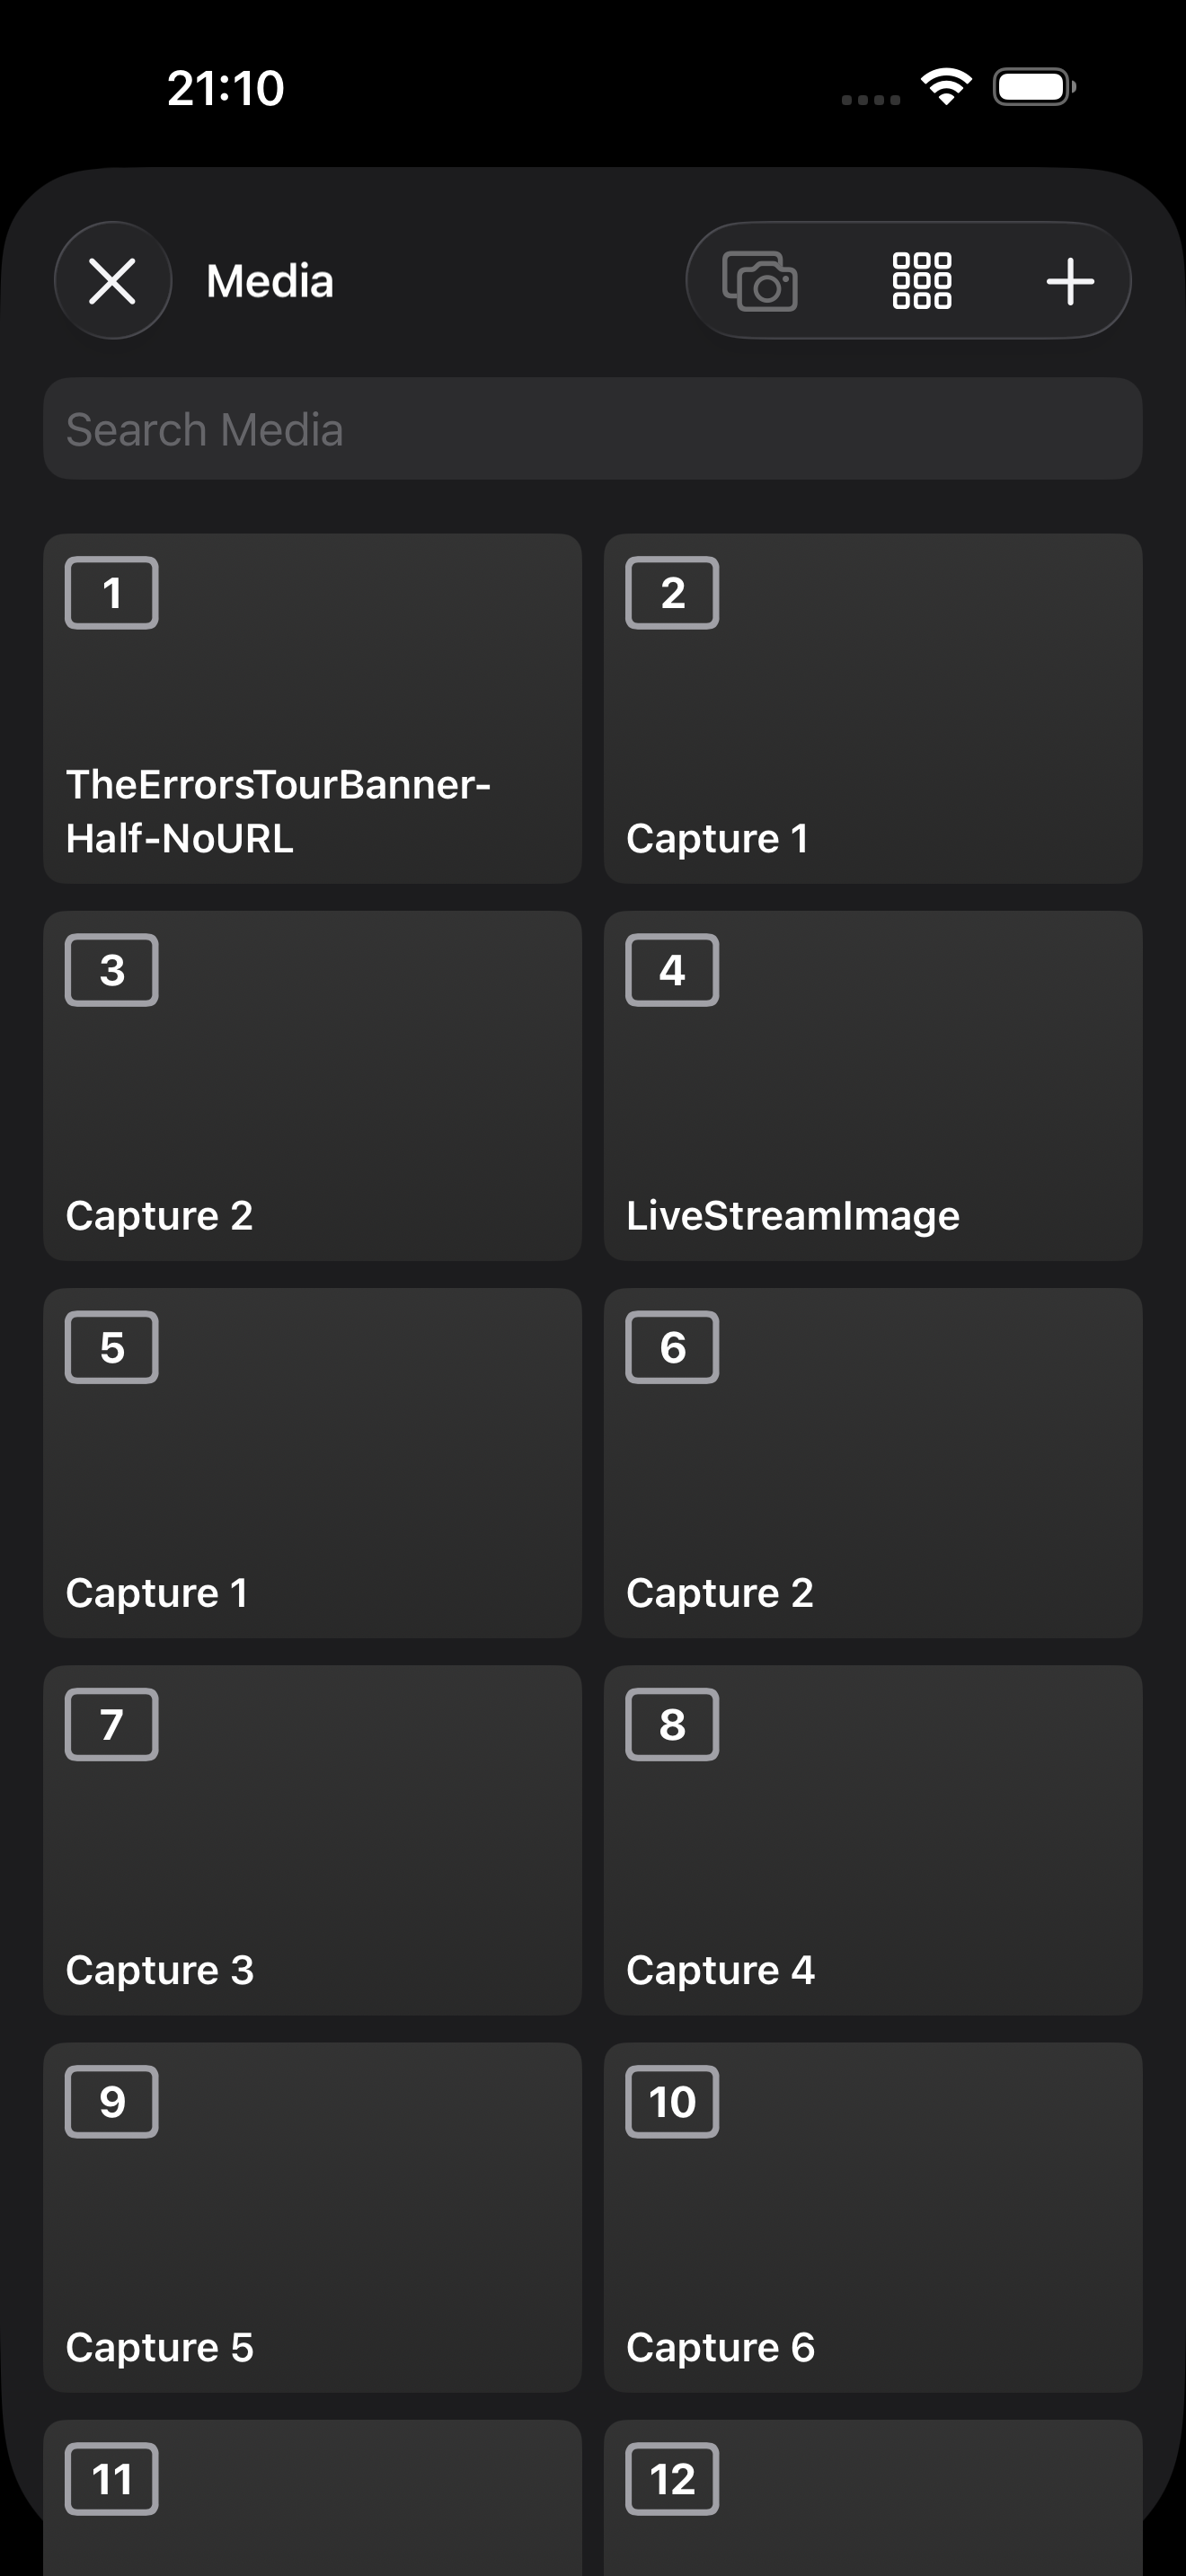
<div><figure><img src="/files/gxdM5p73txsCEQq1ypSL" alt=""><figcaption></figcaption></figure> <figure><img src="/files/Z9xiRGW2SaV3JHQ1QiGJ" alt=""><figcaption></figcaption></figure> <figure><img src="/files/DFLYkDsBIGb8EuHUZ2bd" alt=""><figcaption></figcaption></figure> <figure><img src="/files/N8PIfPXAWopSe5ZEvDiq" alt=""><figcaption></figcaption></figure></div>

<figure><img src="/files/9qGU6T3E8RfKDOBhESwI" alt=""><figcaption></figcaption></figure>

## Table of Contents

* System Requirements
  * MixEffect and MixEffect Pro Compared
* Welcome
  * Setup
  * Updating MixEffect
* Support
  * Troubleshooting and Known Issues
    * Version History

## System Requirements

MixEffect and MixEffect Pro require the following:

* iOS or iPadOS 15.1 or higher.
* Blackmagic ATEM Switcher running version 8.3 or higher.

### MixEffect and MixEffect Pro Compared

As of version 1.5.0, release in April, 2022, there are two versions of MixEffect on the App Store:

<div><figure><img src="/files/iIT9uq8pJdTg3tsUpYnJ" alt=""><figcaption><p>MixEffect (Trial &#x26; Pro Unlock)</p></figcaption></figure> <figure><img src="/files/dqbRJoidsOZLO6CYVrso" alt=""><figcaption><p>MixEffect Pro (Paid Up-Front)</p></figcaption></figure></div>

* **MixEffect**: Free to download version of MixEffect. Feature limited with a 30-day Trial of MixEffect Pro. Pay with an In-App Purchase to unlock features of MixEffect Pro.
* **MixEffect Pro**: Paid version of MixEffect Pro. If you use Apple Business Manager to provision and deploy apps to your organization's users, this is the version of MixEffect that you should buy, since ABM does not support In-App Purchases.

The two applications are functionally identical and share the same database. This means you have access to the same set of switchers, SuperSource presets, streaming services, servers, and profiles across both MixEffect and MixEffect Pro running on the same Apple ID.

## Welcome

The welcome screen will present itself the first time you run MixEffect or MixEffect Pro. Tap **Take the Tour** to view a high-level overview of the features in MixEffect and MixEffect Pro.

### Setup

When you install MixEffect or MixEffect Pro on a new iOS device, you will want to connect it to your ATEM switcher.

1. Open **MixEffect** or **MixEffect Pro**.
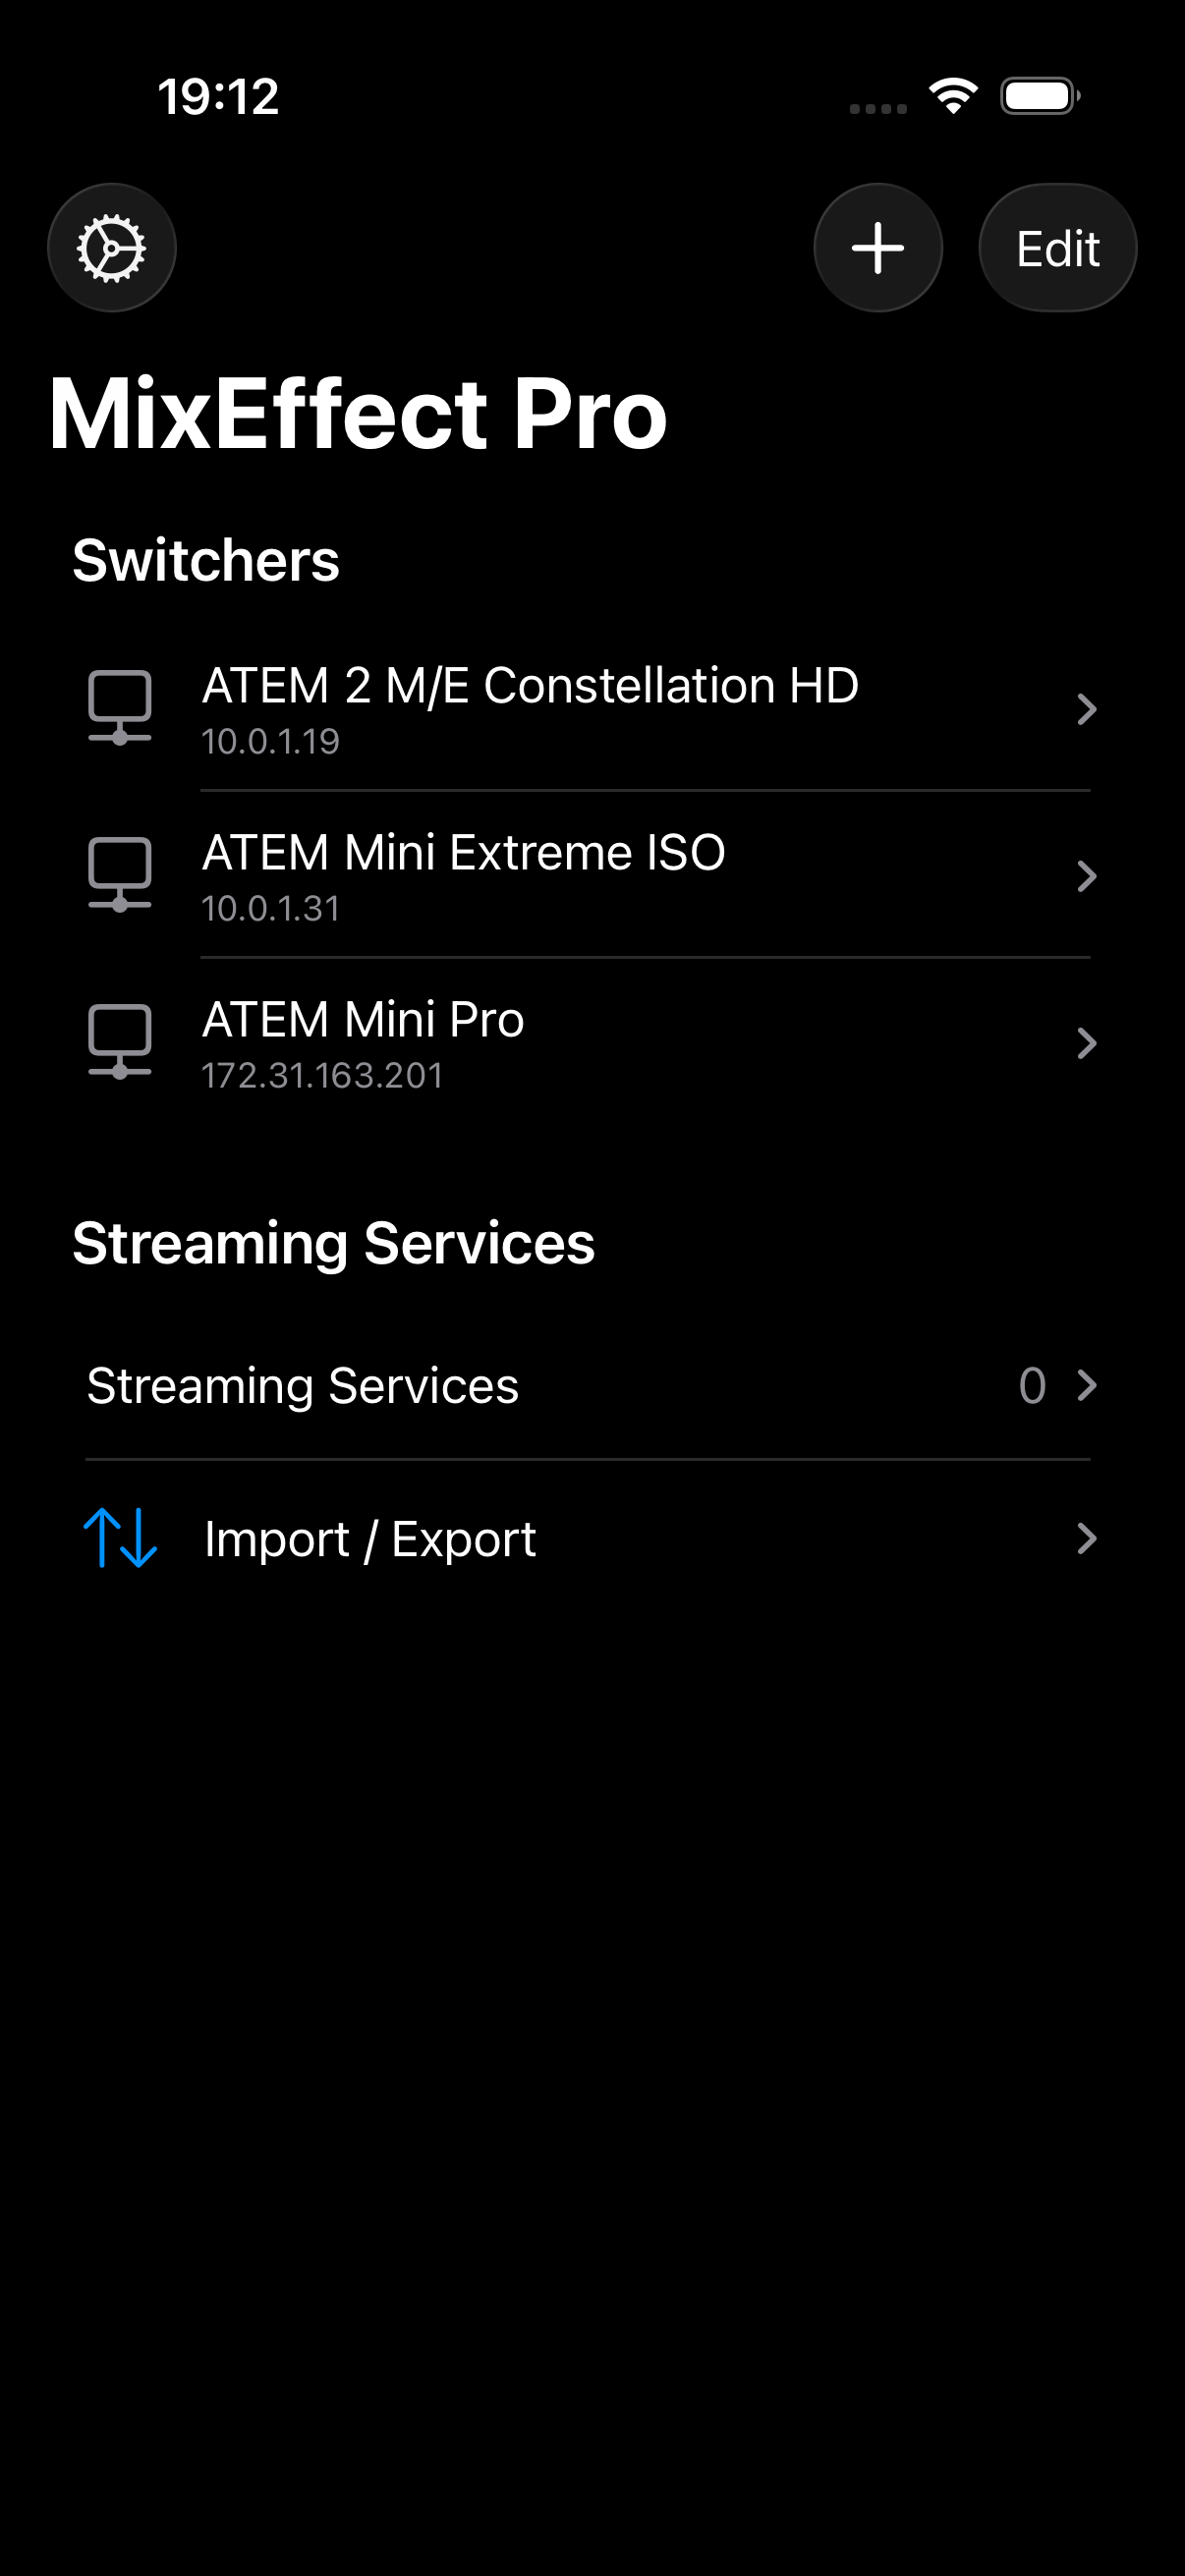
2. Tap the **+** button.
3. Choose **New Switcher**.
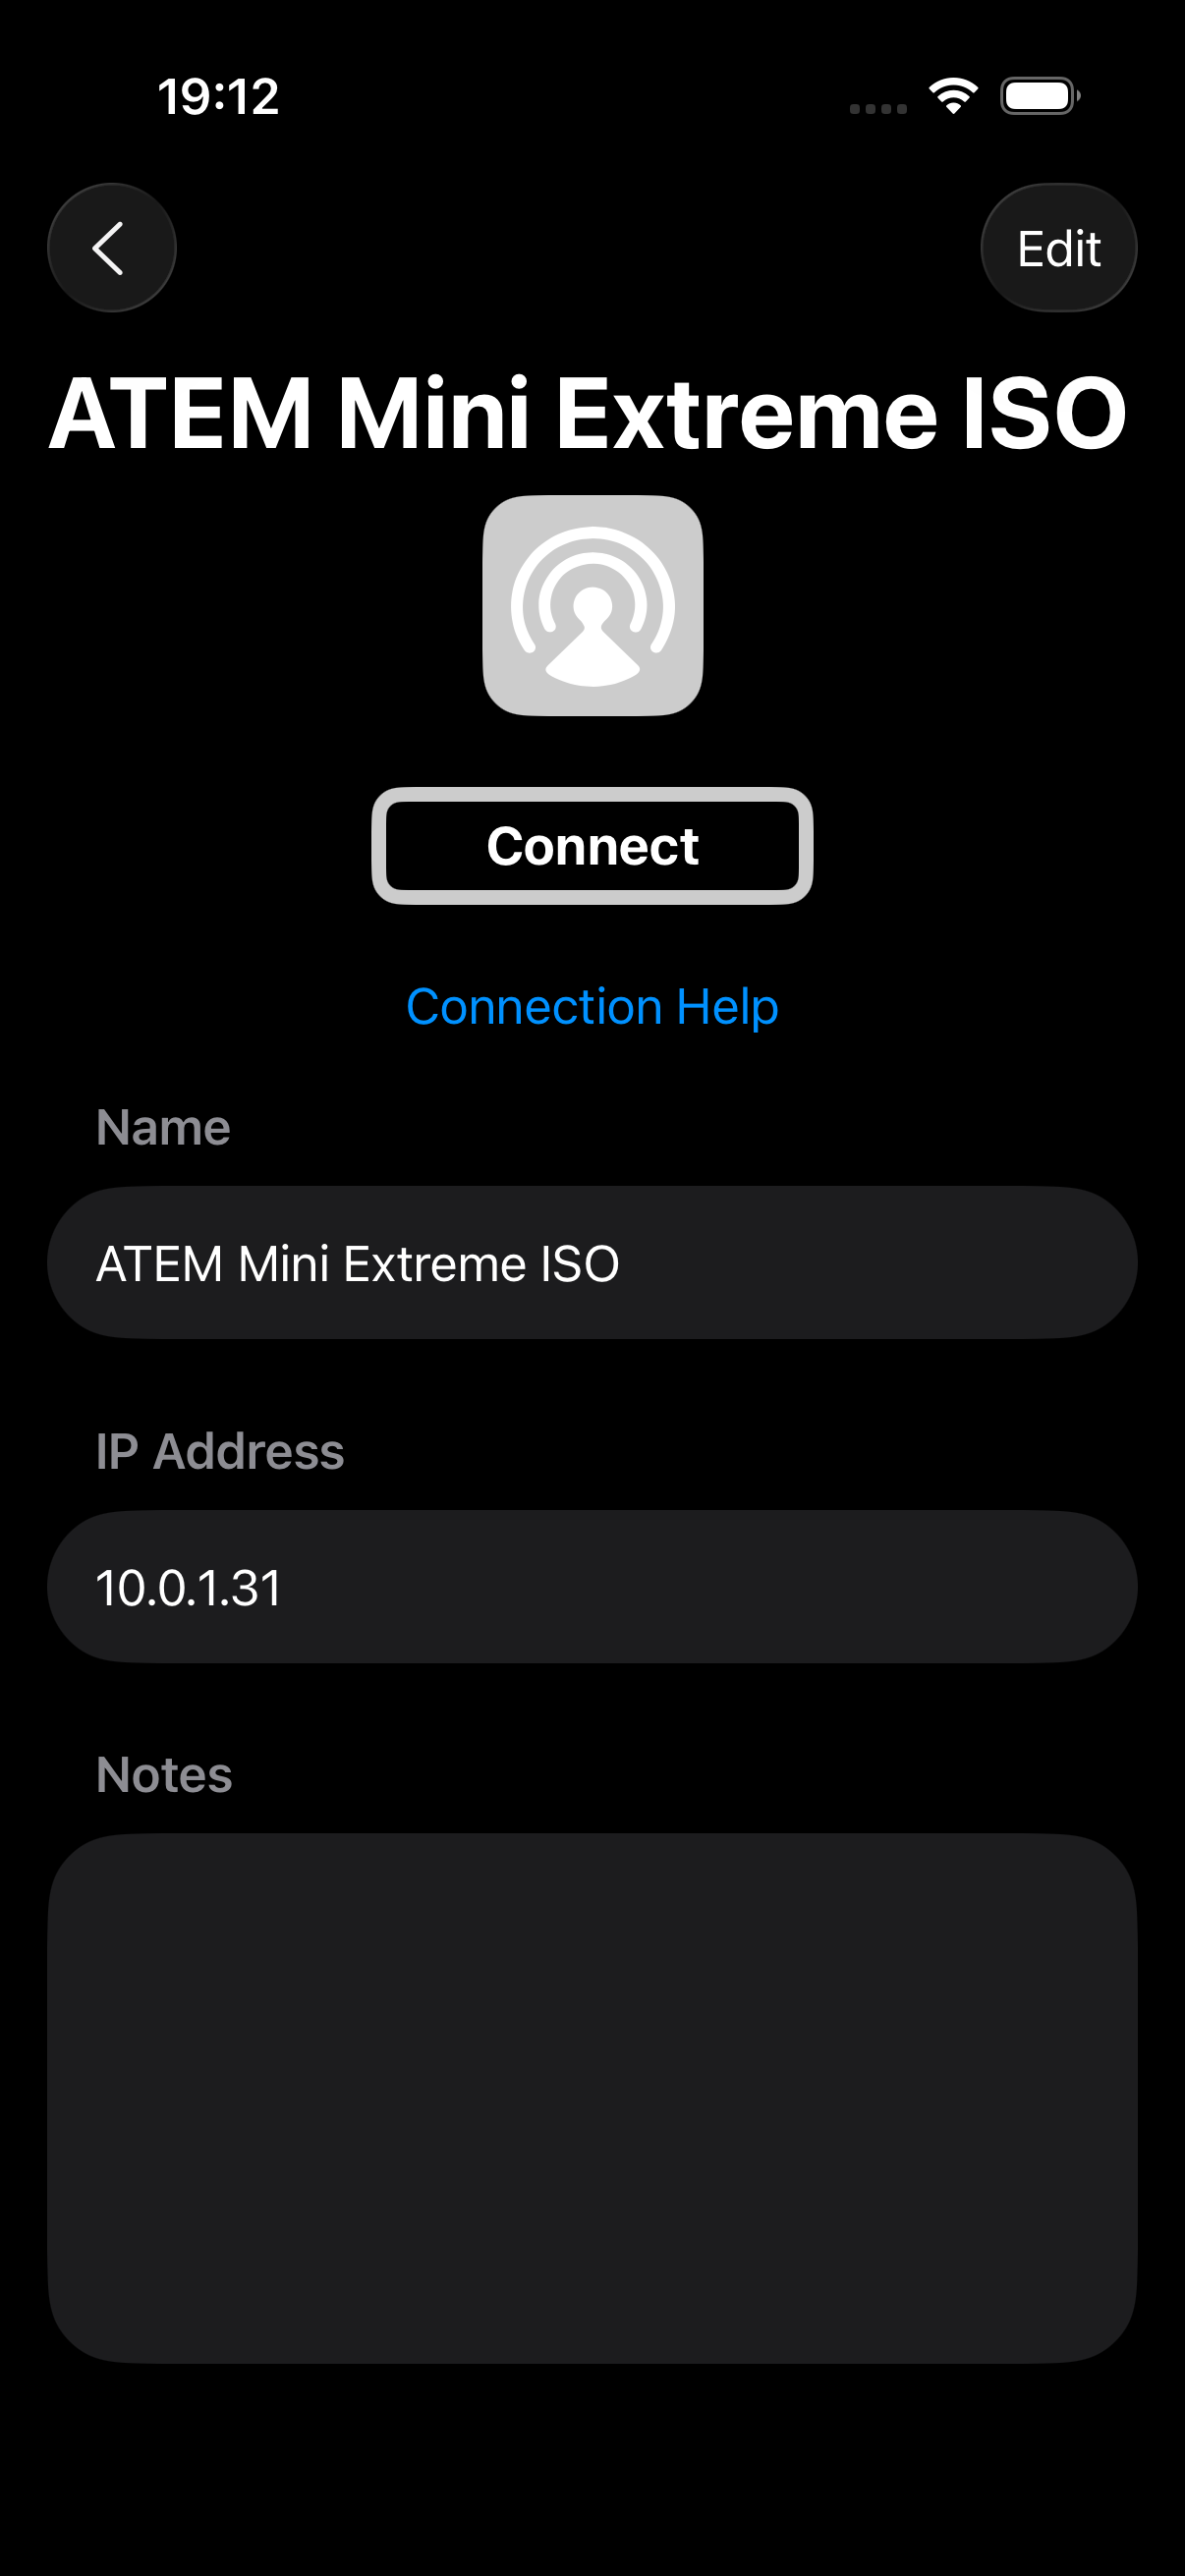
4. A list of switchers available on the network will appear below the Notes section in the view that appears. Tap on a switcher to pre-populate the name and IP address fields.
5. Set a custom name for your switcher. If you use the same ATEM switcher in different locations, you may want to create two Switcher Connection entries for the same switcher. For instance, one could be called `ATEM Mini Pro (Home)` and the other `ATEM Mini Pro (Studio)`.
6. If necessary, enter or update the **IP address** for the switcher. This is the same address you use with Blackmagic's Atem Software Control application for macOS or Windows.
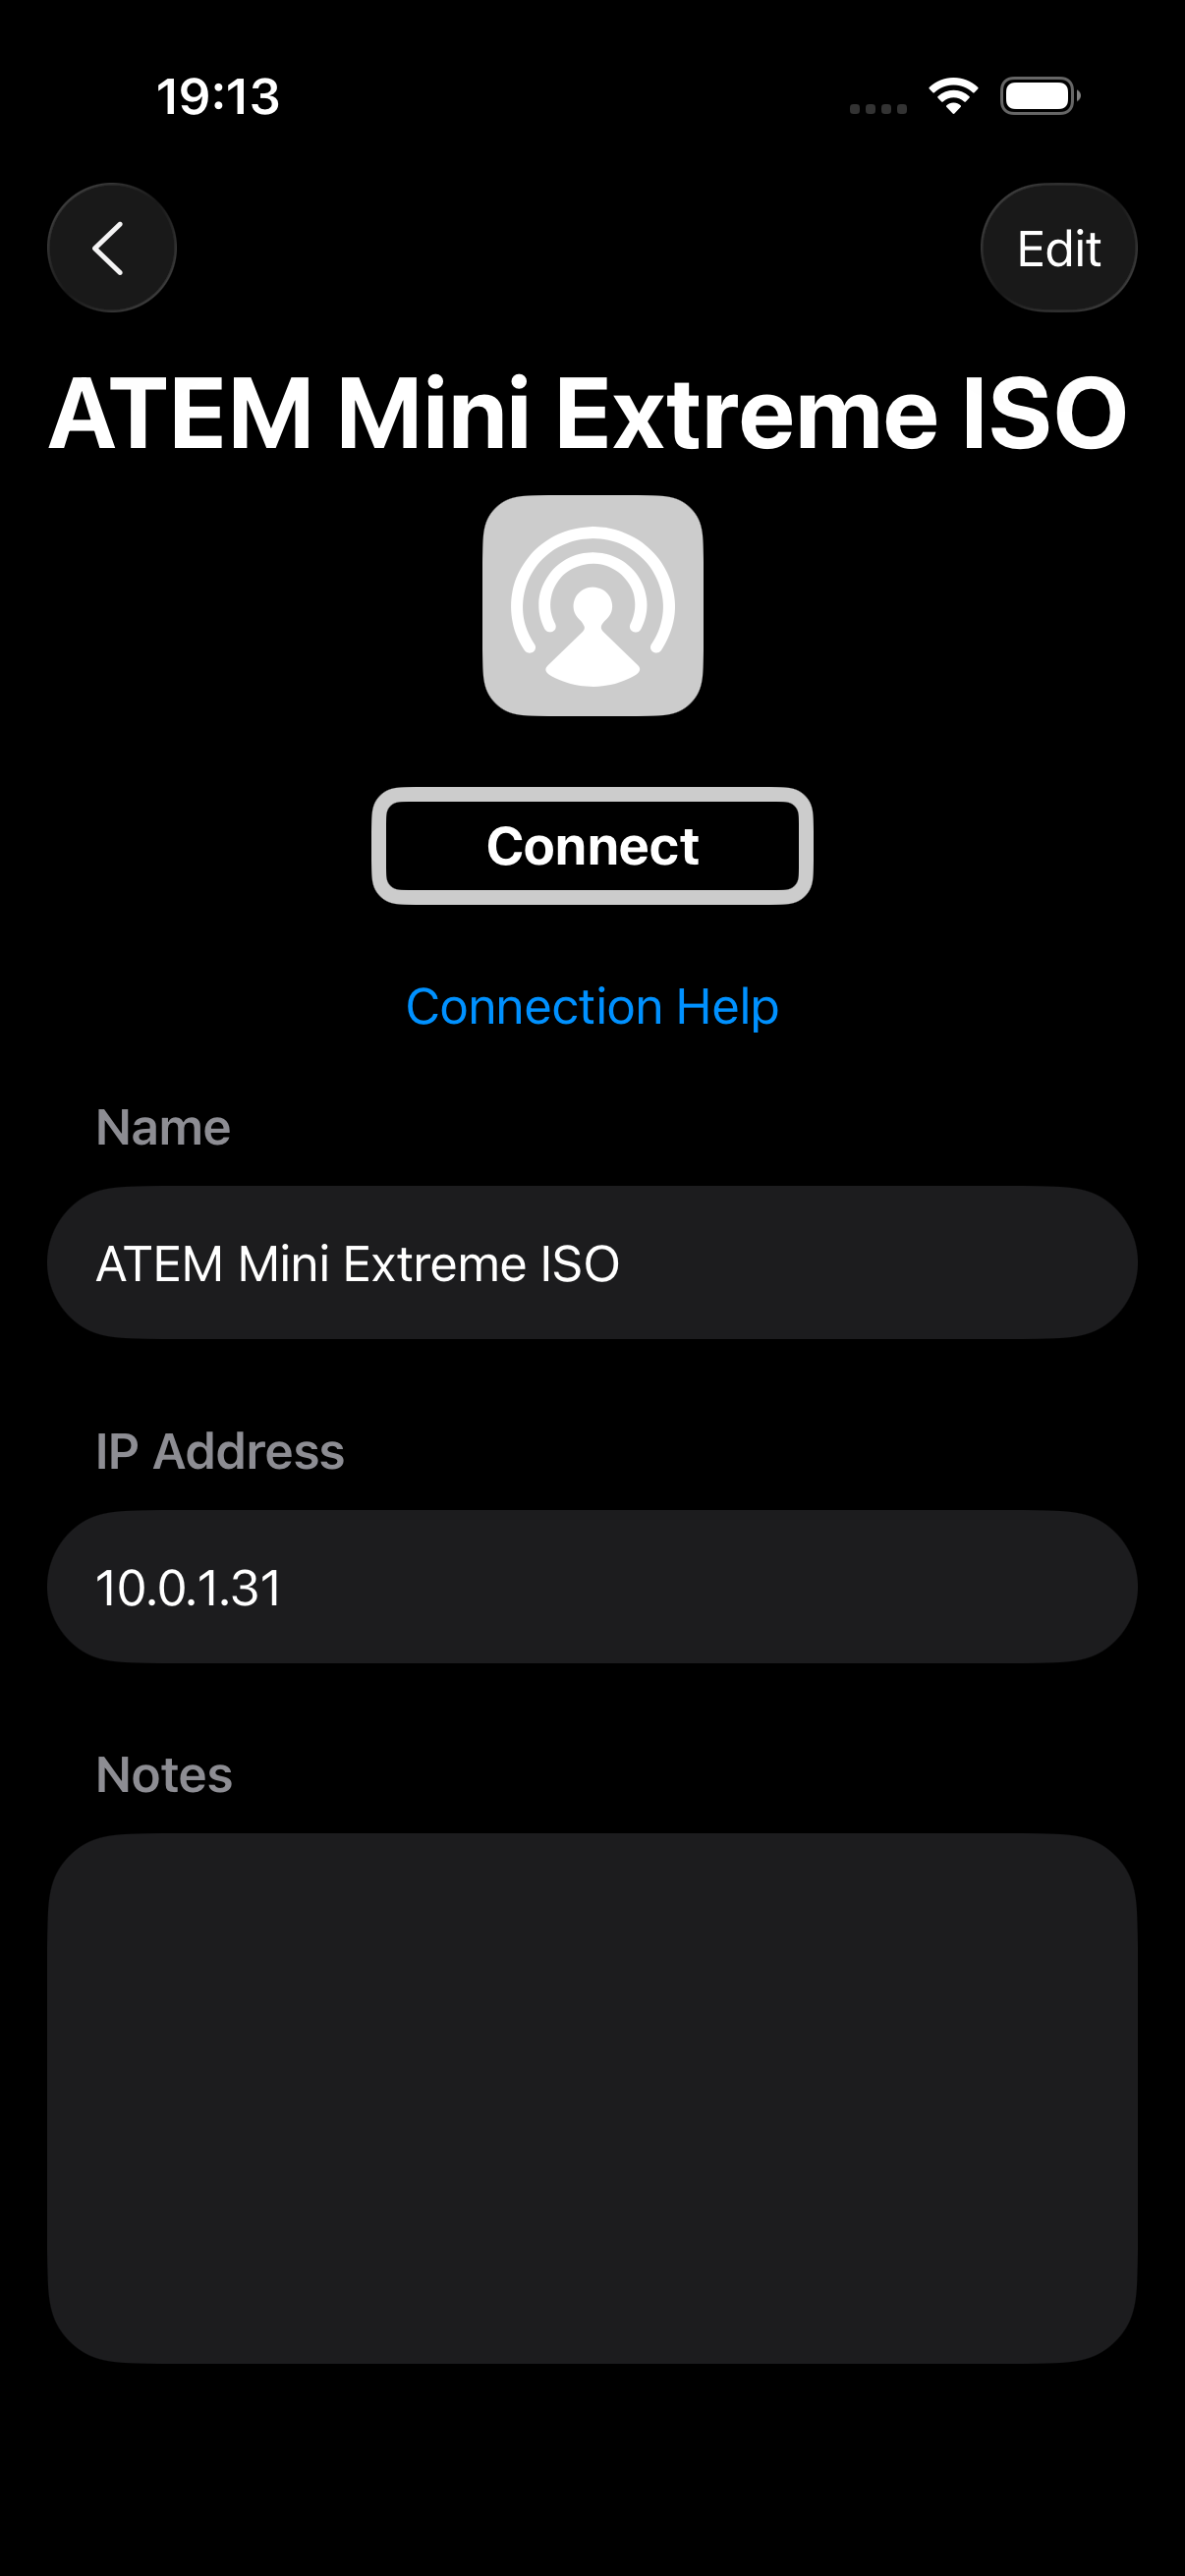
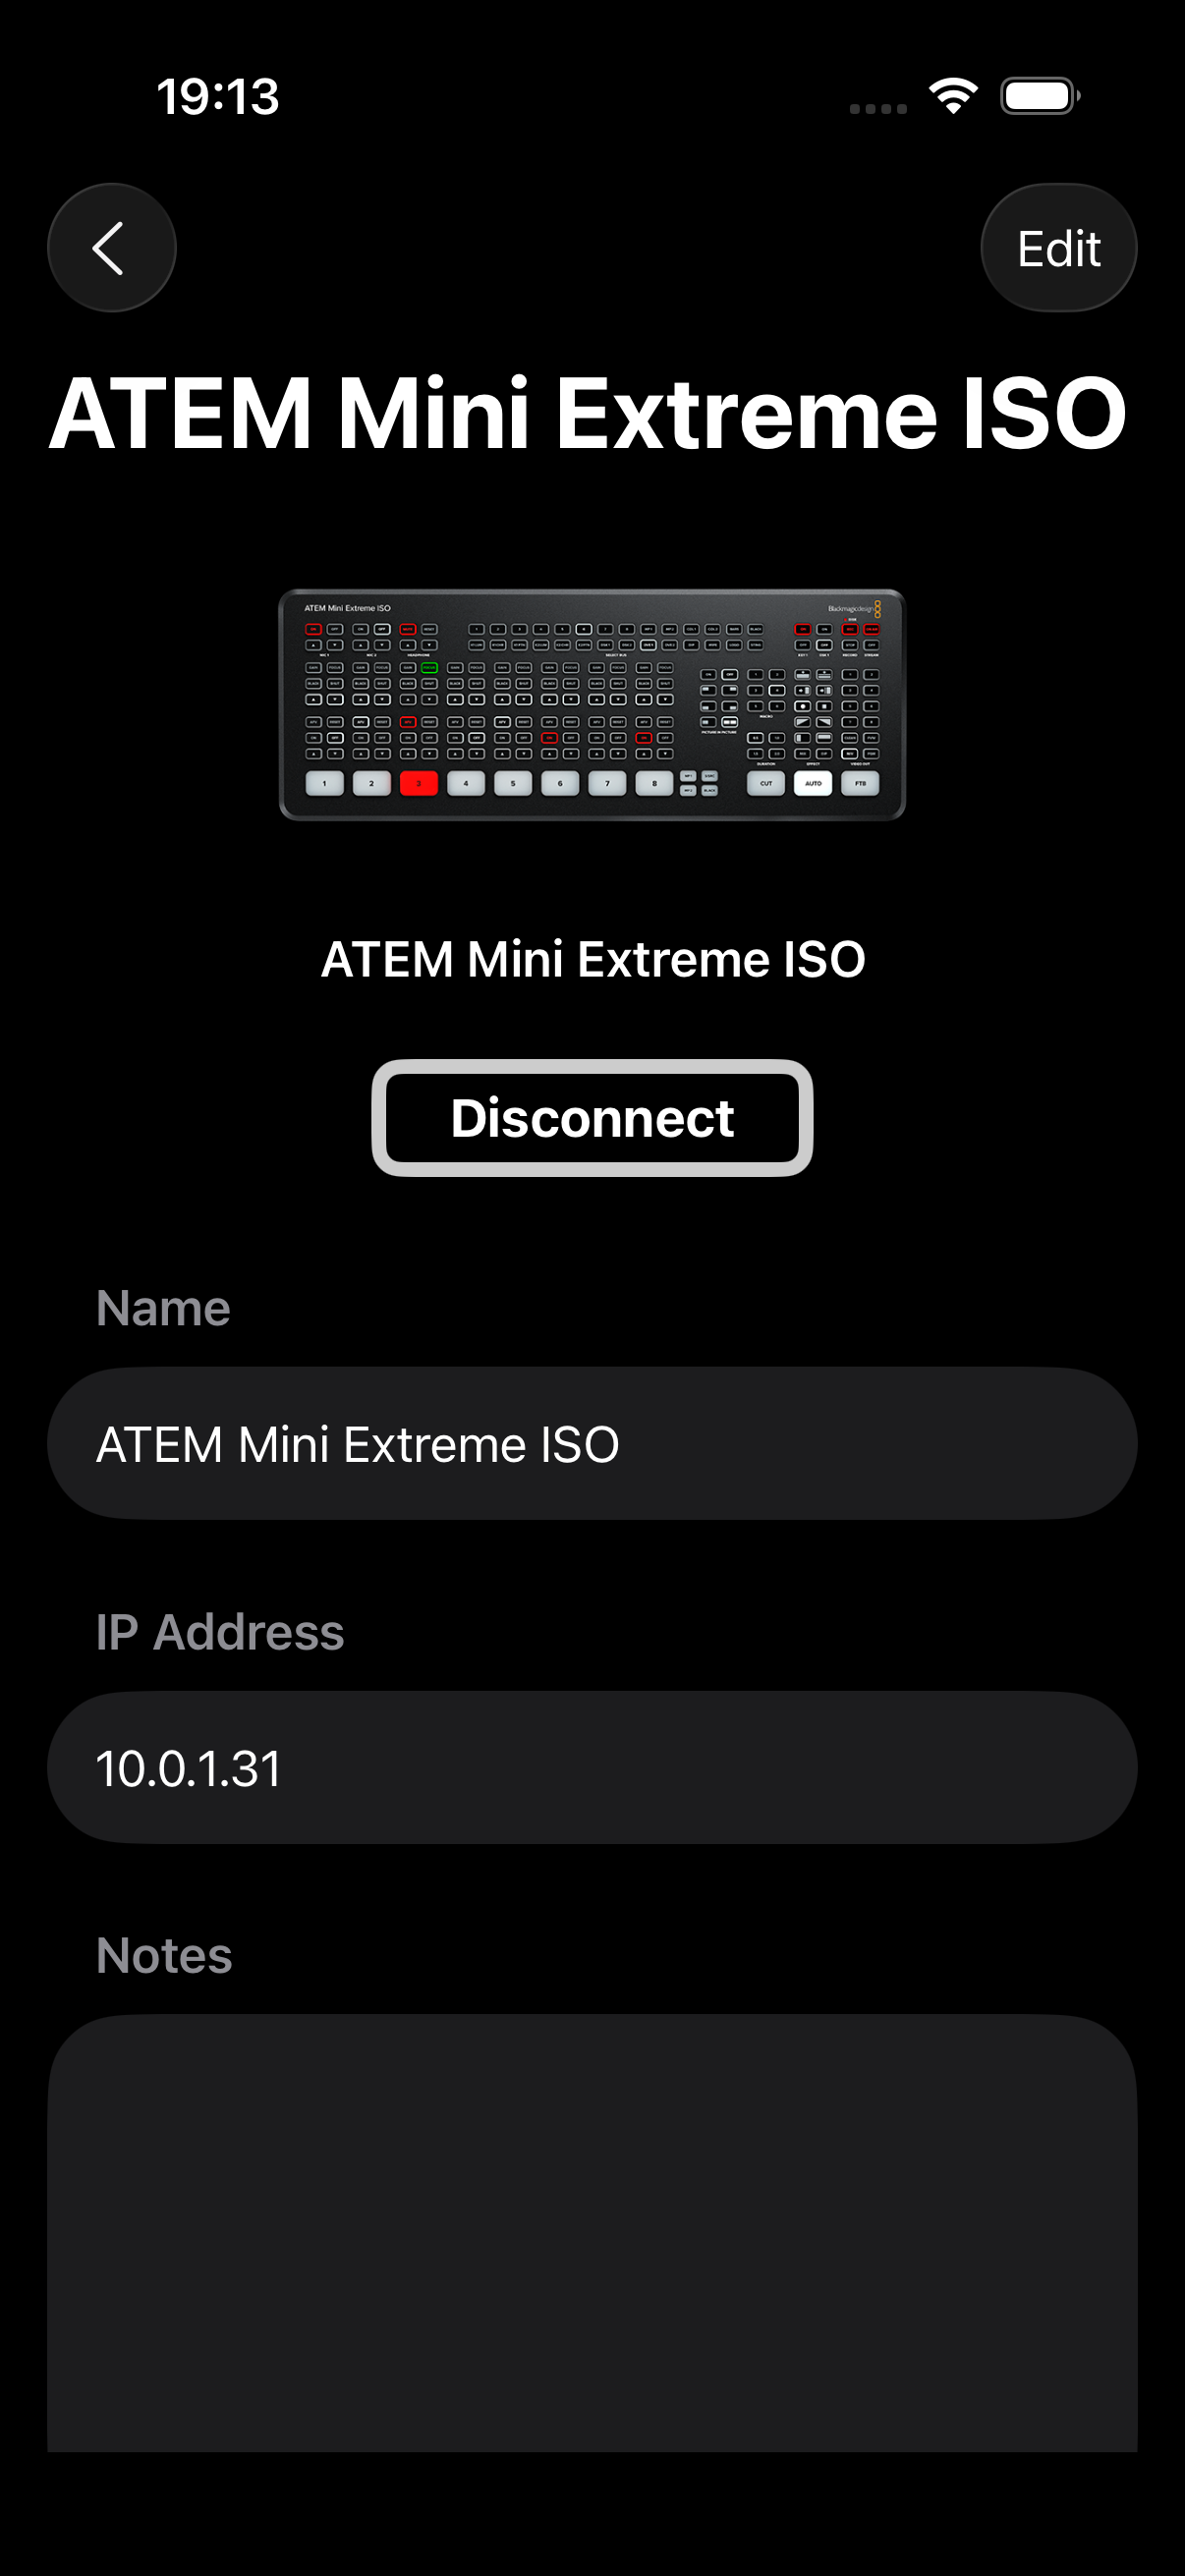
7. Tap **Connect**. When connected, the ATEM symbol image will change to the image of your ATEM switcher.
8. Tap **Back** or tap the switcher image to go directly to the switcher control section.

Once connected, you will see a list of available features in the MixEffect Home screen.

### Updating MixEffect

Turn on App Store auto-updating so you always have the latest version of MixEffect or MixEffect Pro for your device. Whenever the application is updated, a green banner will appear at the top of the application. Tap on the MixEffect X.Y.Z Release Notes button to display information about the new features, changes, and bug fixes in the release.

## Support

For technical support not covered in this documentation, follow these steps:

1. Go to the **MixEffect Home**.
2. Tap **Settings** (gear icon) in the upper-left.
3. Scroll down to the **Contact** section.
4. Tap **Send Feedback**.
5. Enter your support inquiry.
6. Tap **Send**.

### Troubleshooting and Known Issues

For frequently asked questions about MixEffect, please visit the [Troubleshooting](/support/troubleshooting) section of the MixEffect Documentation.

### Version History

Visit the [MixEffect Release Notes Archive](/support/version-history) here.


# Getting Started

Learn how to create new switcher connections, connect to ATEMs, and configure your switchers.

## Add a Switcher

You can add a new switcher to MixEffect by following these steps.

1. Go to the **MixEffect Home**.
2. Tap the **+** button.
3. Tap **New ATEM Switcher**.
4. Enter a name for your simulated switcher (e.g. `ATEM Mini Pro`).
5. Enter the **IP Address** for the switcher (e.g. `10.0.1.50`. This is the same address you use in the ATEM Software Control application on macOS and Windows.
6. Tap **Add**.

<div><figure><img src="/files/rTMahve6h2wqacHXlQaK" alt=""><figcaption></figcaption></figure> <figure><img src="/files/WPM7ywpT8Yoz3jaTEYPF" alt=""><figcaption></figcaption></figure> <figure><img src="/files/aTfQhXlu2Op8nEM1779c" alt=""><figcaption></figcaption></figure></div>

You can add multiple switchers in MixEffect, even to the same switcher. Create sets of switchers that have different settings depending on the project you are working on.

### Discovering ATEMs on the Network

Newer version of MixEffect automatically try to discover ATEM switchers on your network. In the New ATEM Switcher sheet, a list of switchers found on the network will appear. Tap on one to populate the name and IP address fields.

> NOTE: Some ATEM switchers may appear in the list but are unable to connect due to the fact that MixEffect and the switcher are on different networks. Refer to the Connection Help section for troubleshooting tips on how to connect your ATEM switcher to MixEffect.

## Connect to a Switcher

Connect to a switcher by following one of these two steps after confirming that your switcher is powered on and available at the designated IP Address:

1. From the **MixEffect Home**, tap the gray connect symbol to the left of the switcher name for the switcher you wish to connect to.
2. Or, tap on the switcher's name to bring up its **Detail Screen**. Then, tap **Connect**.

<div><figure><img src="/files/NdMeIaapJJ4KDZq6Wt3g" alt=""><figcaption></figcaption></figure> <figure><img src="/files/0Cd2rkDXmMPUnzlukke3" alt=""><figcaption></figcaption></figure> <figure><img src="/files/qw25Qa5kXjDgfP7rS0Oo" alt=""><figcaption></figcaption></figure> <figure><img src="/files/CXY7QipkOS257sv8Fhee" alt=""><figcaption></figcaption></figure></div>

Once you are connected, you can tap on the image of your ATEM switcher to go directly to the default section specified by your switcher. Or, tap the back button in the upper-left to return to the MixEffect Home.

## Organizing Sections

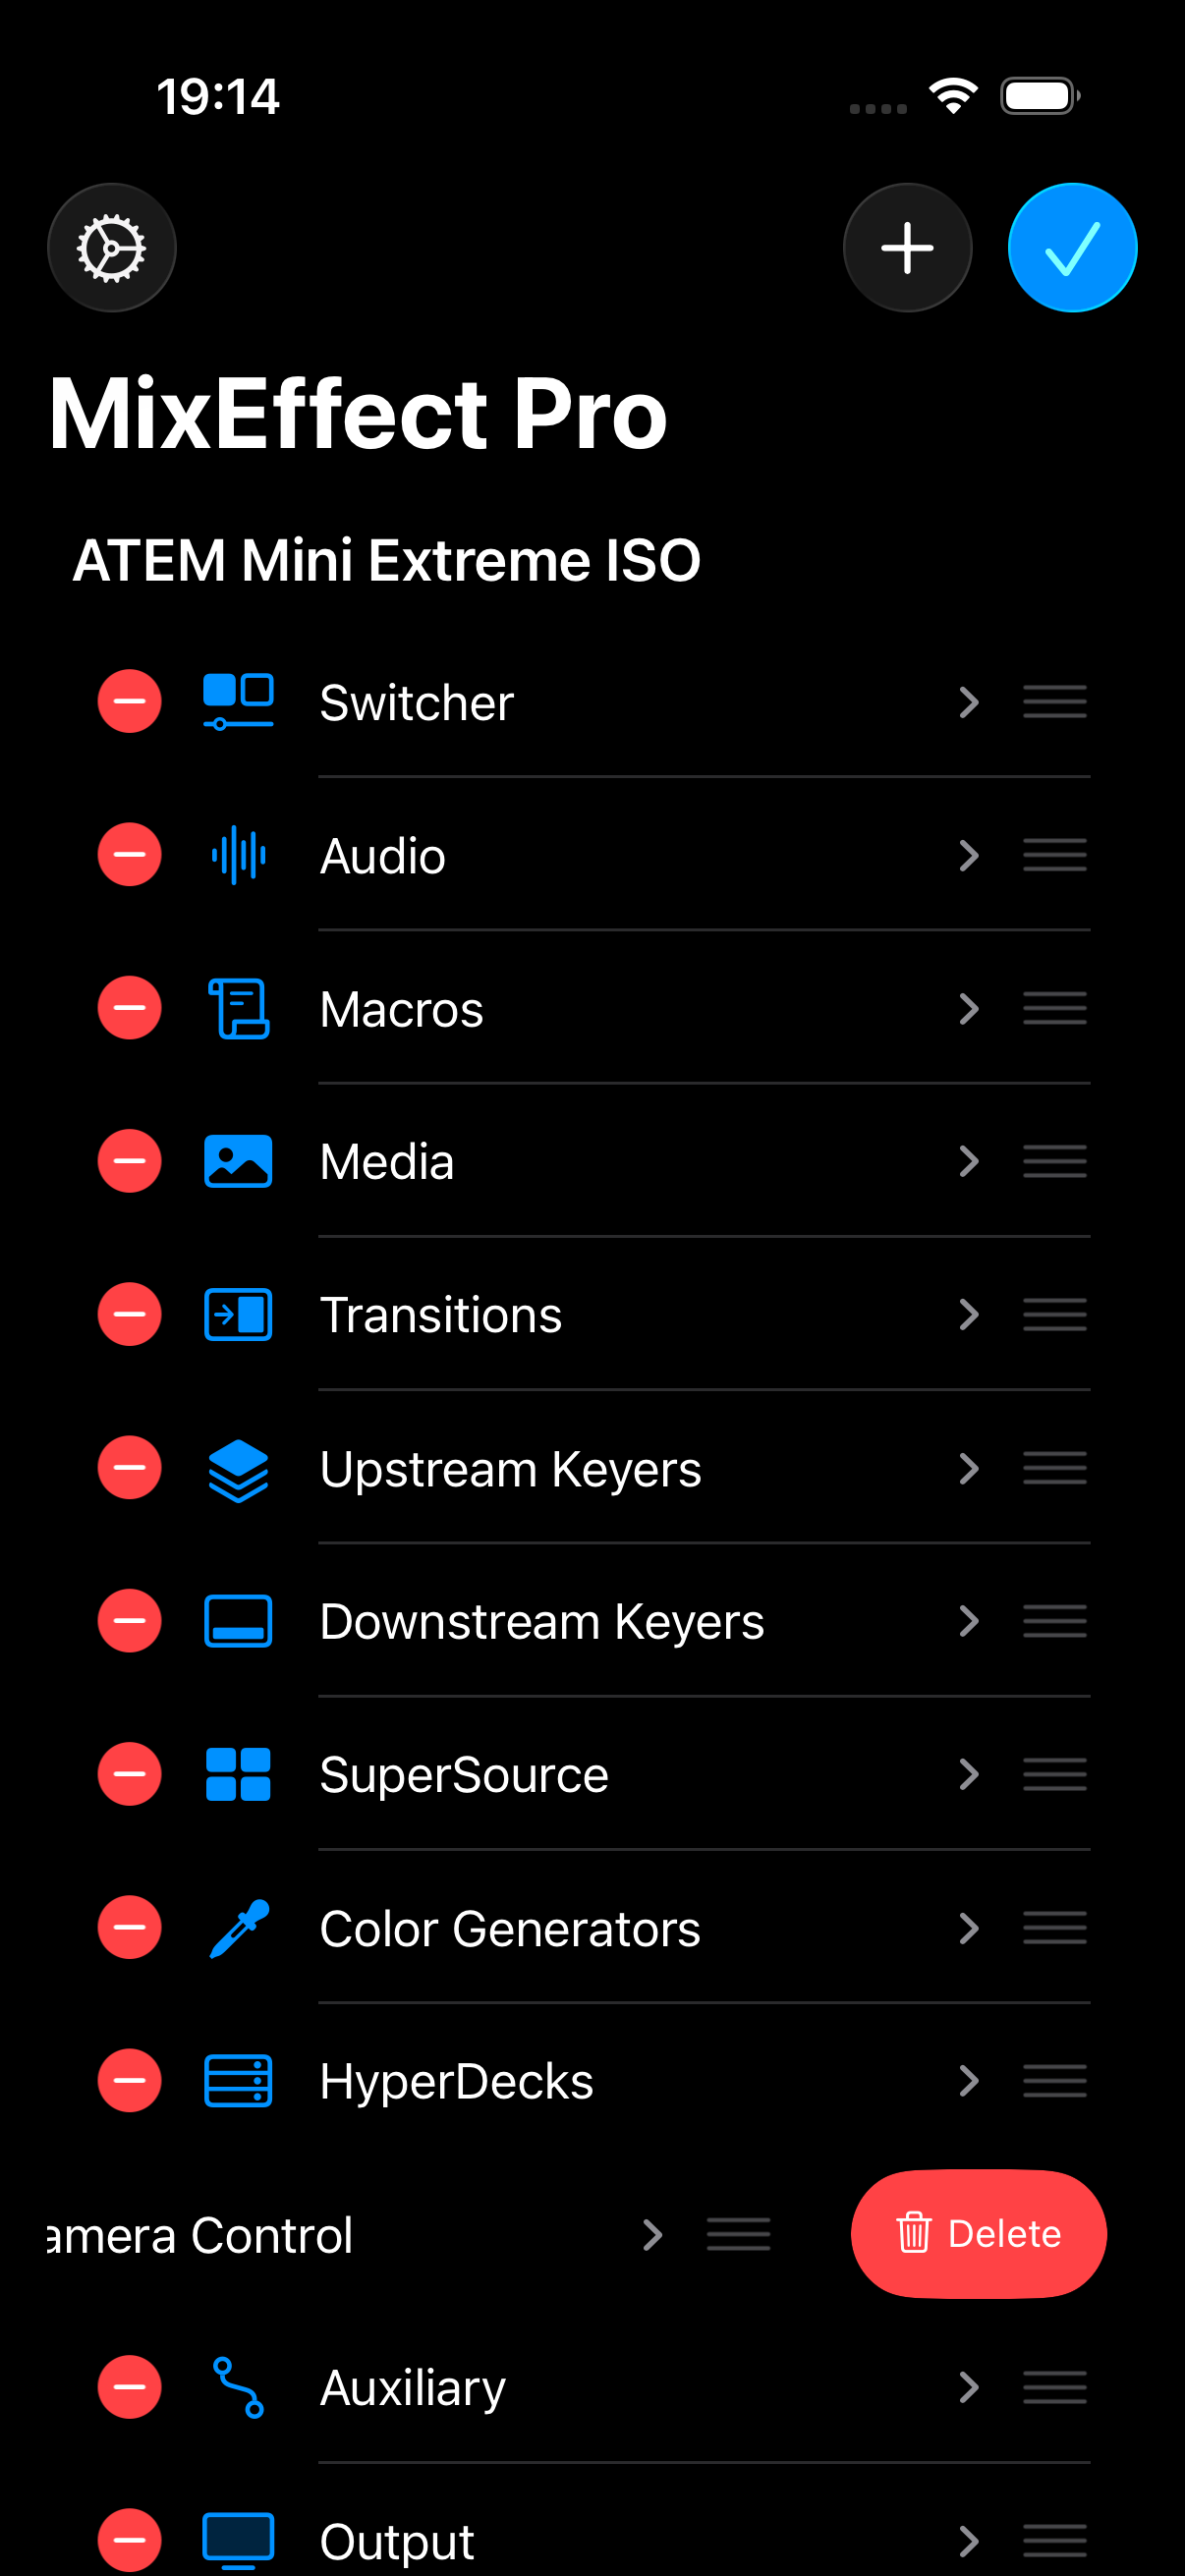
Tap the Edit button in the upper-right corner of the switcher sections section to reveal editing controls. You can drag and drop the switcher sections according to how you want to use. You can also remove a switcher section from the list.

<div><figure><img src="/files/lMvVmw3Ldb7Dv72hWCNa" alt=""><figcaption></figcaption></figure> <figure><img src="/files/3UrvqoyLATncXwnpmA9M" alt=""><figcaption></figcaption></figure> <figure><img src="/files/ThBYu0PkDvGOh3UgVfdw" alt=""><figcaption></figcaption></figure></div>

To reset the switcher sections to their default values, go to the Switcher Detail page for your switcher and tap Reset Layout.

## Conditional Features

Some features are only supported on certain ATEM switcher models. For instance:

* **Live Stream and Record Stream**: ATEM Mini Pro, Pro ISO, Extreme, and Extreme ISO.
* **SuperSource**: Switchers that support SuperSource, such as the ATEM 2 M/E Production Studio 4K, ATEM 4 M/E Broadcast Studio 4K, ATEM Constellation 8K, ATEM Mini Extreme, and ATEM Extreme ISO.
* **Camera Control**: Currently available on ATEM Mini switchers that communicate with compatible HDMI cameras such as the Blackmagic Pocket Cinema Camera 6K.

## Using a Switcher

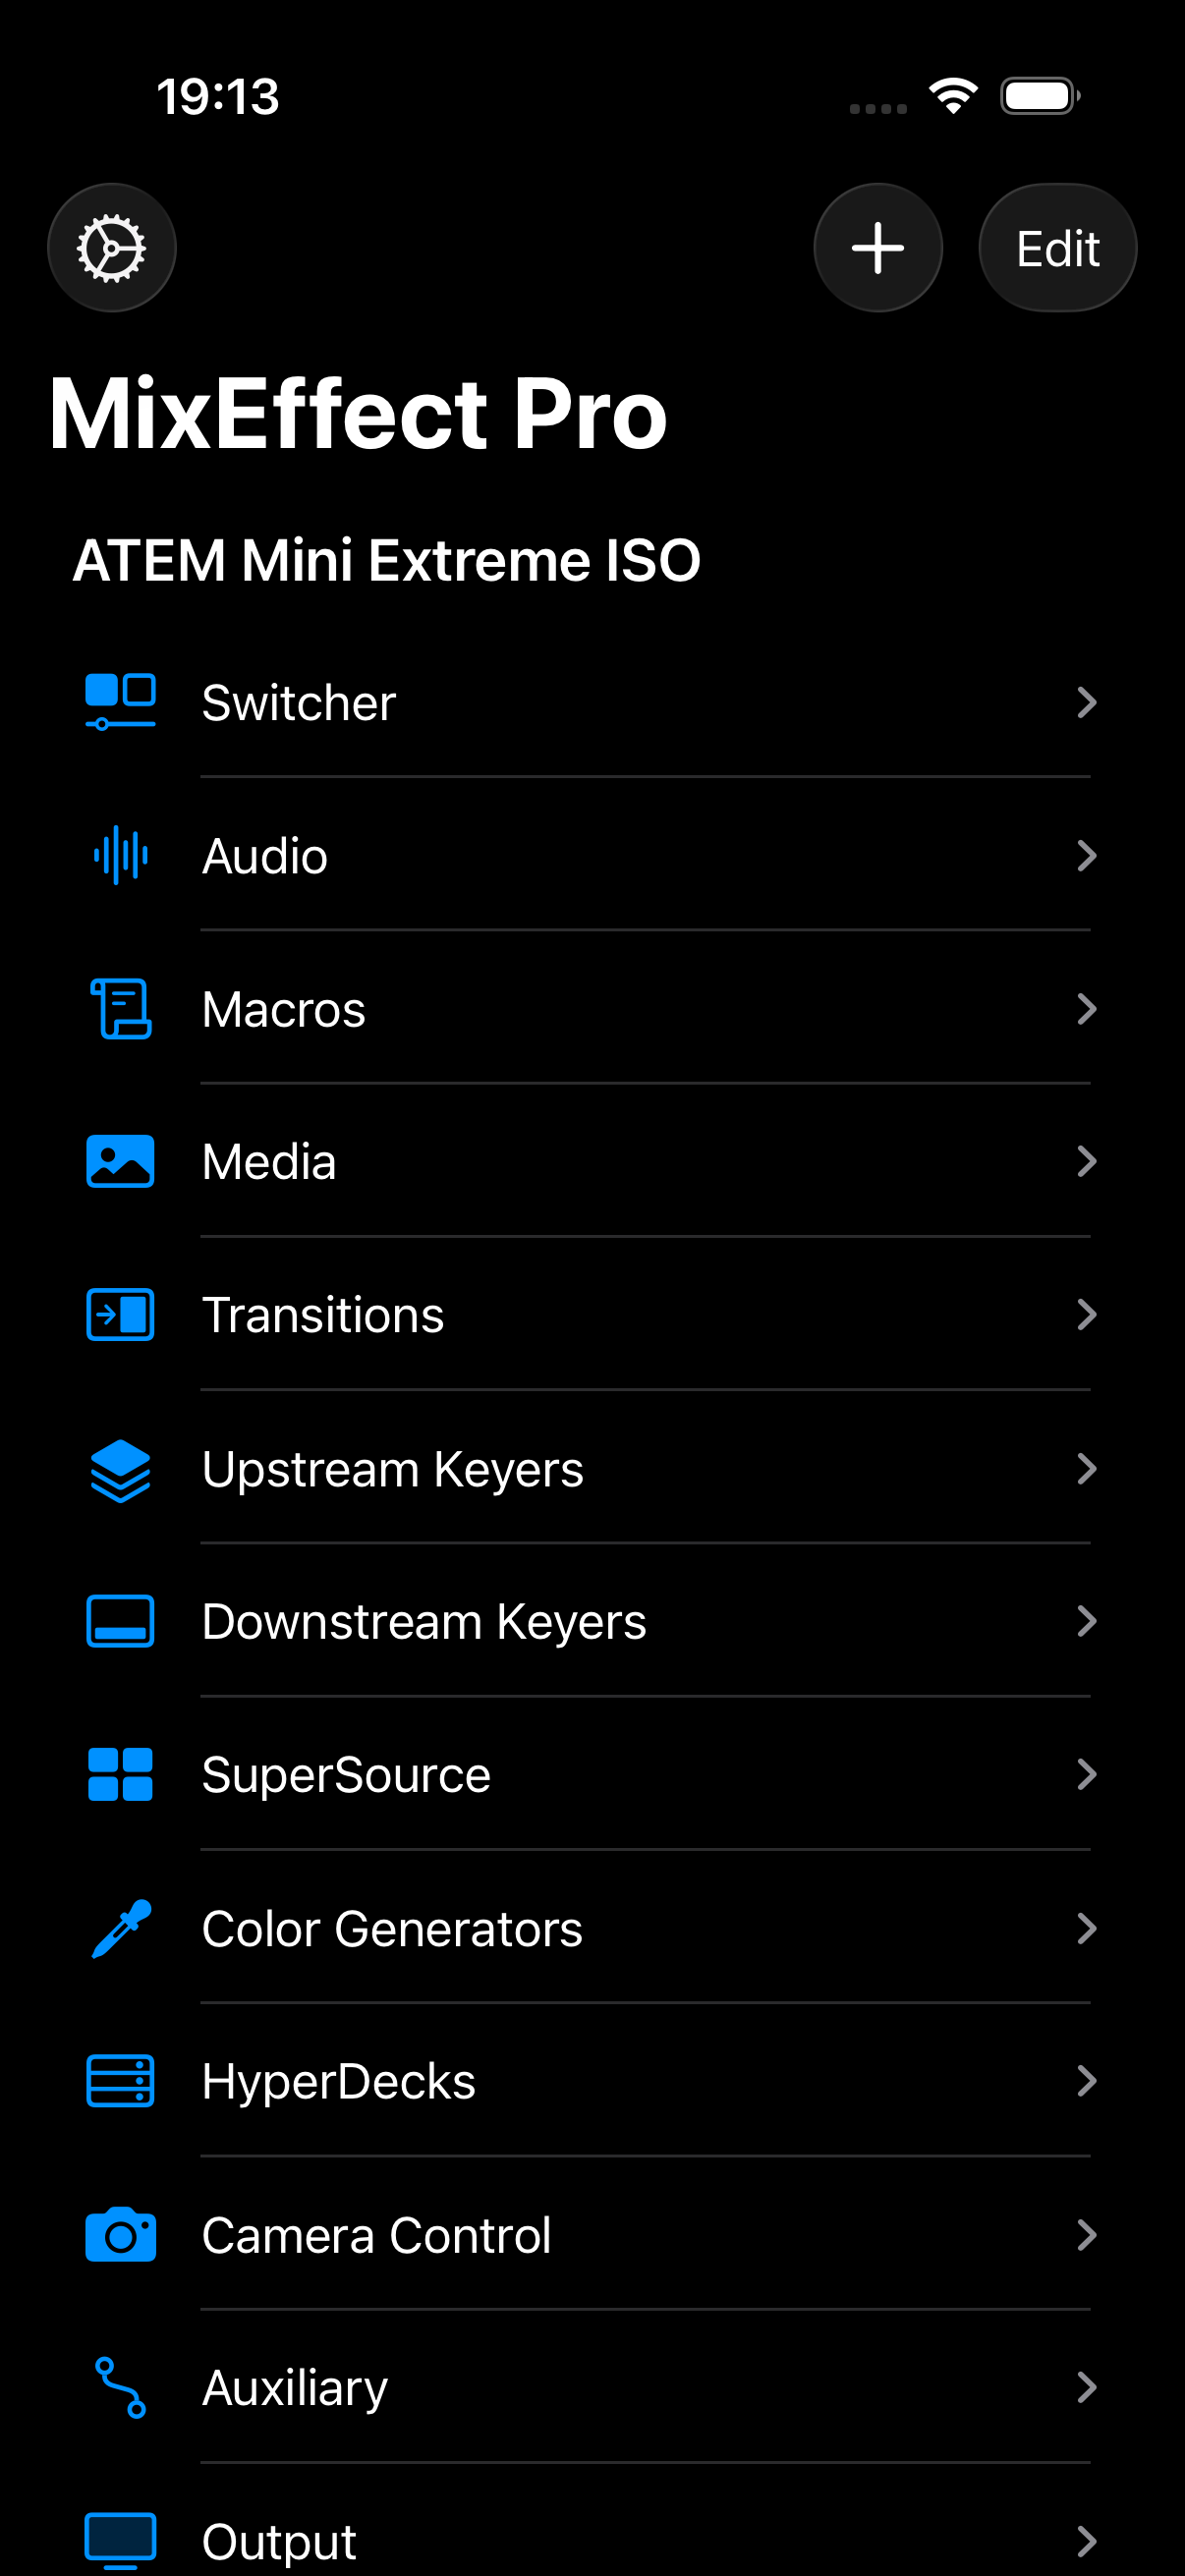
When connected to a switcher, a list of available features will appear above the connected switcher. For instance, when connected to an ATEM Mini Extreme ISO, the following options will be shown:

* Switcher
* Audio
* Macros
* Media
* Transitions
* Upstream Keyers
* Downstream Keyers
* SuperSource
* Color Generators
* HyperDecks
* Camera Control
* AUX
* Output
* Settings

Click on the links above for specific details on using each feature.

## Switcher Interface

Tap on Switcher to be taken to the main interface for controlling your ATEM switcher.

The Switcher interface is composed of buttons, panels, and pages:

* Button
* Panel
* Page

### Button

A button looks like a physical switcher button in the MixEffect interface. It can perform a number of operations:

* Send a command to the ATEM switcher to perform an operation.
* Display a menu when pressed.
* Display a context menu when long pressed.

<div><figure><img src="/files/HMWgRalI04853chqEeRN" alt=""><figcaption></figcaption></figure> <figure><img src="/files/qKxRCthbKs53O4zlvcyu" alt=""><figcaption></figcaption></figure> <figure><img src="/files/w3zHuH7N3uG6DUGgREZD" alt=""><figcaption></figcaption></figure> <figure><img src="/files/1IWWjjFZNQRabRAFQiLB" alt=""><figcaption></figcaption></figure></div>

How a button operates is indicated by the following visual affordances:

* **Inactive**: Button appears white. Tapping on an inactive button will not perform an action.
* **Active**: Button is colored red, yellow, or green. Tapping on an active button will perform an action.
* **Disabled**: Button appears gray and cannot be tapped.
* **Blinking**: Refer to the documentation for your ATEM switcher regarding the meaning of a button that is blinking. For instance, a blinking FTB button means that Fade To Black is currently active on the Program output.
* **Popup Menu Available**: A small triangle appears in the upper-right corner. Tapping on the button will display a menu or sheet.
* **Long-Press Available**: A small triangle appears in the bottom-left corner. Long-pressing the button will either perform an action, display a context menu, or display a sheet.

### Panel

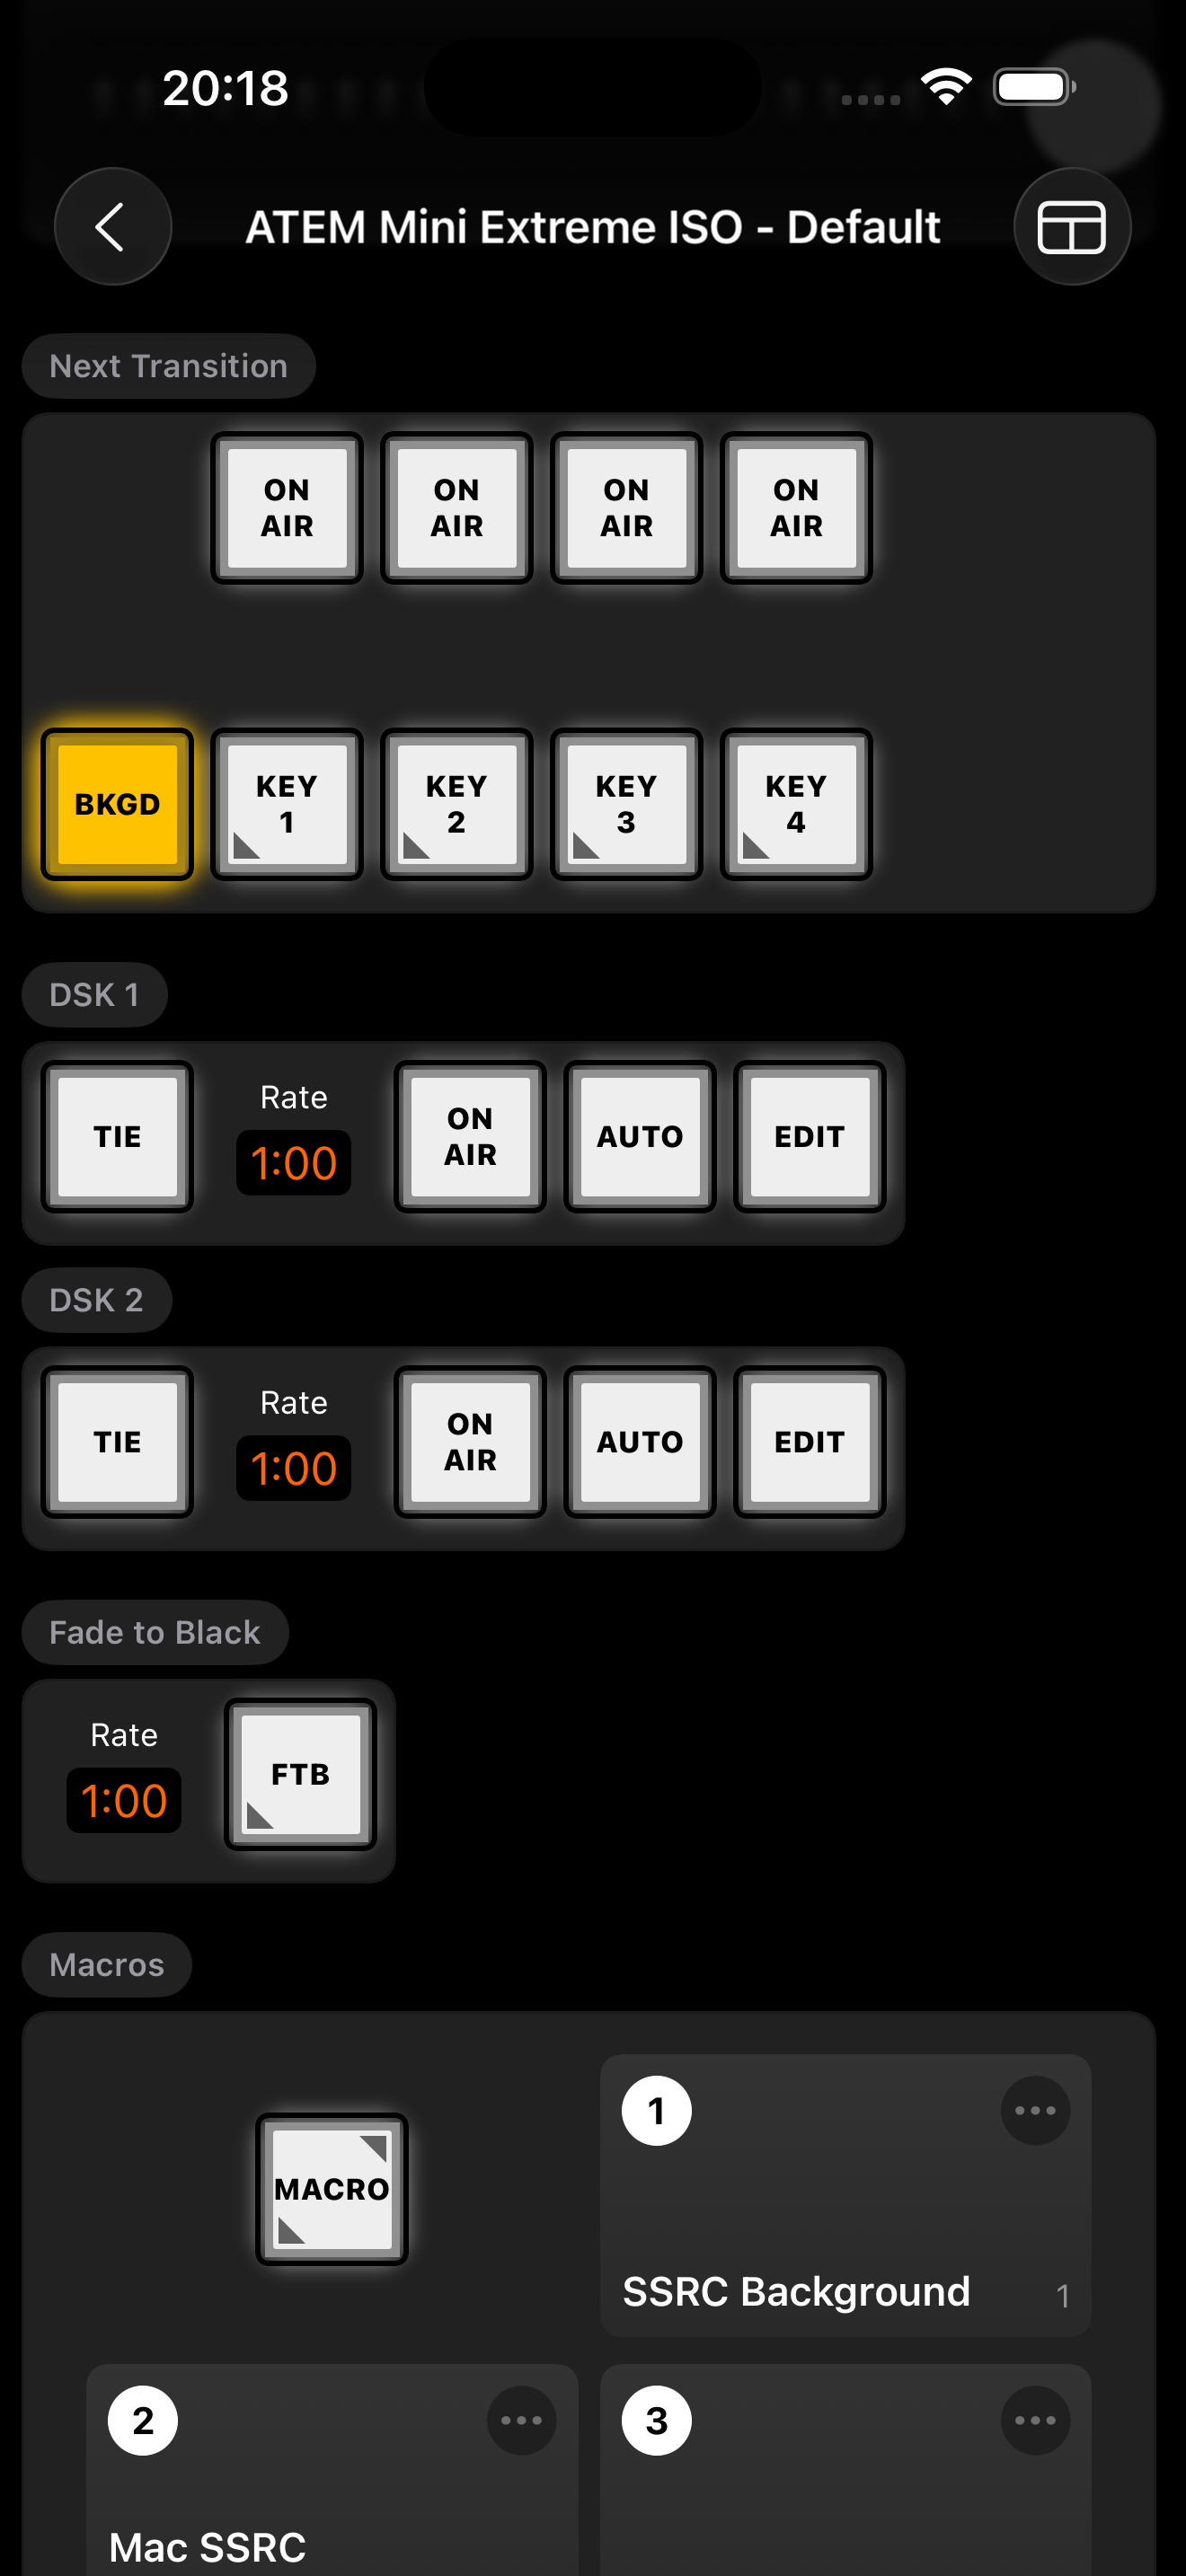
A section related to a particular feature on your ATEM switcher. For instance: the Program bus, Next Transition, or Downstream Keyer.

<div><figure><img src="/files/HnAqUCZ3Sn792x7BOcvx" alt=""><figcaption></figcaption></figure> <figure><img src="/files/dgqnJKm9opAGRt6eS74f" alt=""><figcaption></figcaption></figure> <figure><img src="/files/N87aomSfatbTihJkEikB" alt=""><figcaption></figcaption></figure></div>

If you have used Blackmagic's ATEM Software Control on macOS or Windows, some of these panels will look familiar.

Learn more about buttons and panels here.

### Page

Pages are collections of panels arranged in a particular layout.

MixEffect comes with three different layouts for organizing your panels and buttons:

* **Portrait**: Used on iPhones in portrait orientation and iPadOS in half-size and compact Split View and Slide Over mode. Panels are displayed in a single column.
* **Landscape**: Used on iPhones in landscape orientation. Panels are laid out in a row, two columns, row format.
* **iPad**: Used on iPadOS in full screen mode. Displays a row of panels, followed by two columns of panels. It ends with another row of panels. A thin sidebar flanks the two columns and bottom row.

<div><figure><img src="/files/9BAzL2NI2vMa6PNXuJFM" alt=""><figcaption></figcaption></figure> <figure><img src="/files/TlS9x3euOGw046I2DG2M" alt=""><figcaption></figcaption></figure> <figure><img src="/files/XxqU1necetDCchoE3jpc" alt=""><figcaption></figcaption></figure></div>

#### **Mix Effects Bus**

If your ATEM switcher supports multiple mix effects buses, a segmented picker will appear at the top of the screen allowing you to select the current M/E bus you wish to control. Buttons and panels that are tied to the currently selected M/E will update when you switch buses.

<figure><img src="/files/IpJXOtnycAPJHY9IiwsN" alt=""><figcaption></figcaption></figure>

### Customization

With MixEffect Pro, you can customize which panels appear in which layout by adjusting a switcher's Page settings. Learn more about Switcher Pages here.

<figure><img src="/files/PRiQCPtwVPgZnbYGuBiO" alt=""><figcaption></figcaption></figure>

<figure><img src="/files/9qGU6T3E8RfKDOBhESwI" alt=""><figcaption></figcaption></figure>


# Switcher

The switcher section is your control panel for adjusting multiple settings on your Blackmagic Design ATEM switcher. This section is highly customizable to your liking by creating and editing the [Switcher Pages](/configure/switcher-pages) with the [panels and buttons](/configure/switcher-pages/panels-and-buttons) you desire for each switcher.

<div><figure><img src="/files/T4HfbliRD5bz4d8Q9lci" alt=""><figcaption></figcaption></figure> <figure><img src="/files/ob5v1FvQ9rhTijWd8zDX" alt=""><figcaption></figcaption></figure> <figure><img src="/files/bY70LrCTw4my3MRMdROH" alt=""><figcaption></figcaption></figure> <figure><img src="/files/JqLG3KNdl1PK0AMRmMu8" alt=""><figcaption></figcaption></figure></div>

<figure><img src="/files/IpJXOtnycAPJHY9IiwsN" alt=""><figcaption></figcaption></figure>

When you first install MixEffect, the following panels will appear in the Switcher section:

* Program / Preview
* Next Transition
* Transition Style
* Fader Bar
* FTB
* DSK
* Output
* Macros
* Auxiliary


# Mix Effect Buses

Some ATEM switchers feature multiple Mix Effects Buses, including:

* ATEM 2 M/E Production Studio 4K
* ATEM 4 M/E Broadcast Studio 4K
* ATEM Constellation 8K
* ATEM 2 M/E Constellation HD
* ATEM 4 M/E Constellation HD

When you go to the Switcher section, you will see a segmented picker showing the currently selected Mix Effects Bus and the available ones. Tap on a Mix Effect Bus to switch to it.

<figure><img src="/files/TFAwzcZOLNvN25qVc1PS" alt=""><figcaption></figcaption></figure>

### Switching Mix Effect Buses in Other Sections

If you are in the Transition, DVE, or SuperSource sections, a Mix Effects Bus picker will appear in the upper-right hand corner of the screen. Tapping will display a list of all ME buses for your switcher, and choosing one will set the currently active ME bus.&#x20;

Remember this when returning to the Switcher section that your Mix Effect Bus may have changed if you selected a different one from one of these sections.

<div><figure><img src="/files/mhgldEoLrlKRYQAlc2Qh" alt=""><figcaption></figcaption></figure> <figure><img src="/files/4mqnZLqM9rtXWdrVtq7m" alt=""><figcaption></figcaption></figure> <figure><img src="/files/u9D6UTAVEJZUb5ZpRVtk" alt=""><figcaption></figcaption></figure></div>

## Copying Mix Effect Bus Settings

New as of MixEffect 1.5.2 is the ability to copy the following settings from one Mix Effect Bus to another:

* Program Source
* Preview Source
* Next Transition
* Transition Style
* Fade to Black
* Key 1
* Key 2 (if available)
* Key 3 (if available)
* Key 4 (if available)

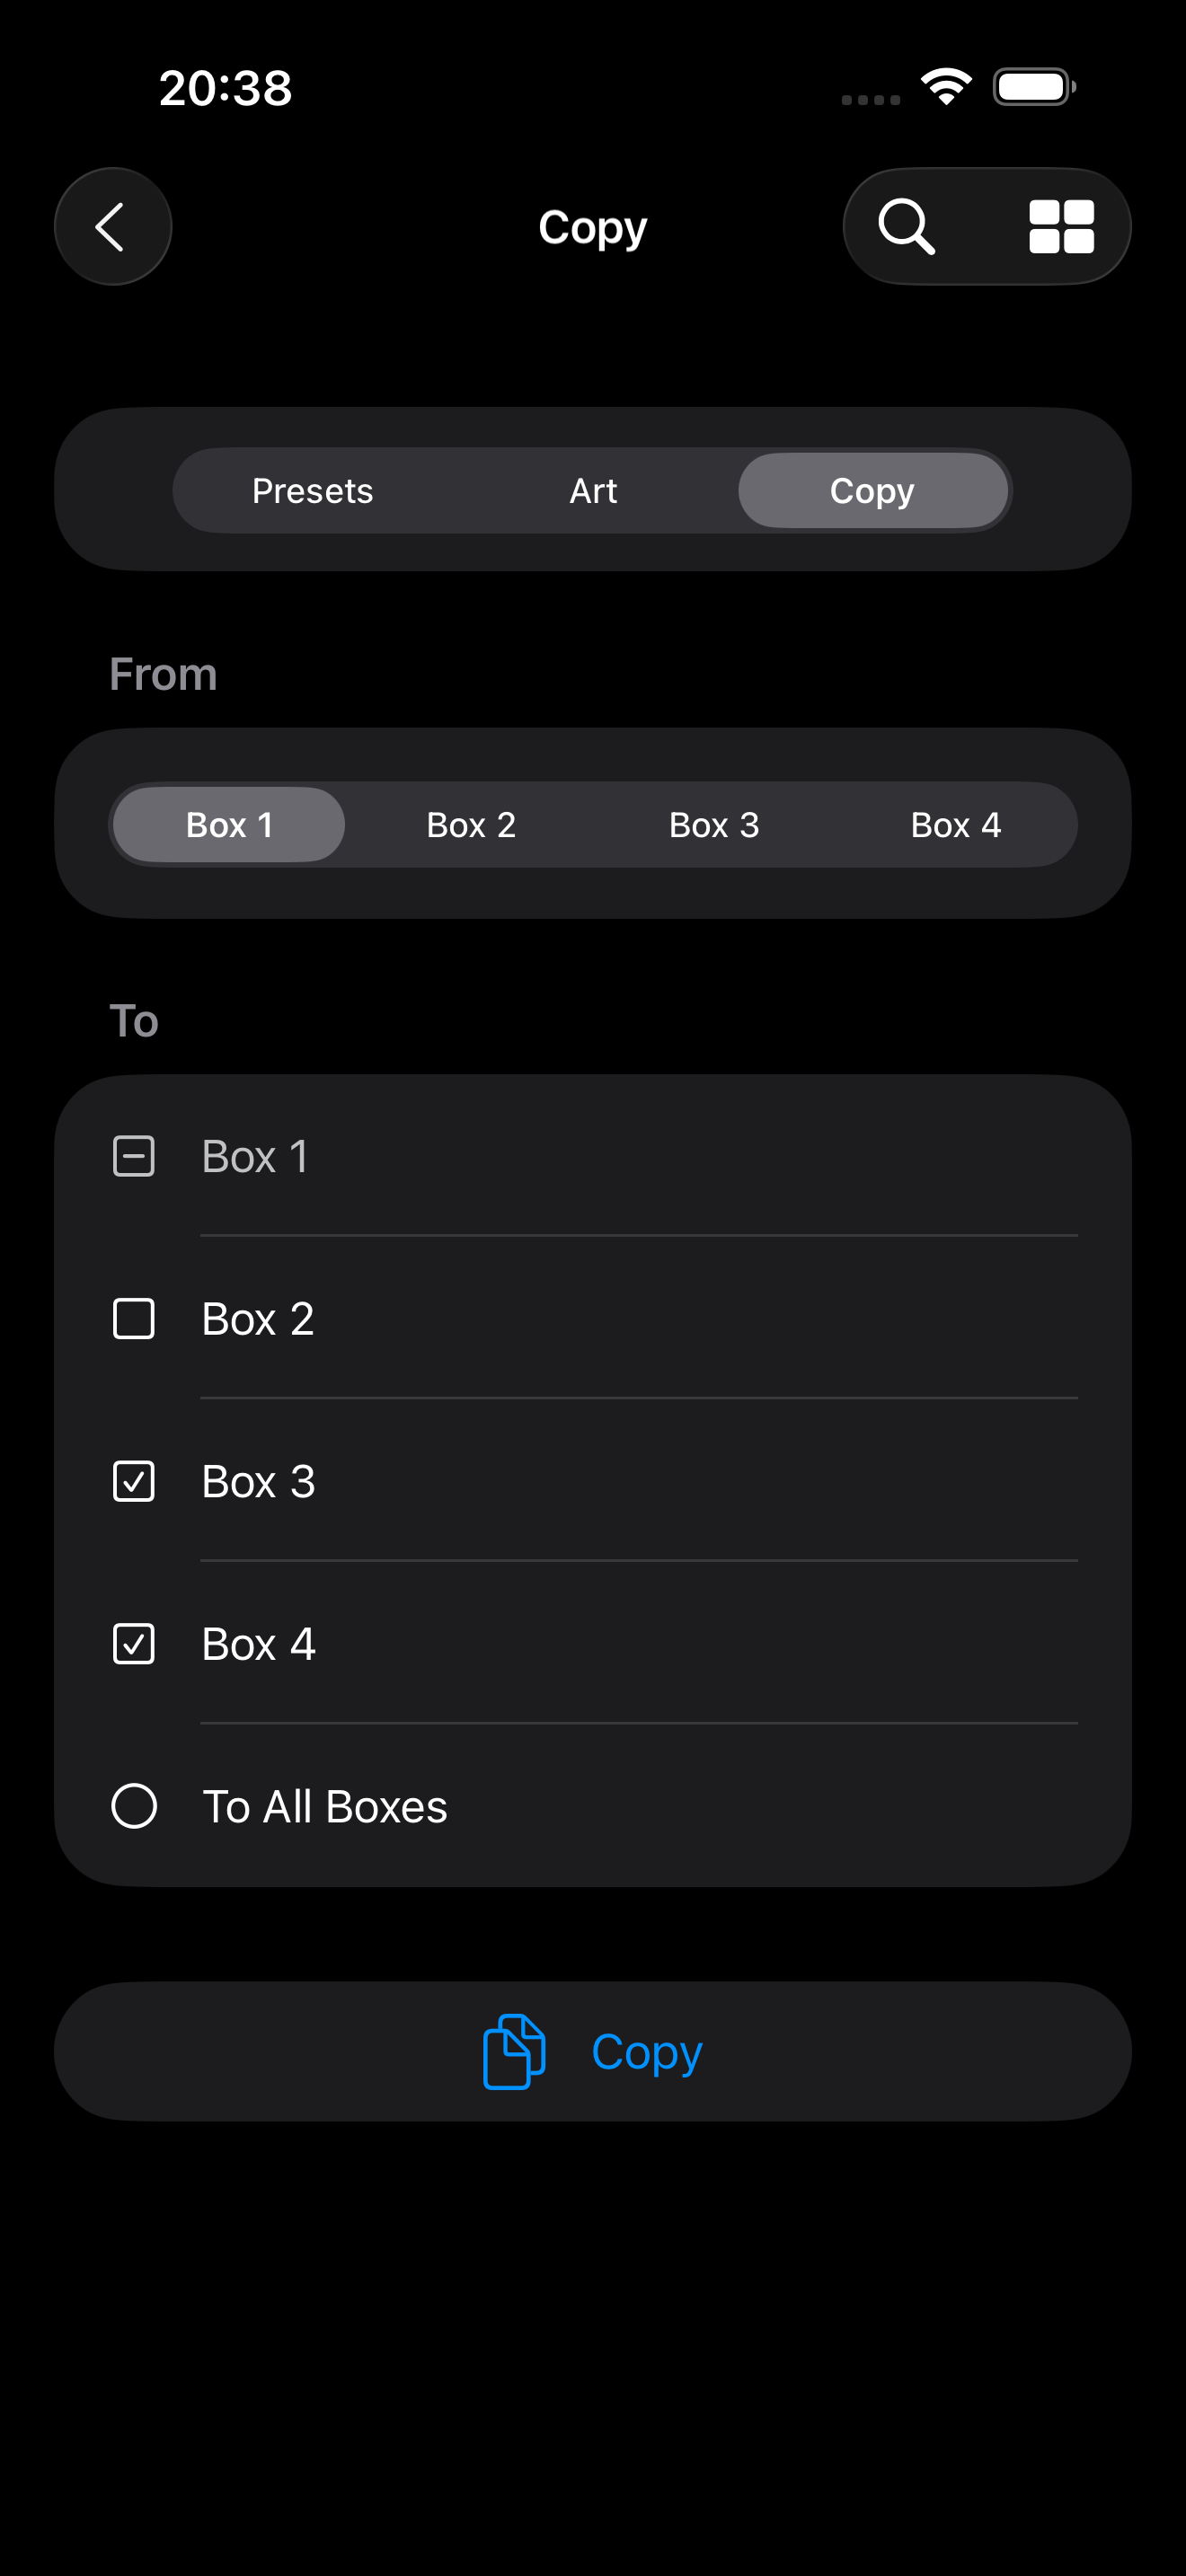
To copy settings, tap on the copy icon to the right of the Mix Effect Bus picker. The Copy Settings sheet will appear.

<figure><img src="/files/BQ2TOexKlaHTQTvyM2sf" alt=""><figcaption></figcaption></figure>

1. Use the segmented picker to select the Mix Effect Bus you want to copy settings from.
2. Select the Mix Effect Buses that you want to copy settings to.
3. Select the settings that you want to copy. By default, All settings are selected.
4. Tap the Copy button in the top-right corner of the sheet.

### Fade to Black

If the source Mix Effect Bus has Fade to Black active and if the destination Mix Effect Buses do not, Fade to Black will be initiated on the destination buses.


# Audio

Monitor audio from your inputs and microphones from the dedicated Audio page in MixEffect.

* [Audio Section](/explore/audio/audio-section)
* [Audio Source Details](/explore/audio/audio-source-details)
* [Mixer Monitor](/explore/audio/mixer-monitor)
* [Switcher Audio Settings](/explore/audio/switcher-audio-settings)


# Audio Section

Monitor audio from your inputs and microphones from the dedicated Audio page in MixEffect.

1. Tap **Audio** from the **MixEffect Home**.
2. Add the **Audio** panel to a Switcher Page.

<div><figure><img src="/files/gliEsoeqxi3fDEz0phb8" alt=""><figcaption></figcaption></figure> <figure><img src="/files/weJHLZkvizbMN8upJcyB" alt=""><figcaption></figcaption></figure> <figure><img src="/files/Dp8CWo7mNi8vLTxg3I0j" alt=""><figcaption></figcaption></figure></div>

Each audio source has the following interface buttons:

* **Meters**: Audio metering levels from -100db to 0db.
* **Solo**: Solo the audio for this input to the headphones by tapping on the circular headphone button. Displayed for the switcher that support solo monitoring of audio inputs, such as the ATEM Mini Extreme.
* **Frames Delay**: If the audio source supports it, the frames delay value will be displayed.
* **AFV/On/Off Button**: A button to turn on or off the audio source. If Audio Follows Video is supported in the source, tapping this button will display a popup menu.
* **Fader Slider**: Tap and drag the circle to adjust the fader gain slider.
* **Equalizer**: Tap to edit the 6-band parametric equalizer.
* **Dynamics**: Tap to edit the expander, compressor, and limiter for the audio source.
* **Quieter**: Tap to lower the fader gain by -3db.
* **Louder**: Tap to raise the fader gain by +3db.
* **Reset**: Reset the fader gain to 0db.
* **Settings**: Tap to adjust additional audio settings.
* **Video Follows Audio**: If you have Video Follows Audio enabled on your switcher in MixEffect, an additional row appears below the Quieter, Louder, and Reset buttons. Long-press to change the video follows audio settings for the selected audio source.

> **NOTE**: If you have an ATEM switcher that does not support Fairlight Audio, the following buttons will be missing from the Audio panel: Equalizer, Dynamics, and Video Follows Audio.

### Simple UI Toggle

In the Audio section, there is a toggle at the top-right of the screen to simplify the audio panel by hiding the buttons for VFA, Equalizer, Dynamics, and Fader Level buttons. This has the effect of allowing more audio panels to be visible on screen.

<div><figure><img src="/files/IkrlSCL9PUqiN34AUXei" alt=""><figcaption></figcaption></figure> <figure><img src="/files/cngKwO0oxvAfwlpKhdM5" alt=""><figcaption></figcaption></figure></div>

### Audio Monitoring Toggle

If you are experiencing problems going to the Audio section and not seeing any activity in the audio meters, tap the button in the upper-right corner of the Audio section. This will the ATEM switcher to toggle sending audio levels to MixEffect. When the icon is filled in, audio levels should be sent to MixEffect. If the icon is outlined, audio levels are not being sent.

## Audio Source Sort Order

You can adjust the sort order for your audio sources by doing the following:

1. Go to **MixEffect Home**.
2. Tap **MixEffect Settings**.
3. Tap **User Interface**.
4. Enable **Sort Audio Sources**.
5. Tap **Edit Sort Order of Audio Sources**.
6. Drag the audio sources in the order you wish for them to appear in the Audio section.

<div><figure><img src="/files/w3gRjI2O7sNQQjyttwfV" alt=""><figcaption></figcaption></figure> <figure><img src="/files/ESkx6LY1T0ZCpXrcePD8" alt=""><figcaption></figcaption></figure> <figure><img src="/files/aQ9zS0XiAekEpJumm0qF" alt=""><figcaption></figcaption></figure></div>

### Order Audio Sources By State

By default, MixEffect will place mixed in audio sources at the top of the screen. If you want your audio sources to stay fixed in the Audio section, perform the following:

1. Go to **MixEffect Home**.
2. Tap **MixEffect Settings**.
3. Tap **User Interface**.
4. Disable **Order Audio Sources by State**

<div><figure><img src="/files/meJwjId6hyEMHfacm6VC" alt=""><figcaption></figcaption></figure> <figure><img src="/files/P3cIB0GvwHqzTWPW9nOI" alt=""><figcaption></figcaption></figure></div>


# Audio Source Details

Tap on the ellipsis button to access the details page for an audio source. The audio details page will appear with the following sections:

* Source
* Equalizer
* Dynamics

### Source

* **Mix Option**: Choose between Off, On, or Audio Follows Video (if supported).
* **Solo**: Enable or disable solo monitoring. Available only on switchers that support solo monitoring.
* **Input Gain**: Set the input gain for an audio source.
* **Frames Delay**: Adjust the frames delay for microphone inputs.
* **Pan**: Adjust the left and right balance for an audio source.

> **NOTE**: Switchers without Fairlight Audio support will not have sections for Equalizer and Dynamics.

### Equalizer

Starting in MixEffect 1.3.0, you can now edit the settings for the 6-band parametric equalizer for all of your Fairlight audio sources.

<figure><img src="/files/sSBbK1arVLHOm9RsKPgz" alt=""><figcaption></figcaption></figure>

You can perform the following operations in the Equalizer Visualizer with each band circle:

* **Tap and drag**: Adjust the band's frequency by dragging horizontally. If the band allows it, adjust the gain by dragging vertically.
* **Double-tap**: If the band shape is set to Bell, you can double-tap the band circle to switch between adjusting the frequency/gain to the Q Factor. The circle will change to purple, and you can drag horizontally to raise or lower the Q Factor value. Double-tap again to switch back to adjusting the frequency/gain.
* **Long-press**: Display a context menu when you can set the band shape, enable/disable, or reset the band's parameters.

![Modifying EQ parameters from the EQ Visualizer.](/files/HtmD3mlf265rXKYYRS7k)

### Dynamics

Starting in MixEffect 1.3.0, you can now edit the dynamics settings for all of your Fairlight audio sources. Input sources have options to configure the Expander, Compressor, and Limiter, while the Master Audio source settings to adjust the Compressor and Limiter.

<figure><img src="/files/EJHf8VofJ4rL1I6OeH26" alt=""><figcaption></figcaption></figure>

> **NOTE**: The Master Audio source does not support Expander/Gate in Dynamics.


# Mixer Monitor

If your switcher supports headphone output, you can adjust the following options:

* Gain
* Mute
* Master Gain
* Talkback Gain
* Engineering Talkback Gain (ATEM Constellation 8K only).
* Sidetone Gain

Follow these steps to adjust the mixer monitor settings:

1. From the **MixEffect Home**, tap **Audio** when connected to a switcher.
2. Tap the **ellipsis button** in the upper-right corner of the Master audio panel.
3. Scroll down to the Mixer Monitor section and adjust the desired control.

<figure><img src="/files/r3b2suo2ZWPYDvLtlm9B" alt=""><figcaption></figcaption></figure>


# Switcher Audio Settings

You can configure audio settings for your switcher by going to the Switcher Settings section:

1. Connect to a switcher.
2. Tap **Settings** in the Switcher sections list.

The audio settings that you can adjust are described in the [Switcher Settings](/explore/switcher-settings) section.


# Media

MixEffect supports listing the names of your stills, clips, and audio clips in the Media Pool of your ATEM switcher.

## Media View Style

As of MixEffect 2.2.0, the view of Stills in the Media section can be toggled between a Grid and List mode. To change the view style:

1. Go to the Media section.
2. Tap the icon next to the plus button in the upper-right.
3. Choose between Grid and List view styles.

Optionally, you can choose to display unused still slots or to hide them.

<figure><img src="/files/xBZ0TBdvdOMwIDjKx13y" alt=""><figcaption></figcaption></figure>

You can set the current still or clip in your Media Players by performing one of the following actions:

* Long-press on a media item and choose the Set option for the desired media player.
* For stills, tap on a still list item and tap the Set button for the desired media player.
* From the Switcher view, long press on a media players space button and choose the clip or still that you want to use from the action sheet.

### Keyboard Shortcuts

Press Command-Plus or Command-Minus to go to the next or previous still/clip.

If you have Loop Stills and Clips in Media Player toggle enabled in MixEffect's User Interface settings, press the next still/clip keyboard shortcut while on the last still/clip will select the first item. Conversely, if you press the previous still/clip keyboard shortcut on the first still/clip will select the last item.

### Capture Still

At the top of the Media section will be a camera icon. On supported ATEM switchers, tap this to take a capture of what's on Program and save it to the first open slot in your Media Pool.

This button is only available if your switcher:

1. Supports saving a photo from the Program output to the switcher
2. There is an empty still slot in your Media Pool. If all slots are being used, the button will be grayed out and disabled.

{% hint style="info" %}
Previous versions of MixEffect featured a blue capture button at the bottom of the Media section. The button has been moved to the upper-right.
{% endhint %}

### Uploading Images

MixEffect allows you to upload images as stills to the Media Pool from your Photo Library.

1. Tap the **+** button. You can also press **Command-N** on an external keyboard.
2. Select the photo you wish to upload.

Images will be resized to the same size as the Video Mode for the switcher. For the ATEM Mini line of switchers, your images will be resized to fit within a 1920x1080 box.

> **NOTE**: Uploading of images has been tested on the ATEM Mini Pro set to 1080p. Testing has not been conducted on those ATEM switchers that support SD, 4K, or 8K resolutions.

{% hint style="danger" %}

#### IMPORTANT NOTE

In rare instances, the ATEM switcher cannot handle the uploaded image and reaches a state where you have to reboot the switcher (unplug and re-plug).

For this reason, it is highly recommended to upload images while using a hard-wired Ethernet connection to your switcher.

Because of this, an alert will appear each time you try to upload an image. Tap Don't Show Again to dismiss the warning in the future.
{% endhint %}

#### Alpha Channel Support

As of MixEffect 2.2.0, you can upload images with transparency and they will be added to the ATEM switcher correctly. Previous versions of MixEffect stripped out the alpha transparency from images.

### Drag and Drop Uploading

You can also use drag and drop to upload images into media still slots. Dragging an image onto an still slot that is currently occupied will replace the image.&#x20;

### Renaming Stills

Tap on a still to bring up the Still detail page. Tap on Edit Name to change the name of the still.

<figure><img src="/files/U7guys257nL7ll7q8gdN" alt=""><figcaption></figcaption></figure>

> NOTE: Still images seem to revert back to their original filename when a new controller (MixEffect, ATEM Software Control, etc.) connects to the switcher. It is possible this happens because the switcher is re-reading the file stored in its non-volatile memory.

### Viewing Stills and Clips

Currently only the name of a still or clip is displayed in MixEffect.

### Playing Back Clips

If you have assigned a clip to a Media Player, you can play it back from the Media Players panel in the Switcher section.


# Macros

MixEffect enhances macros on your ATEM switcher with support for icons, colors, and three different display modes. You can also filter and sort your macros by index, name, color, and icon.

## Display

All of ATEM's macros are available for running from the switcher page. You can display your macros in a grid, button or list view.

### Macros Button

Tap the Macros button to display the Macros sheet. Long-press to bring up the Macros Action menu and choose one of the following actions:

* **New Macro**: Create a new macro in an empty macro slot.
* **New Macro With Details**: Create a new macro in an empty macro slot. Before recording, you can enter metadata about the macro, such as its name, description, icon, and color.
* **Replace Macro**: Replace an existing macro with a new one. This operation cannot be undone.

<div><figure><img src="/files/TdEJrO5PIDvfaOzTgBfR" alt=""><figcaption></figcaption></figure> <figure><img src="/files/nJXE3uBtc1FfdmUcqKXf" alt=""><figcaption></figcaption></figure> <figure><img src="/files/qFkr0oct2FITqvKxmKHT" alt=""><figcaption></figcaption></figure></div>

### Macro Button

Tap a macro to run or edit it depending on your Macro On Tap preference in Settings. Long-press to reveal the Macro Action menu and choose one of the following actions:

* **Run Macro**: Runs the selected macro.
* **Edit Macro**: Edits the selected macro.
* **Re-record Macro**: Replace the selected macro with a new macro. This operation cannot be undone.
* **Delete Macro**: Delete the selected macro. This operation cannot be undone.

## Macros View

The Macros View is where you can search, sort, and manage your macros. There are two ways to access it:

* Tap on **Macros** from **MixEffect Home**.
* Tap on the **Macros** button on a switcher page.

The Macros View is organized as follows:

* **Toolbar**
  * **Loop**: Toggle to turn looping on and off when playing back macros.
  * **Options**: Menu allowing you to change the display mode and sort the list of macros.
  * **New**: Create a new macro.
* **Search Bar**: Filters the list of macros based on text found in the macro's name or description.
* **Macros**: The filtered and sorted list of macros on the ATEM switcher, shown as a grid, button list or text list.

### Search and Sort

MixEffect allows you to search your macros by name or text contained in the notes field. It also allows you to search by the following criteria:

* Index
* Name
* Icon
* Color

This provides unparalleled ability to organize your macros exactly the way you want them.

You could add a keyword in the Notes field and use search in MixEffect to quickly view all macros associated with a particular show or stream.

### Customization

By adding custom metadata in the Notes field in your macros, you can add colors, icons, and custom labels to your macros when viewed by MixEffect.

<div><figure><img src="/files/Y4k01scA6AhQN2o6s2Qm" alt=""><figcaption></figcaption></figure> <figure><img src="/files/HL3EjwNe3aPNrRf1mwfT" alt=""><figcaption></figcaption></figure> <figure><img src="/files/JBRtRdUjFHUOFH1nSKgi" alt=""><figcaption></figcaption></figure></div>

* **Label**: This is a short string to be displayed in a button.
* **Icon**: The SF Symbol to be displayed in place of the macro index or in a button. An icon will not be shown in a button if a label has already been specified.
* **Icon Color**: the color of the icon. Defaults to either white or black depending on the color scheme of your device.
* **Color**: the color of the macro when displayed in the Macros view or sheet.
* **Text Color**: the color of the text when displayed in the Macros view or sheet.

All metadata fields follow the same format. You can enter these fields manually in the ATEM Software Control app from Blackmagic or visually within MixEffect.

#### Label

```
{l#LABEL}
```

For instance, adding `{l#PIP}` to the Notes field of a macro will cause the button to be labeled `PIP` when the macro display mode is set to grid.

#### Icon

```
{i#SF_SYMBOL}
```

For instance, setting the icon to be: `{i#house.fill}` will use the SF Symbol `house.fill` in this macro.

A list of valid symbol names can be found in the [SF Symbols app](https://developer.apple.com/sf-symbols/) from Apple. There are over 2400 symbols available, so you can customize your macros in many ways.

#### Icon Color

```
{ic#ICON_COLOR_HEX}
```

This sets the color of the icon. If left blank, the color will alternate between white and black depending on the color of the macro.

#### Color

```
{c#COLOR_HEX}
```

Entering `{c#00FF00}` will make your macro appear on a green background when seen in the Macros view or sheet in MixEffect.

#### Text Color

```
{tc#TEXT_COLOR_HEX}
```

This sets the color of the text when the macro display mode is set to Button. If left blank, text will be either white or black depending on the color of the macro.

***

## Macro Record Floating Panel

When recording macros, a floating panel with the following buttons will appear:

* **Stop Recording**
* **Add Pause**: Displays a sheet allowing you to add a pause step to the currently recording macro.
* **Wait For User Input**: Causes the macro to wait for the user to press the Continue button when running.

<div><figure><img src="/files/fvJH2ul9PThFPJBIHCrG" alt=""><figcaption></figcaption></figure> <figure><img src="/files/UtWZKpFN6O4LUEKaQSqT" alt=""><figcaption></figcaption></figure> <figure><img src="/files/zx88KIcEjXXFFfFUFW1s" alt=""><figcaption></figcaption></figure></div>

## Macro Run Floating Panel

When you run a macro, a floating panel will appear in MixEffect with the following buttons:

* **Loop**: Run the macro over and over.
* **Continue**: If the macro is waiting for user input, tapping the Play button will cause the macro to go to the next step.
* **Stop**: Stop the currently running macro.

<figure><img src="/files/lyEv0j5u3BI3Z5D4bHRF" alt=""><figcaption></figcaption></figure>

> **NOTE**: The Macro Run panel will not appear if your macro finishes quickly.


# Shortcut Macros

You can now have MixEffect run a shortcut when executing a macro on your ATEM switcher. This is similar in principle to SuperSource Macros, which let you run a macro before or after a SuperSource preset transition.&#x20;

## Types of Shortcut Macros

There are two kinds of Shortcut Macros:

* Manual Shortcut Macro
* Auto Shortcut Macro

### Manual Shortcut Macros

Manual Shortcut Macros run when they are initiated from MixEffect, either directly from the MixEffect app, or when the app is instructed to run a macro via a [Shortcut action](/automate/shortcuts/actions/run-macro) or [OSC message](/automate/osc/messages/macros/run-macro). The shortcut runs right after the call to run the macro is sent to the ATEM switcher.

### Auto Shortcut Macros

An Auto Shortcut Macro is called when MixEffect is notified that a macro is running on the ATEM. The macro could be executed by pressing a macro button on the ATEM switcher, calling the macro via Companion or ATEM Software Control, tapping a macro in MixEffect, running a shortcut or sending MixEffect an OSC message. The shortcut is run once MixEffect is notified that the macro is running.

## When to Use Manual or Auto Shortcut Macros?

If you use MixEffect to run macros and want control over when you want a shortcut to run, you could configure your macros to use Manual Shortcut Macros.&#x20;

If you use other applications to run macros, or if you press the physical buttons on an ATEM switcher to run macros, you should use Auto Shortcut Macros. This allows you to trigger the macro from a wider variety of sources. As long as MixEffect is running and detects the execution of the macro, your shortcut will run.

{% hint style="warning" %}

### Caveats with Auto Shortcut Macros

The downside to using Auto Shortcut Macros is when you have multiple copies of MixEffect running, connected to the same ATEM switcher, and with Enable Shortcut Macros turned on. When a macro is run, each copy of MixEffect will receive the message and try to run the same shortcut. This may lead to unintended circumstances depending on the shortcut does.
{% endhint %}

## Enabling Shortcut Macros

Configuring Shortcut Macros is a two-step process in MixEffect.

* Enable Shortcut Macros in Automations
* Enable Shortcut Macros for a Switcher Connection

### Enable Shortcut Macros in Automations

This is the global setting which allows MixEffect to run shortcuts when executing macros. If this toggle is disabled, you will not be able to run shortcuts when executing macros, even if they are defined at the Switcher Connection level.

<figure><img src="/files/T7t9TkhoA04aZMPhUGam" alt=""><figcaption></figcaption></figure>

1. Open **MixEffect**.
2. Tap **Settings** (the gear icon).
3. Tap **Automations**.
4. Tap **Enable Shortcut Macros**.

The setting here is specific to this particular instance of MixEffect running on your iPhone, iPad, or macOS computer. It is shared via iCloud.

### Enable Shortcut Macros for a Switcher Connection

In order to run Shortcut Macros for your ATEM switcher, the Switcher Connection entry must be enabled by following these steps:

1. Open **MixEffect**.&#x20;
2. Find and tap on the **Switcher Connection** entry for the ATEM you wish to edit.&#x20;
3. Tap **Enable Shortcut Macros**.&#x20;
4. Tap **Save**.&#x20;

<div><figure><img src="/files/eQu42Gxb93cvoWdy5sii" alt=""><figcaption></figcaption></figure> <figure><img src="/files/31ehKfdypoh5K4rZIr6i" alt=""><figcaption></figcaption></figure> <figure><img src="/files/1x1edtuRZZDGE2JuDS6u" alt=""><figcaption></figcaption></figure></div>

{% hint style="info" %}
Remember that Switcher Connection entries are shared in iCloud with all of your devices using the same Apple ID. If you want to Shortcut Macros to run on your iPad but not your iPhone, either disable Shortcut Macros in MixEffect Settings > Automations or create a duplicate Switcher Connection entry for this ATEM on the iPhone.
{% endhint %}

## Adding Shortcut References to Macros

To instruct MixEffect to run a shortcut when executing a macro, you must first add a reference to it in your macro.&#x20;

1. Go to the **Macros** section in MixEffect.&#x20;
2. Tap the **…** icon in the macro you want to edit.&#x20;
3. In the **Notes** field, add one of the three following strings at the beginning of the Notes field:

* `MS: EXACT_NAME_OF_SHORTCUT`
* `AS: EXACT_NAME_OF_SHORTCUT`

Where `MS` stands for **Manual Shortcut Before** and `AS` stands for **Auto Shortcut**, and `EXACT_NAME_OF_SHORTCUT` is the exact name of the shortcut as shown in the Shortcuts application.&#x20;

In the screenshot below, macro 85 is set up to run the VFA Work Color shortcut when executed on this copy of MixEffect.

<figure><img src="/files/4qpZT45peVgsvWMsP9uC" alt=""><figcaption><p>Tapping this macro will run the VFA Work Color shortcut.</p></figcaption></figure>

{% hint style="info" %}
*There is a character limit between the name of a shortcut and its notes field. If you have defined custom labels, colors, and icons for your macro, this will reduce the total number of characters available. Keep this in mind when naming your macros and your shortcuts.*
{% endhint %}

## Recording a Macro or a Blank Macro

A macro that has a reference to a macro can be blank or have actions associated with it. To create a blank macro, follow these steps:

1. Open the **Macro** section in MixEffect.
2. Tap the **plus** icon.
3. Select the **macro index**.
4. Enter the **name** of your macro.
5. Enter the **Manual** or **Auto Shortcut** reference in the **Notes** field.
6. Tap **Record**.
7. Tap **Stop** in the Macro Recording Floating window.

## Use Cases

Here are a number of use cases for Shortcut Macros.&#x20;

* Video Follows Audio Shortcuts
* Binding SuperSource Presets to Physical Macro Buttons
* Controlling Multiple ATEM Switchers

### Video Follows Audio Shortcuts

Suppose you have the following setup:

* You use Video Follows Audio to switch between a wide and closeup shot when audio level changes are detected by MixEffect.
* You also have HomeKit compatible lighting installed in your studio.
* You use H2R Graphics to display lower thirds.

You can configure a Video Follows Audio trigger for each audio input to run a macro. In each macro, you enter a reference to a Manual Shortcut Macro in the Notes field to run a shortcut that changes the lighting in your studio. Finally, whenever VFA is triggered for an audio input, the macro will run and call the shortcut.&#x20;

<div><figure><img src="/files/vBV5asl8k3DaxLwkTHRP" alt=""><figcaption></figcaption></figure> <figure><img src="/files/WYZH92PzW9JNAf3EGOaK" alt=""><figcaption></figcaption></figure> <figure><img src="/files/wtAa9V1rgG5WQgAIFbaw" alt=""><figcaption></figcaption></figure></div>

### Binding SuperSource Presets to Physical Macro Buttons

The ATEM Mini Extreme line of switchers have six physical buttons for running macros. You may want to use those buttons to execute MixEffect SuperSource presets.

You can create Auto Shortcut Macros that run shortcuts on MixEffect to execute SuperSource presets:

1. Create a **blank macro** in first six macro slots.
2. Enter an **Auto Shortcut Macro** reference in the Notes field of the macro with the name of the shortcut to run (i.e. `Four Grid Preset`)
3. Open **Shortcuts**.
4. Tap the **plus** button to create a new shortcut.
5. Rename the shortcut to the exact name you specified in Step 2: `Four Grid Preset`.
6. In the shortcut, add a **Set SuperSource Preset Layout** action.
7. Select the **SuperSource Preset** to run.
8. Tap **Done** to save the shortcut.
9. Press the physical macro button on the ATEM switcher.

{% hint style="warning" %}
If you have multiple copies of MixEffect with Shortcut Macros enabled, running multiple SuperSource preset commands may lead to stuttering because each copy of MixEffect will be instructing the ATEM to move the SuperSource boxes.
{% endhint %}

### Controlling Multiple ATEM Switchers

Suppose you have two ATEM switchers, an ATEM Mini Extreme and an ATEM Mini Pro. The Mini Pro is plugged into the Extreme and provides additional inputs to the Extreme. You have a macro 2 that configures the Extreme which you have assigned to a physical macro button in the Extreme. When running this macro, you also want to run a macro on the Mini Pro.&#x20;

1. Add a reference to an Auto Shortcut Macro to macro 2 that runs a shortcut that does one of two actions.
2. Calls an OSC action to the ATEM Mini Pro to run its corresponding macro to configure the second ATEM. This requires another instance of MixEffect connected to the ATEM Mini Pro that will receive this OSC message.
3. Use the Get Contents of URL action to call a Companion button.&#x20;

<div><figure><img src="/files/JipcYW9Tq0NELg8Z3mKQ" alt=""><figcaption></figcaption></figure> <figure><img src="/files/Sc3FWG86YQgjWrbwFZ3w" alt=""><figcaption></figcaption></figure> <figure><img src="/files/WuRACArunRIoHCODq1rB" alt=""><figcaption></figcaption></figure></div>

## Running Shortcuts and MixEffect at the Same Time

If you are using MixEffect on an iPad, it’s recommended that you do one of the following things:

* Run Shortcuts alongside MixEffect in Slide Over on iPadOS 18 and before.
* Place MixEffect and the Shortcuts app in Split View on iPadOS 18 and before.
* Run Shortcuts and MixEffect in Stage Manager on iPadOS 18.
* Run Shortcuts and MixEffect in Windowed App mode on iPadOS 26 and higher.&#x20;

<figure><img src="/files/UD3VQwVWUBjwgevs7V56" alt=""><figcaption><p>Preventing app switches when running Shortcut Macros using Slide Over, Split View, and Stage Manager on iPadOS 18.</p></figcaption></figure>

<figure><img src="/files/zV83Oxu7uUW0nFhTEM2e" alt=""><figcaption><p>Running Shortcuts and MixEffect at the same time on iPadOS 26.</p></figcaption></figure>

Using one of these methods may prevent a switch to the Shortcuts app when a Shortcut Macro is invoked, which might interrupt the connection between the ATEM switcher and MixEffect.<br>


# Transitions

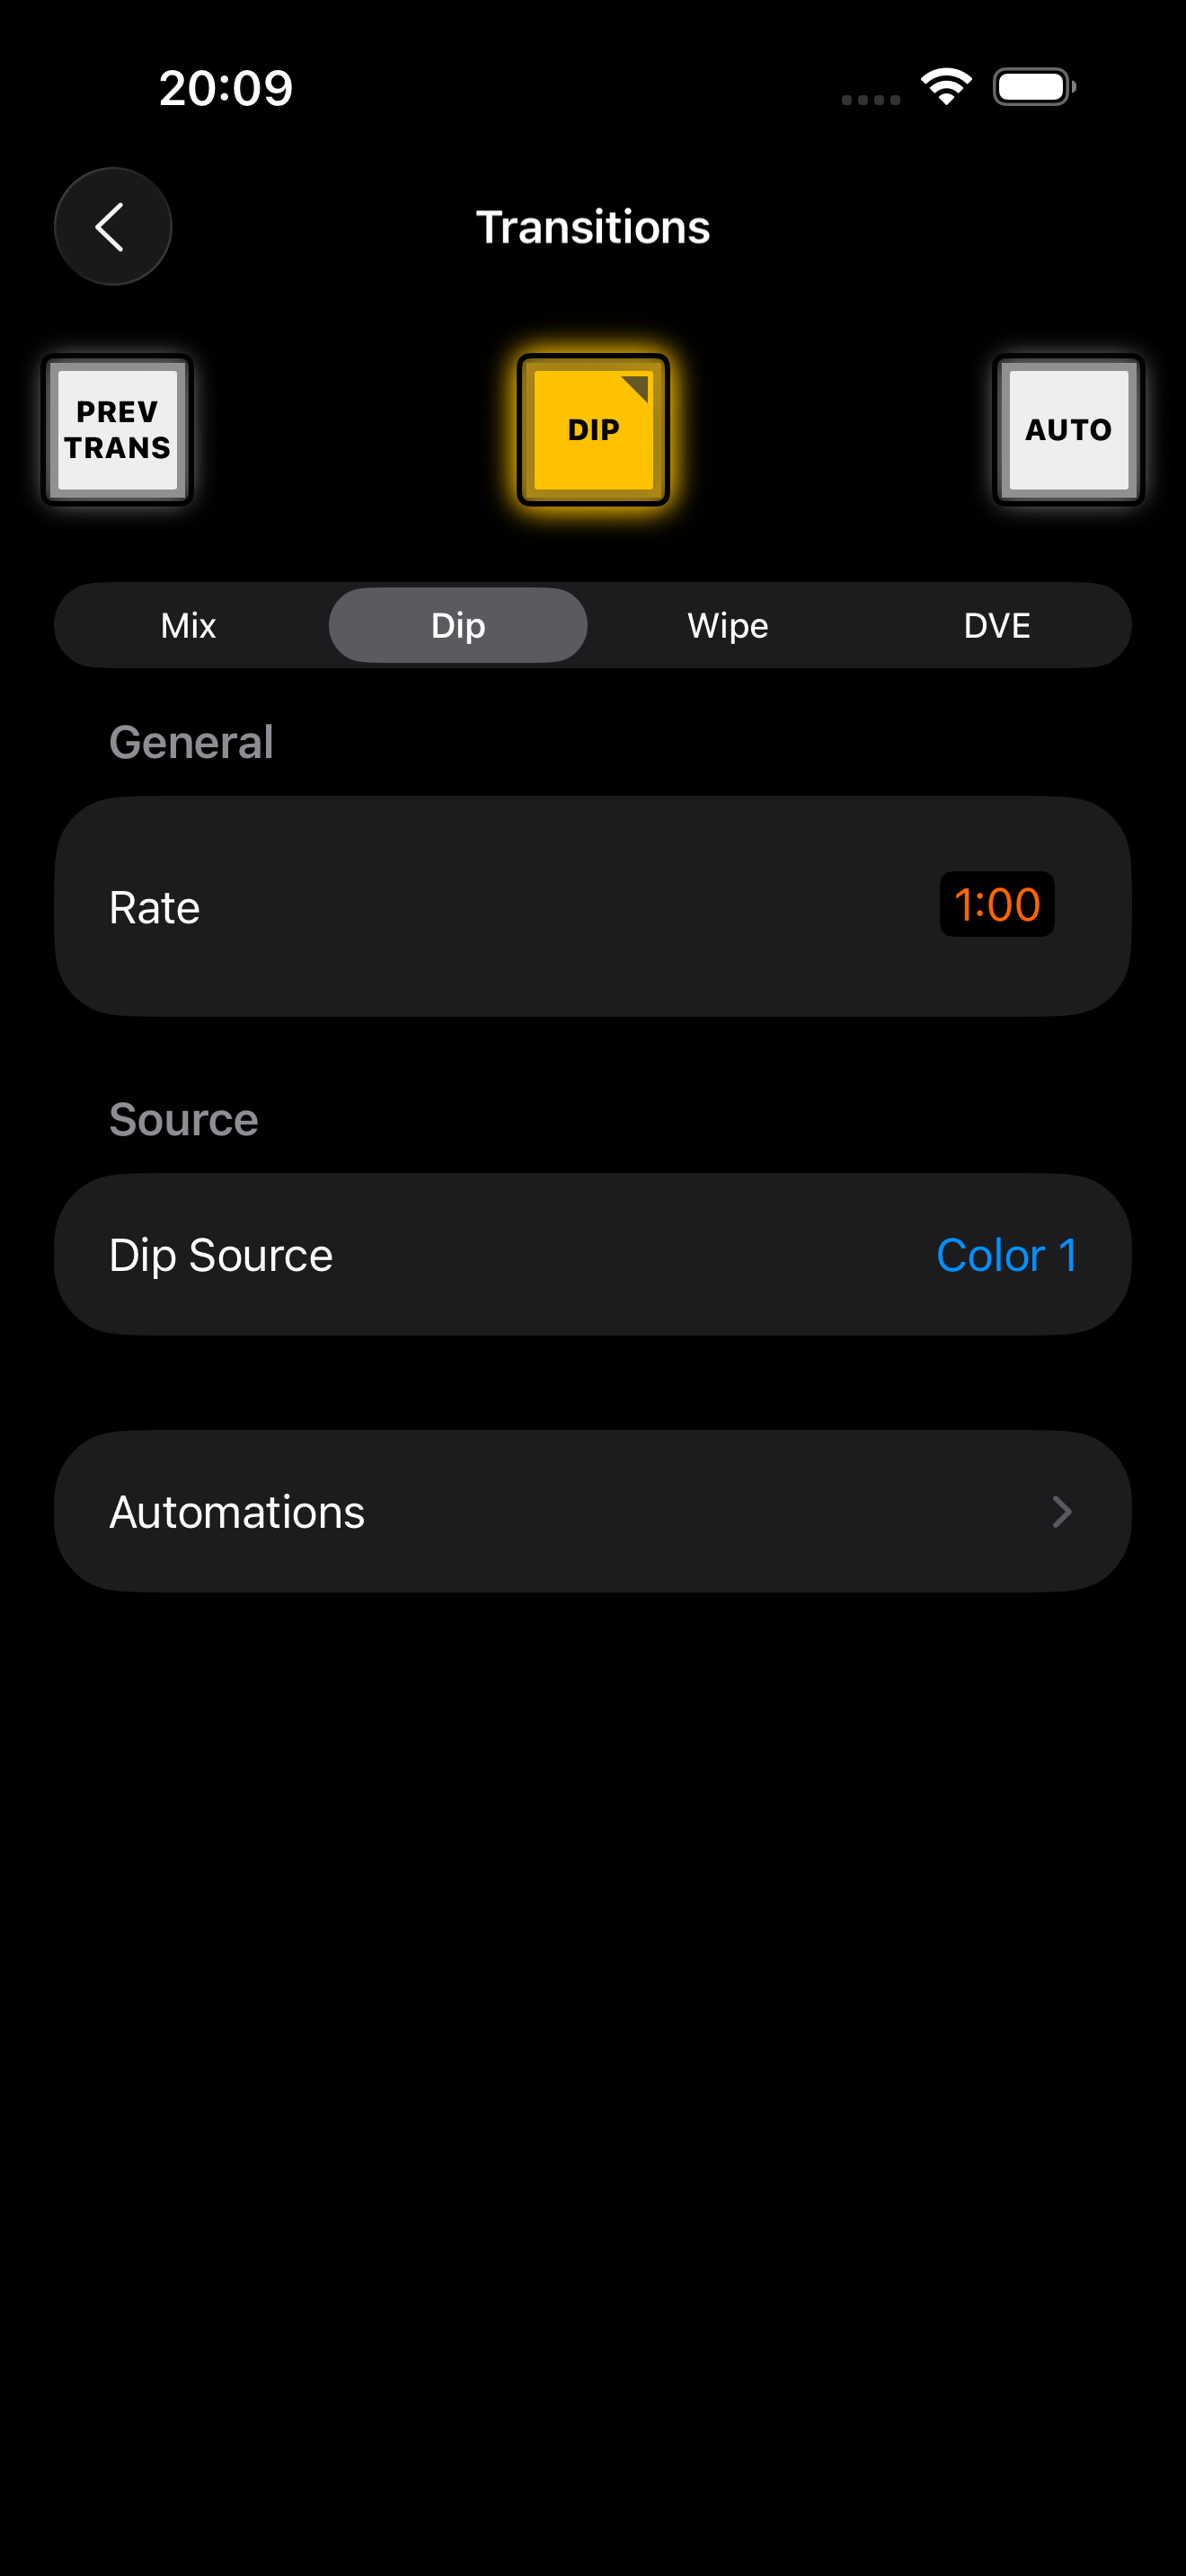
The Transitions section lets you change the current transition or adjust settings for any of the transitions supported by your ATEM switcher:

* Mix
* Dip
* Wipe
* Sting
* DVE

## Changing the Selected Transition

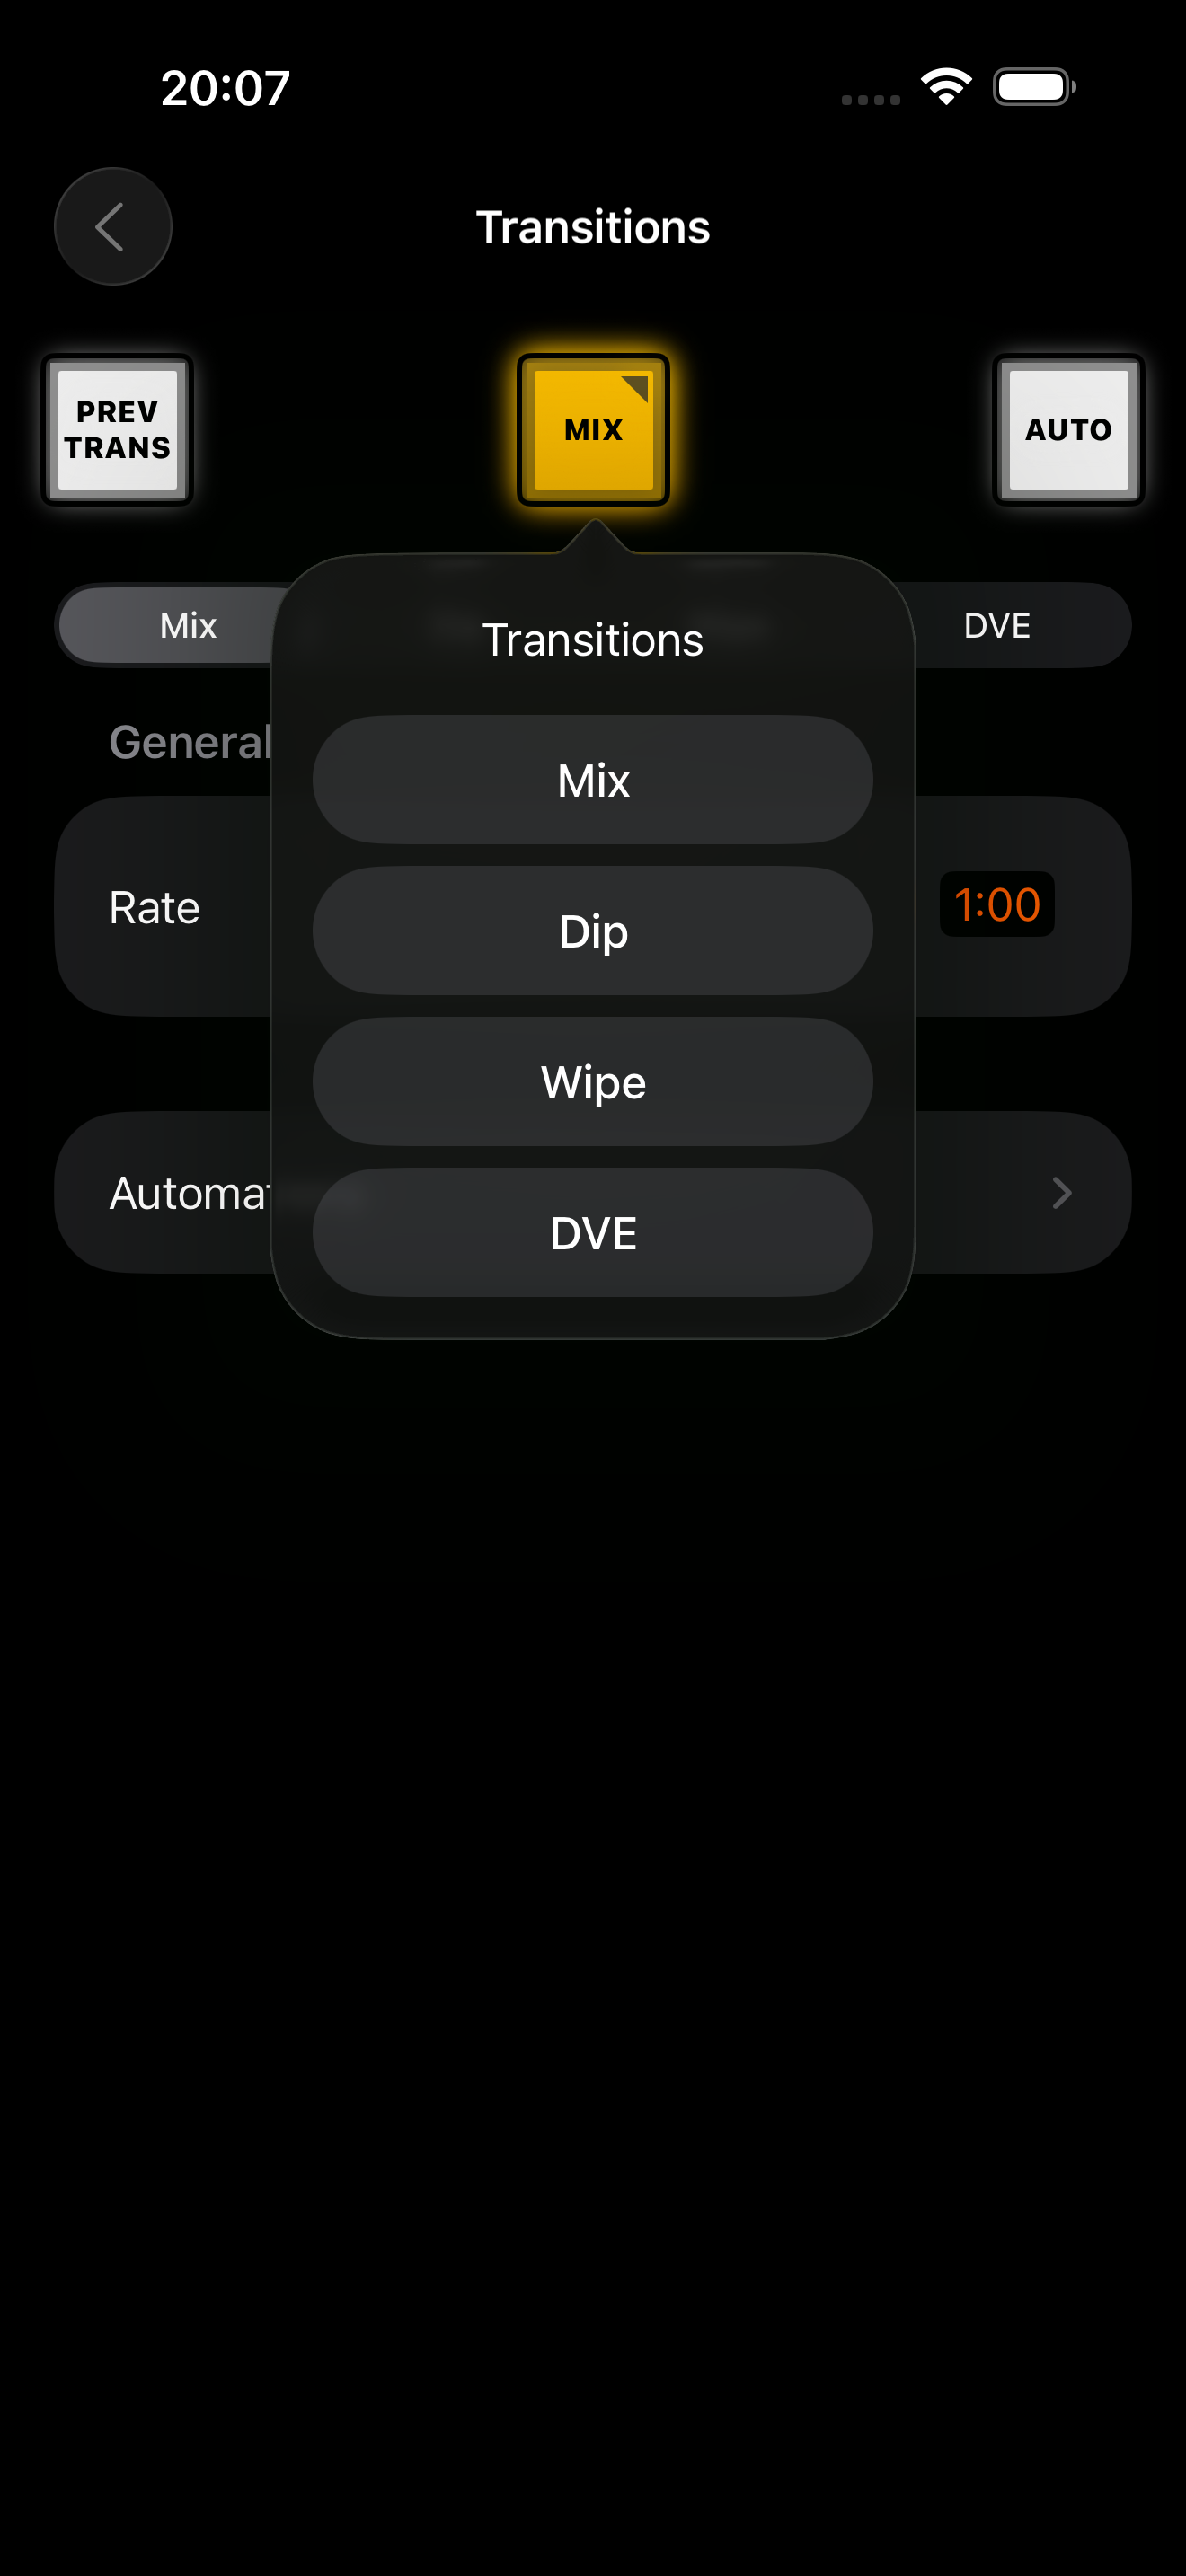
Tap on the yellow button that displays the currently selected transition. A menu will appear allow you to set the current transition.

<div><figure><img src="/files/Igis0RfW04ZEIm3GGraD" alt=""><figcaption></figcaption></figure> <figure><img src="/files/SuJ6vxvX3JthKSPxMV9a" alt=""><figcaption></figcaption></figure> <figure><img src="/files/SnWKPKzoHpUZlliAvGVC" alt=""><figcaption></figcaption></figure></div>

## Previewing the Transition

Tap the **PREV TRANS** button in the upper-left to activate Preview Transition mode. When you tap the Auto button, it will preview the transition in the Preview source.

## Performing the Transition

Tap the **Auto** button in the upper-right to perform an Auto transition with the currently selected transition.

## Adjusting Transition Settings

Use the tabs to adjust settings for one of the transitions.

### Mix

You can only adjust the transition rate with the Mix transition.

### Dip

You can adjust the rate and the video source used with the Dip transition.

### Wipe

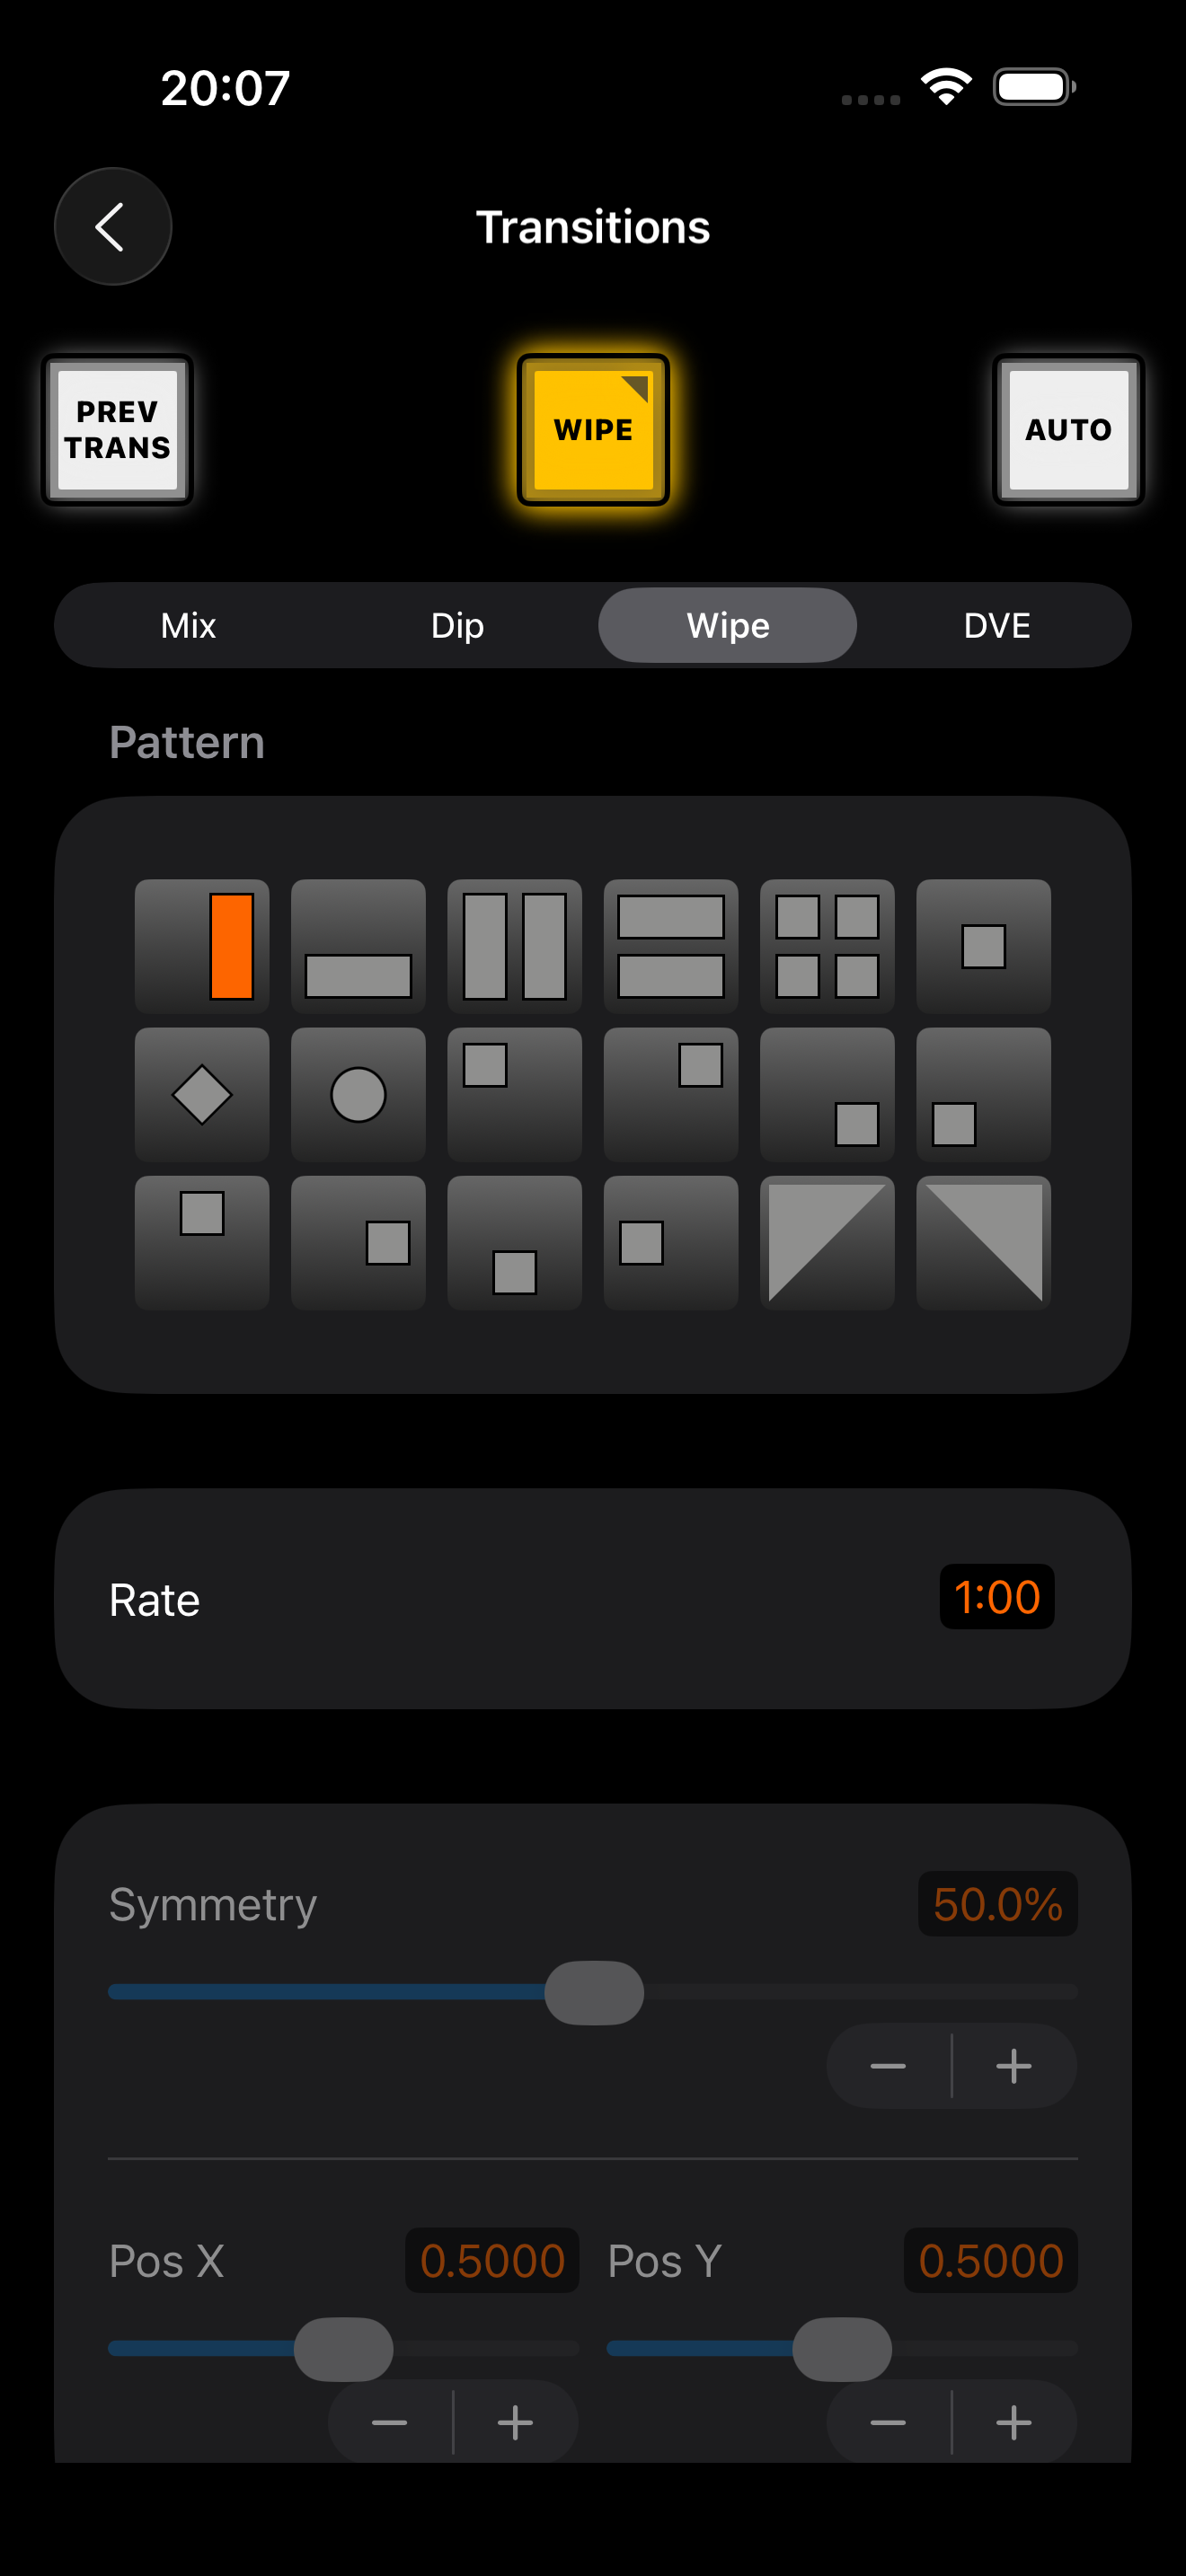
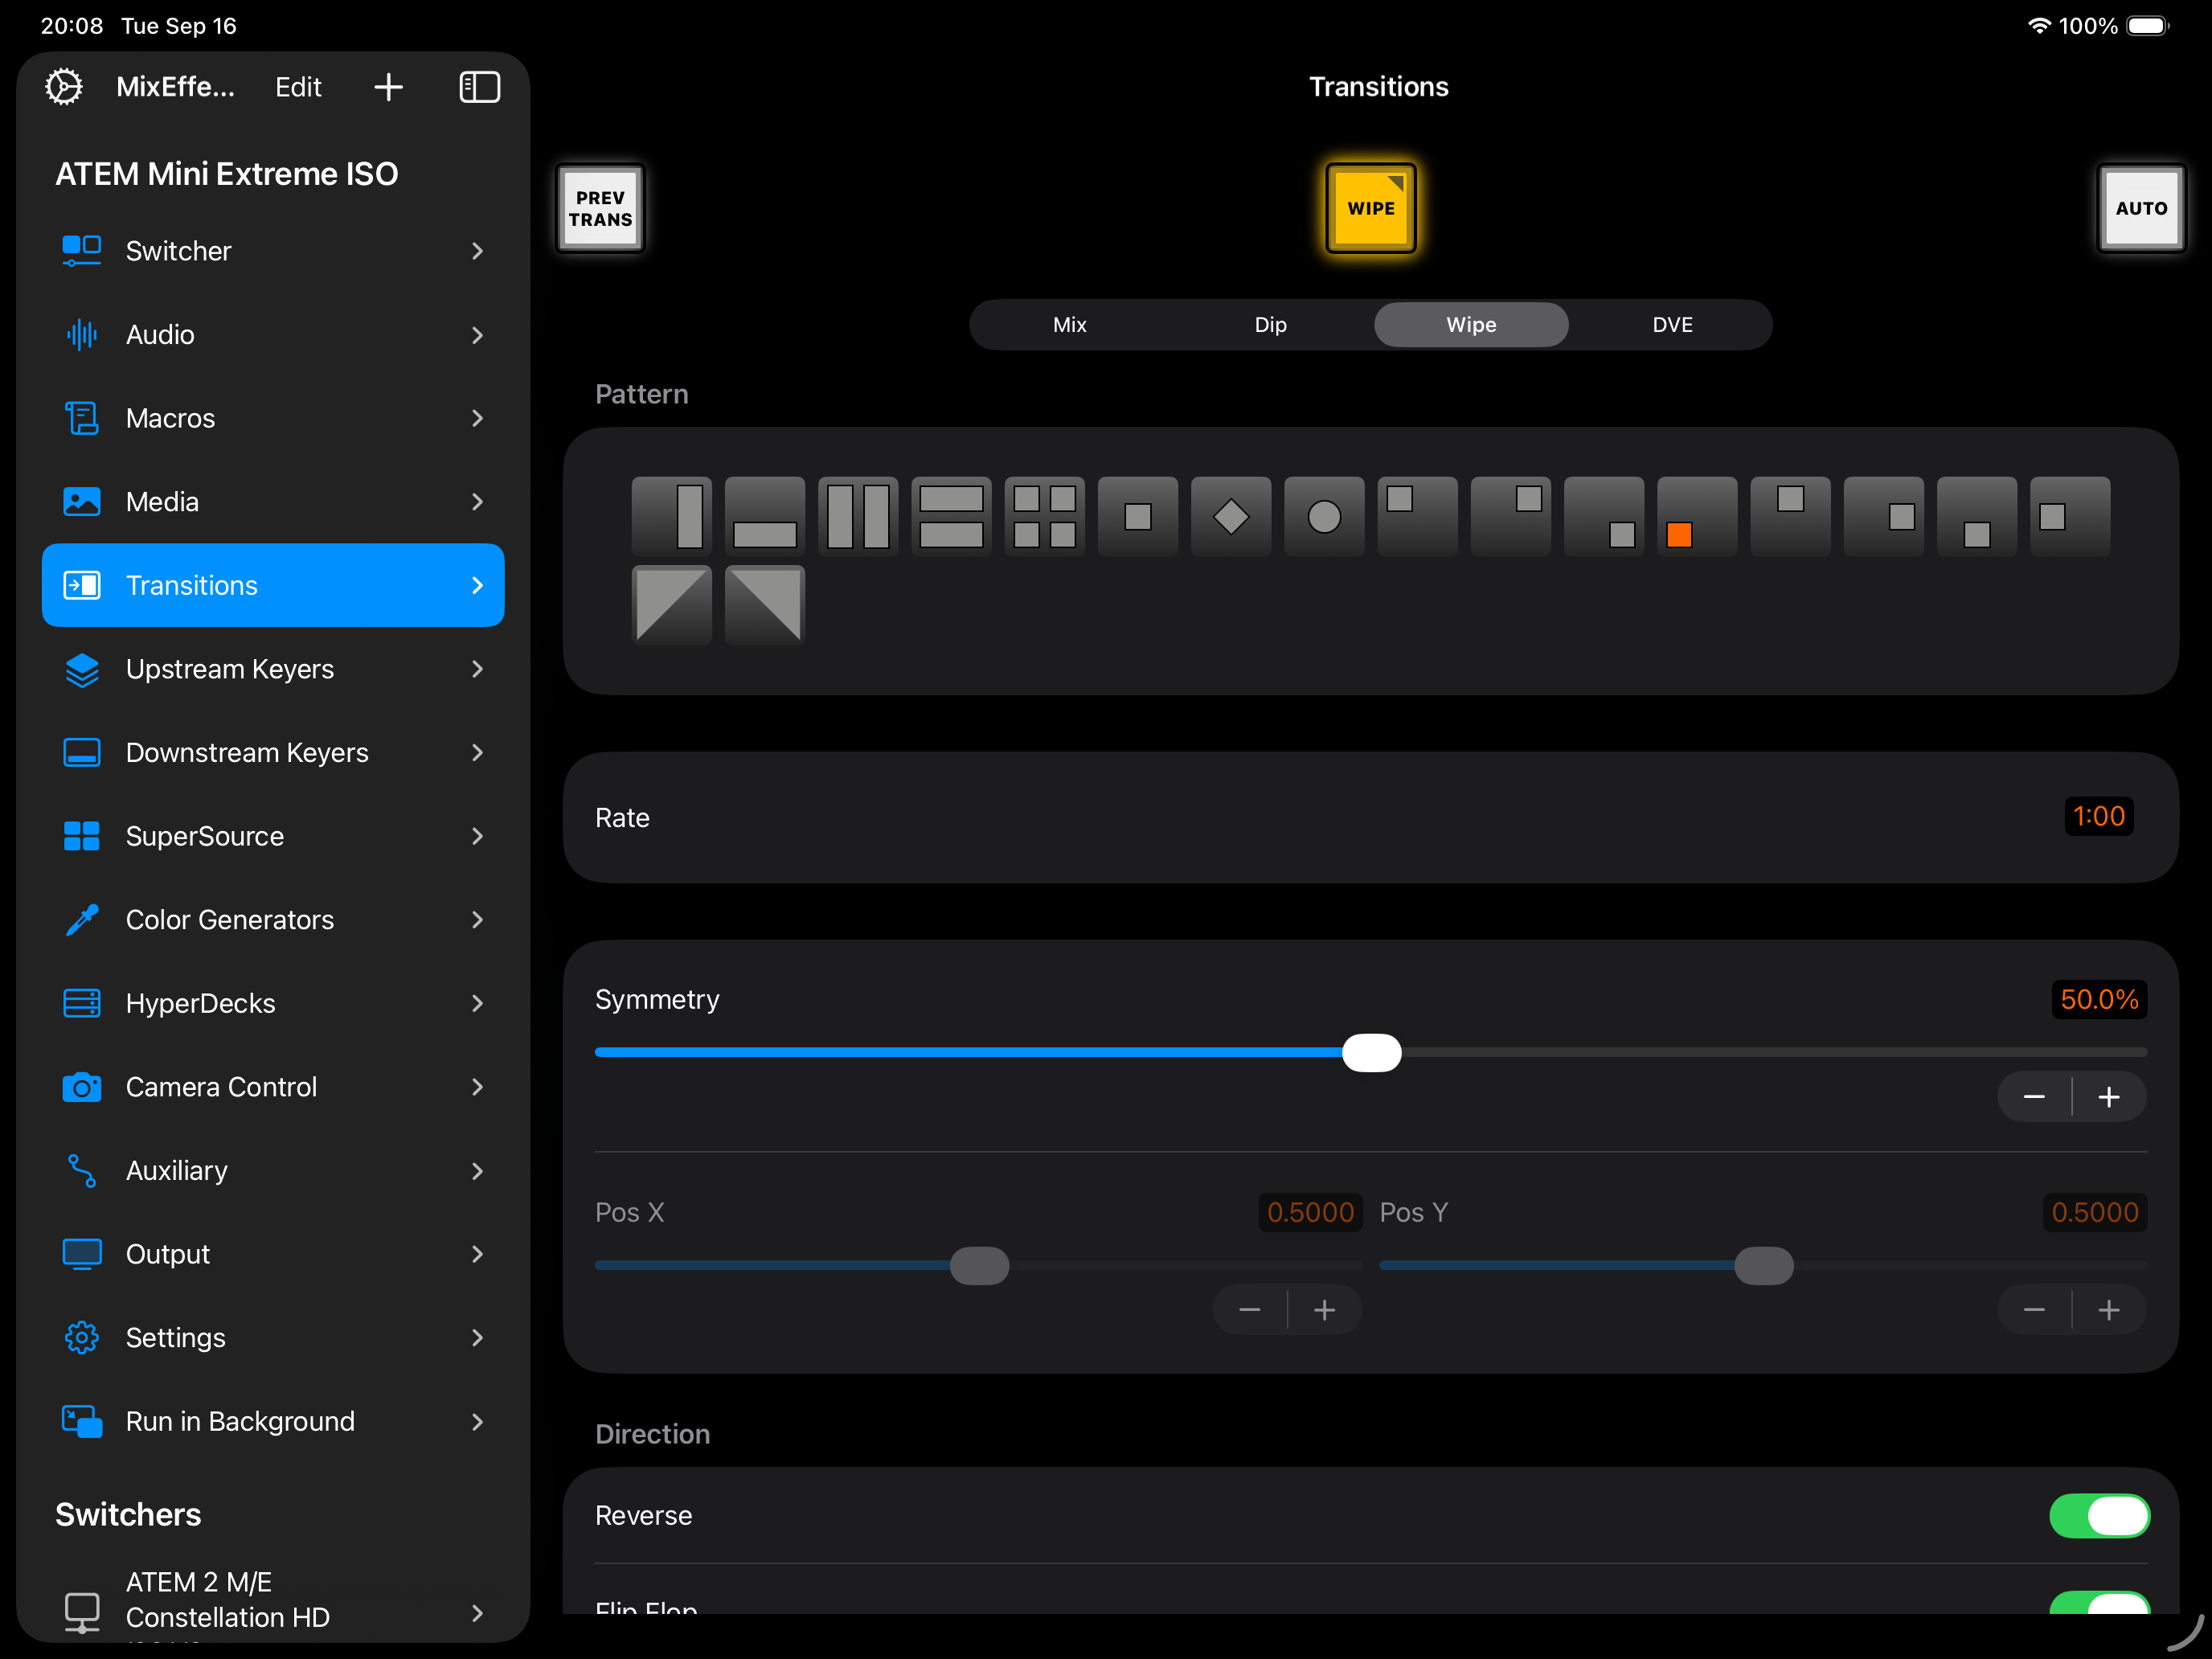
With the Wipe transition, you can adjust the following settings:

* Pattern
* Rate
* Symmetry
* Pos X
* Pos Y
* Reverse
* Flip Flop
* Softness
* Width
* Fill Source: This option is available if your width is greater than 0.

<figure><img src="/files/iyPIhcIrmLV8oHWaTLPL" alt=""><figcaption></figcaption></figure>

### Sting

Only those switchers that have Media Clip support will have the Sting transition. You can configure the following settings:

* **Source**: The media player to use for clip playback.
* **Clip Duration**: The length of the animation.
* **Trigger Point**: The time when the switcher will begin the background mix transition.
* **Mix Rate**: The duration of the mix that will occur between preview and program under the animation.
* **Pre-Roll**: An amount of time to trim the beginning of the clip.
* **Pre Multiplied Key**
* **Clip**
* **Gain**
* **Invert Key**

### DVE

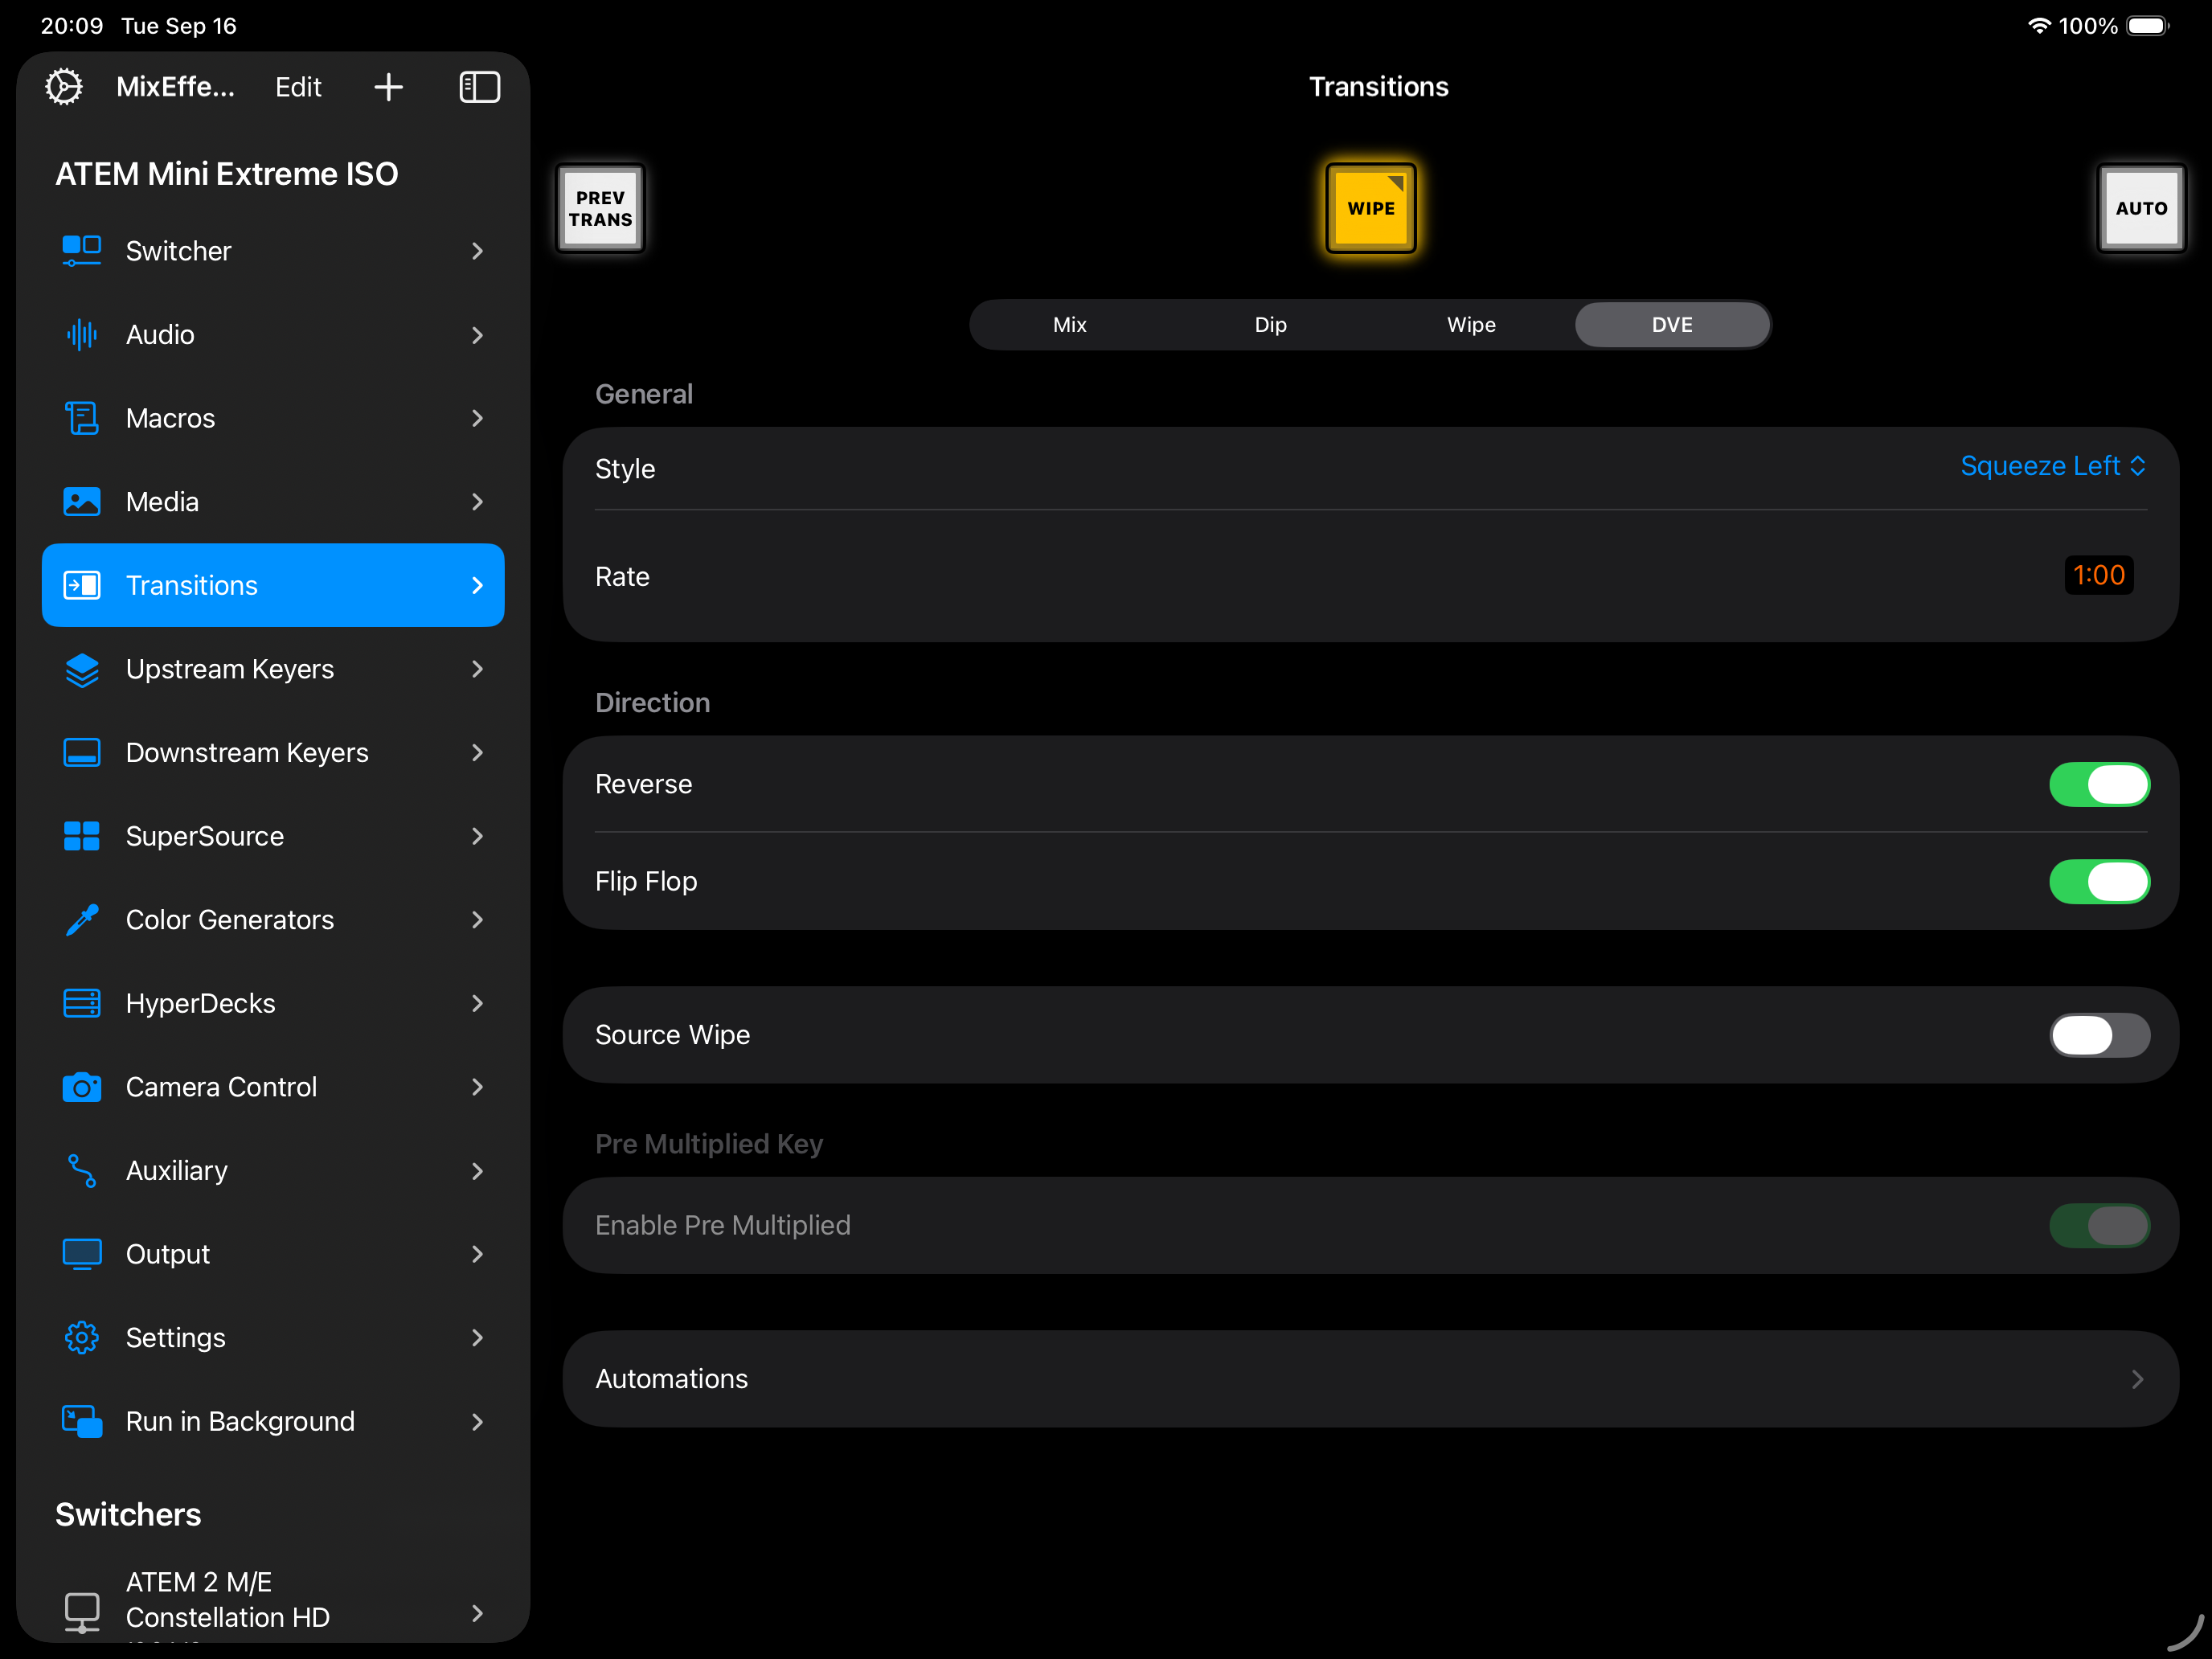
The following settings can be changed with the DVE transition:

* **Style**: Choose the type of DVE transition to perform. Some switchers display different styles than others.
* **Rate**: The transition rate from 1-250 frames.
* **Reverse**: Reverse the transition.
* **Flip Flop**: Flip the orientation of the transition.
* **Source Wipe**: If Graphic Logo Wipe is chosen, you can specify the fill and (optional) key source to use with the transition.
* **Pre Multiplied Key**
* **Clip**
* **Gain**
* **Invert Key**

<figure><img src="/files/PuBNtzfH07L5AW0fvNR2" alt=""><figcaption></figcaption></figure>

### Set All Settings and Recording Macros

When you are recording a macro, the Set All Settings button will appear at the bottom of the page. Tap to record all settings for the selected transition into the macro.

## Automations

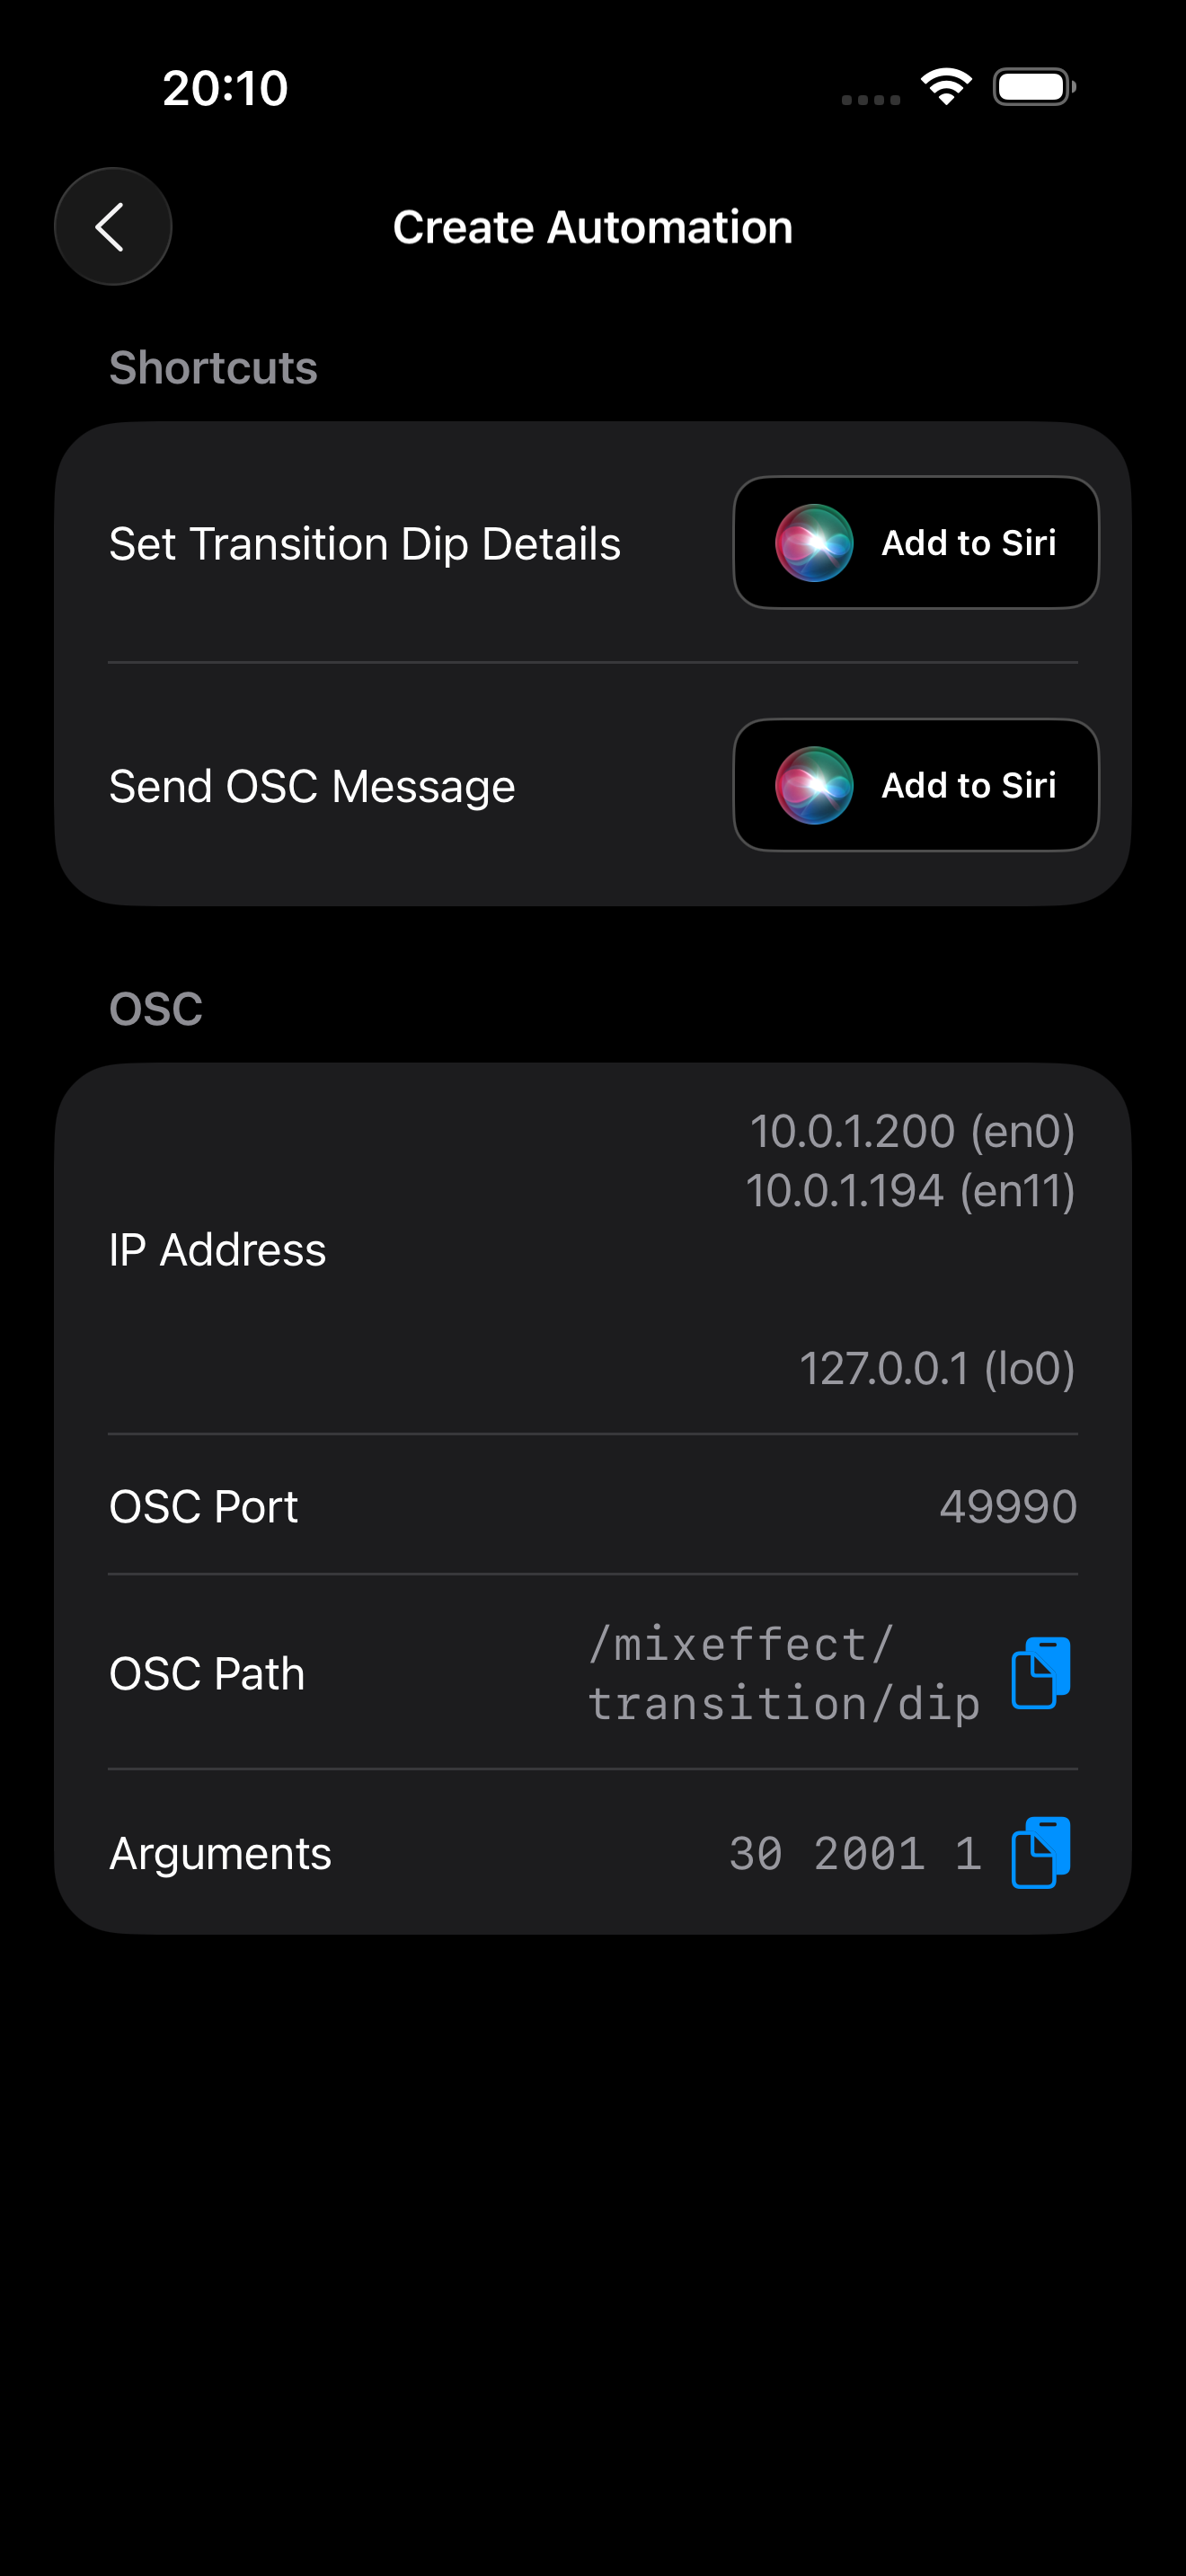
In MixEffect 1.4.0, an Automations link appears at the bottom of the Transitions section or sheet. You can use this to quickly create a Transition preset for the current keyer selected.

> **NOTE**: This option will only appear if you have **Enable Automations** active in MixEffect Settings and if you have **Enable Shortcuts** or **Enable OSC** turned on.

<div><figure><img src="/files/m1Tp8miVzVvnHnMeYITy" alt=""><figcaption></figcaption></figure> <figure><img src="/files/J237KqQ4OkycXhfMIV6C" alt=""><figcaption></figcaption></figure> <figure><img src="/files/ex0adbOA4j5C5HaIm5UN" alt=""><figcaption></figcaption></figure></div>

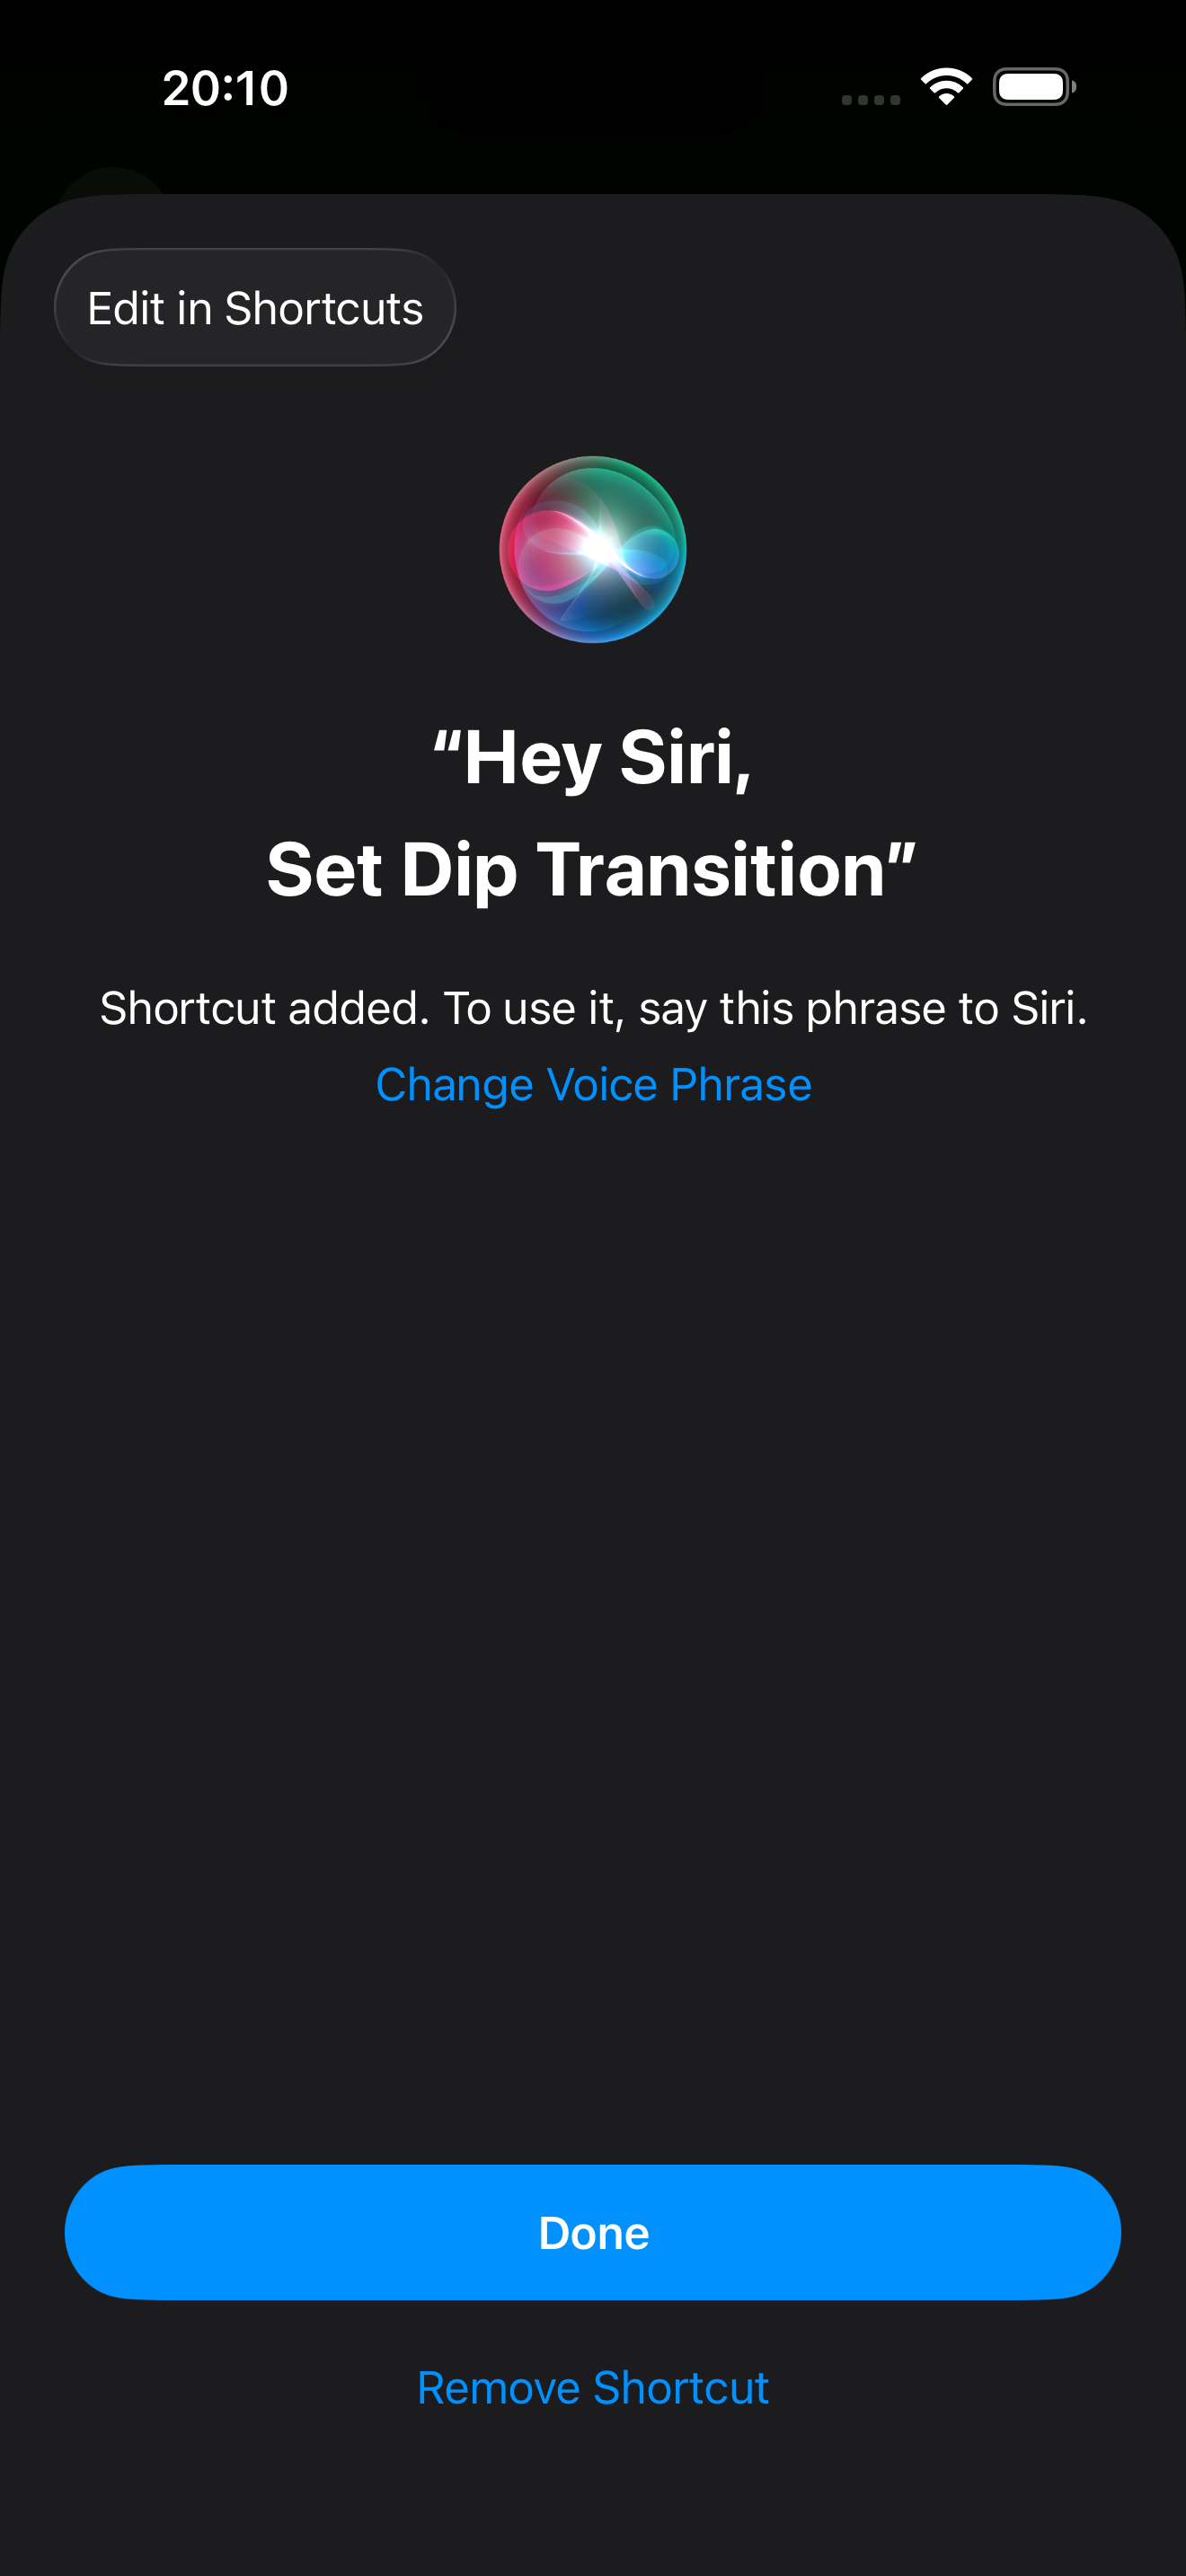
* **Set Transition Mix Details / Set Transition Dip Details / Set Transition Wipe Detals / Set Transition Sting Details / Set Transition DVE Details**: Tapping the Add to Siri button will create a shortcut that uses appropriate action for the selected transition.
* **Send OSC Message**: Tapping the Add to Siri button will create a shortcut that uses the Send OSC Message to send the appropriate transition message to MixEffect.
* **OSC**: If you prefer to enter the OSC commands directly into Companion, this section shows you exactly what you need to enter. For commands with multiple arguments, be sure to choose the `Send message with multiple arguments` action when using the Generic OSC module.

> **NOTE**: You cannot animate transition settings, so the Use Custom Animation, Duration, and Animation Style options are not available when creating a Transition Automation.


# Upstream Keyers

Control the look of your Upstream Keyers (USK) completely using MixEffect. No more digging around palettes in ATEM Software Control when they are right there at your fingertips.

<div><figure><img src="/files/rEsUwAlh52CuQgNeAO5p" alt=""><figcaption></figcaption></figure> <figure><img src="/files/CXfcMKhpQa60HSyevkdR" alt=""><figcaption></figcaption></figure> <figure><img src="/files/9MM6H8rMQok9zagCOzV1" alt=""><figcaption></figcaption></figure> <figure><img src="/files/3Bep4bWxrHKWGGcOXHMx" alt=""><figcaption></figcaption></figure></div>

MixEffect lets you change the current keyer style and toggle its On Air status.

With MixEffect Pro, you have full access to the settings behind each keyer and can also customize the position of the Next Transition panel within each layout.

* Panel
* Sheet and View
* Luma
* Chroma
* Pattern
* DVE

## Panel

The Next Transition panel holds information about your upstream keyers and can be added to your switcher interface.

The panel lists all of the available upstream keys from your ATEM switcher for the current Mix Effect bus. For instance, an ATEM mini will display one available USK and three disabled ones whereas an ATEM Mini Extreme will show four active USKs.

<figure><img src="/files/u745QWExkfg4vqYU0ctP" alt=""><figcaption></figcaption></figure>

## Section and Sheet

You access the USK settings in one of two ways:

1. Tap **Upstream Keyers** from the **MixEffect Home**.
2. Long-press the **Key 1**, **Key 2**, **Key 3**, or **Key 4** button in the **Next Transition** panel and choose **USK Settings** in the context menu that appears.

### Luma

Refer to the section on Keying using ATEM Switchers in your ATEM's manual on how to configure each setting in the Luma tab of the Upstream Keyers settings page.

### Chroma

Refer to the section on Keying using ATEM Switchers in your ATEM's manual on how to configure each setting in the Chroma tab of the Upstream Keyers settings page.

### Pattern

Refer to the section on Keying using ATEM Switchers in your ATEM's manual on how to configure each setting in the Pattern tab of the Upstream Keyers settings page.

### DVE

Refer to the section on Keying using ATEM Switchers in your ATEM's manual on how to configure each setting in the DVE tab of the Upstream Keyers settings page.

## Visual DVE Editor

When you are on the DVE tab, or have enabled the flying key in Luma, Chroma, or Pattern, you gain access to an advanced positioning system for the DVE frame. Use drag and drop or multitouch to position the frame on the virtual screen. You can continue to fine-tune your size, position, and rotation settings using the sliders or text-entry fields in the sections below the visual editor.

<div><figure><img src="/files/Lh2hJ416EDhndukldYpu" alt=""><figcaption></figcaption></figure> <figure><img src="/files/GsRJfP1rMU54gAYKHNcl" alt=""><figcaption></figcaption></figure></div>

### Presets

Five convenient buttons allow you to position the current DVE or Flying Key box in the four corners or center of the viewport.

### Padding

Add padding around the DVE box for better positioning when aligned in the corners of the viewport.

### Preview Scale

Adjust the size of the Visual DVE Editor in MixEffect. This helps with positioning of the DVE or Flying Key or when using MixEffect on difference iOS or iPadOS devices.

### **Lock**

Tap the Lock icon to lock or unlock the Visual DVE Editor. If the lock icon is covered by the DVE or Flying Key, you can long press in the visual editor box for 1.75 seconds to toggle the lock status.

### Flying Key

Controls for setting and running the flying key. This allows you to move the DVE box around the screen. For more complex movements, refer to the section on [Automations](#automations) below.

* **Set**: Set the A and B positions of the Flying Key.
* **Rate**: Adjust the rate at which the flying key moves between the A, B, Full, and Infinity positions
* **Run**: Run the Flying Key between the A and B positions, Full, or various Infinity settings.

<div><figure><img src="/files/aLXqmY1U7dZpeDtRBXWm" alt=""><figcaption></figcaption></figure> <figure><img src="/files/sWXhyIdvQli5e89AujNr" alt=""><figcaption></figcaption></figure> <figure><img src="/files/HAp7ZOUguiWikJHIVluK" alt=""><figcaption></figcaption></figure></div>

## Reposition in Box

Take the guesswork out of figuring out the right values for the x, y, and top, bottom, left, and right crop values with the new Reposition in Box feature of MixEffect 1.8.0. You can now reposition an input source within the Upstream Keyer DVE or Flying Key.

> **NOTE**: *Adjusting the size of the input source is not allowed when the Reposition in Box feature is enabled.*

After you have tapped the Unlock icon to enable repositioning of the DVE/Flying Key, another icon will appear to the left of the lock icon. This is the Reposition in Box button. Tap it to enable it and turn the icon red. Tap again to disable Reposition in Box.&#x20;

<figure><img src="/files/mjvlhCDX5uphRd7ni0nt" alt=""><figcaption><p>Using the Reposition in Box feature to adjust the position of the DVE.</p></figcaption></figure>

Tap and drag the DVE/Flying Key to reposition the input sources position within the crop boundaries.

#### Caveats When Using Reposition in Box with DVE and Flying Key

When using the Reposition in Box feature with the DVE and the Flying Key, you may encounter a situation when the size of the DVE/Flying Key gets slightly larger or the position of the box changes.

This is because MixEffect has to do the calculations and send two commands to the ATEM to adjust the crop and position of the Flying Key. They are separate actions, and sometimes the ATEM doesn’t update its status quick enough to MixEffect. It is recommend that you have a macro, shortcut, or Companion button that sets the position, crop, and crop values of your DVE and Flying Key presets so you can quickly recall their original values during adjustment.<br>

## Splitting the Visual Editor and USK Settings

Tap on the Split Controls command in the toolbar to create two columns in the Upstream Keyers section. This provides an easy way to edit your Flying Key or DVE settings when editing the upstream keyers.

* **Column A**: Luma, Chroma, Pattern, and DVE settings.
* **Column B**: Flying Key and DVE editor

<figure><img src="/files/wMl4qCRWdD8K8jQvZoJ4" alt=""><figcaption></figcaption></figure>

> **Note**: This feature only works on iPadOS or on iPhones in Landscape orientation running MixEffect 1.7.0.

## Set All Settings and Recording Macros

When you are recording a macro, the Set All Settings button will appear at the bottom of the page. Tap to record all settings for the selected USK into the macro.

## Automations

In MixEffect 1.4.0, an Automations link appears at the bottom of the USK section or sheet. You can use this to quickly create a USK preset for the current keyer selected.

> **NOTE**: This option will only appear if you have **Enable Automations** active in MixEffect Settings and if you have **Enable Shortcuts** or **Enable OSC** turned on.

<div><figure><img src="/files/EcxpCb4etplJAoATKIF8" alt=""><figcaption></figcaption></figure> <figure><img src="/files/PGoUSy5qXtPqEs3yJO90" alt=""><figcaption></figcaption></figure> <figure><img src="/files/YhFIMGo7ptqLBz6R22Z1" alt=""><figcaption></figcaption></figure></div>

* **Set Luma Details / Set Chroma Advanced Details / Set Pattern Detals / Set DVE Details**: Tapping the Add to Siri button will create a shortcut that uses appropriate action for the currently selected keyer.
* **Send OSC Message**: Tapping the Add to Siri button will create a shortcut that uses the Send OSC Message to send the appropriate USK message to MixEffect.
* **OSC**: If you prefer to enter the OSC commands directly into Companion, this section shows you exactly what you need to enter. For commands with multiple arguments, be sure to choose the `Send message with multiple arguments` action when using the Generic OSC module.
* **Use Custom Animation**: Toggle this on if you want to animate between the current settings to the saved settings in the shortcut or OSC call.&#x20;
* **Duration**: Specify the amount of time to perform the animation in milliseconds from 0 to 10000 (i.e. 10 seconds).
* **Style**: Choose an animation style that will be used to perform the transition. These styles are the same as in the SuperSource Transition Style.


# Downstream Keyers

This section explains how to access the DSK functionality of your switcher within MixEffect. For general instructions on what the downstream keyer does, refer to the Blackmagic manual for your switcher.

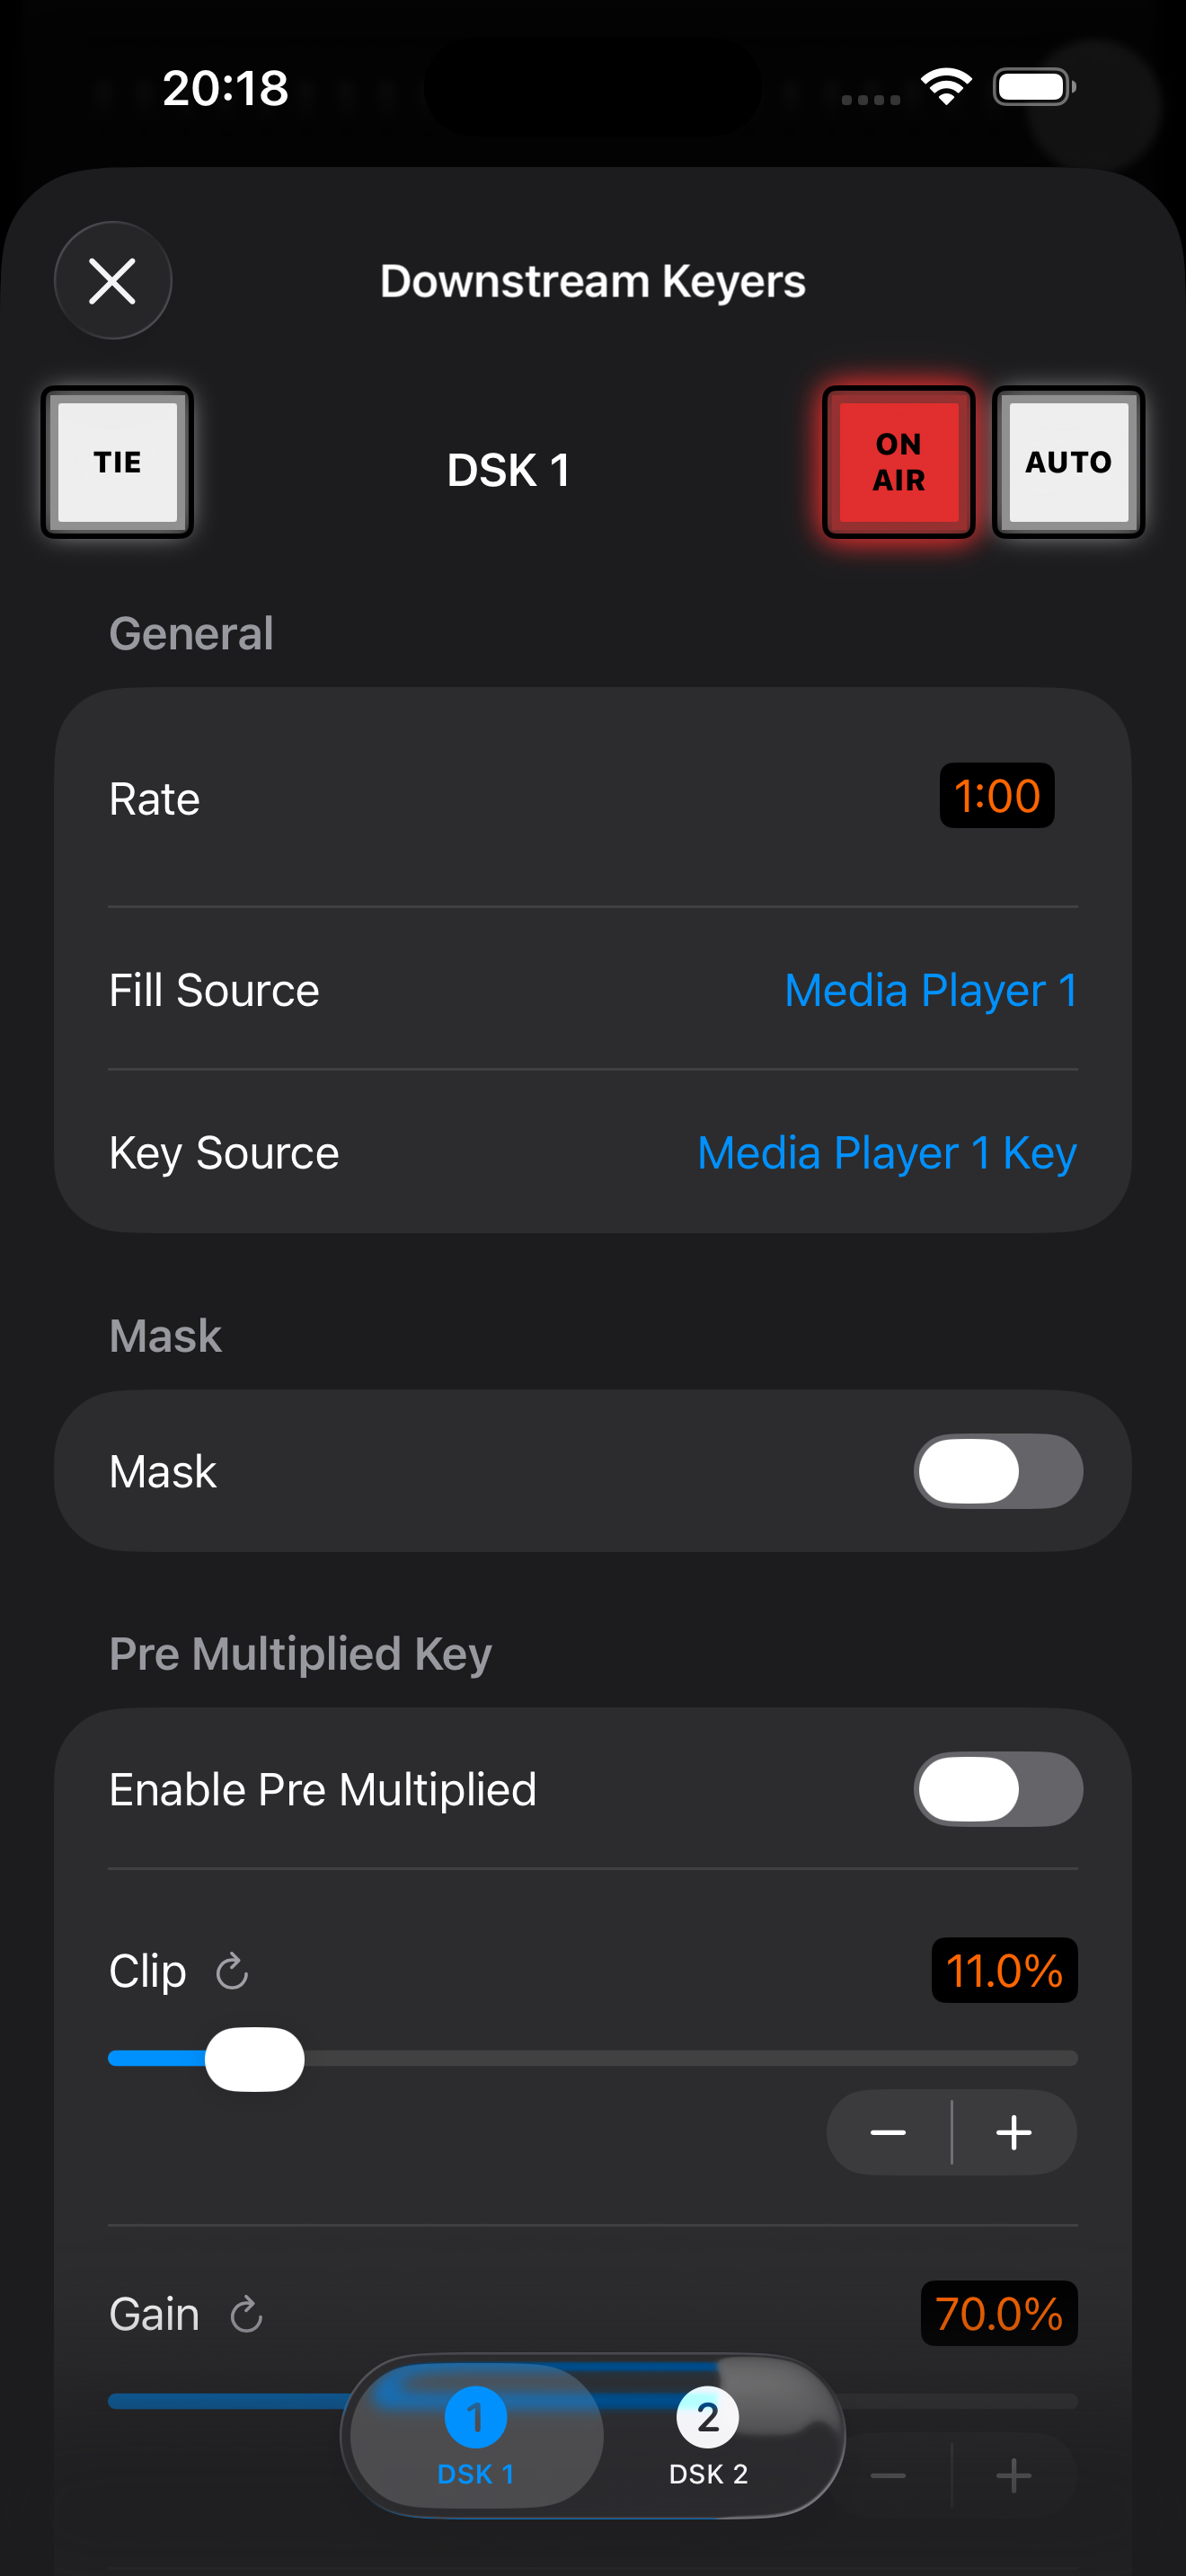
<div><figure><img src="/files/DYHc1P9ye4aZ5wrRRo4Y" alt=""><figcaption></figcaption></figure> <figure><img src="/files/mnN1MgtKRUTOpNBT66gb" alt=""><figcaption></figcaption></figure> <figure><img src="/files/NuGGeIGnezyskadyzsmV" alt=""><figcaption></figcaption></figure></div>

ATEM Mini users will appreciate the ability to turn on and off the DSK straight from the Switcher interface, as the physical hardware lacks a dedicated DSK button.

The buttons perform the following actions:

* **Tie**: Links the downstream key with the main transition control.
* **Rate**: The amount of time an Auto transition will take to complete the transition. Tap to edit the rate.
* **On Air**: Toggles the DSK on or off.
* **Edit**: Displays the DSK editing sheet.

## DSK Tab

If you have an ATEM switcher that has multiple DSKs, a tab interface will appear at the bottom of the page allowing you to modify each DSK independently.

<figure><img src="/files/4C0dSoXQJxDTkXWuaR1M" alt=""><figcaption></figcaption></figure>

## Set All Settings and Recording Macros

When you are recording a macro, the Set All Settings button will appear at the bottom of the page. Tap to record all settings for the selected DSK into the macro.

## Automations

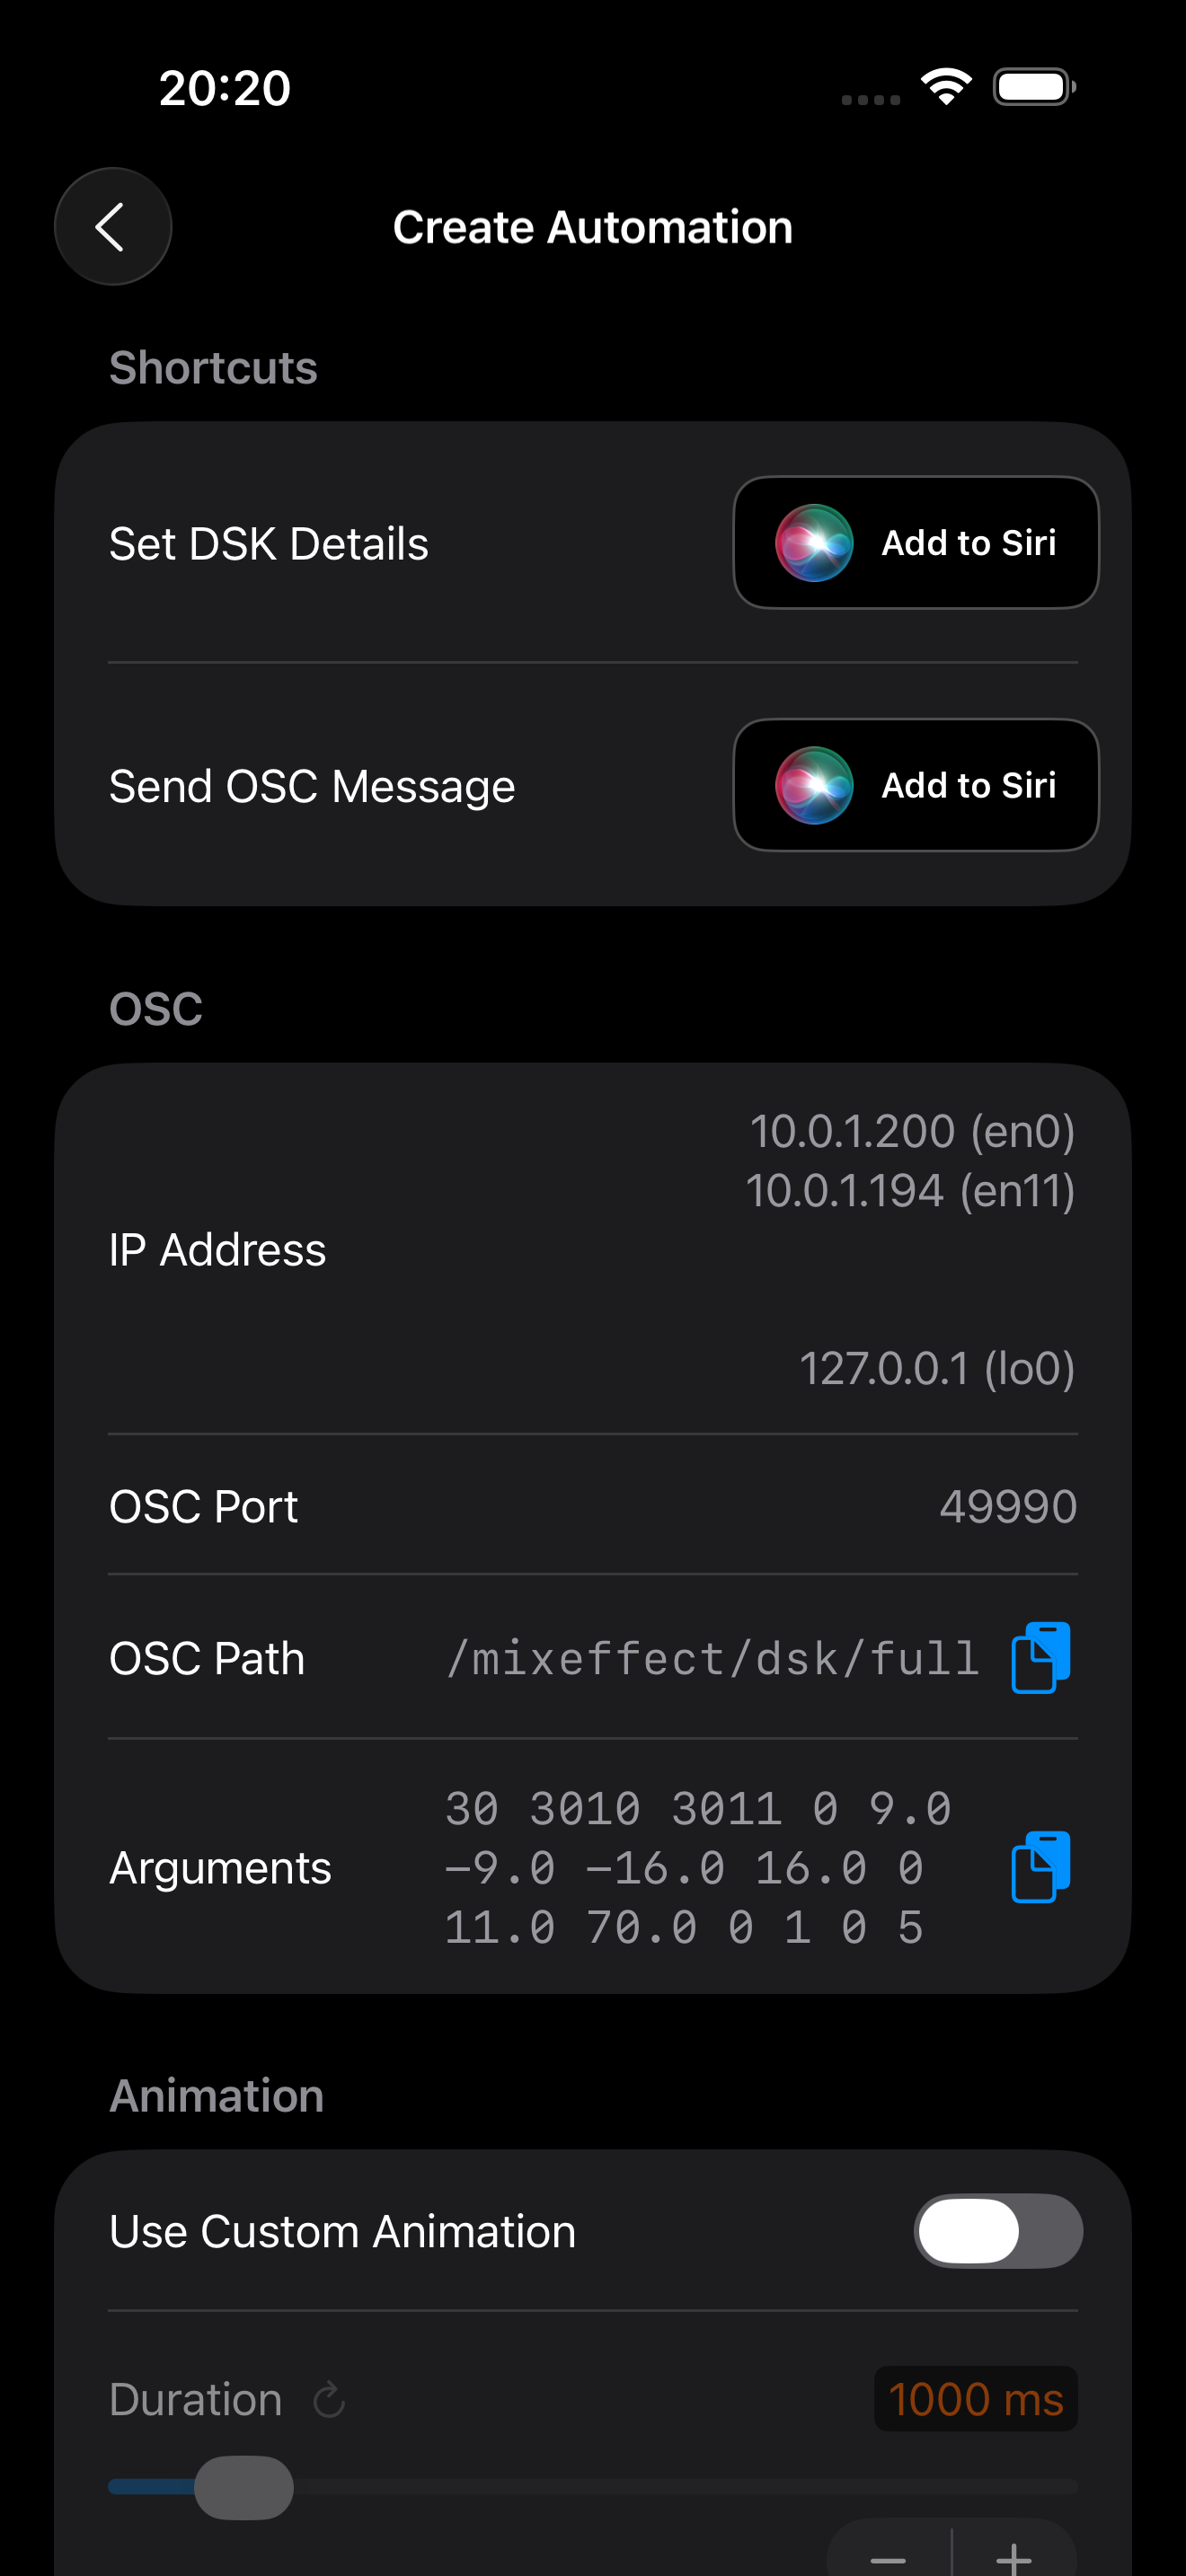
In MixEffect 1.4.0, an Automations link appears at the bottom of the DSK section or sheet. You can use this to quickly create a DSK preset.

> **NOTE**: This option will only appear if you have **Enable Automations** active in MixEffect Settings and if you have **Enable Shortcuts** or **Enable OSC** turned on.

<div><figure><img src="/files/CyGaFfaGjQTjcTZs8O9i" alt=""><figcaption></figcaption></figure> <figure><img src="/files/QXumEieqMM089QdVg9Nw" alt=""><figcaption></figcaption></figure> <figure><img src="/files/S99pEhXO2ZYNhkzumX52" alt=""><figcaption></figcaption></figure></div>

* **Set DSK**: Tapping the Add to Siri button will create a shortcut that uses the Set DSK action.
* **Send OSC Message**: Tapping the Add to Siri button will create a shortcut that uses the Send OSC Message to send a Set DSK Full message to MixEffect.
* **OSC**: If you prefer to enter the OSC commands directly into Companion, this section shows you exactly what you need to enter. For commands with multiple arguments, be sure to choose the `Send message with multiple arguments` action when using the Generic OSC module.
* **Use Custom Animation**: Toggle this on if you want to animate between the current settings to the saved settings in the shortcut or OSC call.&#x20;
* **Duration**: Specify the amount of time to perform the animation in milliseconds from 0 to 10000 (i.e. 10 seconds).
* **Style**: Choose an animation style that will be used to perform the transition. These styles are the same as in the SuperSource Transition Style.


# SuperSource

MixEffect offers the most powerful and configurable way to control SuperSource on supported ATEM switchers.

SuperSource is a feature that allows you to display four to eight\* input sources on screen at the same time. With MixEffect, you can:

* Manipulate your SuperSource boxes using touch.
* Animate transitions from one preset layout to another.
* Create groups of presets that you can recall with a tap.
* Control SuperSource using Shortcuts and OSC.
* Run macros when recalling or leaving a preset.
* Export, import, and share your presets with others.

### SuperSource Requirements

SuperSource is only available on the following ATEM switchers.

* ATEM Mini Extreme
* ATEM Mini Extreme ISO
* ATEM SDI Extreme ISO
* ATEM SDI Extreme ISO G2
* ATEM 2 M/E Constellation HD
* ATEM 4 M/E Constellation HD
* ATEM 2 M/E Constellation 4K
* ATEM 4 M/E Constellation 4K
* ATEM 4 M/E Constellation 4K Plus
* ATEM 2 M/E Production Studio 4K
* ATEM 4 M/E Broadcast Studio 4K
* ATEM Television Studio HD8
* ATEM Television Studio HD8 ISO
* ATEM Television Studio 4K8
* ATEM Constellation 8K

If your ATEM switcher is not one of the switchers listed above, the SuperSource feature will not be available when you connect to your switcher.&#x20;

That said, you will be able to create SuperSource layouts within the [ATEM Simulator](/explore/supersource/supersource-and-simulator). Then, if and when you get one of the above switchers, you'll be able to enjoy SuperSource.

<figure><img src="/files/C1tO1thQRT1UKOkwHy1R" alt=""><figcaption></figcaption></figure>

*\** ATEM 4 M/E Constellation HD and *ATEM Constellation 8K only.*


# Interface

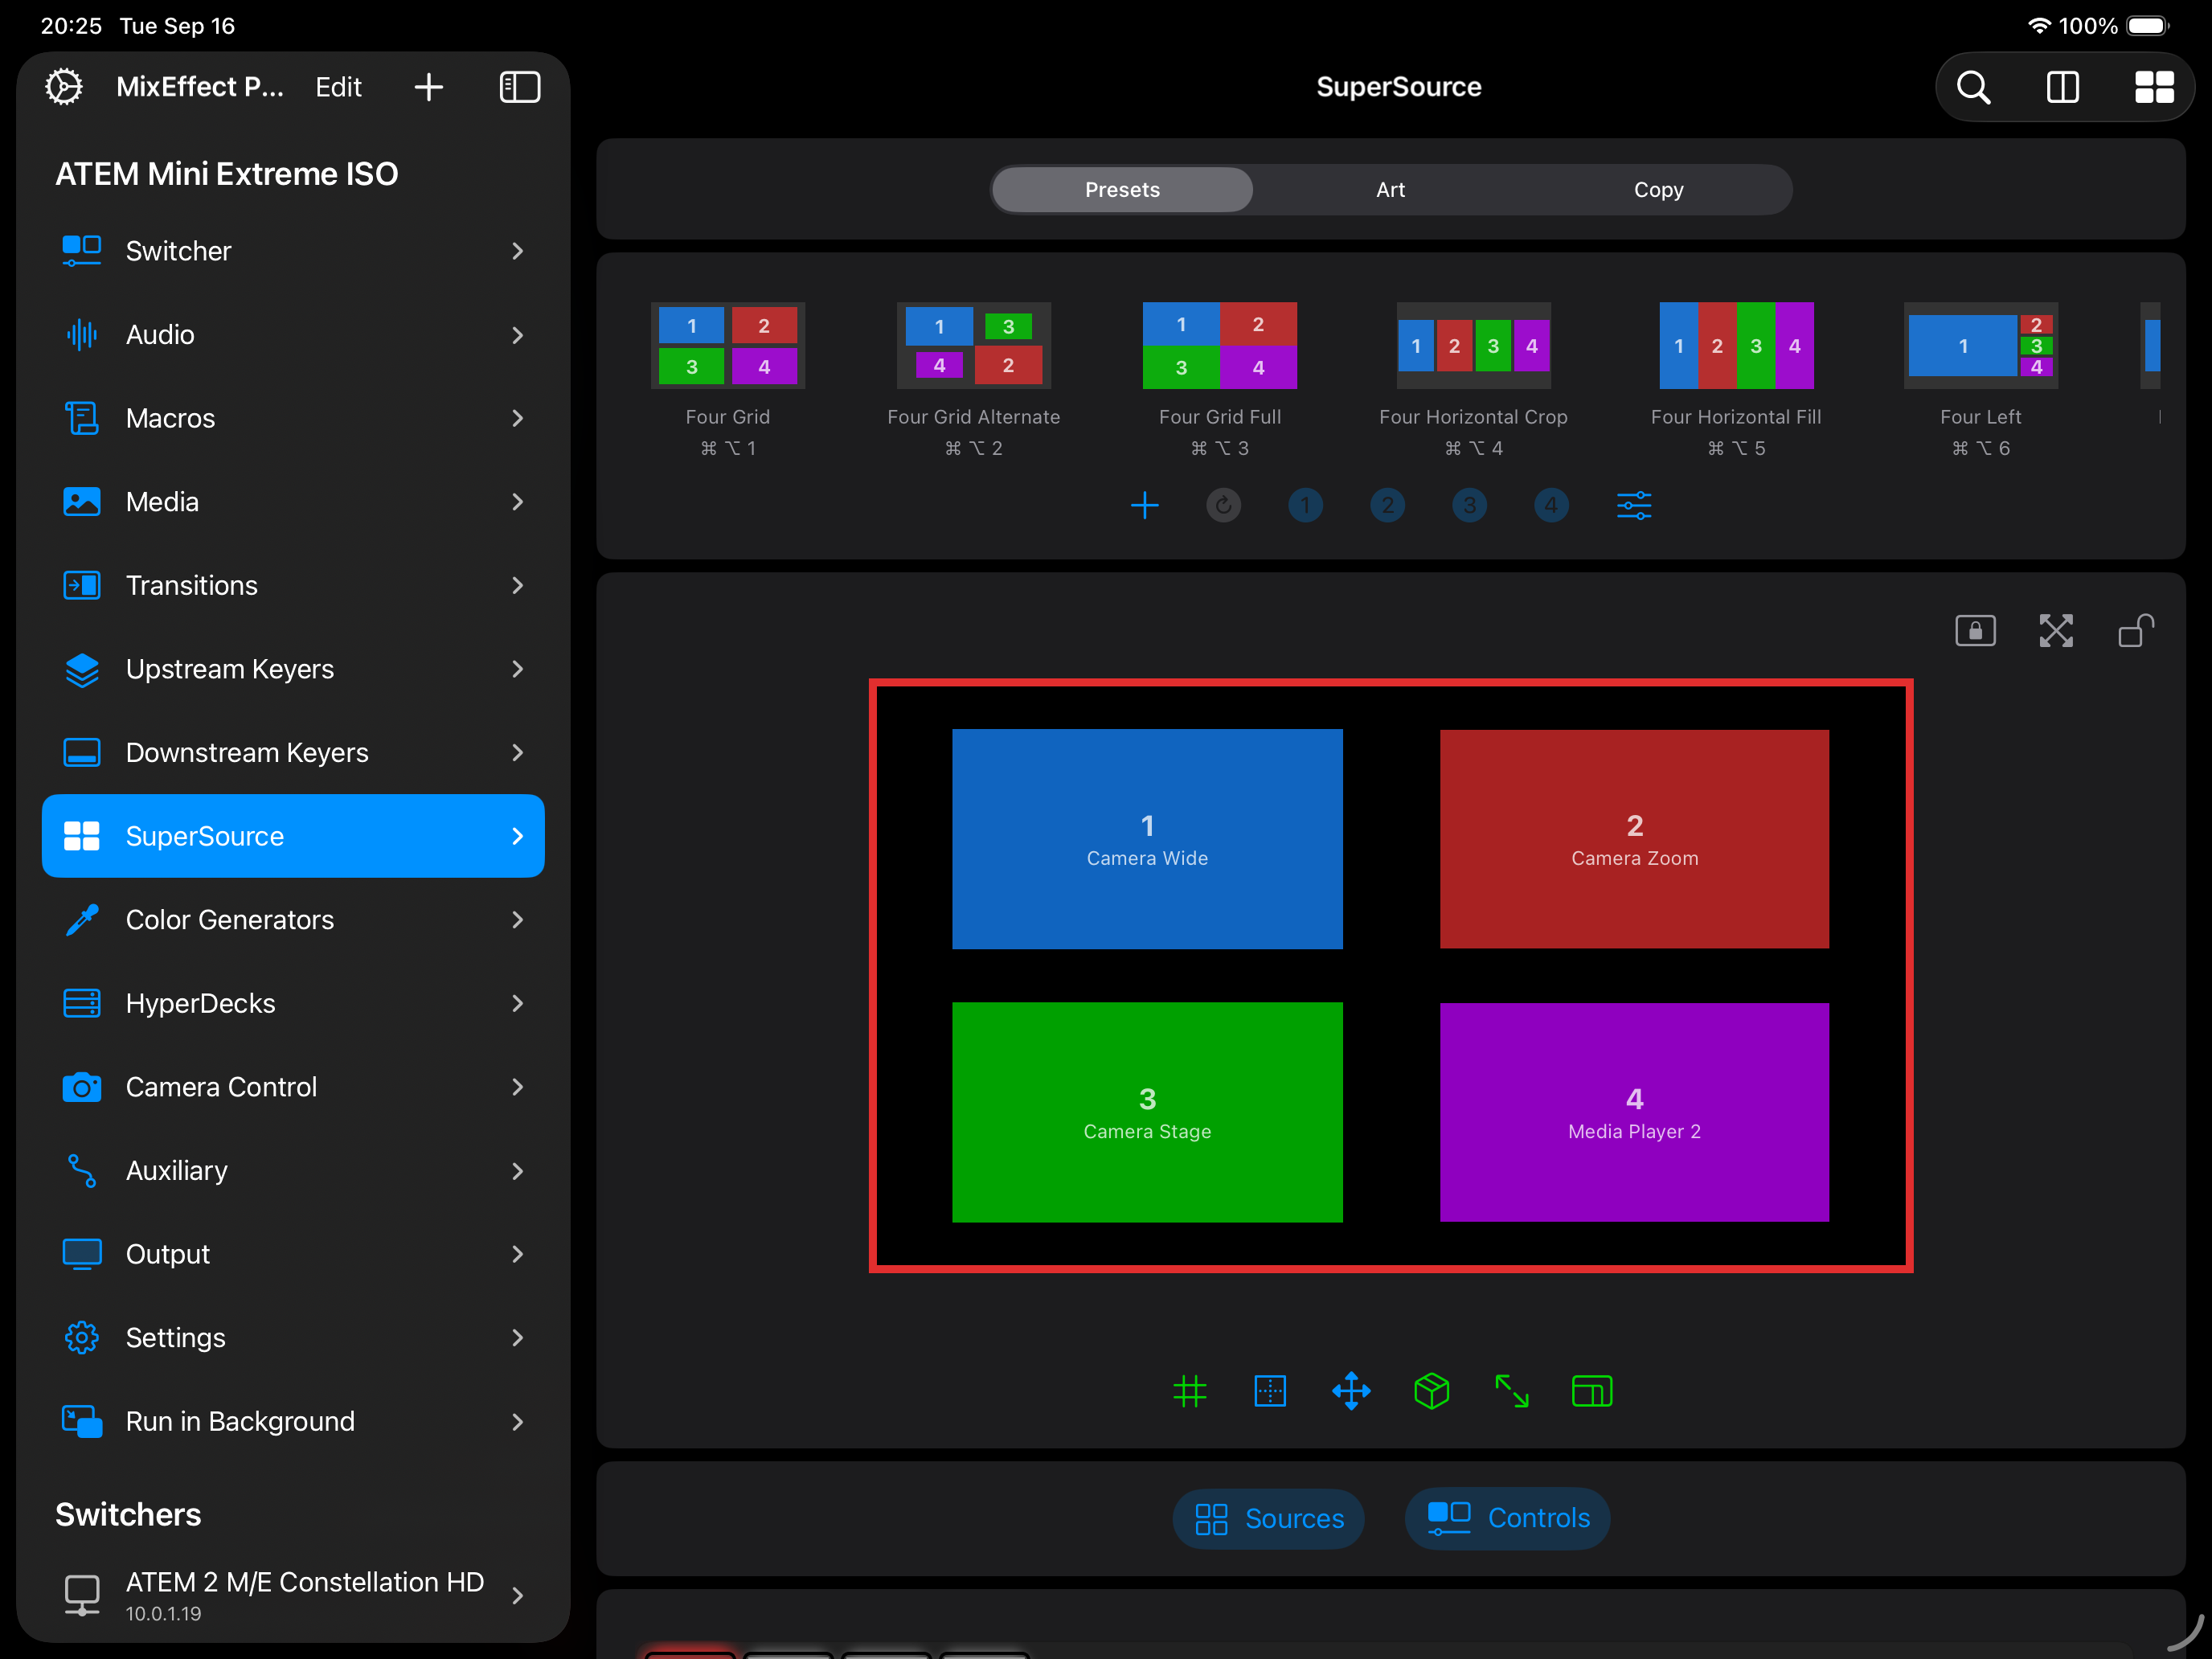
The SuperSource section in MixEffect has four main components:

* [Presets Tab](/explore/supersource/interface/presets-tab)
* [Art Tab](/explore/supersource/interface/art-tab)
* [Copy Tab](/explore/supersource/interface/copy-tab)
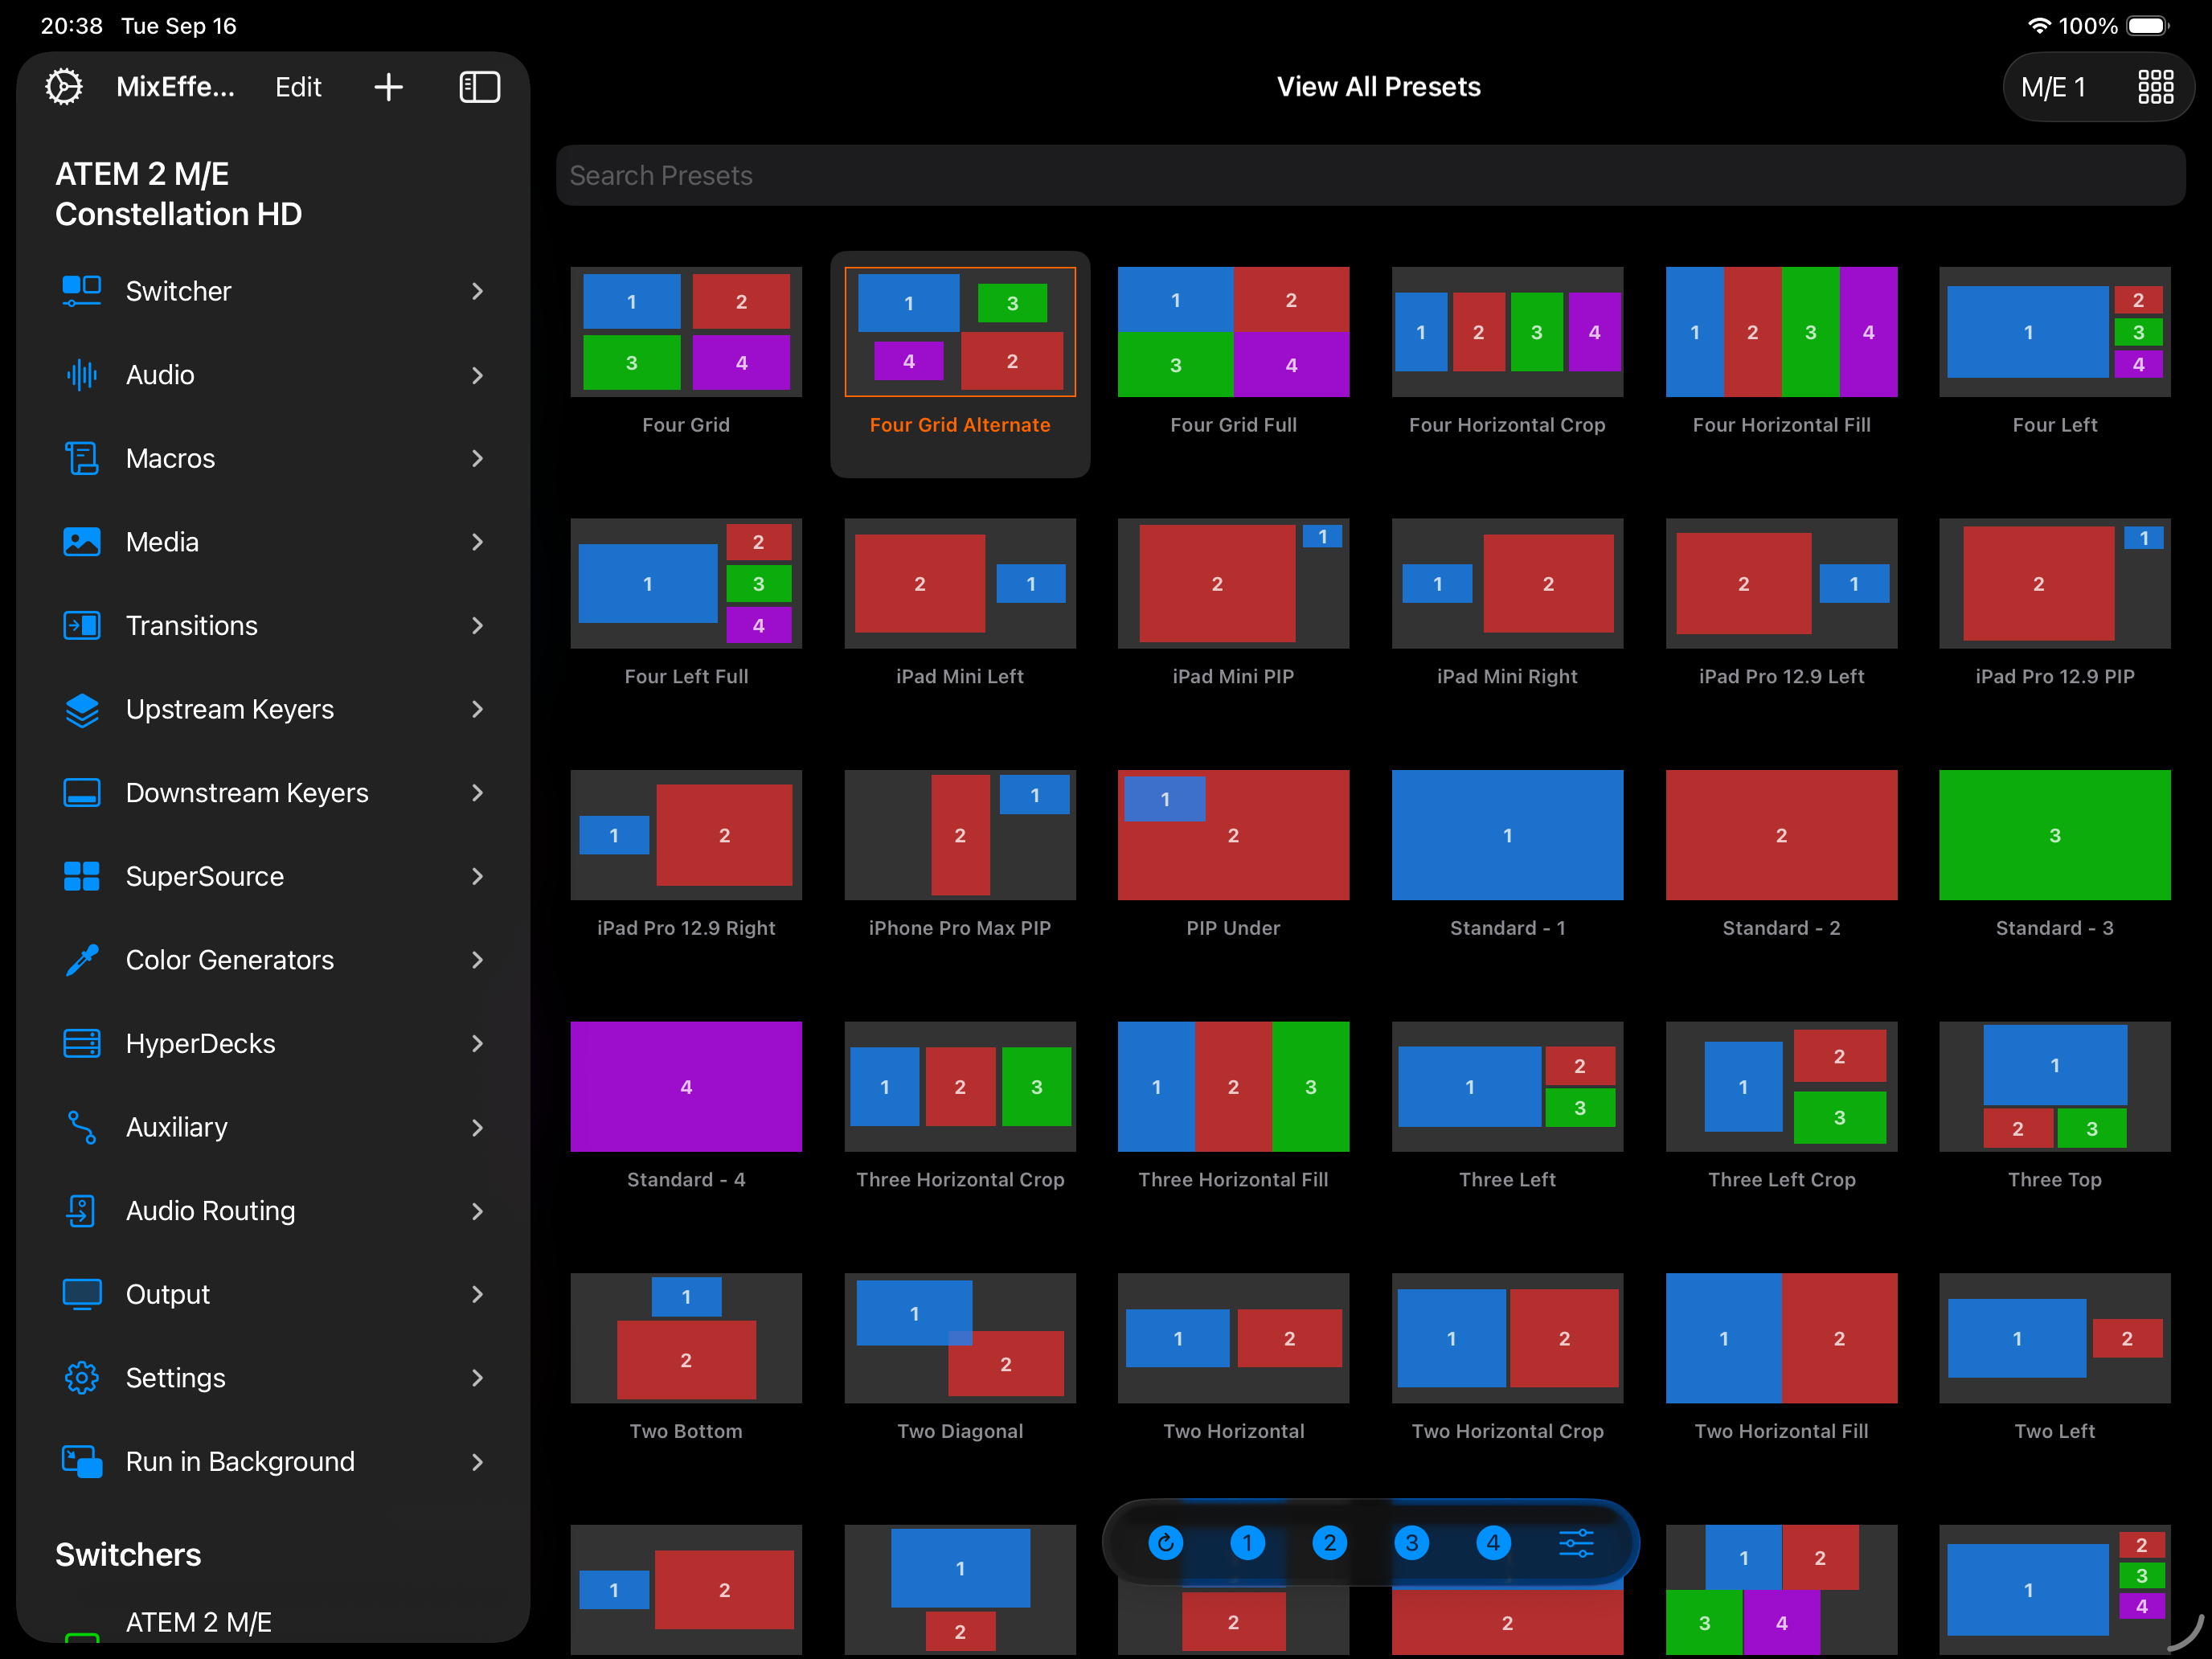
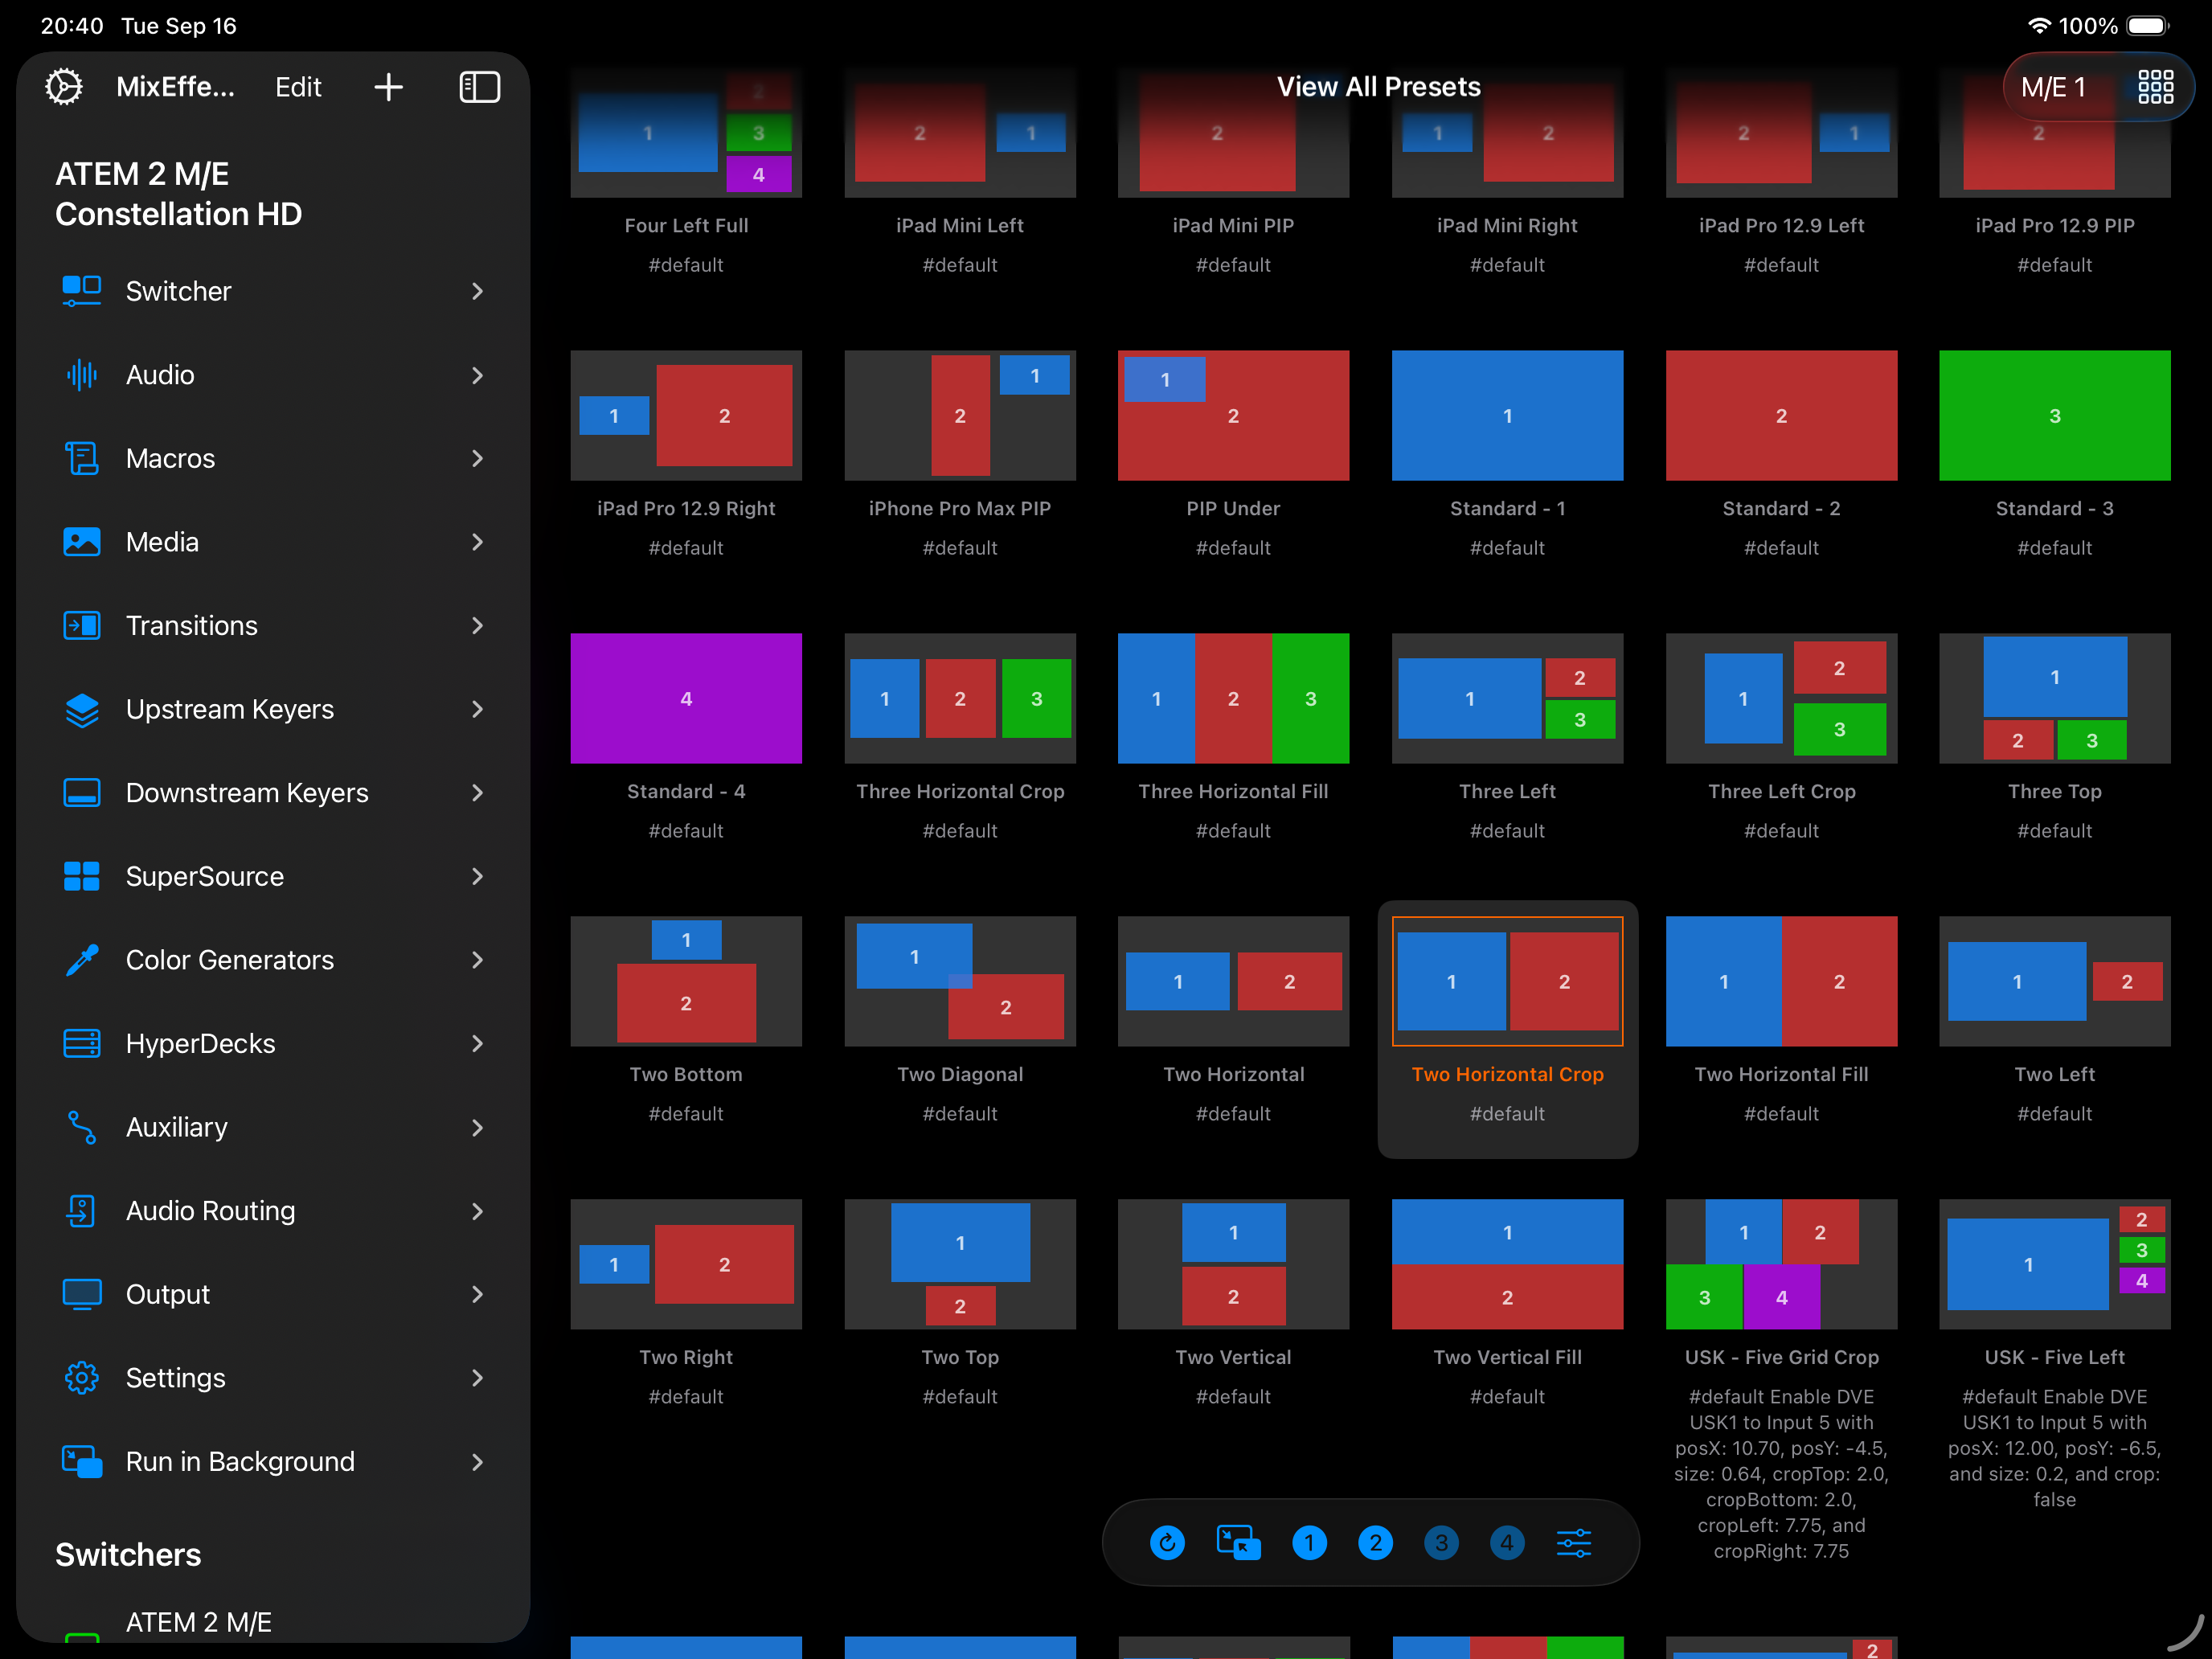
* [View All Presets](/explore/supersource/interface/view-all-presets)

The first three map to the picker interface at the of the three sections. You access the View All Presets page by tapping on the filled-grid icon in the upper-right corner.


# Presets Tab

The presets tab allows you to switch between layouts and adjust the settings for each box.

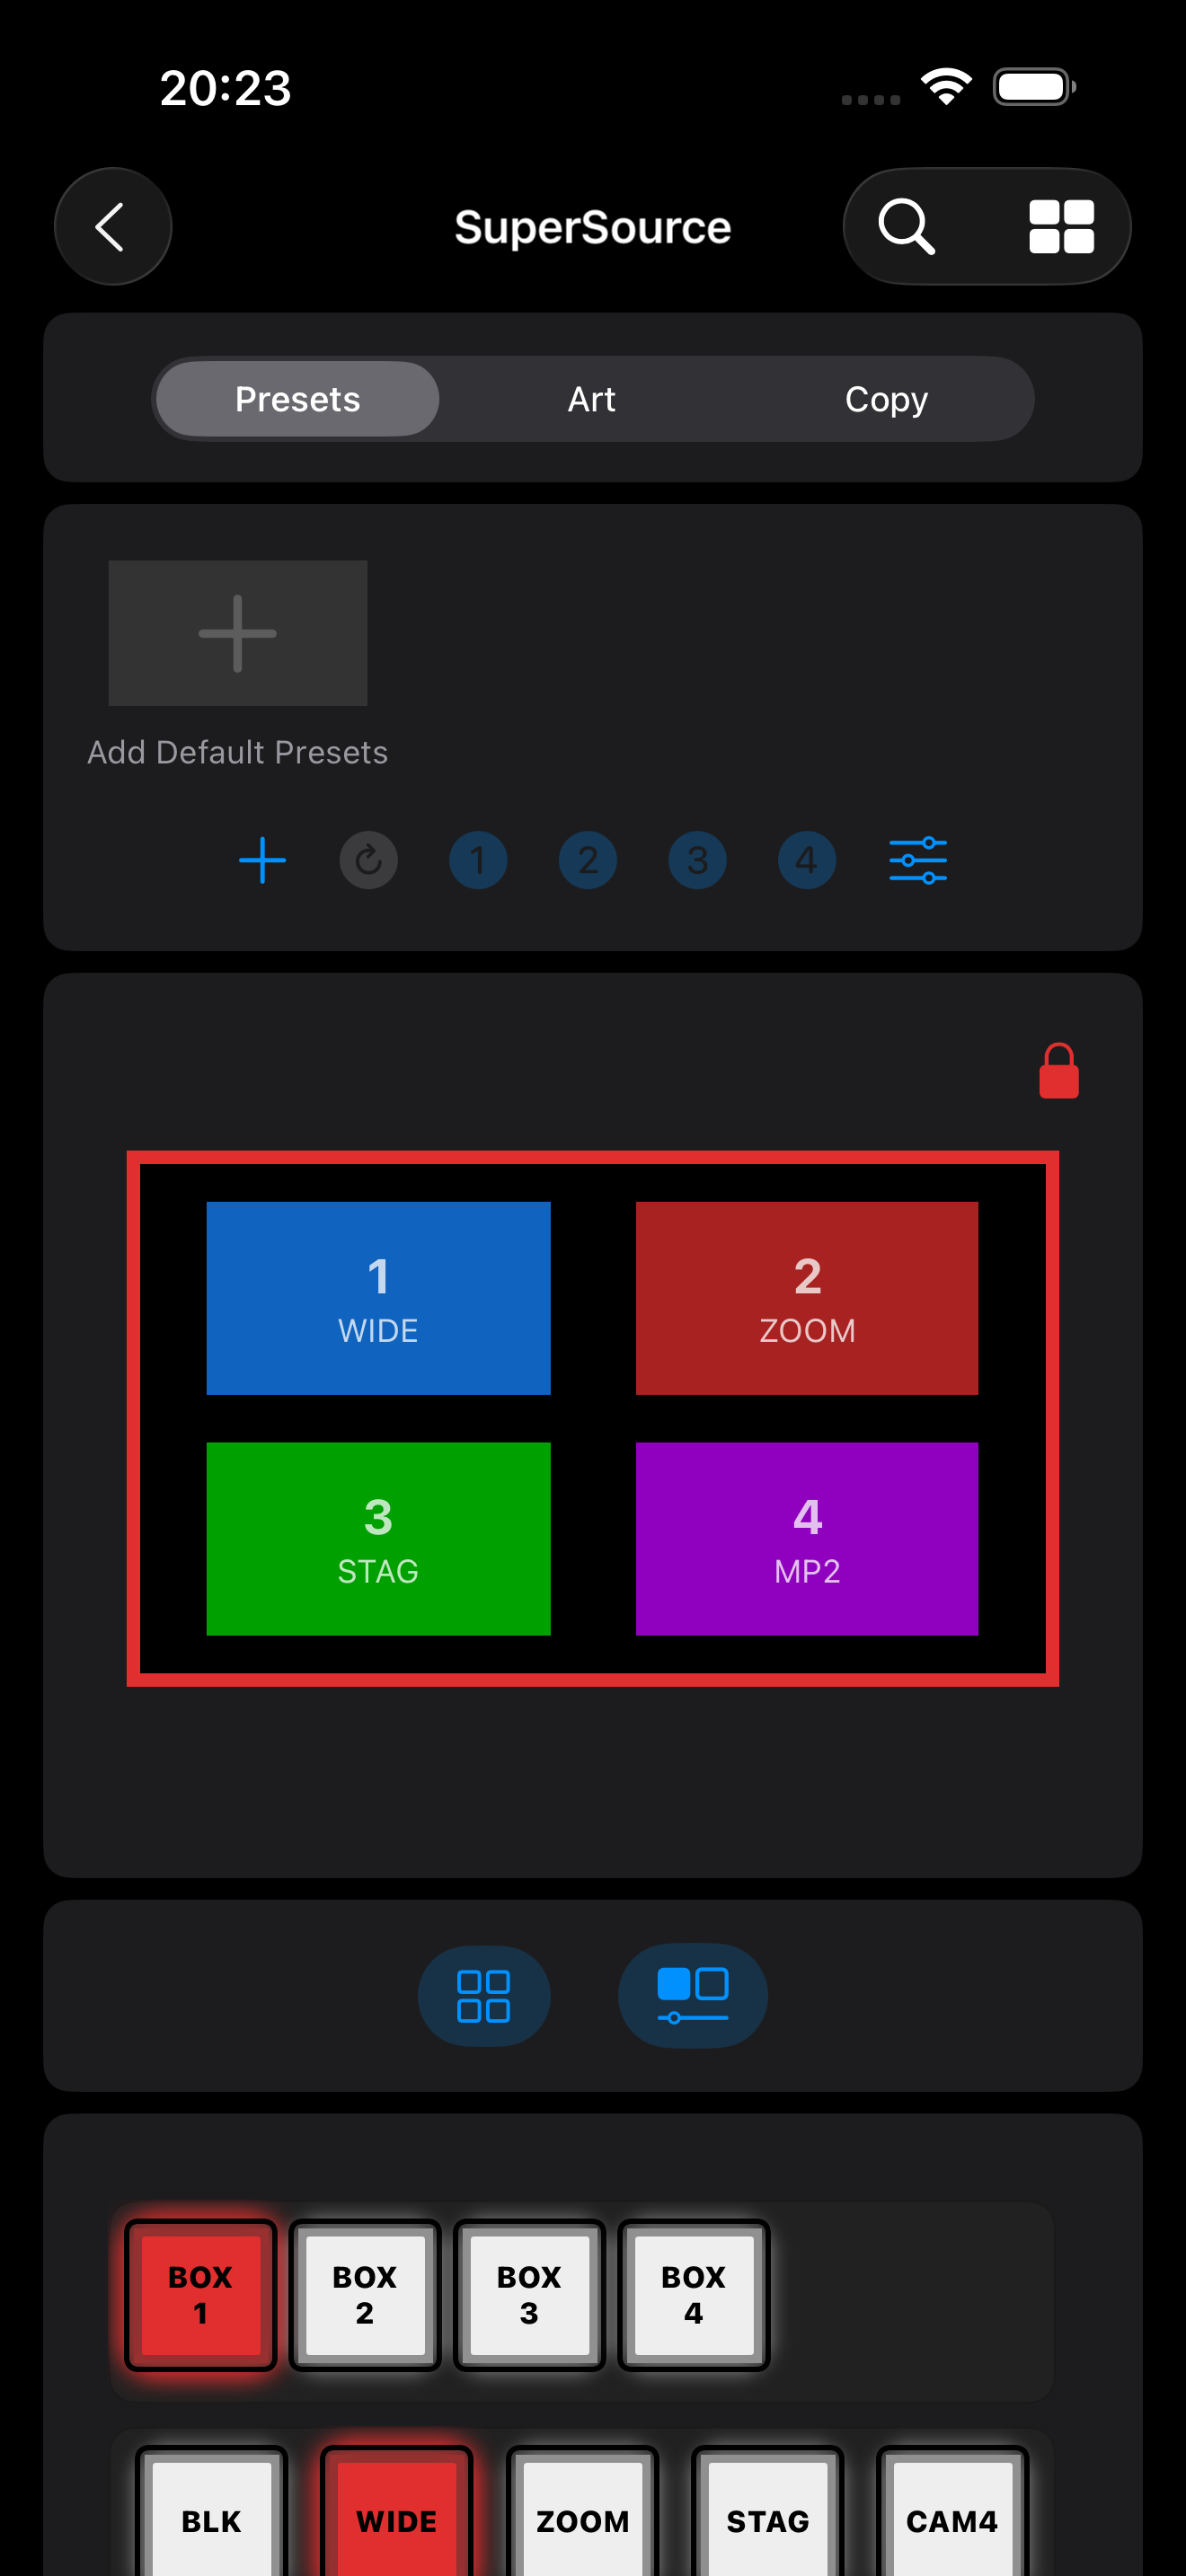
## Default Presets

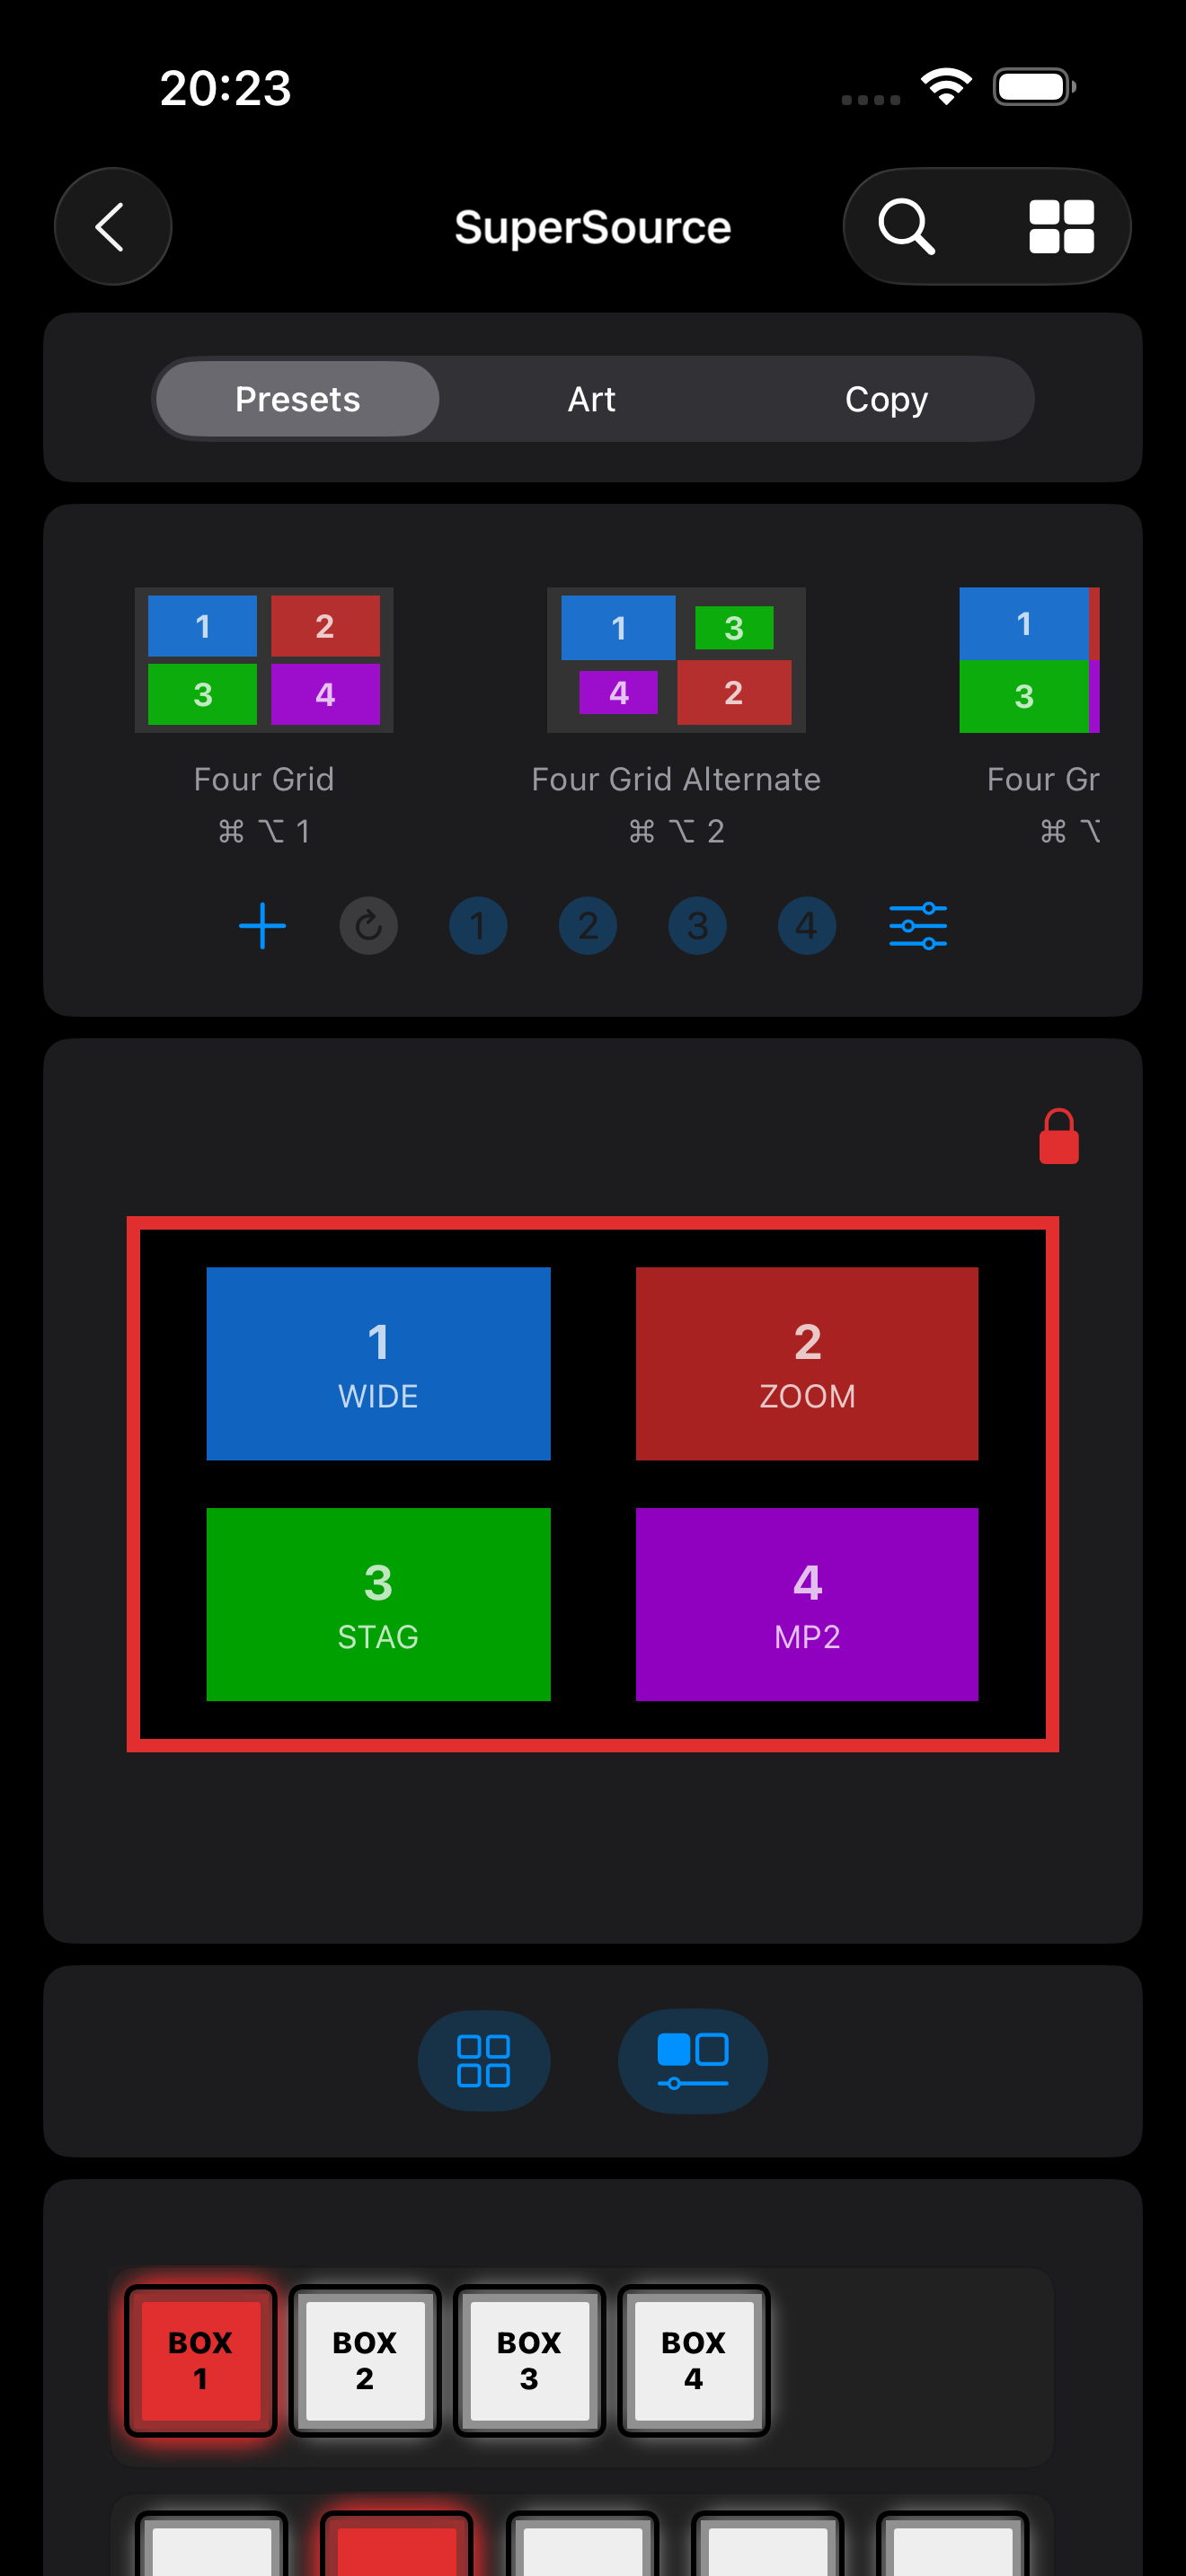
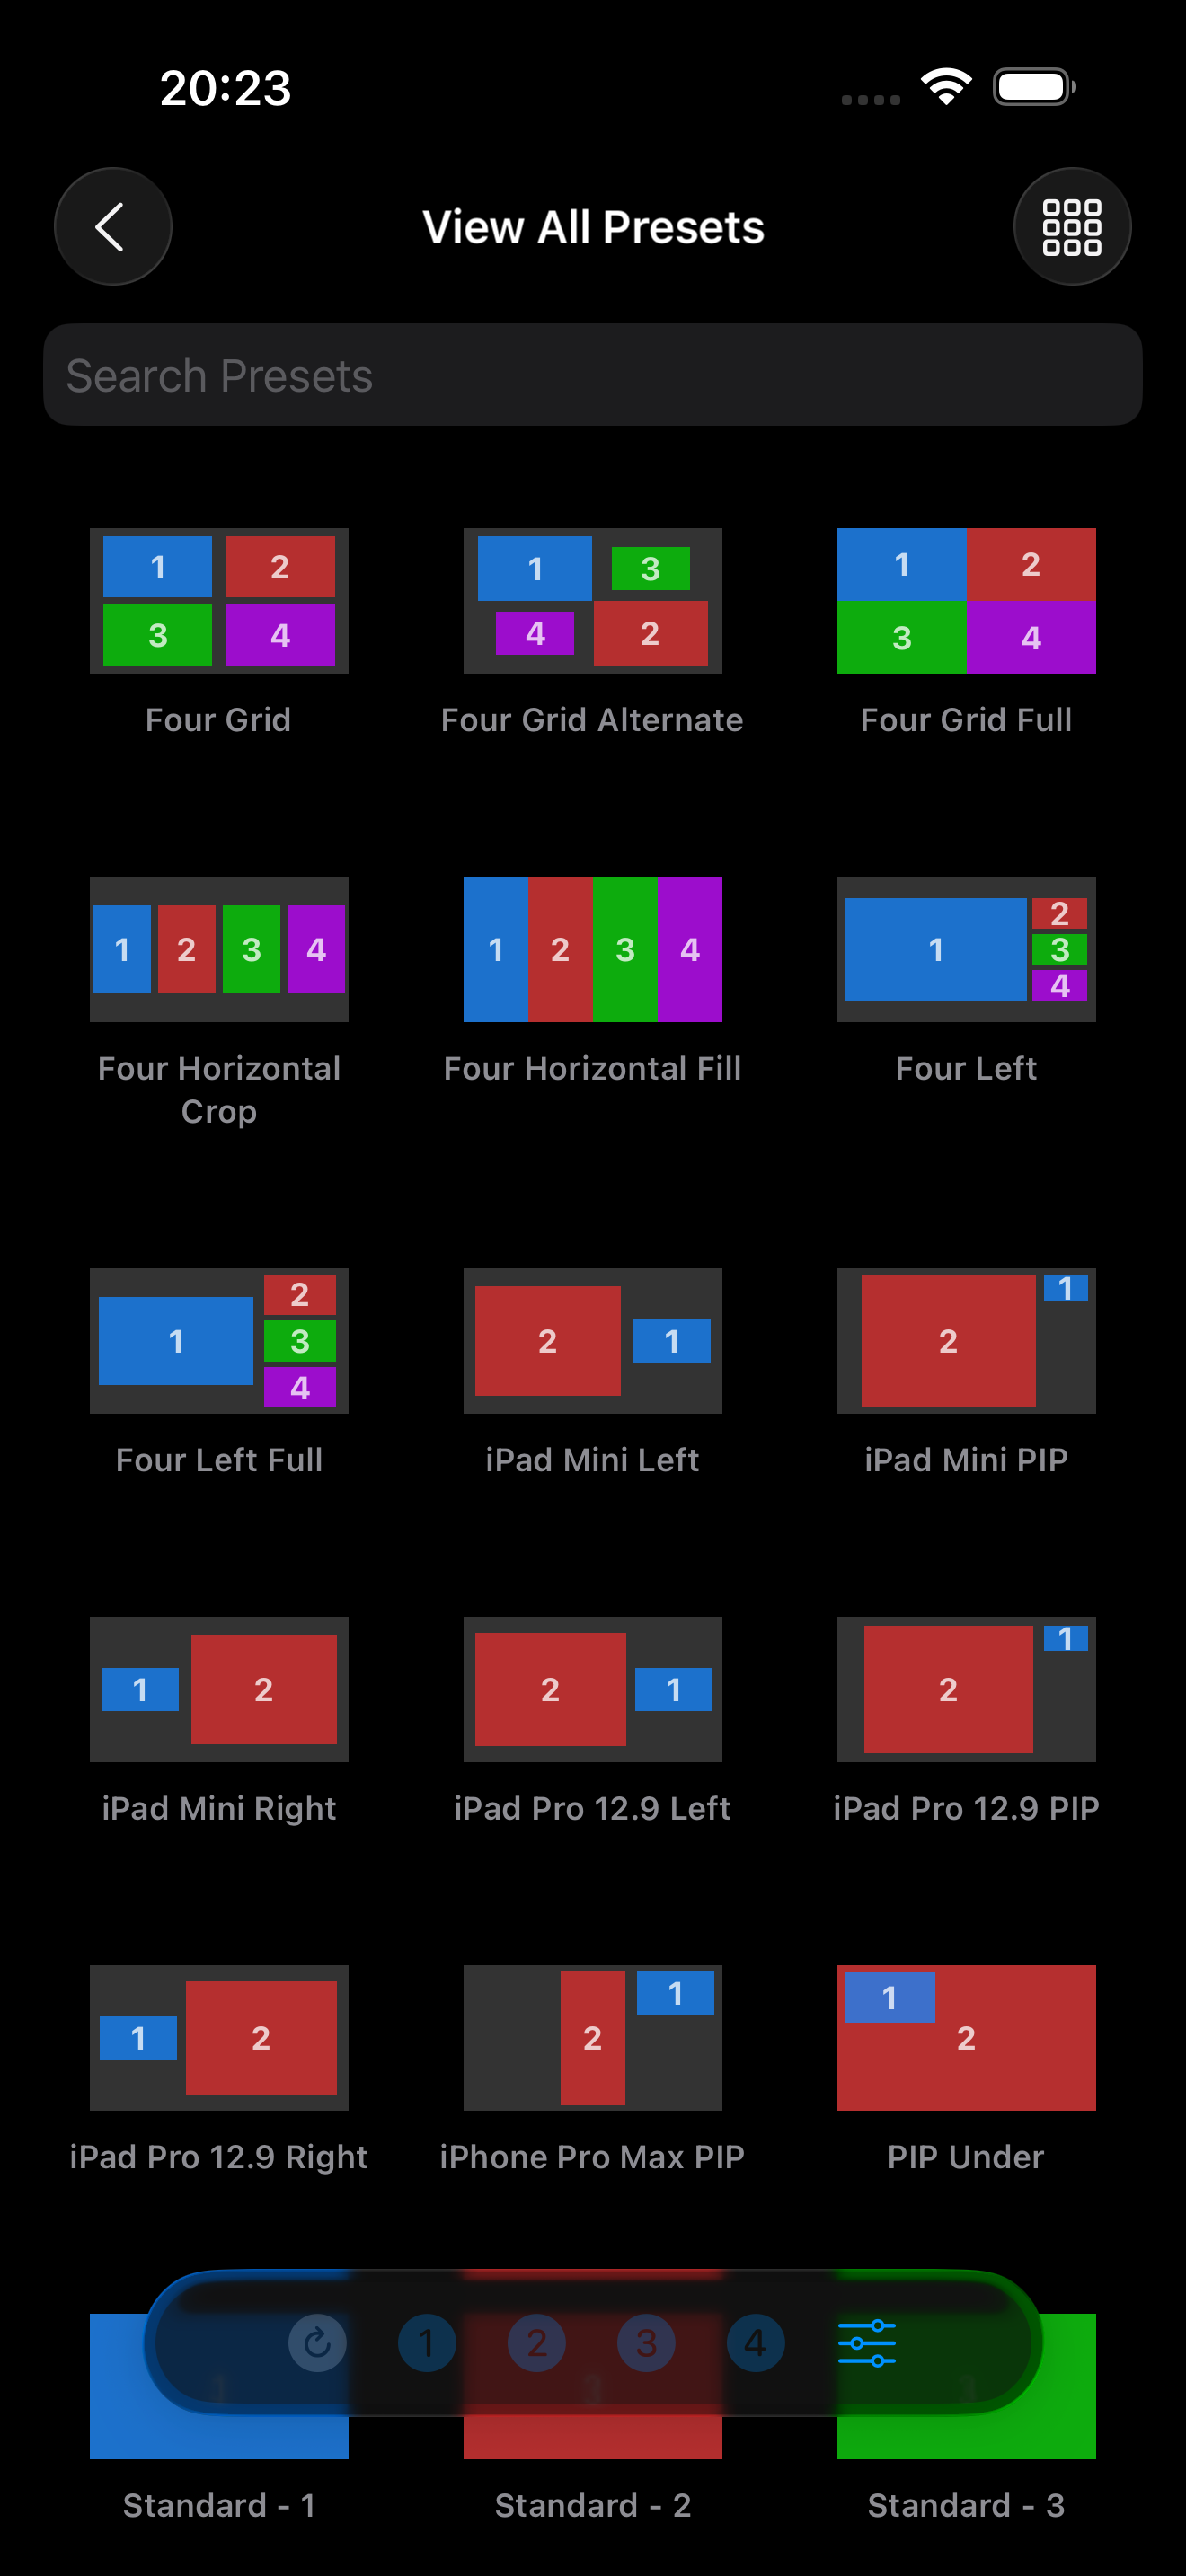
MixEffect comes with a number of pre-built SuperSource layouts for you to use in your video productions. You don't need to create macros or mess with the box settings. And you can create your own layouts and share them with other people.

When you open up the SuperSource section, tap on the **Add Default Presets** button to install the default layouts.

Tap on a layout and watch your SuperSource come to life as it transitions from one layout to the other.

> **NOTE:** If you do not see the default presets when you first install MixEffect, you can recall them by going to MixEffect Settings > Reset > Reset Presets. This will delete any existing presets you have created in MixEffect, so export your presets if you want to keep what you already made.

<div><figure><img src="/files/KsEi5xK7SbqPfjMl0n3Z" alt=""><figcaption></figcaption></figure> <figure><img src="/files/Z2JlWIjQhWrGEcwdKSK2" alt=""><figcaption></figcaption></figure> <figure><img src="/files/C9GjMvIIFY3CltLrdam9" alt=""><figcaption></figcaption></figure></div>

## Highlight Bar

* **New Layout**: Save the current SuperSource layout settings into a new layout. Press `Command-N` to perform this function on a hardware keyboard.
* **Reset Layout**: Resets the SuperSource layout settings to the original layout. Press `Command-5` to perform this function on a hardware keyboard.
* **Swap Boxes**: If you have only two boxes visible on-screen, tapping this button will swap the video sources in each box.
* **Highlight Box 1**: Highlight box 1 in the current SuperSource layout. Press `Command-1` to perform this function on a hardware keyboard.
* **Highlight Box 2**: Highlight box 2 in the current SuperSource layout. Press `Command-2` to perform this function on a hardware keyboard.
* **Highlight Box 3**: Highlight box 3 in the current SuperSource layout. Press `Command-3` to perform this function on a hardware keyboard.
* **Highlight Box 4**: Highlight box 4 in the current SuperSource layout. Press `Command-4` to perform this function on a hardware keyboard.
* **Options Menu**: Tap to display a menu allowing you to change the transition speed, transition style, the source for each box, controls for swapping box sources, and the sizes of the highlighted and non-highlighted boxes. You can also perform an Auto or Cut transition to and from the SuperSource.

<figure><img src="/files/4MWIUizJHhRJbshfw9yd" alt="" width="563"><figcaption><p>Highlight Bar in the SuperSource Presets tab.</p></figcaption></figure>

### **Transition Style**

The transition style determines the look of the animation between preset layouts.

Adjust the mathematical style of the transition from the following options:

* **Linear**: Each step in the transition travels the same distance.
* **Smooth**
* **Smoother**
* **Cubed**
* **Square**
* **Inverse Square**
* **Inverse Cubed**
* **Sine**: Default option.
* **Cosine**
* **Ease In Out Elastic**
* **Ease Out Bounce**
* **Ease Out Elastic**

Experiment with each style to find one that looks and feels the best for your production.

### **Transition Speed**

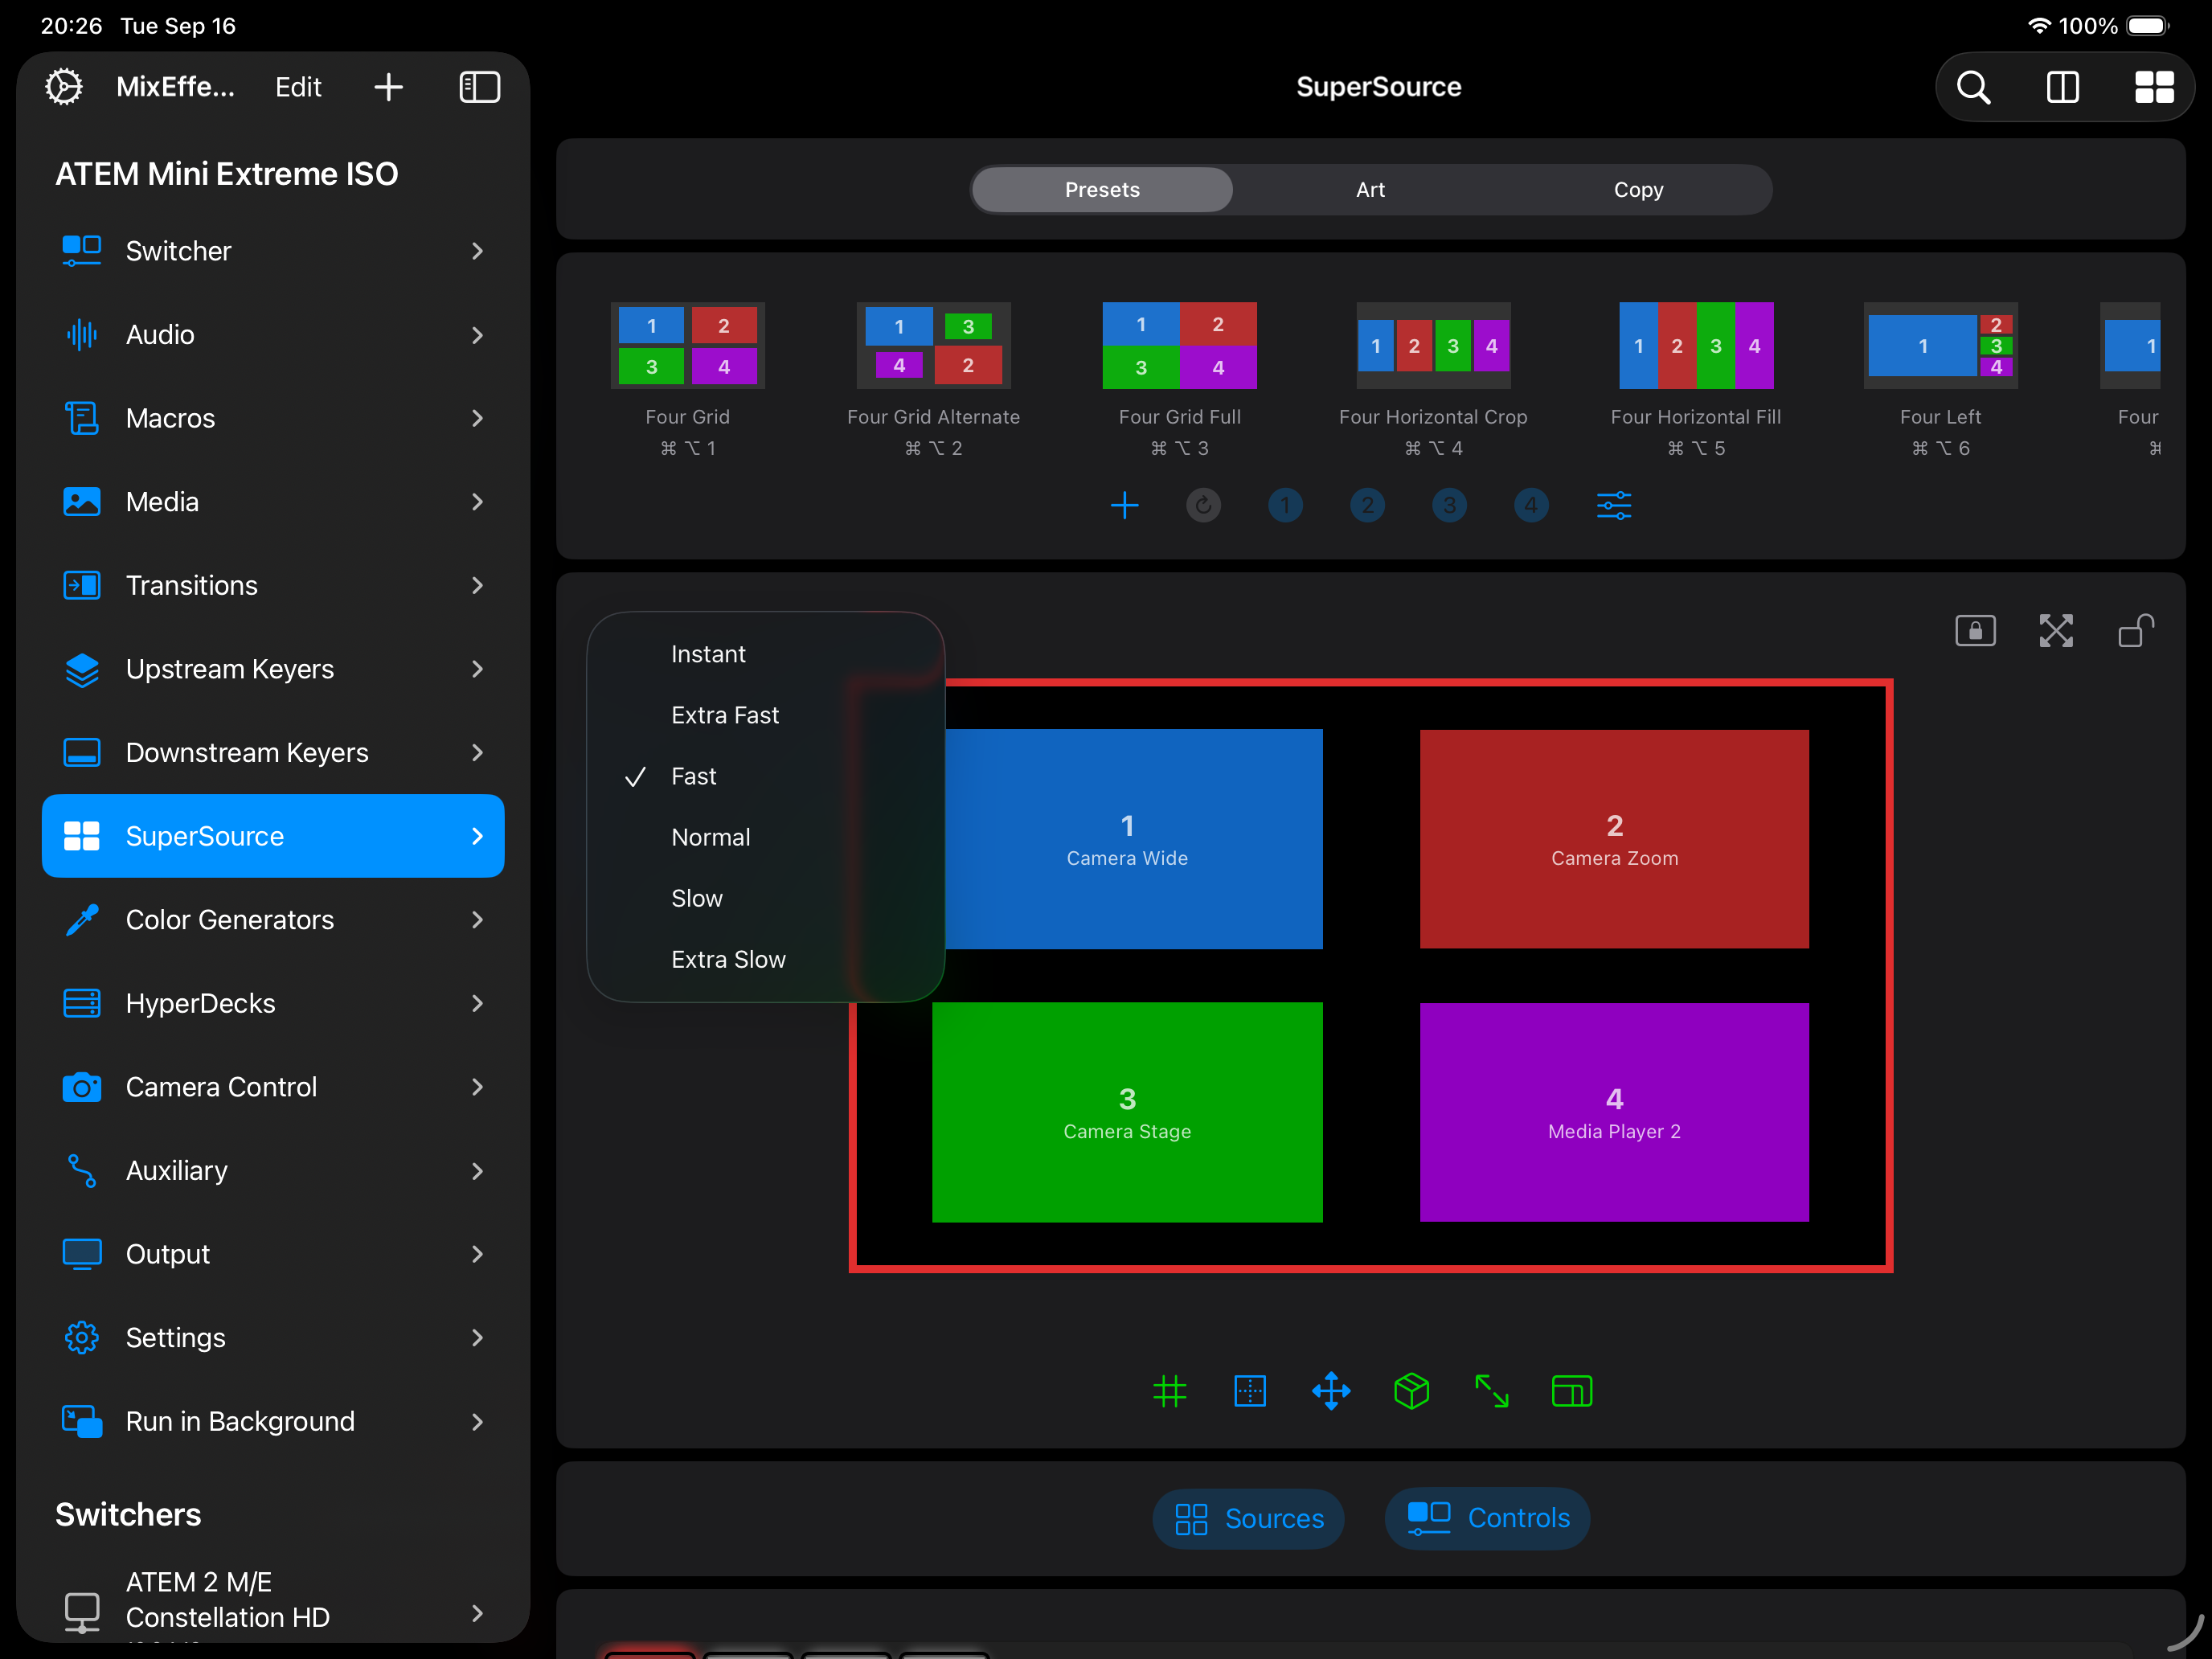
Adjust the speed of the animated transitions from one layout to another. Tap on the SuperSource options menu and choose Transition Speed. Select a speed from one of the following six options:

* **Instant**: The layout switches instantly from the current layout to the selected layout.
* **Extra Fast**: The transition between layouts takes a fraction of a second.
* **Fast**: The transition takes about a second.
* **Normal**: The transition takes about 1.5-2 seconds.
* **Slow**: The transition takes its time.
* **Extra Slow**: The transition really takes its time to go from the current layout to the selected layout.

### **Grow Highlighted Box**

When you highlight a box, you can grow the size of the box to emphasize it in relation to the other boxes. Choose a value from 1.0 to 1.5 times the original size of the box.

### **Shrink Other Boxes**

When you highlight a box, you can shrink the size of the other three boxes at the same time. Choose a value from 1.0 to 0.5 times the original size of the boxes.

## Updating a Preset

If you have modified the SuperSource layout and want to update an existing preset, follow these steps:

1. **Long-press** or **right-click** on the preset in the SuperSource section main screen
2. Choose **Save Layout** in the menu that appears.

The currently selected preset can also be updated by pressing Command-S. Any box changes will be copied to the preset highlighted in orange. The preset thumbnail will spin and change from its previous layout configuration to the new layout.

> **NOTE**: Versions of MixEffect prior to 1.2.0 required just a long-press on the preset in the SuperSource section to save. Version 1.2.0 introduced a menu of additional options when long-pressing on a preset.

### Visual Editor

Below the presets, preview scale, and highlight bar is the SuperSource visual editor. Here you see an accurate recreation of your SuperSource layout. If SuperSource is currently set to the Program selection, a red box will outline the visual editor. If SuperSource is the current Preview selection, the visual editor will be outlined in green.

Tap and drag the boxes around, or pinch and expand to resize the box. Use the visual editor to get your boxes in roughly the position you want them. Then use the box controls below to fine-tune your layout.

> **NOTE**: *To reposition the boxes, you must first unlock the visual editor by tapping on the red lock icon.*

### Reposition in Box

Unlocking the visual editor will reveal the Reposition in Box button to the left of the lock icon. Reposition in Box takes the guesswork out of figuring out the right values for the x, y, and top, bottom, left, and right crop values when you want to reposition an input source within a SuperSource box.

> **NOTE:** *Adjusting the size of the input source is not allowed when the Reposition in Box feature is enabled.*&#x20;

Tap the Reposition in Box button to enable the feature. The icon will turn red. Tap again to disable Reposition in Box.&#x20;

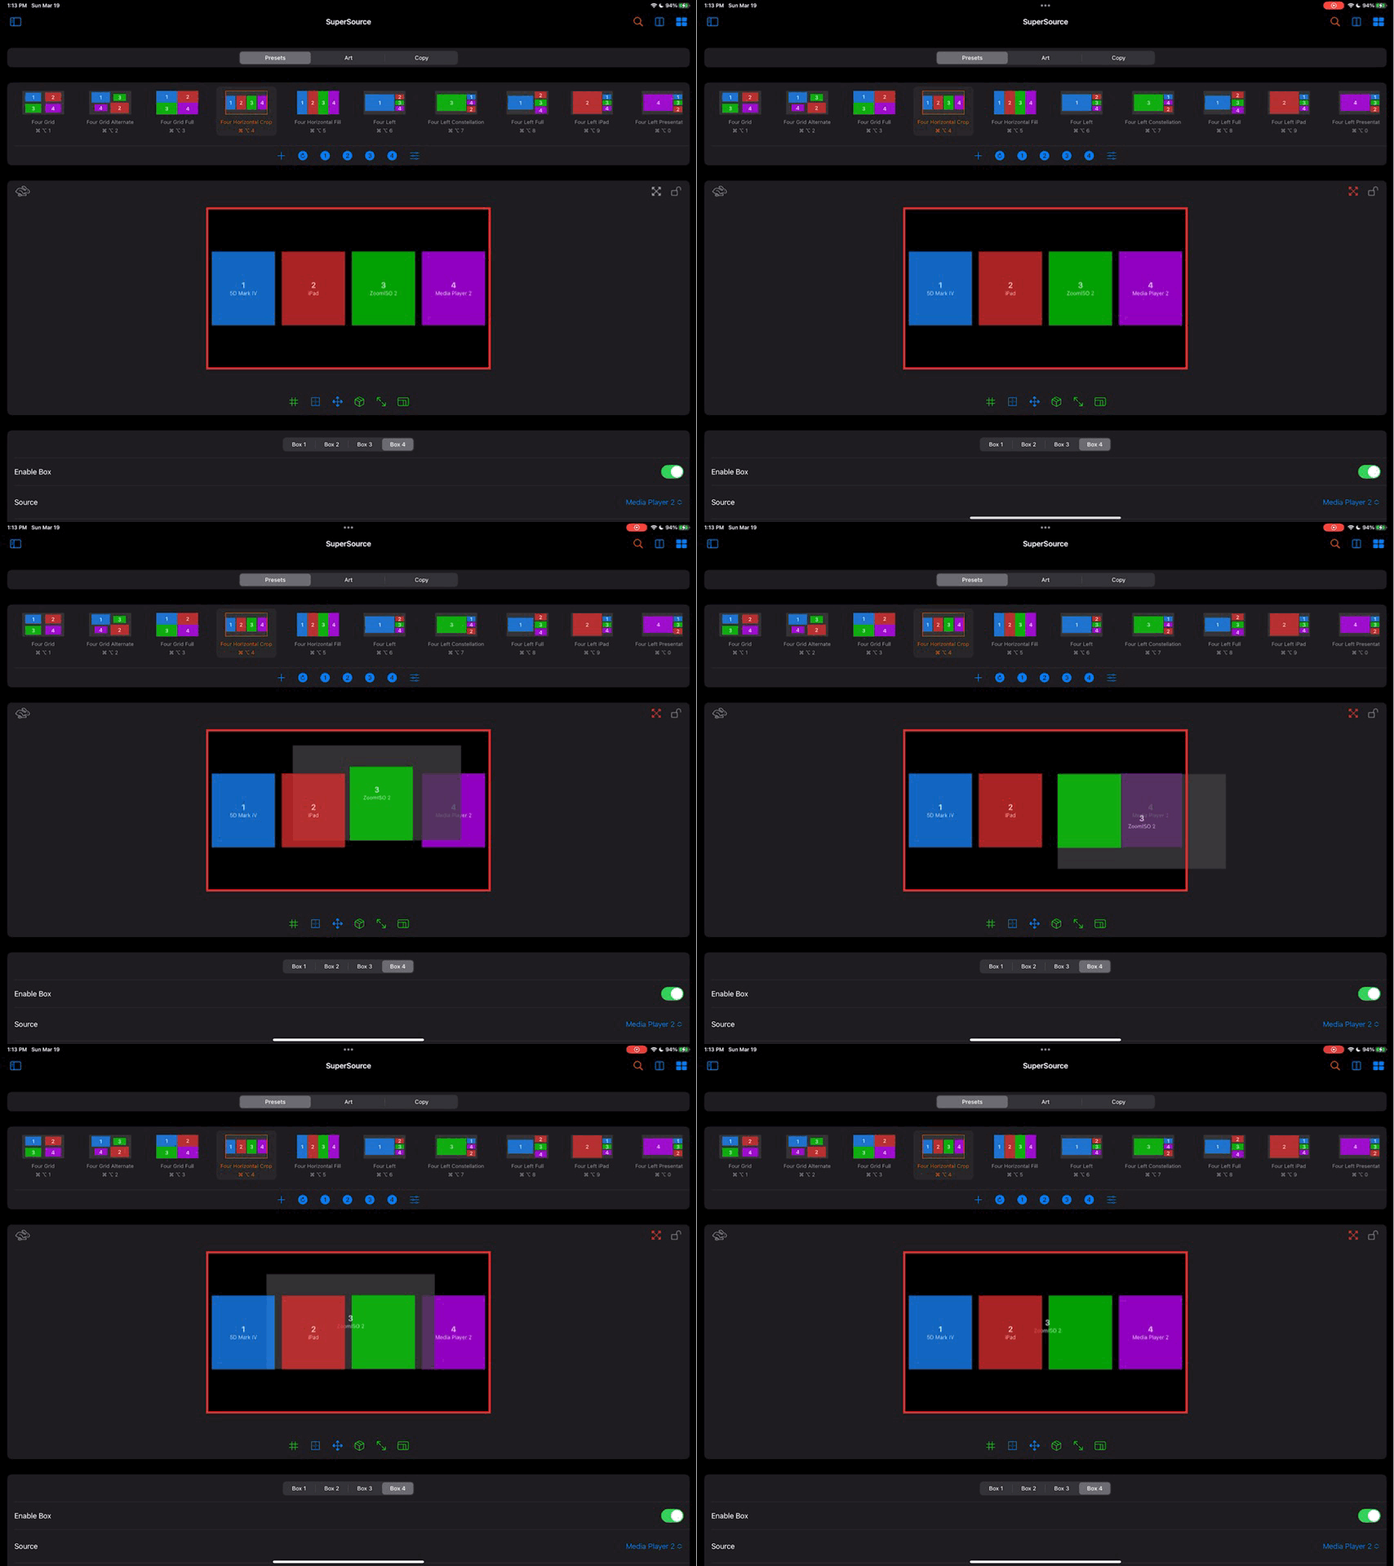
<figure><img src="/files/v2ZHFx2svD6ebnJyHxcM" alt=""><figcaption><p>Using the Reposition in Box feature.</p></figcaption></figure>

When you tap and drag a SuperSource box, you will see a representation of the input source within its crop boundaries. The boundaries are hidden until you tap because there may be overlapping SuperSource boxes. Drag the video to its desired position. You can preview your changes directly in Program, Preview, or the Multiview outputs from your ATEM.&#x20;

### Locked Boxes

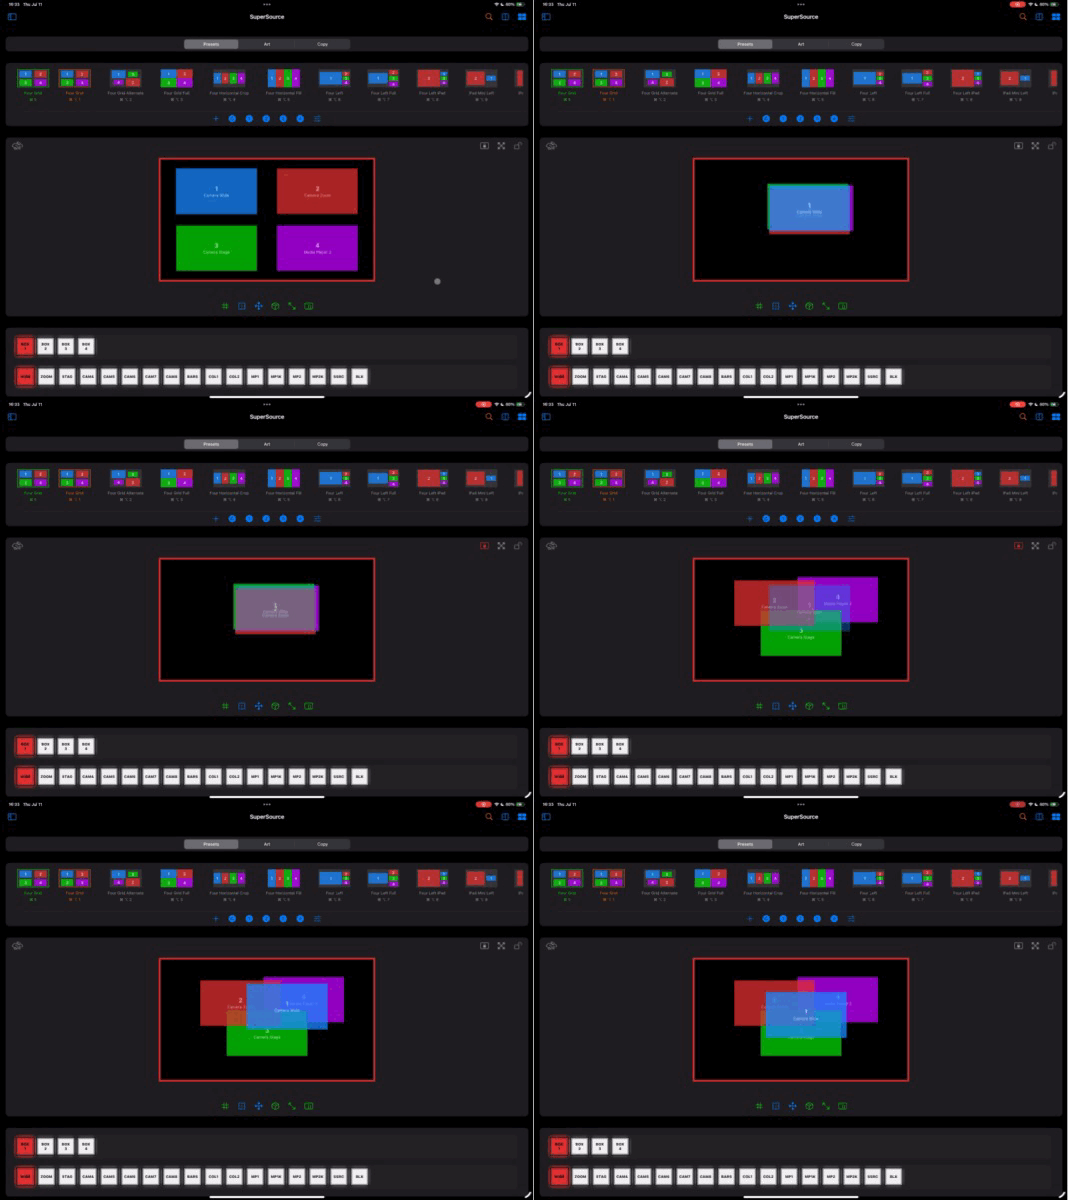
In the ATEM, box 1 will always be on top of box 2, followed by box 3, and box 4. When positioning boxes in the visual editor, you may get in a situation where boxes are stacked on top of each other and you want to reposition one that is underneath another box (i.e. box 2 underneath box 1). You can use the locked box menu to selectively lock or unlock boxes in the visual editor.

<figure><img src="/files/h0q67syDkHUdDJZeEkSC" alt=""><figcaption><p>Locking boxes in the Visual Editor.</p></figcaption></figure>

### Apple Pencil Support

If you have an Apple Pencil, you can use the following gestures while in the SuperSource section:

* **Double-tap**: Toggle the Visual Editor.
* **Squeeze**: Display a menu to lock or unlock individual SuperSource boxes within the Visual Editor. This feature is only available when using the Apple Pencil Pro.

### Box Arrange Bar

Unlocking the visual editor will reveal the Box Editing Bar (available in MixEffect 1.0.3 and later) that features the following buttons:

* Toggle Grid Mode
* Grid Size
* Constrain Movement
* Box Selector
* Box Size
* Aspect Ratio

> **TIP**: Long press in the visual editor for 1.75 seconds to lock/unlock the visual editor. This is useful if the lock icon is covered by a SuperSource Box.

<figure><img src="/files/SFwrpdgOQwnlHcy9ey1o" alt=""><figcaption></figcaption></figure>

#### **Toggle Grid Mode**

Turns on an off grid alignment mode. Dragging boxes will align the box to a grid size specified in the Grid Size menu.

#### **Grid Size**

A menu allowing you to specify the grid size used when aligning boxes. This menu is visible when you have enabled Grid Mode.

#### **Constrain Movement**

Tap this button to cycle through three movement constraints when tapping and dragging your boxes:

* **None**: Boxes can be moved in any direction.
* **Horizontal**: Boxes can only be moved left and right.
* **Vertical**: Boxes can only be moved up and down.

#### **Box Selector**

Select which box the Box Size and Aspect Ratio commands will operate on. You can select an individual box to modify or choose to modify every box.

When To All Boxes is chosen, the icons for Box Size and Aspect Ratio will turn green to reflect that all boxes will be modified.

#### **Box Size**

Change the size of a box or all the boxes. You can also enter a custom size between 0.07 and 1.0 by choosing Custom.

#### **Aspect Ratio**

Choose the aspect ratio of a box from a list of commonly used aspect ratios, from 1:1 (Square) to 16:9 (HD), to 3:2 (35mm), and more.

#### Transition Speed Menu

If you have enabled Show Transition Speed Menu in MixEffect Settings > User Interface, a menu will appear in the upper-right corner of the Visual Editor. The icon will indicate the current speed.

Tap the speed indicator to change the SuperSource Transition Speed:

* Instant
* Extra Fast
* Fast
* Normal
* Slow
* Extra Slow

<figure><img src="/files/NvDccTuXADCeIVP9rVVH" alt=""><figcaption></figcaption></figure>

### Splitting the Visual Editor and Box Controls

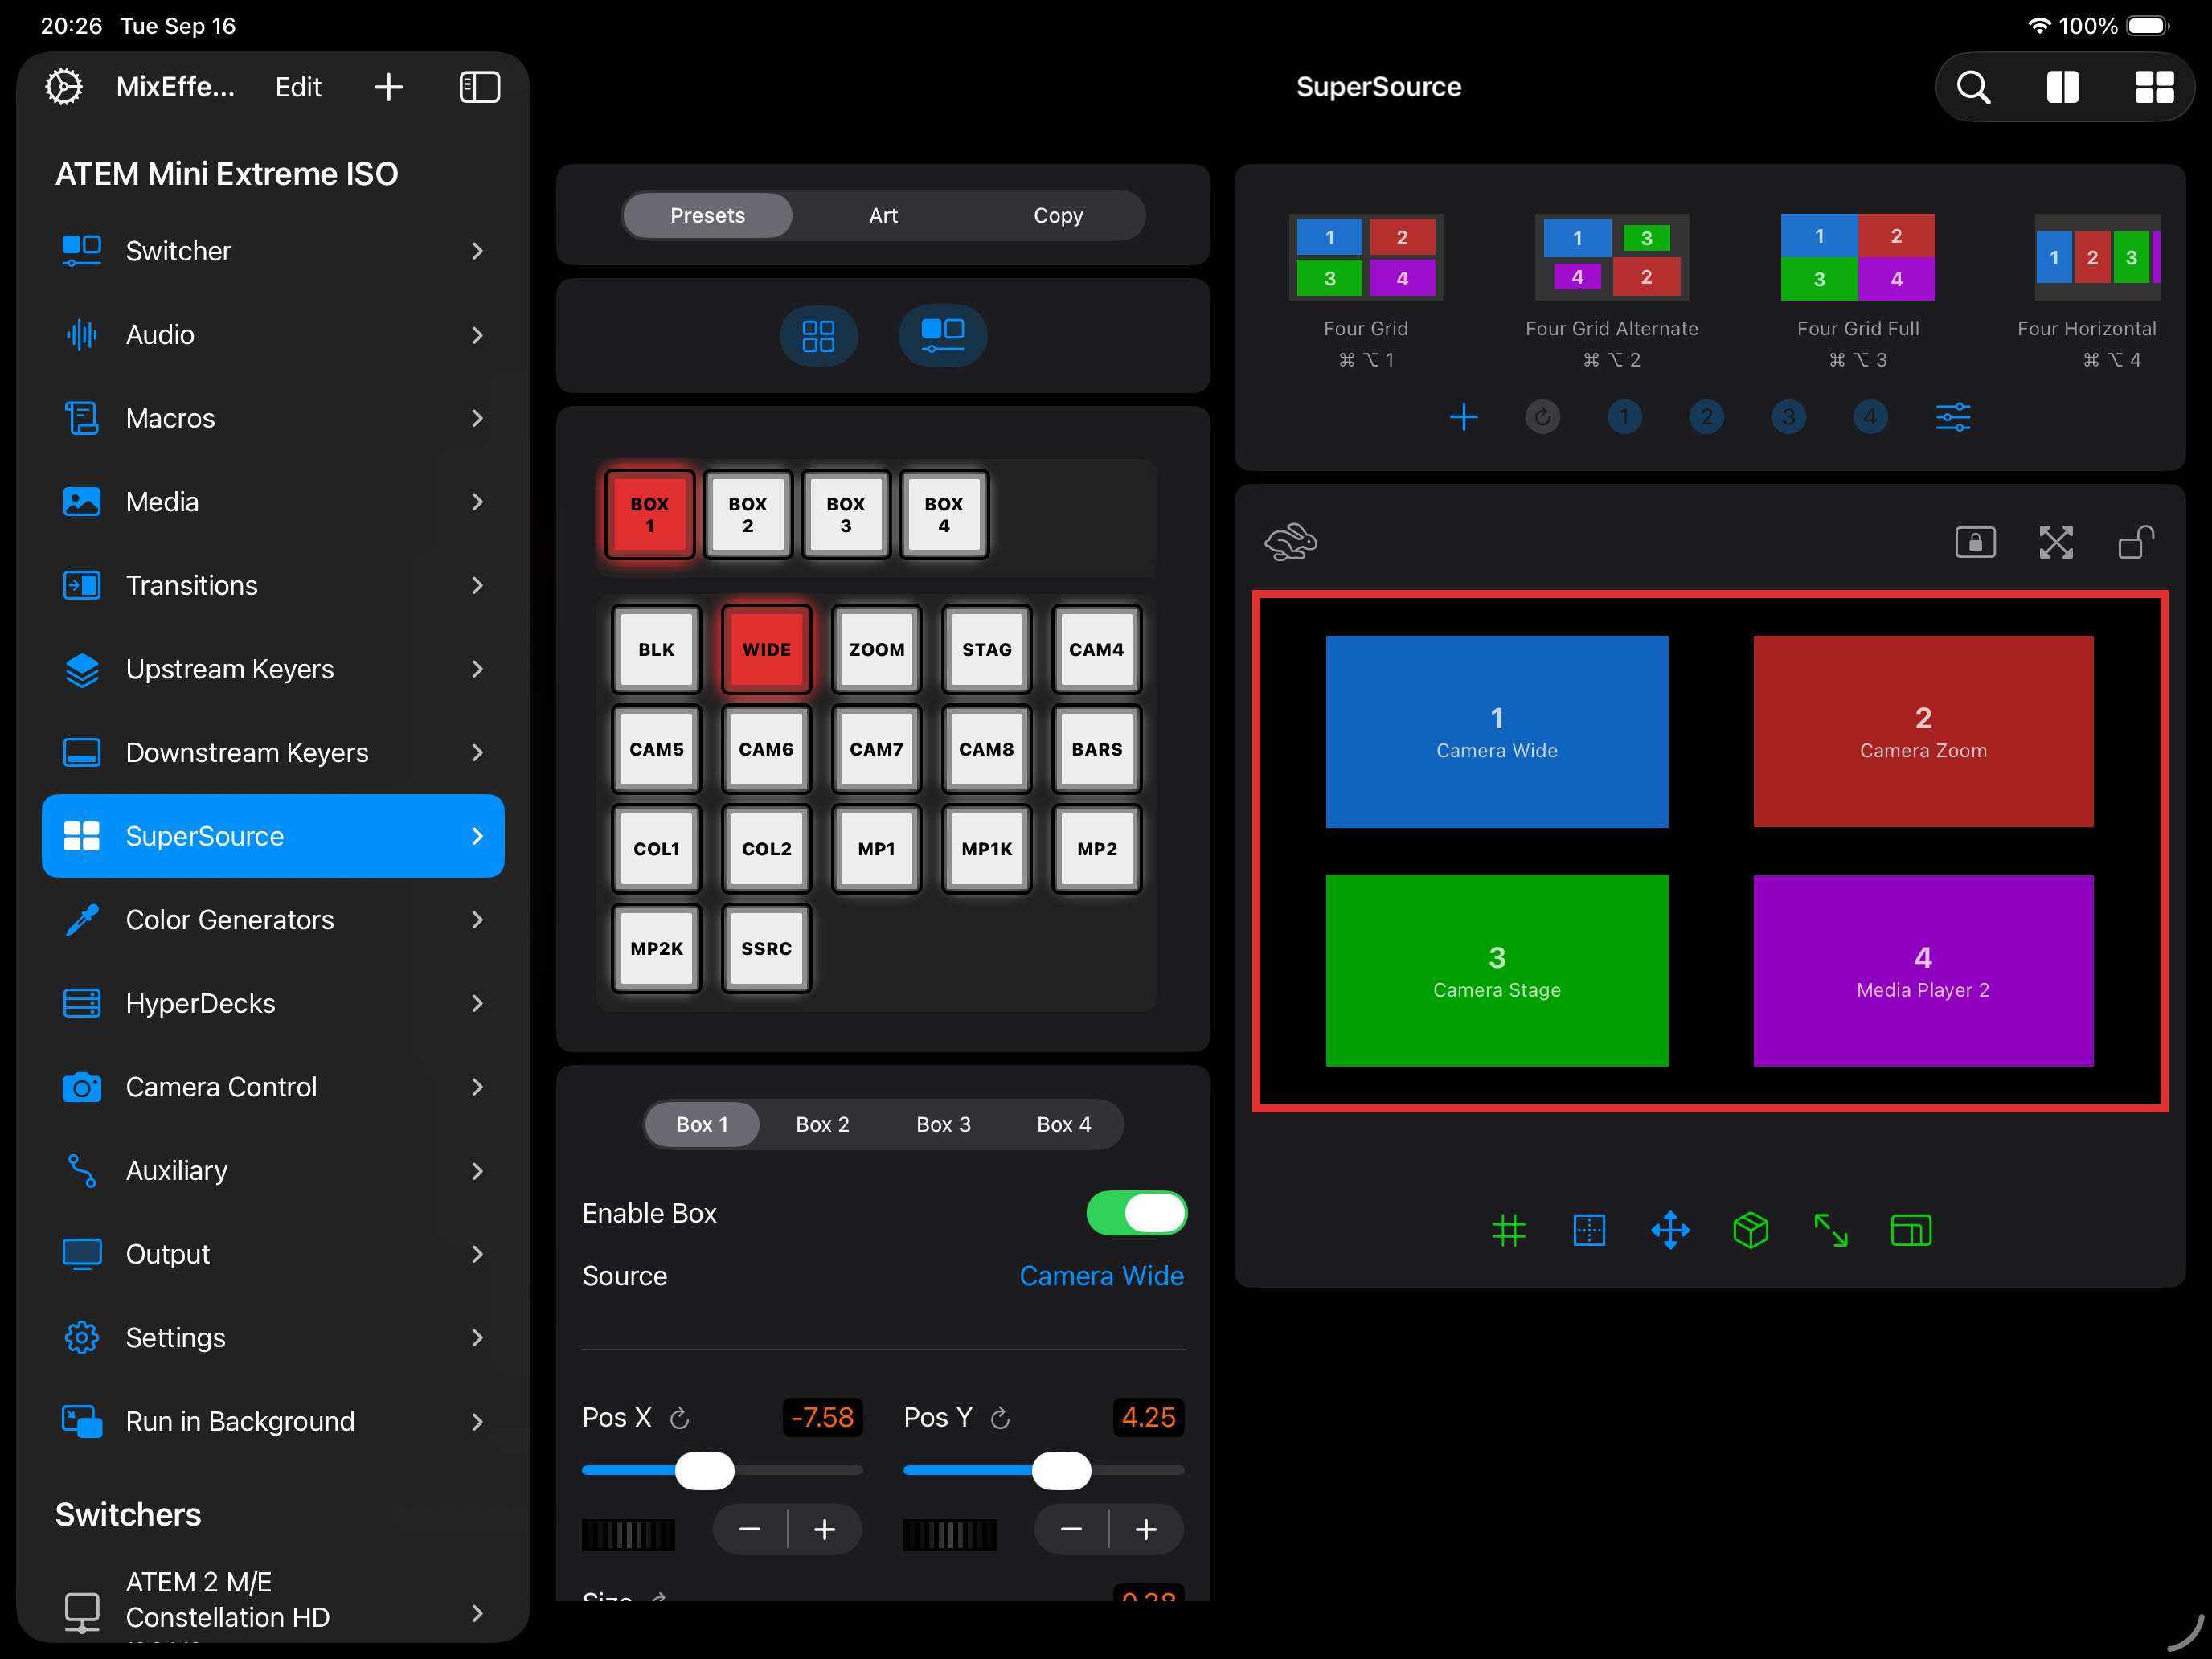
Tap on the Split Controls command in the toolbar (between the Search and the View All Presets buttons) to create two columns in the SuperSource section. This provides an easy way to edit your SuperSource boxes while still being able to see the Visual Editor.

* **Column A**: Box Sources, Box Controls, and Automations
* **Column B**: Presets and Visual Editor

<figure><img src="/files/sn8nzPsgq5PnBH26OIQC" alt=""><figcaption></figcaption></figure>

> **Note**: This feature only works on iPadOS or on iPhones in Landscape orientation running MixEffect 1.7.0.

### Box Editing Visibility Buttons

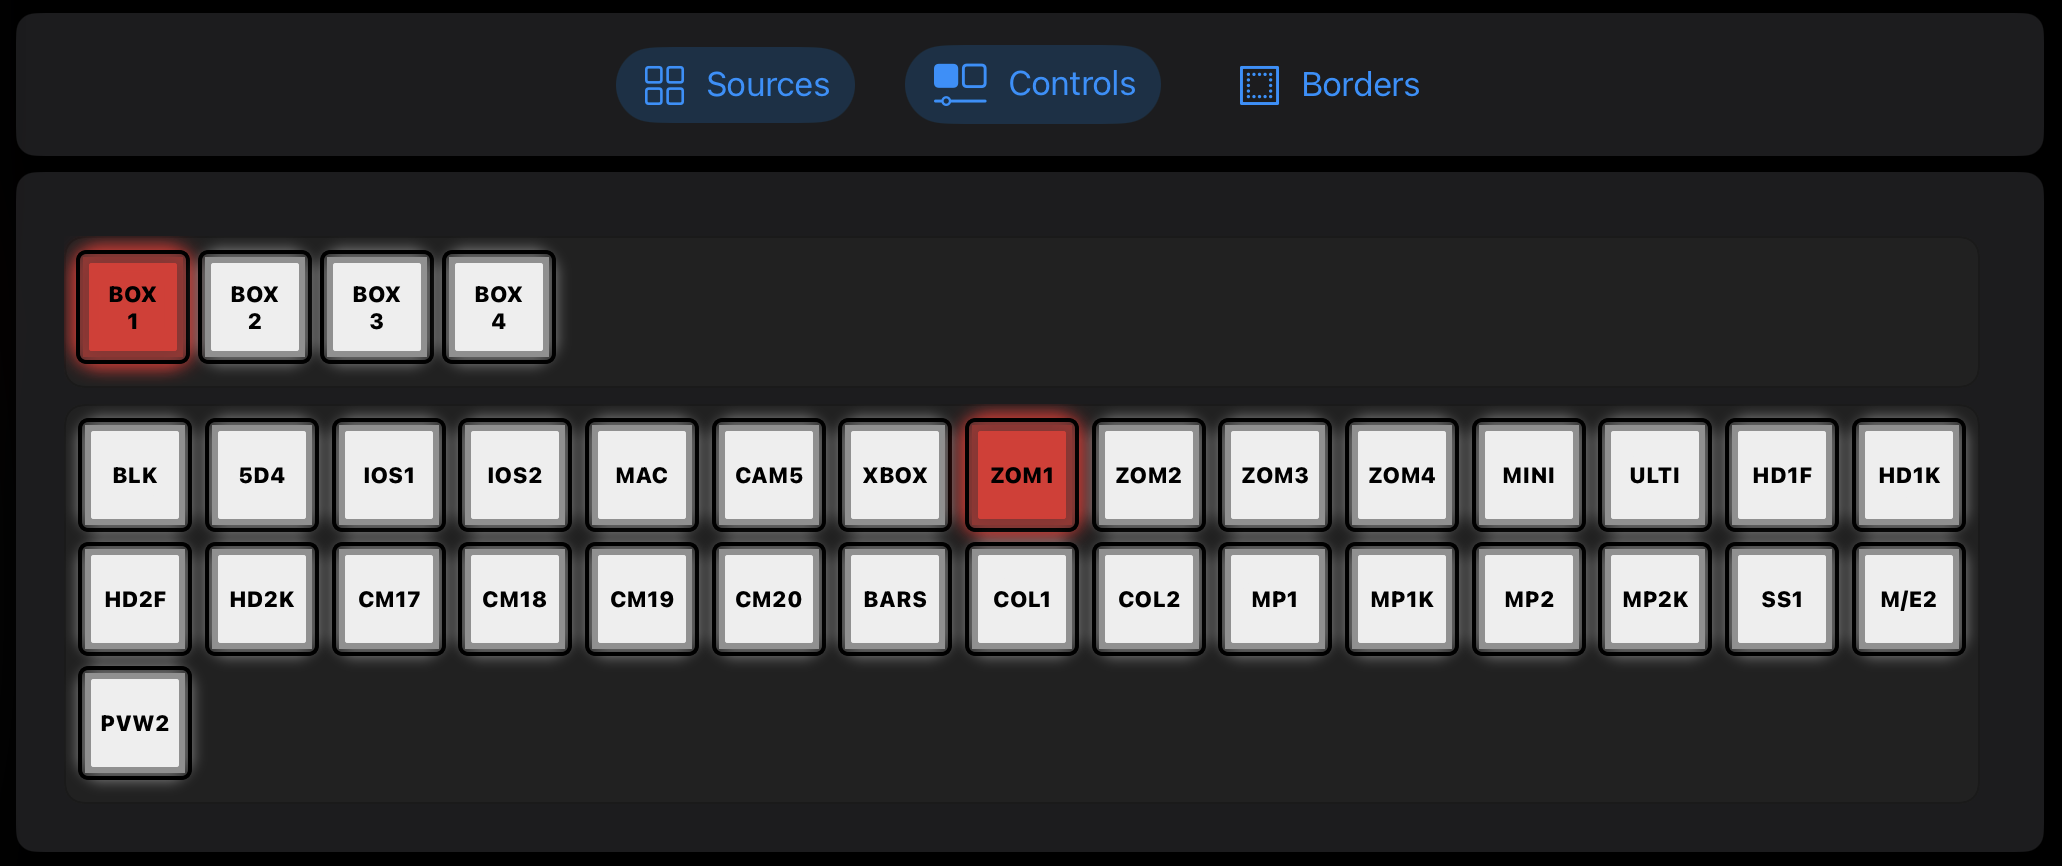
In MixEffect 2.2.0, there's a new way to toggle between Box Sources, Box Controls, and Box Borders editing panels. Tap on the button to reveal the editing panel. Note that Box Borders will only appear if the ATEM switcher MixEffect is currently connected to supports SuperSource Box Borders.

* Box Sources
* Box Controls
* Box Borders

<figure><img src="/files/caZ6nkESyXkfPrY9lODi" alt=""><figcaption></figcaption></figure>

### Box Sources

You can quickly adjust the box sources using a crosspoint selector.

* Tap **Show Box Sources** to reveal the crosspoint selector.
* The box highlighted in red is the selected box. The input below in red is the current source for the box.
* Tap on a source to change the selected box's source. Tap on a box to start changing its source.

<div><figure><img src="/files/UdKaBAgKWeQNG8O4V2fo" alt=""><figcaption></figcaption></figure> <figure><img src="/files/G6rkMb1RaDHeMsajs6Vt" alt=""><figcaption></figcaption></figure> <figure><img src="/files/nGpkg7mdhffU9V8xhlDe" alt=""><figcaption></figcaption></figure></div>

### Box Controls

Tap **Show Box Controls** to adjust the following settings for each box:

* **Enabled**: Set to display the box.
* **Source**: Change the source of the box.
* **Position X**: The horizontal position of the box.
* **Position Y**: The vertical position of the box.
* **Size**: The size of the box from 0.07 to 1.0.
* **Cropped**: Enable to crop the source.
* **Top**: The top crop value.
* **Bottom**: The bottom crop value.
* **Left**: The left crop value.
* **Right**: The right crop value.

#### Slider

With the slider controls, a clockwise-arrow button will appear when the slider value has changed from its default. Tap on the button to reset the setting back to its default value.

#### Increment

Tap the Plus or Minus buttons to adjust the position, size, or crop settings by the minimum value.

#### Jog Dial

In MixEffect 1.7.0, jog dials have been added for fine adjusment of the SuperSource Box position and crop settings. You can long-press the jog dials for even finer adjustment of those settings.

<figure><img src="/files/8mtpyzbQvsVV19Dmzvi3" alt=""><figcaption></figcaption></figure>

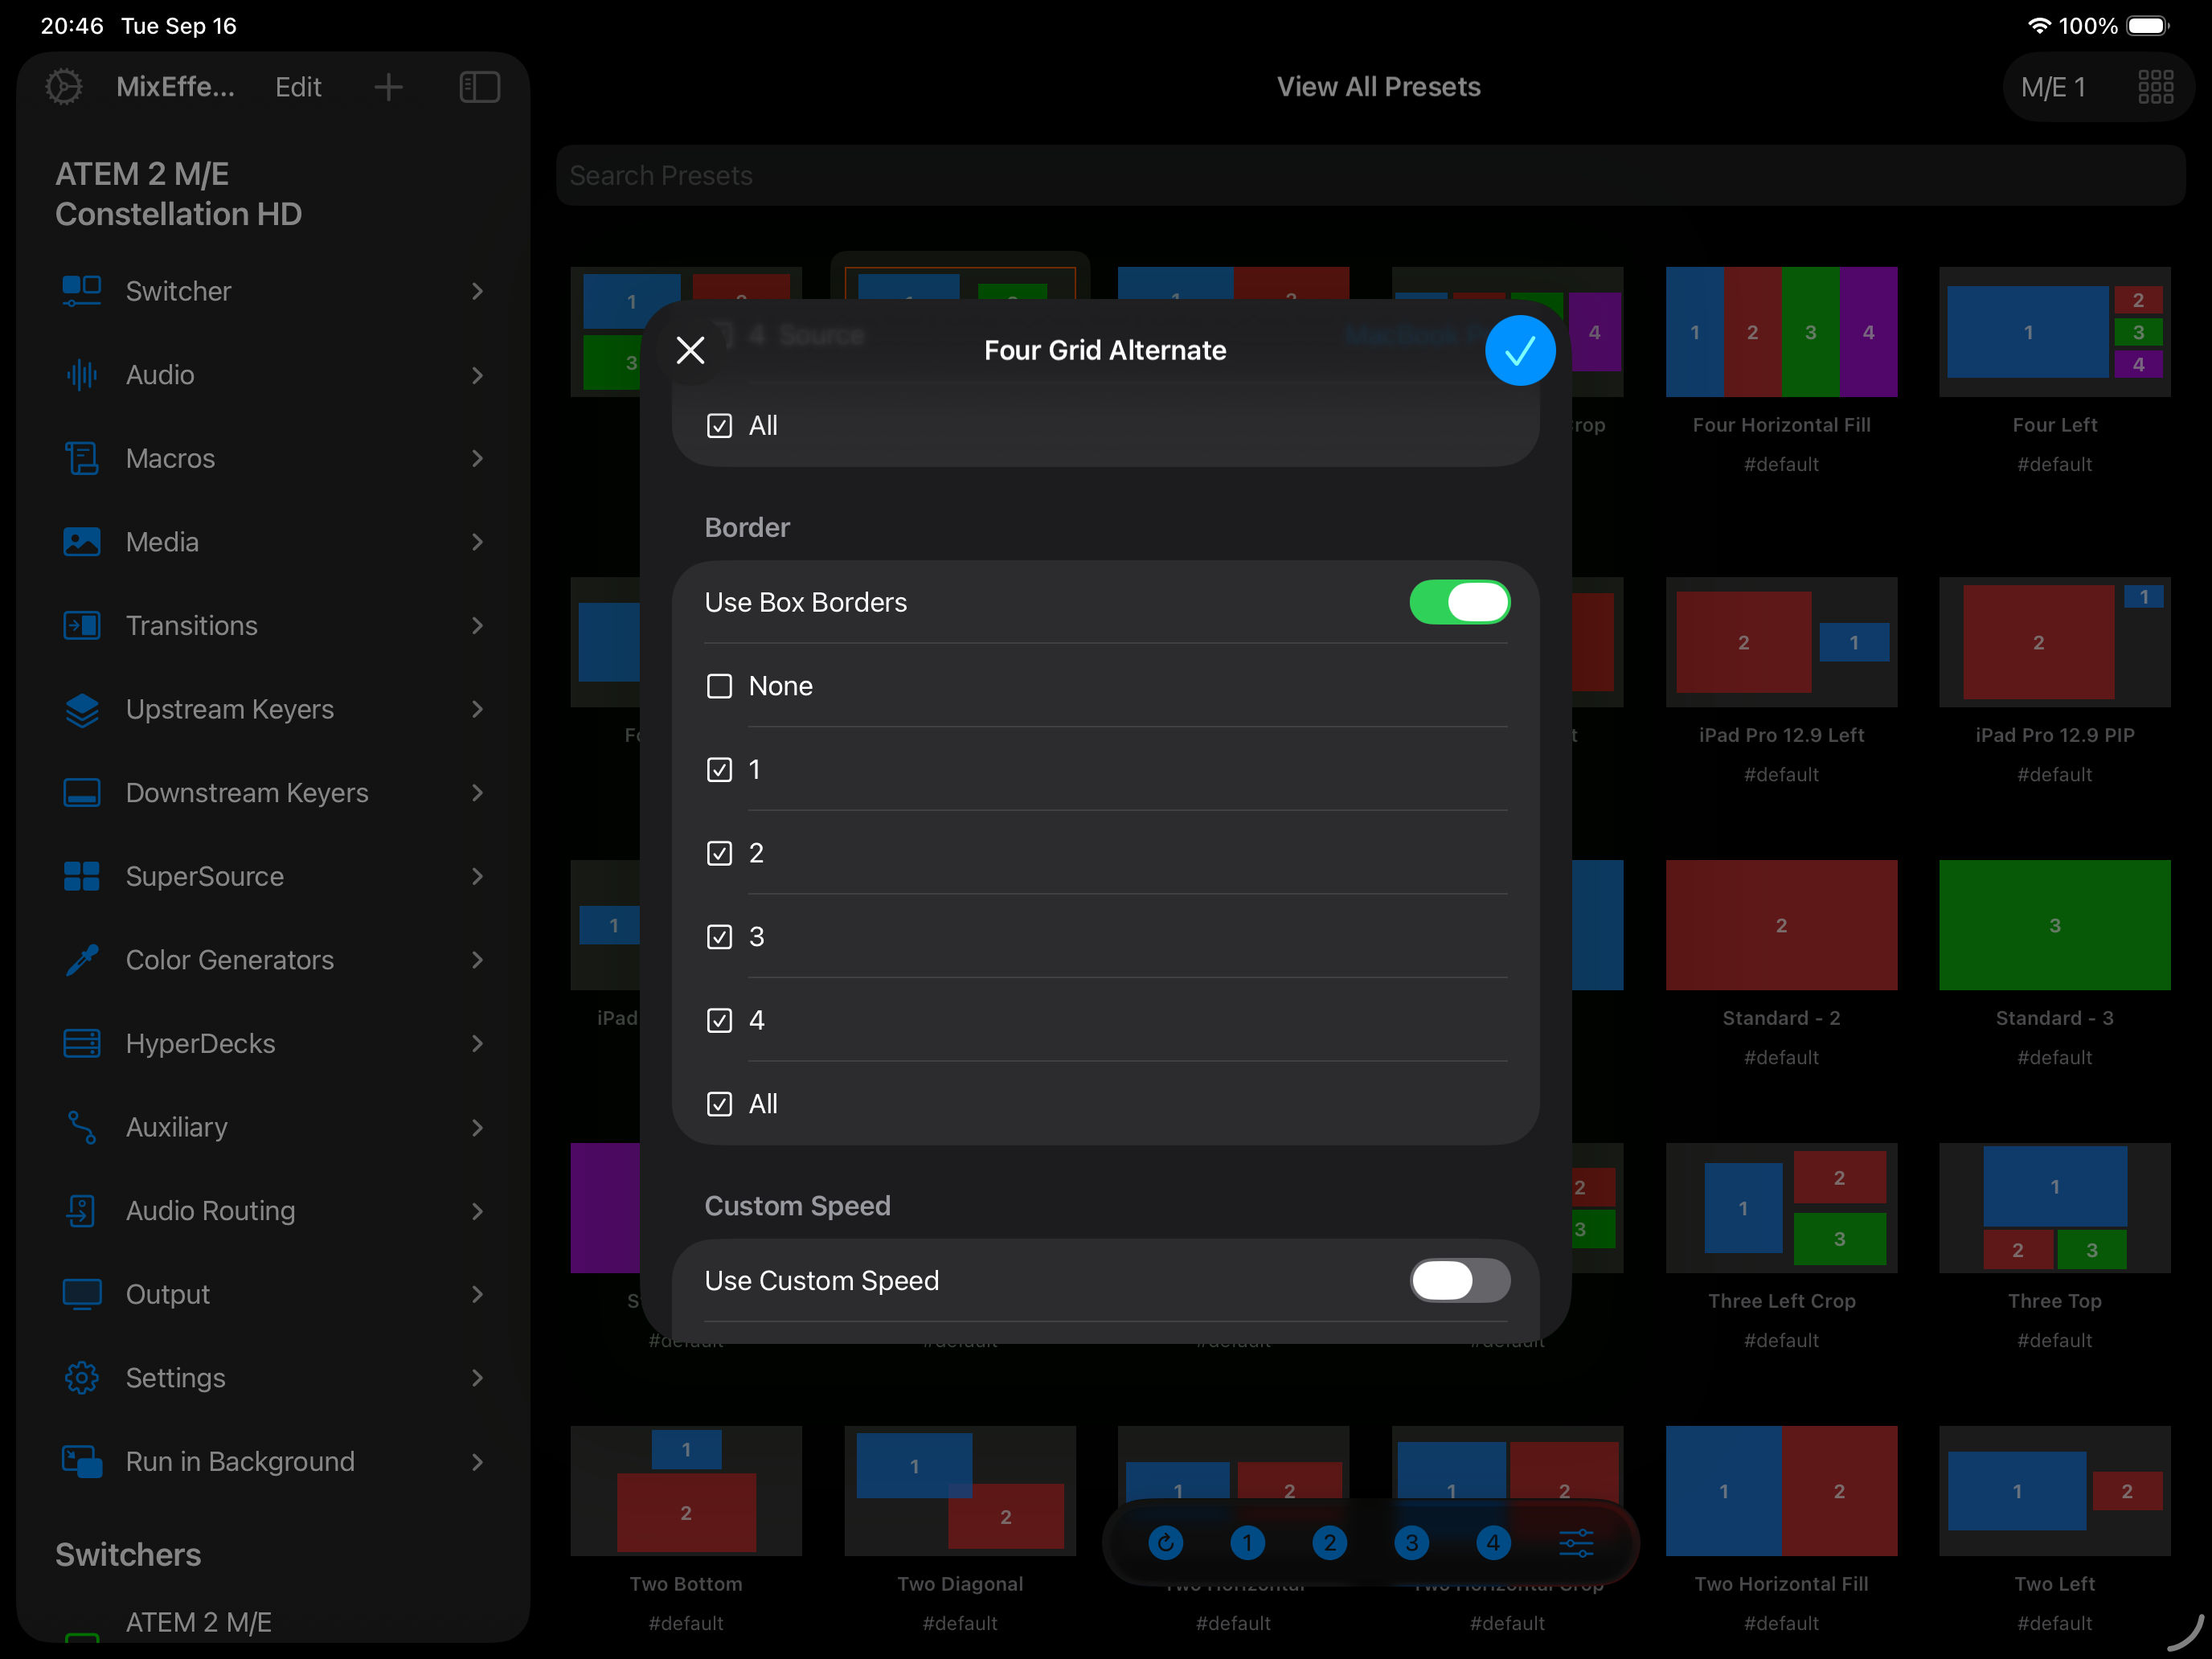
### Box Border Controls

If the connected switcher supports SuperSource Box Borders, there will be controls for adjusting the following box border settings for each box:

* Border Enable
* Outer Width Horizontal
* Outer Width Vertical
* Inner Width Left
* Inner Width Right
* Inner Width Top
* Inner Width Bottom
* Hue
* Saturation
* Luma

You can link the Outer Width Horizontal and Outer Width Vertical values by tapping on the link button on the right-hand side of the sliders. You can do the same for the four Inner Width parameters.

<figure><img src="/files/uoN9wszKt0Zi5wZjJQ0t" alt=""><figcaption></figcaption></figure>

{% hint style="info" %}
Linking the outer width parameters will cause the Outer Width Vertical parameter to take the current value of the Outer Width Horizontal value. When linking the inner width parameters, all the parameters will take the current value of the Inner Width Left value.
{% endhint %}

{% hint style="warning" %}
If your ATEM switcher supports Box Borders, note that setting the Place In value to Foreground will disable borders. This limitation is imposed on by the ATEM switcher's firmware and is not overridable by MixEffect.
{% endhint %}

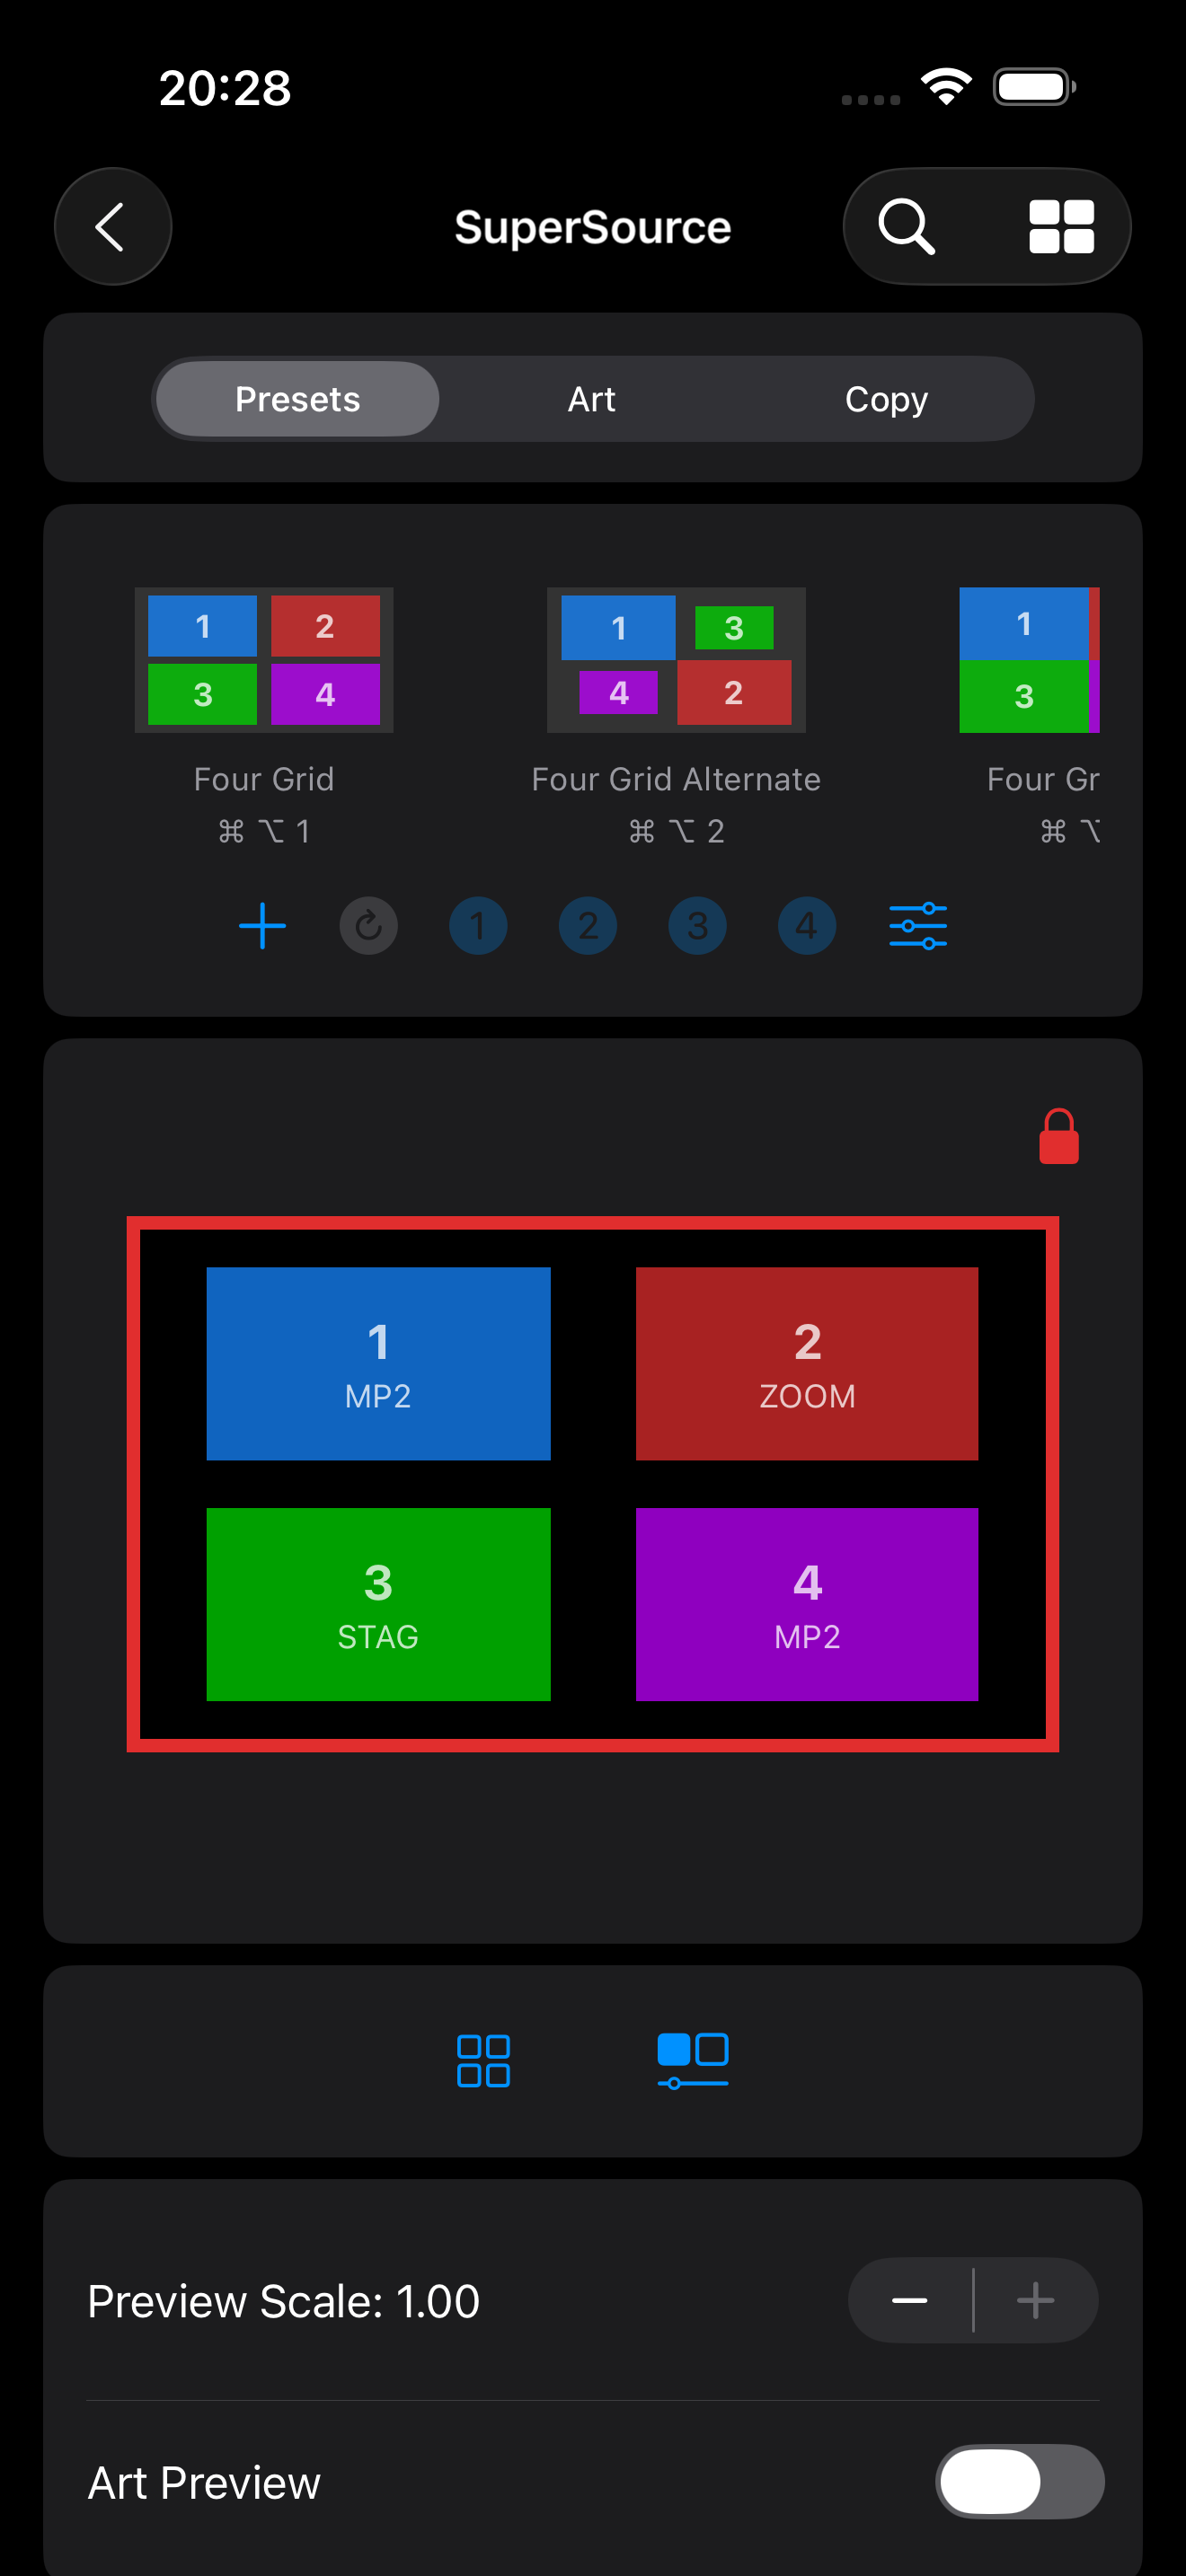
### Preview Scale

Adjust the size of the SuperSource Visual Editor preview from 0.25 to 1.0.

<div><figure><img src="/files/R3GPQc0tt12RuLkoz4pQ" alt=""><figcaption></figcaption></figure> <figure><img src="/files/Fm0DF62ZGzUtGckiQ9nn" alt=""><figcaption></figcaption></figure> <figure><img src="/files/s6ksvLCfP85axCsPy7SK" alt=""><figcaption></figcaption></figure></div>

### Art Preview

You can display an image from the internet as the Art Foreground or Background in the SuperSource Visual Editor.

1. Enable **Art Preview**.
2. Enter the URL to an image on the internet. The URL must be accessible via HTTPS.
3. Depending on the value of the **Art Place In** setting, the image will be displayed in front of or behind your SuperSource boxes.

<figure><img src="/files/TAdeDI2aB2kY3DmxPvGs" alt=""><figcaption></figcaption></figure>

If you have an ATEM switcher featuring two SuperSources, such as an ATEM Constellation 8K, you can specify a different Art Preview image for each SuperSource.

> **NOTE**: Images displayed in the foreground may not be 100% precisely positioned. Please use the Multiview or SuperSource Program output to align your boxes with the actual Art foreground.

## **Set All Settings and Set Box Settings**

When you are recording a macro, two buttons, Set Box Settings and Set All Settings, will appear at the bottom of the Box Control section. Set Box Settings will code into the macro all settings for the currently visible box. Tapping Set All Settings will code into the macro settings for all boxes in the current SuperSource.

### **Reset Settings**

Tap Reset Settings to reset the current box settings to the defaults.

## Cascade

If you have an ATEM Constellation 8K or an ATEM 4 M/E Constellation HD, you can combine the two SuperSources into one by enabling the **Enable Cascade** toggle at the bottom of the Presets section.

When enabled, an orange `Cascade` indicator will appear atop the SuperSource Visual Editor window.

> **NOTE**: Performing transitions from MixEffect only sets the layout for the currently selected SuperSource. If you want to animate both SuperSources when Cascade is enabled, you will have to use Shortcuts or OSC. Also note that the animations currently happen sequentially, rather than concurrently. So, the first SuperSource preset layout will change, followed by the second SuperSource preset layout.

If you have a keyboard attached to your device, you can also press `Command-Option-C` to toggle cascade. This will display the word "Cascade" in orange at the top of the SuperSource Visual Editor.

### **Cascading Both SuperSources at the Same Time**

If you have an ATEM Constellation 8K or ATEM 4 M/E Constellation HD, you can use a shortcut or Companion to change the layout of your cascade SuperSources at the same time. See the documentation in the Shortcuts section on the Set SuperSource Cascade Layout and the SuperSource Cascade Presets command in the OSC docs for more details.

## Automations

In MixEffect 1.4.0, an Automations link appears at the bottom of the Presets section. You can use this to quickly create a shortcut or OSC action to set the current preset or set individual box settings.

> **NOTE**: This option will only appear if you have **Enable Automations** active in MixEffect Settings and if you have **Enable Shortcuts** or **Enable OSC** turned on.

There are several automations available:

### **Automations - Preset**

Create a shortcut or OSC action that sets the current SuperSource to the selected  preset.

<div><figure><img src="/files/jx88g9GobDDmKewDS3T6" alt=""><figcaption></figcaption></figure> <figure><img src="/files/hcnZ4b283Ge5upu6FuQK" alt=""><figcaption></figcaption></figure> <figure><img src="/files/zMhd9qKNKcIQGW42VI0L" alt=""><figcaption></figcaption></figure></div>

### **Automations - Box 1-4**

Create a shortcut of OSC actions that sets one of the following for the selected box:

* Every setting
* Position, size, and crop
* Position
* Size
* Crop

<div><figure><img src="/files/wI6gKY8DP3Cqva0L407T" alt=""><figcaption></figcaption></figure> <figure><img src="/files/V2IwLtEyxaav2L0ZZWOD" alt=""><figcaption></figcaption></figure> <figure><img src="/files/AHDqSEsxmcApQEL90I4o" alt=""><figcaption></figcaption></figure></div>

Within the Automation page, you can also configure a custom animation duration and style for the shortcut or OSC action.

* **Use Custom Animation**: Toggle this on if you want to animate between the current settings to the saved settings in the shortcut or OSC call.&#x20;
* **Duration**: Specify the amount of time to perform the animation in milliseconds from 0 to 10000 (i.e. 10 seconds).
* **Style**: Choose an animation style that will be used to perform the transition. These styles are the same as in the SuperSource Transition Style.


# Art Tab

Change the background or foreground art of your SuperSource input and adjust the borders for each box on support switchers.

## Input Source

You can adjust the fill and key source for the SuperSource Art.

## Place In

The art source can be placed either as part of the background or in front of the box sources. If you choose the foreground option, be sure that your SuperSource Art has cutouts so that your boxes sources will display through.

{% hint style="warning" %}
If your ATEM switcher supports Box Borders, note that setting the Place In value to Foreground will disable borders. This limitation is imposed on by the ATEM switcher's firmware and is not overridable by MixEffect.
{% endhint %}

## Legacy Border

You can add borders to your SuperSource boxes if your switcher supports borders. Currently, only the ATEM 2 M/E Production Studio 4K, ATEM 4 M/E Broadcast Studio 4K, and the ATEM Constellation 8K supports borders.

{% hint style="danger" %}
If you have an ATEM Mini Extreme, ATEM Mini Extreme ISO, or ATEM SDI Extreme ISO, the border settings will appear in the Art Tab but will be disabled. This is because those switchers do not support the Legacy SuperSource Border feature.
{% endhint %}

The following border options are available to change:

* Enable Border: Turns the border on and off for your boxes.
* Style: Choose from Bevel None, Bevel In, Bevel Out, and Bevel In Out.
* Color: Select the color for your border.
  * Hue
  * Saturation
  * Luminance
* Outer Width
* Inner Width
* Outer Soften
* Inner Soften
* Bevel Position
* Bevel Soften
* Angle
* Direction

## New Box Borders

Certain ATEM switchers support the new SuperSource Box Borders feature, including the ATEM 2 M/E Constellation HD, ATEM 2 M/E Constellation 4K, ATEM 4 M/E Constellation HD, and ATEM 4 M/E Constellation 4K.

<figure><img src="/files/ush7WRAL0slYyr3Xkgyk" alt=""><figcaption></figcaption></figure>

The following box border options are available to change. When you manipulate the sliders in this section, the borders for all boxes will be affected.

* Enable Border: Turns the borders on and off for all of your boxes.
* Outer Width Horizontal
* Outer Width Vertical
* Inner Width Left
* Inner Width Right
* Inner Width Top
* Inner Width Bottom
* Color: Select the color for your border.
  * Hue
  * Saturation
  * Luminance

### Copy Box Border Settings

Above the control to enable borders, there are four box buttons that you can tap to apply the current settings of the selected box to all other boxes.&#x20;

Tap on the Clear button to remove border information from all boxes. This will disable the box border and set all other parameter values to 0.


# Copy Tab

This section allows you to copy position, enables, size, and crop settings from one box to the other three boxes.

> **Note**: The input source is not copied to the other boxes.

<div><figure><img src="/files/bLv25LL5zLZF9PF4af0m" alt=""><figcaption></figcaption></figure> <figure><img src="/files/skMpSTVWe09lCJsQCwix" alt=""><figcaption></figcaption></figure> <figure><img src="/files/SDLZ3Em2VDMUeNplbp8x" alt=""><figcaption></figcaption></figure></div>

{% hint style="danger" %}
As of MixEffect 2.2.0, SuperSource Box Borders parameters are not copied between boxes, only the position, size, and crop settings.
{% endhint %}


# View All Presets

Tap the View All button or press Command-O in the Presets section to go to the View All Presets page.

<figure><img src="/files/Cx3bWAYix0zdauvts1gq" alt=""><figcaption></figcaption></figure>

Tap the button in the upper-right to access the following menu:

* **Grid**: Switch the layout to a grid of preset layout thumbnails.
* **List**: View your presets in a list.
* **Detail**: View your presets in a grid with additional information about each preset.
* **Name**: Sort your presets by name. Tap again to toggle the sort between ascending and descending.
* **Favorite**: Sort your presets by their favorite status.
* **Box Count**: Sort your presets by the number of enabled boxes.
* **Show Descriptions**: Display the notes associated with your presets.
* **Import Presets**: Import presets into MixEffect.
* **Export All Presets**: Export your presets to a file.
* **Reset Presets**: Deletes all presets in MixEffect and installs the default presets.

## View All Presets Shortcut

You can also access the View All Presets page directly from the Switcher Navigation section by tapping the chevron icon on the SuperSource row.

<figure><img src="/files/7t4rgWL10sebJxRCh6d9" alt=""><figcaption></figcaption></figure>

### Setting Layouts

When in Grid or Detail mode, you can tap on a preset to set its layout.

<figure><img src="/files/WrdpcWbZ1i5qX8vLNn7o" alt=""><figcaption></figcaption></figure>

The Detail view will highlight which boxes are enabled in the preset, even if they are positioned off-screen. Enabled boxes will have a colored box around the video source. Boxes that are disabled will have no border around them.

<figure><img src="/files/I6vZtjjayUVqzXXqLSXS" alt=""><figcaption></figcaption></figure>

When in List mode, you will tap on the Play button on the far right to set the SuperSource layout to the selected preset. This is done to prevent accidental triggering.

<figure><img src="/files/FVicTisc2WkR8VfLZGn0" alt=""><figcaption></figcaption></figure>

### Highlight Bar

The same highlight bar from the SuperSource section main page is present on the View All Presets page.

### Filtering Presets

Use the search bar to filter your presets by text contained in the preset name or description. The filtered list of presets will be shown on the main SuperSource section.

Use the description to place tags to identify collections of layouts used for a particular show or event.


# Editing Presets

You can edit a preset in several ways:

## From Presets Tab

Long-press or control-click on a preset in the presets bar on the Presets Tab in the SuperSource section.

<div><figure><img src="/files/7t8uyf5BgusOLlGh2ATy" alt=""><figcaption></figcaption></figure> <figure><img src="/files/Ni9dqKT3mWUafKVihzj3" alt=""><figcaption></figcaption></figure> <figure><img src="/files/WnEEUzVIDoLklUIDqL9k" alt=""><figcaption></figcaption></figure></div>

## From View All Presets

Long-press or control-click on a preset in the View All Presets page.

<div><figure><img src="/files/xuEjZwY6mY2gjRaT6JiN" alt=""><figcaption></figcaption></figure> <figure><img src="/files/njyAgZ97hZ6OJQc0ixmM" alt=""><figcaption></figcaption></figure> <figure><img src="/files/aPt80tIn6R8YEhQmwvdy" alt=""><figcaption></figcaption></figure></div>


# Naming Presets

It's important to have unique names for your presets. MixEffect does not prevent you from having duplicate names, but keep in mind the following things:

1. The preset name will be used to identify the currently active preset. If you have multiple presets with the same name, you may see multiple presets highlighted in orange.
2. Video Follows Audio uses the preset name to determine which preset to switch to. If multiple presets exist with the same name, the wrong preset may be chosen.


# Use Box Sources

Assign sources to your preset boxes.

When Use Box Sources is enabled, the box sources defined in the preset will be used when transitioning to that preset. For instance, if the currently SuperSource layout had the following box sources:

1. Camera 1
2. Camera 2
3. Camera 3
4. Camera 4

And you switched to a preset that had Use Box Sources enabled and the following boxes defined:

1. Camera 5
2. Camera 6
3. Camera 7
4. Camera 8

Going to this second preset will change the box sources. If you went to another preset that has Use Box Sources disabled, the box sources would remain Cameras 5-8.

A preset that has Use Box Sources enabled will be indicated by an icon of a lock inside a rectangle below the preset name.

<figure><img src="/files/nehWDxtU8hW8ftIO0ota" alt=""><figcaption></figcaption></figure>

From the View All Presets page, you can mark presets to use the box sources defined in the preset.

1. Go to the **View All Presets** page.
2. Long-press on a preset you want to modify.
3. Tap **Use Box Sources**. If enabled, a checkmark icon will appear next to the Use Box Sources menu option.

You can also access the Edit Preset screen by long-pressing a preset in the presets bar within the Presets tab.

### **Specifying Individual Locked Box Sources**

You can specify which box sources should be locked in a preset. For instance, you may want Boxes 1 and 2 to be locked but 3 and 4 to be able to change based on other presets.

1. Go to the **SuperSource** section.
2. Tap the **View All Presets** button in the upper-right.
3. Long-press on a preset.
4. Choose **Edit Preset**.
5. Enable **Use Box Sources**.
6. Check the boxes that you want to lock.

When you enable Use Box Sources for the first time, all the boxes will be locked.

<div><figure><img src="/files/a0hEmvD3zZPswqQqzky4" alt=""><figcaption></figcaption></figure> <figure><img src="/files/yex7nQ8XKSY3zmn7SOC9" alt=""><figcaption></figcaption></figure> <figure><img src="/files/9fuqH1EtpO0IBkqF9wvq" alt=""><figcaption></figcaption></figure></div>


# Use Box Borders

Some newer ATEM switchers supports the new SuperSource Box Borders feature, including:

* ATEM 2 M/E Constellation HD
* ATEM 2 M/E Constellation 4K
* ATEM 4 M/E Constellation HD
* ATEM 4 M/E Constellation 4K

{% hint style="warning" %}
If you have one of these switchers but don't see the SuperSource Box Borders, be sure you are running ATEM Switchers 9.6.2 Update or higher.
{% endhint %}

As of MixEffect 2.2.0, you can store the border information for every box in a SuperSource Preset.

By default, the setting is disabled for new presets. And, like with [Use Box Sources](/explore/supersource/editing-presets/use-box-sources), you can specify which boxes should preserve their border information and which boxes should adopt the existing border information.

If you recall a SuperSource Preset on an ATEM switcher that does not support the new SuperSource Box Border feature, the boxes will animate, but no borders will be displayed.&#x20;

<figure><img src="/files/Un8nzrg8BBB8c4L38RN0" alt=""><figcaption></figcaption></figure>

To enable Use Box Borders on a preset, perform the following actions:

1. Go to the SuperSource section.
2. Adjust border information for all boxes in the Art tab or for individual boxes in the Presets tab.
3. Right-click of long-press on a preset in the Presets tab.
4. If changed the border information, save your changes back to the preset by choosing Save Preset.
5. Edit a preset by right-clicking or long-pressing on a preset in the Presets tab.
6. Choose Edit Preset from the menu that appears.
7. In the sheet that appears, scroll down to the Border section.
8. Tap Use Box Borders.
9. Select the boxes you want to retain border information for.
10. Tap Save.

Now, when recalling the preset on switcher that supports SuperSource Box Borders, the saved border information will be displayed when viewing the preset.


# Custom Animation Speed

In version 1.2.0 of MixEffect, you can now set a custom animation speed to use when recalling a preset. This custom speed will override whatever animation speed you have set in MixEffect.

1. Go to the **SuperSource** section.
2. Tap the **View All Presets** button in the upper-right.
3. Long-press on a preset.
4. Choose **Edit Preset**.
5. Enable **Use Custom Speed**.
6. Tap **Speed** and select the animation speed you wish to use with the preset.

The icon associated with the custom speed will be displayed next to the preset button.

<div><figure><img src="/files/G1V2GhLrMlTYJbJRh0WW" alt=""><figcaption></figcaption></figure> <figure><img src="/files/KbNP1Dc6ajBHIrvA3rya" alt=""><figcaption></figcaption></figure> <figure><img src="/files/YMftwNV4wcLMOl8zOHXP" alt=""><figcaption></figcaption></figure></div>

### **Custom Animation Speed with Cascading Presets**

If you have an ATEM Constellation 8K and make use of the Cascade SuperSource Layout OSC command or Shortcut action to recall two presets at the same time, use the following guide to determine the speed of the preset transitions:

* **No custom speed defined**: The default speed will be used.
* **Preset One has a custom speed**: Preset One's custom speed will be used for both presets.
* **Preset One does not have a custom speed, and Preset Two has a custom speed**: Preset Two's custom speed will be used for both presets.
* **Both presets have custom speeds defined**: Preset One's custom speed will be used for both presets.


# Custom Animation Style

In version 1.4.0 of MixEffect, you can now set a custom animation style to use when recalling a preset. This custom style will override whatever animation style you have set in MixEffect. There are eleven different animation styles that change the speed and movement of the boxes as they transition from one preset to another.

* Cosine
* Cubed
* Inverse Cubed
* Inverse Squared
* Linear
* Sine
* Smooth Step
* Smoother Step
* Squared
* Ease In Out Elastic
* Ease Out Bounce
* Ease Out Elastic

To change the animation style for a preset, follow these steps:

1. Edit a preset.
2. Toggle **Use Custom Animation**.
3. Choose the animation style.
4. Tap **Save**.

<div><figure><img src="/files/xq5R4xGmLJ4TBvoU1dgF" alt=""><figcaption></figcaption></figure> <figure><img src="/files/Ds2dgkrkodkbbhnZofTk" alt=""><figcaption></figcaption></figure> <figure><img src="/files/9ZxOdhkg7Zgnm6QQwxkc" alt=""><figcaption></figcaption></figure></div>

### Easing Styles and Speed

If you make use of the Ease In Out Elastic, Ease Out Bounce, or Ease Out Elastic animation styles, it's recommend that you choose a slower animation speed than you would ordinarily use. For instance, it you have MixEffect's default animation speed set to Fast, you will want to choose Normal or Slow if you use presets with these animation styles.


# Bulk Editing Presets

Switch to List view to access editing controls for managing your presets. Tap the Edit button and select the presets you wish to manage.

<figure><img src="/files/8TTZyCO0wsz3UdlbWzeO" alt=""><figcaption></figcaption></figure>

The highlight bar will transform into an editing bar with the following commands:

* **Copy Presets to Clipboard**: Export the selected presets to the clipboard. You can then add these presets to a shortcut that you can share with other people. If no presets are selected, all of your presets will be copied to the clipboard.
* **Export Selected Presets**: If no presets are selected, all of your presets will be exported to a file.
* **Add Tags**: Add keywords, separated by spaces, which will be added to the preset's notes with `#` characters appended to the beginning of each tag.
* **Remove Tags**: Remove keywords, separated by spaces, to be removed from the selected presets. You do not have to add `#` in front of the tag names.
* **Delete Selected Presets**: Deletes the selected presets from MixEffect.


# SuperSource and Macros

Learn how to incorporate macros with SuperSource.

## Recording Presets as Macros

You can record SuperSource transitions as macros on your ATEM switcher.

First, you need to enable the following preference:

* Go to the **MixEffect Home**.
* Tap **Settings** (gear icon) in the upper-left.
* Tap **Macros**.
* Enable **Add Pause Steps When Recording Macros**.

This will add a pause step of 1 frame after each step of the animation transition between layouts.

To record a macro from MixEffect, do the following:

1. Go to the **Macros** section.
2. Tap **+**.
3. Choose the **macro slot** you wish to record.
4. Enter your name, description, icon, color, etc.
5. Tap **Record**.
6. Go to the **SuperSource** section.
7. Tap a **preset**.
8. Tap the **Stop** button in the Macro Record floating panel.

<mark style="color:red;">**NOTE: When recording a macro that contains a SuperSource transition, sometimes the macro stops recording. One workaround is to use a faster (i.e. Extra Fast or Instant) speed. This is a result of the ATEM not being able to record all the commands that go into a slower transition.**</mark>

### Macro Recall of a Preset Disclaimer

It is important to note that the macro you just recorded will perform the preset transition animation based on how the current SuperSource boxes were when you started the transition. If your SuperSource is configured to display another preset and you run the macro, you will see the boxes jump to the same starting position they were in when you recorded the macro.

As a result, it is almost always better to run your SuperSource presets from the SuperSource section (or via Companion on your Stream Deck) instead of through a macro. Doing it in this fashion will ensure your box transitions operate smoothly from preset to preset.

## SuperSource Macros

In version 1.2.0 of MixEffect, you can now have a macro run when recalling a preset and when leaving a preset.

In order to make use of this feature, you must toggle the Enable SuperSource Macros in each switcher connection entry in MixEffect:

1. Go to **MixEffect Home**.
2. Tap on a **switcher connection** entry.
3. Turn on **Enable SuperSource Macros**.

<div><figure><img src="/files/9jMxo6LXWPeNtXSqjwKT" alt=""><figcaption></figcaption></figure> <figure><img src="/files/PQX8X2YThcFJDwUpUJwg" alt=""><figcaption></figcaption></figure> <figure><img src="/files/0EH4uK0W5dfXgNi1IkUY" alt=""><figcaption></figcaption></figure></div>

### **Attaching Macros to Presets**

There are two types of macros that can be assigned to a preset:

* **Run Macro**: A macro will run when transitioning to a preset.
* **Exit Macro**: A macro will be run when leaving the current preset.

To assign a run macro, perform the following:

1. Go to the **SuperSource** section.
2. Tap the **View All Presets** button in the upper-right.
3. Long-press or right-click on a preset.
4. Choose **Edit Preset**.
5. Enable **Run Macro**.
6. Tap **Macro** and select the macro you wish to run when recalling the preset.

A scroll icon will appear next to the preset name when a macro has been assigned.

To assign an exit macro, perform the following:

1. Go to the **SuperSource** section.
2. Tap the **View All Presets** button in the upper-right.
3. Long-press on a preset.
4. Choose **Edit Preset**.
5. Enable **Run Macro on Exit**.
6. Tap **Macro** and select the macro you wish to run when leaving the preset.

<div><figure><img src="/files/KunBQpAo8J4xcJ5FzibP" alt=""><figcaption></figcaption></figure> <figure><img src="/files/4QionNYXAqHh9DZ0oXbW" alt=""><figcaption></figcaption></figure> <figure><img src="/files/f6klyR3yrKil3B42P6xz" alt=""><figcaption></figcaption></figure></div>

A filled scroll icon will appear next to the preset name when an exit macro has been assigned.

### **Recalling the Same Preset**

Run and exit macros will not run if you recall a preset if it is the currently selected preset in MixEffect.

### **Macro Timing**

ATEM switchers can only run one macro at a time. If a macro is currently running when another macro is executed, the current macro will terminate before finishing all of its actions.

If you are transitioning from a preset that has an exit macro defined to a preset with an entrance macro defined, there will be a small delay between calls to execute the macro.

### **SuperSource Macros and Multiple Switchers**

If you use multiple SuperSource-capable switchers with MixEffect, you will have to spend extra time making sure that either (1) your macros are in sync or (2) you identify which presets with macros work with which switchers. Otherwise, you can run into a situation where the wrong macro runs when you recall a SuperSource preset.


# Importing and Exporting

Share your SuperSource presets with colleagues and the MixEffect community.

You can share presets with other people, or save copies of your presets to your computer.

## SuperSource Preset Export File Format

The preset export file is a simple JSON text file that contains information about your preset, including:

* Name
* Description
* Favorite
* Boxes
* Use Box Sources
* Use Custom Speed
* Speed
* Use Custom Animation
* Animation
* SuperSource Macro

> **Note:** The Run Macro and Run Macro Exit flags **are not** set when importing a preset export file. This is to prevent accidental triggering of macros when importing presets from a third-party.

## Importing Presets

There are two primary ways to import a preset into MixEffect:

* Import File
* Shortcuts

### Import File

Use the Import Presets command from the View All Presets page in the SuperSource section. Navigate and select the presets file that you wish to import.

Presets with the same UUID (unique identifier) will be replaced by the imported preset. Any new preset will be added to MixEffect.

### Import Presets Using Shortcuts

The Import Presets shortcuts action can take your presets JSON text and import presets directly into MixEffect. Follow these steps to create a shortcut:

1. Open **Shortcuts**.
2. Tap the **+** button.
3. Add a **Text** action.
4. Paste the contents of a **MixEffect presets export file** into the Text action.
5. Add an **Import Presets** action.
6. Run the shortcut or share it with others.

## Exporting Presets

To export your SuperSource Presets from MixEffect into a JSON text file, follow these steps:

1. Go to the **SuperSource** section.
2. Tap the **View All Presets** button in the upper-right corner.
3. Tap the **Options** button in the upper-right corner.
4. Choose **Export All Presets**.
5. A file sheet will appear allow you to save the JSON file containing your SuperSource presets.

### Exporting Individual Presets

If you want to export individual presets, follow these steps:

1. Go to the **SuperSource** section.
2. Tap the **View All Presets** button in the upper-right corner.
3. Tap the **Options** button in the upper-right corner.
4. Tap **List**.
5. Tap **Edit**.
6. Select the presets you wish to export.
7. Tap the **Share** button in the bottom toolbar.
8. A file sheet will appear allow you to save the JSON file containing the selected SuperSource presets.

In both export cases, you can use this JSON file in a shortcut or as an import file to MixEffect's Import Presets command.


# SuperSource and Shortcuts

Learn how to integrate SuperSource with custom shortcuts.

MixEffect's deep integration with Siri and Shortcuts allows you to automate your SuperSource presets.

### Default Boxes Shortcut

The [Default SSRC Boxes shortcut](https://www.icloud.com/shortcuts/6d28d988ed45409da8c7bfa18659457d) sets the inputs for Box 1, 2, 3, and 4 to Inputs 1, 2, 3, and 4.

### SuperSource Box Helper Shortcut

The SuperSource Box Helper shortcut assists with the creation of boxes of a certain size and aspect ratio.

<figure><img src="/files/V4ll8L7D8QszCLsKwTo0" alt=""><figcaption></figcaption></figure>

### Using Siri

Create a shortcut that sets a particular SuperSource preset and recall it with your voice. Here is an [example shortcut that sets the Four Grid preset](https://www.icloud.com/shortcuts/e9cb9546093c497cbe771d2b6324f417). Run it by saying, "Hey Siri, Four Grid Preset" when MixEffect is running in the foreground.


# SuperSource Settings

Change how SuperSource looks and operates in MixEffect.


# Show Transition Speed Menu

You can display a menu button in the SuperSource Visual Editor to allow you to quickly adjust the transition speed:

1. Tap **Settings** (gear icon) from the MixEffect home.
2. Tap **User Interface**.
3. Under SuperSource, tap to enable **Show Transition Speed Menu**.


# Sticky Current Preset

You can affix the currently selected preset in the Presets tab by enabling the Sticky Current Preset in MixEffect's Settings.

1. Tap **Settings** (gear icon) from the MixEffect home.
2. Tap **User Interface**.
3. Under SuperSource, tap to enable **Sticky Current Preset**.

The current preset will be displayed on top of the list of presets when MixEffect is displaying its compact (e.g. portrait) interface. Otherwise, the preset will be stuck on the left-hand side of the presets bar.

<div><figure><img src="/files/z33qKQpri0gFYxLFKOgX" alt=""><figcaption></figcaption></figure> <figure><img src="/files/JCe6yQH7TKxrDBXynMBI" alt=""><figcaption></figcaption></figure> <figure><img src="/files/YqFtQaSTFzS3GBJpEsIG" alt=""><figcaption></figcaption></figure></div>


# Differentiate Box Colors

By default, the box colors are displayed in the accent color specified in MixEffect's Settings. You can change this so the boxes are differentiated by color by following these steps:

1. Tap **Settings** (gear icon) from the MixEffect home.
2. Tap **User Interface**.
3. Under SuperSource, tap to enable **Differentiate Boxes with Color**.

The colors below will be used to identify each box:

* **Box 1**: Blue
* **Box 2**: Red
* **Box 3**: Green
* **Box 4**: Purple

<div><figure><img src="/files/hJAh303k6MXcrzgvFtic" alt=""><figcaption></figcaption></figure> <figure><img src="/files/Oc0ykT9IkMYkEYP8L5h2" alt=""><figcaption></figcaption></figure> <figure><img src="/files/XxqVEd8K4mAiEdkuFX45" alt=""><figcaption></figcaption></figure></div>


# SuperSource and Simulator

Use the ATEM Simulator in MixEffect to edit and preview your presets on-the-go.

If you are not at your ATEM switcher but want to edit and preview your SuperSource presets, you can use the ATEM Simulator that's a part of MixEffect.

If you do not have the Simulator active, follow these steps:

1. Go to **MixEffect Settings**.
2. Toggle **Enable ATEM Simulator**.
3. Tap **Done**.
4. If you haven't done so already, create an ATEM Simulator Switcher Connection.
   1. Go to the MixEffect Home screen.
   2. Tap **+**.
   3. Choose **New ATEM Simulator.**
   4. Enter a name for your Simulator.
   5. Tap **Add**.
5. Connect to the Simulator by tapping the **Connect** button or icon.
6. Go to the **SuperSource** section.
7. Interact with your presets.


# Color Generators

You can quickly change the color of your two built-in Color Generators on your ATEM switcher with MixEffect by performing one of the following actions:

1. Tap **Color Generators** from the **MixEffect Home**.
2. Long-press on a color generator button (e.g. **COL1** or **COL2**) from the **Program** or **Preview** panel on a switcher page.

## Adjusting Colors

The Color Generators page or sheet will appear allowing you to modify the following settings via sliders.

* Hue
* Saturation
* Luminance

The selected color will be shown in the large rectangle above the sliders.

<div><figure><img src="/files/FANYb74ZvWESIrCXoNOX" alt=""><figcaption></figcaption></figure> <figure><img src="/files/WCH4qpmFSOx5ZbrhFdt3" alt=""><figcaption></figcaption></figure> <figure><img src="/files/X8PDyaf3eUTY9ceNcFLI" alt=""><figcaption></figcaption></figure></div>

You can also tap the Color Picker button to bring up the standard iOS picker.

By default, MixEffect will show both color generators when you long-press on the COL1 or COL2 buttons on a switcher page. You can change this to show only the selected color generator by doing the following:

1. Go to **MixEffect Home**.
2. Tap **Settings**.
3. Uncheck **Show All Color Generators**.

## Automations

In MixEffect 1.4.0, an Automations link appears below each color generator. You can use this to quickly create a color preset.

> **NOTE**: This option will only appear if you have **Enable Automations** active in MixEffect Settings and if you have **Enable Shortcuts** or **Enable OSC** turned on.

<div><figure><img src="/files/KBXVKaVWDIO4WxyeILMV" alt=""><figcaption></figcaption></figure> <figure><img src="/files/dqJmvb24fsDDJt6AAFOW" alt=""><figcaption></figcaption></figure> <figure><img src="/files/vQtqnRgleY0liAbeATAz" alt=""><figcaption></figcaption></figure></div>

* **Set Color Generator**: Tapping the Add to Siri button will create a shortcut that uses the Set Color Generator action.
* **Send OSC Message**: Tapping the Add to Siri button will create a shortcut that uses the Send OSC Message to send a Set Color Generator message to MixEffect.
* **OSC**: If you prefer to enter the OSC commands directly into Companion, this section shows you exactly what you need to enter. For commands with multiple arguments, be sure to choose the `Send message with multiple arguments` action when using the Generic OSC module.
* **Use Custom Animation**: Toggle this on if you want to animate between the current settings to the saved settings in the shortcut or OSC call.&#x20;
* **Duration**: Specify the amount of time to perform the animation in milliseconds from 0 to 10000 (i.e. 10 seconds).
* **Style**: Choose an animation style that will be used to perform the transition. These styles are the same as in the SuperSource Transition Style.


# HyperDecks

MixEffect can control up to four HyperDecks from the app and any number of HyperDecks using Shortcuts.

### Setting Up HyperDecks

Once you are connected to a switcher, do the following to configure your HyperDecks for use with your switcher. If you have already configured them in ATEM Software Control, you can skip this step.

1. Tap **Settings** in the Switcher Section navigation list.
2. Tap **HyperDeck**.
3. Enter the **IP address** of the HyperDeck.
4. Configure the **Input** if the HyperDeck if it is connected to your ATEM switcher.
5. Set the **Auto Roll** and **Offset** values if desired.
6. Tap **Save**.

If the switcher is able to connect to the HyperDeck, a green checkmark will appear next to the IP address.

Depending on the ATEM switcher you are connected to, you can configure from four to ten HyperDecks to work inside the MixEffect application.

### Adding the HyperDecks Section

If you create a new switcher, the HyperDecks section will appear in your Switcher Section navigation list. If you are using an existing switcher, the HyperDecks section may not appear in the list. To add it, follow these steps:

1. Go to the **Switcher Detail** page for your switcher.
2. Tap **Reset Layout**.

![](/files/o0mtFeT2KtjCozKoVf3C)

The HyperDeck section will appear below Color Generators. You can tap Edit from the Switcher Navigation section to rearrange the order of your switcher sections.

### Adding the HyperDecks Panel to a Switcher Page

You can add a HyperDecks panel to your switcher page by following these steps:

1. Go to the **Switcher** section.
2. Tap the **Switcher Page** menu in the upper-right hand corner.
3. Tap **Edit This Page**.
4. Tap **Add Panel to XXX** where XXX is the switcher page section you wish to add the panel to.
5. Choose **HyperDecks** from the menu that appears.
6. Tap **Edit** to rearrange the order of the panel in the section.
7. Tap **Close**.

<figure><img src="/files/57jUcphmX7HUNrdd5IGY" alt=""><figcaption></figcaption></figure>

### Using the HyperDeck Panel

The HyperDeck panel is where you control the functions of the HyperDeck from MixEffect.

A HyperDeck can either record or playback videos stored on storage cards inserted into the HyperDeck. MixEffect displays these in two separate tabs to differentiate between the two modes.

<div><figure><img src="/files/y2cG6ffaVxn8b0QqnwVn" alt=""><figcaption></figcaption></figure> <figure><img src="/files/G9fejUmC8cmuVW43TObJ" alt=""><figcaption></figcaption></figure> <figure><img src="/files/DfchSehW4mmPLVIvvnHk" alt=""><figcaption></figcaption></figure></div>

#### Record Tab

The Record tab displays the current timecode from the ATEM switcher, along with the amount of recording time available on the currently selected storage card.

If you are not recording, you can tap on the card icons in the bottom-left hand corner to switch storage devices.

There is a Warning icon located in the bottom-right of the Record panel. Enabling that will turn the selected panel red when a recording session is not active. Use this as a reminder that a HyperDeck should be recording.

#### Playback Tab

The Playback tab is used to controlling the playback of video clips stored on the HyperDeck. It has the following controls:

* **Clip Name**: The name of the currently selected clip.
* **Clip Length**: The length of the currently selected clip.
* **Time Elapsed**: How much time has elapsed in the currently selected clip.
* **Time Remaining**: How much time is remaining in the currently selected clip.
* **Back**: Goes to the previous clip. If a clip is currently playing and two or more seconds have elapsed, tapping this button will move the playhead to the start of the current clip.
* **Play**: Starts and stops playback of the currently selected clip. If no clips are selected, the first clip will start playing.
* **Single Clip**: When toggled, MixEffect will instruct the HyperDeck to play just the selected clip and stop. If not toggled,  the HyperDeck will play subsequent clips (until the end of the clip list) after completing the current clip.
* **Next**: Goes to the next clip. If on the last clip and loop all is not enabled, the last frame of the last clip will be displayed. If loop all is enabled, tapping the Next button will go to the first clip.
* **Loop**: Toggle between Single Clip looping, Loop All, and No Loop.
* **Shuttle / Jog Controls**: A toggle to switch between shuttle and jog. If you have a device with a Taptic Engine, spinning the Jog Control wheel will provide haptic feedback. Long-press on the Jog Control wheel to increase the jog speed.
* **Clip List**: The list of video clips stored on the HyperDeck for the currently selected card.
* **Card List**: Icons representing the storage slots of the HyperDeck. Tap to switch cards when not playing or recording.
* **Input**: The input of the ATEM switcher that the HyperDeck is attached to.

## Shortcuts

The **Send HyperDeck Command** action allows you to send a command to any network-addressable HyperDeck.

### Parameters

* **Command**: The command to send to the HyperDeck. See list of commands below.
* **IP address**: The IP address of the HyperDeck.
* **Port Number**: The port number to communicate with the HyperDeck. The default is 9993.

### Returns

A string that is the result of the HyperDeck command.

### Commands

Refer to the HyperDeck manual for a complete list of support commands. Here is a sampling of the commands you can send to HyperDecks running 1.11 firmware. Note that some older HyperDecks that run the 1.08 firmware may not support all of these commands.

* **help**: return list of supported commands
* **commands**: return commands in XML format
* **device info**: return device information
* **disk list**: query clip list on active disk
* **disk list: slot id: {n}**: query clip list on disk in slot {n}
* **quit**: disconnect ethernet control
* **ping**: check device is responding
* **preview: enable: {true/false}**: switch to preview or output
* **play**: play from current timecode
* **play: speed: {-5000 to 5000}**: play at specific speed
* **play: loop: {true/false}**: play in loops or stop-at-end
* **play: single clip: {true/false}**: play current clip or all clips
* **playrange**: query play range setting
* **playrange set: clip id: {n}**: set play range to clip {n} only
* **playrange set: clip id: {n} count: {m}**: set play range to {m} clips starting from clip {n}
* **playrange set: in: {inT} out: {outT}**: set play range to play between:
  * timecode {inT} and timecode {outT}
* **playrange set: timeline in: {in} timeline out: {out}**: set play range in units of frames between:
  * timeline position {in} and position {out}
* **playrange clear**: clear/reset play range setting
* **play on startup**: query unit play on startup state
* **play on startup: enable: {true/false}**: enable or disable play on startup
* **play on startup: single clip: {true/false}**: play single clip or all clips on startup
* **play option**: query play options
* **play option: stop mode: {lastframe/nextframe/black}**: set output frame when playback stops
* **record**: record from current input
* **record: name: {name}**: record named clip (supports UTF-8 name)
* **record spill**: spill current recording to next slot
* **record spill: slot id: {n}**: spill current recording to specified slot. Use current slot id to spill to same slot
* **stop**: stop playback or recording
* **clips count**: query number of clips on timeline
* **clips get**: query all timeline clips
* **clips get: clip id: {n}**: query a timeline clip info
* **clips get: clip id: {n} count: {m}**: query m clips starting from n
* **clips get: version: {1/2}**: query clip info using specified output version:
  * version 1: id: name startT duration
  * version 2: id: startT duration inT outT name
* **clips add: name: {name}**: append a clip to timeline
* **clips add: clip id: {n} name: {name}**: insert clip before existing clip {n}
* **clips add: in: {inT} out: {outT} name: {name}**: append the {inT} to {outT} portion of clip
* **clips remove: clip id: {n}**: remove clip {n} from the timeline (invalidates clip ids following clip {n})
* **clips clear**: empty timeline clip list
* **transport info**: query current activity
* **slot info**: query active slot
* **slot info: slot id: {n}**: query slot {n}
* **slot select: slot id: {n}**: switch to specified slot
* **slot select: video format: {format}**: load clips of specified format
* **slot unblock**: unblock active slot
* **slot unblock: slot id: {n}**: unblock slot {n}
* **cache info**: query cache status
* **dynamic range**: query dynamic range settings
* **dynamic range: playback override: {off/Rec709/Rec2020\_SDR/HLG/ST2084\_300/ST2084\_500/ST2084\_800/ST2084\_1000/ST2084\_2000/ST2084\_4000/ST2048}**: set playback dynamic range override
* **notify**: query notification status
* **notify: remote: {true/false}**: set remote notifications
* **notify: transport: {true/false}**: set transport notifications
* **notify: slot: {true/false}**: set slot notifications
* **notify: configuration: {true/false}**: set configuration notifications
* **notify: dropped frames: {true/false}**: set dropped frames notifications
* **notify: display timecode: {true/false}**: set display timecode notifications
* **notify: timeline position: {true/false}**: set playback timeline position notifications
* **notify: playrange: {true/false}**: set playrange notifications
* **notify: cache: {true/false}**: set cache notifications
* **notify: dynamic range: {true/false}**: set dynamic range settings notifications
* **goto: clip id: {start/end}**: goto first clip or last clip
* **goto: clip id: {n}**: goto clip id {n}
* **goto: clip id: +{n}**: go forward {n} clips
* **goto: clip id: -{n}**: go backward {n} clips
* **goto: clip: {start/end}**: goto start or end of clip
* **goto: clip: {n}**: goto frame position {n} within current clip
* **goto: clip: +{n}**: go forward {n} frames within current clip
* **goto: clip: -{n}**: go backward {n} frames within current clip
* **goto: timeline: {start/end}**: goto first frame or last frame of timeline
* **goto: timeline: {n}**: goto frame position {n} within timeline
* **goto: timeline: +{n}**: go forward {n} frames within timeline
* **goto: timeline: -{n}**: go backward {n} frames within timeline
* **goto: timecode: {timecode}**: goto specified timecode
* **goto: timecode: +{timecode}**: go forward {timecode} duration
* **goto: timecode: -{timecode}**: go backward {timecode} duration
* **goto: slot id: {n}**: goto slot id {n} equivalent to "slot select: slot id: {n}"
* **jog: timecode: {timecode}**: jog to timecode
* **jog: timecode: +{timecode}**: jog forward {timecode} duration
* **jog: timecode: -{timecode}**: jog backward {timecode} duration
* **shuttle: speed: {-5000 to 5000}**: shuttle with speed
* **remote**: query unit remote control state
* **remote: enable: {true/false}**: enable or disable remote control
* **remote: override: {true/false}**: session override remote control
* **configuration**: query configuration settings
* **configuration: video input: {SDI/HDMI/component/composite}**: change the video input
* **configuration: audio input: {embedded/XLR/RCA}**: change the audio input
* **configuration: file format: {format}**: switch to specific file format
* **configuration: audio codec: {PCM/AAC}**: switch to specific audio codec
* **configuration: timecode input: {external/embedded/preset/clip}**: change the timecode input
* **configuration: timecode preset: {timecode**}: set the timecode preset
* **configuration: audio input channels: {n}**: set the number of audio channels recorded to {n}
* **configuration: record trigger: {none/recordbit/timecoderun}**: change the record trigger
* **configuration: record prefix: {name}**: set the record prefix name (supports UTF-8 name)
* **configuration: append timestamp: {true/false}**: append timestamp to recorded filename
* **uptime**: return time since last boot
* **format: slot id: {n} prepare: {exFAT/HFS+} name: {name}**: prepare formatting operation filesystem type with volume name {name}
  * "slot id" can be omitted for the current mounted slot
  * "name" defaults to current volume name if mounted (supports UTF-8)
* **format: confirm: {token}**: perform a pre-prepared formatting operation using token
* **identify: enable: {true/false}**: identify the device
* **watchdog: period: {period in seconds}**: client connection timeout

### Usage

Use the Send HyperDeck Command to create interactive interfaces to your HyperDecks via Shortcuts.

The screenshot above shows how you can create a menu to send various commands to a HyperDeck.

It's recommend to store a reference to the HyperDeck's IP address in a variable so you don't have to enter it every time. You can also copy and paste a shortcut action multiple times to do the same thing. Use this sample shortcut as a starter.


# Camera Control

> **IMPORTANT NOTE**: In MixEffect 1.0.6, the Camera Control section and panel have been removed from all non-ATEM Mini switchers due to a bug which can crash the switcher when trying to initiate autofocus of an SDI camera. HDMI cameras such as the Blackmagic Pocket Cinema Camera 6K should be unaffected. If you require control of your camera, use ATEM Software Control on your Mac or PC or the Blackmagic Camera Control application.

Rudimentary support has been added to control compatible HDMI-cameras attached to ATEM Mini line of switchers.

Right now, you can only initiate autofocus on a connected camera as view which cameras are currently on air.

<figure><img src="/files/2xmTsuRwxhBdT6tlYKGT" alt=""><figcaption></figcaption></figure>

You can toggle between using a cross point selector interface or displaying all your cameras using the tabs at the top of the page.￼

### Crosspoint Selector Colors

The color of the inputs can be one of the following for colors:

* **White**: Camera input is not selected nor active.
* **Red**: Camera input is not selected but active.
* **Yellow**: Camera input is selected and active.
* **Green**: Camera input is selected but not active.

Active is defined as meaning the input is currently being used as a fill or key source for an output currently being displayed, such as a program feed, downstream keyer, upstream keyer, etc.


# Audio Routing

Audio Routing is a very powerful feature his allows you to manually route audio channels from all SDI inputs to embedded audio channels in the SDI video outputs.

The following ATEM switchers supporting audio mapping, including:

* ATEM 2 M/E Constellation HD
* ATEM 4 M/E Constellation HD
* ATEM 2 M/E Constellation 4K
* ATEM 4 M/E Constellation 4K
* ATEM Constellation 8K
* ATEM Television Studio HD8
* ATEM Television Studio HD8 ISO
* ATEM Television Studio 4K8

Supported ATEM switchers should be running the latest firmware version to ensure that this feature exists.

{% hint style="warning" %}
It is highly recommended to save the default audio routing settings to a macro, so you can quickly recall it if you make an error when using this feature.
{% endhint %}

## Enabling Audio Routing

Audio Routing is a new section in MixEffect, but it is hidden by default on existing Switcher Connections. To reveal it, perform the following actions:

1. Open **MixEffect**.
2. Tap on a **Switcher Connection**.
3. **Scroll** to the bottom of the Switcher Connection detail screen.
4. Tap **Reset Layout**.

Audio Routing should appear between the Auxiliary and Output sections.

Additionally, you can access the Audio Routing section by going to Switcher Settings > Audio > Audio Routing.

<div><figure><img src="/files/MAg4z9yYQ3prfdY2Tx17" alt=""><figcaption></figcaption></figure> <figure><img src="/files/qqDl67J2Lx9oWFhBaeR3" alt=""><figcaption></figcaption></figure> <figure><img src="/files/yApqigJMRls30rsvERmc" alt=""><figcaption></figcaption></figure></div>

Tapping on Audio Routing will display a screen with three tabs:

* Select
* Crosspoint
* Bulk

## Select

This section allows you to set what audio input source is assigned to the 8 channel pairs on a SDI output.

1. Go to the Audio Routing section.
2. Tap Select.
3. Select the auxiliary output to edit.
4. Set the audio input source for each audio channel pair.

<figure><img src="/files/iHdlmvv6tQpsWq7fMHeJ" alt=""><figcaption></figcaption></figure>

## Crosspoint

This section displays a crosspoint selector for every possible input source and every audio channel pair for a single auxiliary output.&#x20;

1. Go to the Audio Routing section.
2. Tap Crosspoint.
3. Select the auxiliary output to edit.
4. Use the crosspoint selector to assign audio input sources to each audio channel pair.

<figure><img src="/files/XmoTMbgWinkkBTjYPOHt" alt=""><figcaption></figcaption></figure>

## Bulk

This section allows you to bulk assign an audio input source to many channels and auxiliary inputs at once. Options include:

* Setting to all audio channel pairs.
* Setting to a specific audio channel pair.
* Setting to all auxiliary outputs.
* Setting to a specific auxiliary output.

<figure><img src="/files/ApYtD55UNM46XJddALVW" alt=""><figcaption></figcaption></figure>

## Recording Macros

A common use case is to record your audio routing settings into a macro on your ATEM switcher. MixEffect makes it easy to assign all these settings with the tap of a single button.

1. Start **recording a macro**.
2. Go to the **Audio Routing** section.
3. From any one of the three tabs, tap **Set All Settings**.

The macro will record all the audio mapping settings currently saved on your ATEM switcher. Use this to save a starting point for your audio mapping or to save frequently used audio mapping presets.


# Bus Mapping

Bus Mapping lets you link one or more follower mix effects buses or auxiliary outputs to a primary M/E so they stay in sync during cuts and transitions. When the primary M/E switches sources, the follower bus follows automatically.

Using Bus Mapping, you can optionally substitute specific sources on a follower. This allows the follower to behave exactly like the primary for switching and transitions, while outputting different sources where needed.

Bus Mapping is supported only on certain ATEM switchers, such as:

* ATEM 1 M/E Constellation HD and 4K
* ATEM 2 M/E Constellation HD and 4K
* ATEM 4 M/E Constellation HD, 4K, and 4K Plus
* ATEM Mini Extreme ISO G2

You can find Bus Mapping in one of two locations:

1. Switcher Settings > Display > Bus Mapping
2. Bus Mapping section

If you do not see the Bus Mapping section in the left-hand sidebar of MixEffect when connected to your switcher, reset your sidebar layout. Instructions on how to [reset your layout can be found here](/configure/switcher-connections).

## Bus Mapping User Interface

If your switched has multiple mix effect buses, you'll see a tabbed interface with which to choose which mix effect bus is the lead or primary M/E.

### Adding a follower

To add a follower bus, follow these steps:

1. Tap on the plus icon.
2. Choose a mix effect bus (if available) or an auxiliary bus to act as a follower for your primary M/E.

<figure><img src="/files/TUX43l20e3qY1AHd8VG2" alt=""><figcaption><p>Adding a follower for M/E 1.</p></figcaption></figure>

### Removing a follower

To remove a follower bus, follow these steps:

1. Tap on the minus icon.
2. Choose the follower bus that you want to remove.

### Substituting sources

On the left-hand sidebar, the list of sources from the lead M/E will be shown alongside the sources of a follower. Tap on a follower source and choose the substitution source. For instance:

1. When Camera 5 is chosen on the lead M/E, have Camera 6 be substituted on the follower M/E
2. When Camera 1 is chosen on the lead M/E, have Camera 2 be subsituted on Auxiliary Output 1

<figure><img src="/files/UdYXY88WTxNQ5lEiwesA" alt=""><figcaption><p>Substituting a source for Camera 5 on the auxiliary output Videohub 1.</p></figcaption></figure>

## Options Menu

Tap on the button in the upper-right corner of the Bus Mapping section to reveal additional commands when working with bus mapping:

* **Show All Sources**: Displays all sources and substitutions for a follower, even if they haven't changed from the lead mix effects bus.
* **Show Mapped Sources**: Displays only those sources that have active substitutions.
* **Copy Mapping**: Copies the source substitutions for a selected follower.
* **Paste Mapping**: Pastes copied settings from a follower to another follower.
* **Remove All Buses**: Disables all buses for the selected mix effects bus.
* **Reset Bus**: Resets the substitutions for a selected follower back to its defaults.
* **Reset All**: Resets all substitutions for enabled followers.

<figure><img src="/files/1kJUnXPDZHN174Cn5EH2" alt=""><figcaption><p>Bus Mapping options menu.</p></figcaption></figure>


# Auxiliary

MixEffect lets you set the source for your ATEM switcher's auxiliary outputs.

1. Go to the **MixEffect Home**.
2. Tap **Aux**.

You can configure the Aux section to display as either a crosspoint selector or as individual panels.

## Crosspoint Selector

A single panel will appear that has two sections. The top section lists all available Auxiliary outputs. The bottom section lists all inputs that can be routed through the selected Auxiliary output.

<figure><img src="/files/BLm2EUagIxrdYWYiH4Ii" alt=""><figcaption></figcaption></figure>

## Separate Panels

Each auxiliary output will appear as a separate panel with the same sources. The selected source for each Aux output will be highlighted in red.

<figure><img src="/files/c66a3PIfHl79xwxXFGOi" alt="" width="375"><figcaption></figcaption></figure>

For example, on the ATEM Mini Pro, the lone Aux output is tied to the MultiViewer HDMI output.

On an ATEM 1 M/E Production Studio 4K, there are three Aux channels, so the Aux view displays three panels.

## Remote Webview

Remote Webview displays a floating 16:9 window within MixEffect. Use it with a video streaming service like [VDO.Ninja](https://VDO.Ninja) to display your ATEM's Multiview inside MixEffect. [Learn more about Remote Webview](/configure/remote-webview).

<figure><img src="/files/dAVFdNgbrJQqCPRnaler" alt=""><figcaption></figcaption></figure>


# Output

This section covers output options for ATEM switchers connected to MixEffect.

* [Live Stream](#live-stream)
* [Record Stream](#record-stream)
* [Capture Still](#capture-still)
* [Timecode](#timecode)
* [Counter](#counter)

## Live Stream

This section is displayed for those switchers — such as the ATEM Mini Pro, Mini Pro ISO, Mini Extreme, and Mini Extreme ISO — capable of outputting program to a live streaming service. It provides an interface to those familiar with the Live Stream tab in ATEM Software Control, but there are important differences to keep in mind.

#### Streaming.xml

ATEM switchers that support live streaming read in a file named `Streaming.xml` on macOS or Windows computers in the following locations:

* **macOS**: `/Library/Application Support/Blackmagic Design/Switchers`
* **Windows**: `C:\Program Files (x86)\Blackmagic Design\Blackmagic ATEM Switchers\ATEM Software Control`

This file is read on each power cycle of the switcher. While the API allows you to set the current streaming service, server, and profile, there is no known API to update or import a Streaming.xml file into the ATEM switcher while it is running.

MixEffect displays those streaming services, servers, and profiles that have been imported to or manually created in MixEffect. It supports importing of an existing Streaming.xml as well as exporting of such files suitable for importing into a switcher via the ATEM Software Control desktop application.

If the currently selected service, server, or profile in the ATEM switcher does not exist in MixEffect, a placeholder entry will be displayed but it cannot be selected if you change the service.

On the flip side, if you select a service, server, or profile in MixEffect that does not exist in the Streaming.xml file loaded into memory on the ATEM switcher, ATEM Software Control will display blank lines in the Live Stream tab in Output. The ATEM is still configured to live stream to what you set in MixEffect, there is just no visual indication.

### Live Stream Options

* **Status**: Displays the current streaming status, such as Off, Connecting, and On Air.
* **Time**: If streaming, this displays the duration of the current stream.
* **Data Rate and Cache**: If streaming, this displays the current data rate in Mb/sec and the current percentage of cache used.
* **Service**: Choose the streaming service to use (e.g. YouTube, Twitch, or Vimeo).
* **Server**: Choose a server associated with the selected Streaming service. MixEffect will display the user-facing name alongside the RTMP server URL. You can set a default server to be selected whenever a service is chosen.
* **Stream Key**: MixEffect allows you to store a stream key for each server. When a server is selected and has a stream key defined, it will be entered automatically for you. Otherwise, the stream key will be cleared out.
* **Quality**: Choose the quality of the stream. The HyperDeck options are automatically added to the top of the list. You can create additional quality profiles and set a certain profile as the default for the service.
* **Off and On Air**: Buttons to go On Air and to turn off the stream.
* **Show Streaming Indicator**: Displays a small red indicator at the top of the screen when you are streaming.
* **Edit Streaming Services**: Brings up MixEffect's list of streaming services. This feature is disabled when streaming is active.

#### Using Default Servers and Profiles

MixEffect allows you to set a server and profile as default for their service. When you choose a service, the server and profile are automatically set for you. You no longer have to dig around for the correct server to stream to, nor have to change the quality setting each time.

<div><figure><img src="/files/gvYuAm2uHvMdfsH6SRGE" alt=""><figcaption></figcaption></figure> <figure><img src="/files/l9NVygLKKL7OCOtW5zvw" alt=""><figcaption></figcaption></figure> <figure><img src="/files/LsjHLZBj4Y5X4VXHDzZG" alt=""><figcaption></figcaption></figure></div>

## Record Stream

This section controls the settings that instruct the ATEM switcher to record your program output to SSD drives connected to the ATEM Switcher.

<div><figure><img src="/files/Vs1CknuZgr6JX3qfO45o" alt=""><figcaption></figcaption></figure> <figure><img src="/files/nexoYwL6xIaLQa84D5ju" alt=""><figcaption></figcaption></figure> <figure><img src="/files/0uNQYIBPev7ywP5CFA35" alt=""><figcaption></figcaption></figure></div>

* **Filename**: Set the base filename for each recording.
* **Drive 1**: Select the drive to record to. The amount of available recording time is listed below the name in days:hours:minutes.
* **Drive 2**: If another drive is available, this menu lets you choose it. The amount of available recording time is listed below the name in days:hours:minutes.
* **Record in all Cameras**: If you have Blackmagic Pocket Cinema cameras attached to the ATEM switcher, this option will cause the cameras to start recording when you press Record.
* **ISO Record All Inputs**: On ATEM models that support ISO records, namely the Mini Pro ISO and Mini Extreme ISO, this option will cause ISOs to be recorded from each camera and mic input.
* **Switch**: If you have multiple drives attached, tapping this button will switch recording from one drive to the other. This button is disabled when nothing is being recorded or if only one drive is connected to the switcher.
* **Stop**: Stops the current recording. This button is disabled when nothing is being recorded.
* **Record**: Starts a recording. This button is disabled if no drives are connected or if there is an error with the drives.
* **Show Recording Indicator**: Displays a recording indicator at the top of the screen when recording is active.

## Capture Still

Allows you to capture the current program output as a still image in your Media Pool.

The Capture Still button is only available if there is an empty still slot in your Media Pool. If all slots are being used, the button will be grayed out and disabled.

<div><figure><img src="/files/0WHAiaNGpQBUiscnyajk" alt=""><figcaption></figcaption></figure> <figure><img src="/files/c2I91DOedQou0x4252OT" alt=""><figcaption></figcaption></figure> <figure><img src="/files/ozuYMTqPPeShATwDdbhz" alt=""><figcaption></figcaption></figure></div>

## Timecode

Set the timecode for the connected switcher using either the current time or starting from a pre-set value.

<div><figure><img src="/files/UC4tvxZ3MAmz7uvu9tFa" alt=""><figcaption></figcaption></figure> <figure><img src="/files/ZI7B2t2f2Ucr6PBG5e8b" alt=""><figcaption></figcaption></figure> <figure><img src="/files/N6Jx5GN8IATOZm1TxvRs" alt=""><figcaption></figcaption></figure></div>

## Counter

The ATEM Constellation HD switchers have a new Counter Overlay feature that displays a countdown or countup timer on Output 1.&#x20;

<figure><img src="/files/TXJgQSyWiJK1OyCZlzHl" alt=""><figcaption></figcaption></figure>

MixEffect features a Counter Overlay Visualizer, which allows you to reposition and resize the counter via touch. You also have access to handy presets for setting the countdown time.

Tap the Lock icon in the upper-right hand corner of the Visualizer to enable tap and dragging of the overlay. You can pinch and expand to resize the overlay.

<figure><img src="/files/aGfuAKWAjS4GjBnVKxds" alt=""><figcaption></figcaption></figure>

### Time of Day Button

Next to the presets button is a Time of Day button that sets the Counter Overlay time to the current time. Tapping the button alternates the time between 12h or 24h format.

<figure><img src="/files/iXXHnbYpUgklAHYTvVgk" alt=""><figcaption></figcaption></figure>

\
Automating the Counter Overlay

You can also create transitions and animations for the Counter Overlay by tapping on the Automations link at the bottom of the page. Execute the transition using [Shortcuts](/automate/shortcuts) or [OSC](/automate/osc) via a Stream Deck and Companion.

<figure><img src="/files/6jkwQpVOlW2tQtAHoICW" alt=""><figcaption></figcaption></figure>


# Run in Background

The Run in Background feature allows MixEffect to run completely in the background on iOS and iPadOS via Picture in Picture. You can run other applications while the MixEffect PIP window is active, and MixEffect will maintain its connection to the ATEM switcher.

When running in the background, MixEffect can continue to receive and process OSC messages and perform actions via Shortcuts.

## Requirements

* iOS 16 or iPadOS 16.1

**Note**: *Run in Background is not available on macOS. MixEffect can run in the background on macOS as long as the MixEffect window is not hidden or minimized to the Dock.*

## Activating Run in Background

To activate Run in Background, perform the following:

1. Connect to your switcher.
2. Tap **Run in Background** in the MixEffect Navigation area.
3. Tap **Start**.

The MixEffect Picture in Picture window should now appear.&#x20;

<figure><img src="/files/ZKGa8jrheLpnykUe4KHD" alt=""><figcaption><p>Activating Run in Background</p></figcaption></figure>

### Interacting with the MixEffect PIP Window

You can move the PIP window to the four corners of your screen. You can use the pinch and expand gesture to resize the window, although you will probably want to keep the window as small as possible.&#x20;

Below the MixEffect logo will be a list of the current Preview and Program sources on your ATEM's Mix Effect Buses.

Furthermore, an indicator will appear if your ATEM switcher is currently streaming or recording.

<figure><img src="/files/N5IOrx4pkkaGqURP4gm1" alt=""><figcaption></figcaption></figure>

### PIP Window Controls

The following controls are available in the MixEffect PIP Window:

* **Skip Backward**: Tapping this performs a Cut transition.
* **Skip Forward**: Tapping this performs an Auto transition.
* **X**: Tapping this closes the PIP window and terminates background operation of MixEffect.
* **Expand**: Tapping this opens MixEffect.
* **Pause**: Does nothing.

### Hiding the MixEffect PIP Window

When the MixEffect PIP window is visible, you can safely leave MixEffect and go to other applications. MixEffect will continue to run in the background. If MixEffect happens to disconnect from the ATEM, it will try to reconnect provided you have the [Auto-Reconnect setting](/configure/settings) enabled in MixEffect Settings.

If you don't want to see the MixEffect PIP window but still want it active, you can drag it to the left or right-hand side of the screen. A gray bar with an arrow will appear showing you the location of the MixEffect PIP Window, which you can drag out to reveal.

<figure><img src="/files/hnZhmj6dNcNq501AZhYG" alt=""><figcaption><p>Hiding the MixEffect PIP window</p></figcaption></figure>

## Troubleshooting

### Not Seeing Run in Background?

If you do not see a section called Run in Background, follow these steps to reset your Switcher Connection's navigation layout.

1. Tap your Switcher Connection.
2. Tap Reset Layout.

### Not Seeing the Picture in Picture Window?

If after tapping Start, you see a red error message that reads:

> If the MixEffect PIP window does not appear, go to another section, come back to Run in Background, and tap Start.

You will need to exit out of the Run in Background section, come back to it, and tap Start again.


# Switcher Settings

You can modify settings of your ATEM switcher by tapping on Switcher Settings from the MixEffect Home when connected to a switcher.

Depending on the model of switcher you have, the following settings may appear in this section:

* [Cut Bus](#general)
* Disable Fade to Black
* [Video Modes](#video)
* [Media](#media)
* [Audio](#audio)
* [Multiview](#multiview)
* [Source Labels](#source-labels)
* [HyperDeck](#hyperdeck)
* [Remote](#remote)
* [Delete All Macros](#macros)
* [Startup State](#startup)

## General

### Cut Bus

By default, ATEM switchers added to MixEffect operate in Program Preview mode. Tapping on a button in the Program panel will cause an immediate cut to that video source. Use the Cut and Auto buttons to transition to either cut directly or transition to the source in the Preview panel.

You can change the switcher to use a Cut Bus. Doing this will add a long-press action to the Cut and Auto buttons, which will change the way pressing buttons in the Program panel operate. If Cut is selected, pressing a program source will cut to that source. If Auto is selected, a transition will occur between the current source and the selected source.

When Cut Bus is active, the current mode will be highlighted in yellow. Long-press on the Cut and Auto buttons to set the Cut Bus mode. A single press of the Cut and Auto button will cause a cut or auto transition to occur respectively.

### Disable Fade to Black

On supported switchers, you can disable the hardware Fade to Black button from within MixEffect. When the Disable Fade to Black toggle is enabled, pressing the hardware Fade to Black button on your ATEM switcher will do nothing.

<figure><img src="/files/g4F4UgTEhmUgtAnKj84a" alt=""><figcaption></figcaption></figure>

### Disable Timecode for all SDI Outputs

On certain switchers, there may be a checkbox for disabling timecode on all SDI outputs.

### Enable Switcher to be Discovered on the Network

On certain switchers, there may be a checkbox to enable the switcher to be discovered on the network.

***

## Video Modes

### Auto Video Standard

Sets the ATEM switcher to automatically determine its video mode. This feature will not be displayed if your switcher does not support this feature.

### Video Mode

Sets the video output mode of the ATEM switcher.

An alert will be displayed before changing the video mode informing you that items in the Media Pool may be cleared when switching video modes.

### Multiview Video Mode

If your switcher supports changing the Multiview Video Mode, a drop-down menu will appear below the Video Mode to adjust the Multiview video standard.

### Colorspace and HDR Override

On certain switchers, you may see a menu to set the colorspace of the switcher and settings to perform HDR override.

<figure><img src="/files/L7uDVvf7bvibeJA0luM0" alt=""><figcaption></figcaption></figure>

### Down Convert Video Mode and 3G SDI Output

Some switchers, such as the ATEM 4 M/E Broadcast Studio 4K feature a Down Converted SDI Program Output. If supported, a drop-down menu will appear allowing you to set the video standard for the down converted output and the output level (Level A and Level B).

![Adjusting the Video Mode of the connected switcher.](/files/8JraAUXGKL8wDdJ4h0ml)

***

## Media

### Media Pool

If your switcher supports clip playback, you will be able to adjust the number of frames assigned to each clip in the Media Pool section.

<div><figure><img src="/files/8Q4BdLiHa4VQC7ILBhwP" alt=""><figcaption></figcaption></figure> <figure><img src="/files/B7MhYS6ganCH4P8Fg3Ke" alt=""><figcaption></figcaption></figure> <figure><img src="/files/CdYfbt5m51Rr5Hqrcg9E" alt=""><figcaption></figcaption></figure></div>

## Audio

You can configure audio settings for your switcher by going to the Switcher Settings section.

### Split Audio

If you have split audio from an audio source, the left and right channels will appear as independent panels in Audio. All the settings that could be changed across the stereo pair — input gain, frames delay, pan, etc. —will now be available on each channel.

You can split audio for an audio source in the Audio section of Switcher Settings.

1. Connect to a switcher.
2. Tap **Settings** in the Switcher sections list.
3. Tap **Split Audio**.
4. Check or uncheck the audio sources you want to split or combine.

<figure><img src="/files/kHsUZiDMpbWM5ltdc496" alt=""><figcaption></figcaption></figure>

### Audio Follows Video

You can have your switcher perform either a hard cut of the audio or add a transition when switching.

1. Connect to a switcher.
2. Tap **Settings** in the Switcher sections list.
3. Tap **Audio Follows Video**.
4. Choose your preferred setting.

### Analog Inputs

Some switchers can adjust the settings of their analog audio inputs.

1. Connect to a switcher.
2. Tap **Settings** in the Switcher sections list.
3. Tap **Analog Inputs**.
4. Adjust the settings of the switcher's analog inputs.

On certain switchers, the analog inputs can be configured with plug-in power or phantom power.

<figure><img src="/files/v6mnkFJPVg2BMv9FRDba" alt=""><figcaption><p>Analog inputs for the ATEM Mini Extreme ISO G2</p></figcaption></figure>

The screenshot above shows how you can switch between Mic and Line input on the ATEM Mini Extreme ISO G2.

### Talkback

Some switchers feature Talkback, an ability to communicate with your production crew over SDI channels. On ATEM Constellation HD switchers, production talkback is embedded into SDI channels 15 and 16, whereas engineering talkback is embedded into SDI channels 13 and 14.

<div><figure><img src="/files/lLGsvw5ictWZJYkMbOnt" alt=""><figcaption></figcaption></figure> <figure><img src="/files/KII91mtsn0aHy9kiUTte" alt=""><figcaption></figcaption></figure> <figure><img src="/files/8Ub0KggdlikeUkTc3BJQ" alt=""><figcaption></figcaption></figure></div>

### Mix Minus

Some switchers support mix minus, an ability to mute the audio on an SDI output from their return program feed. Enabling mix minus on an input will output all program audio in the mix, minus that particular input.

<figure><img src="/files/VR8kUjciyERi8lCRGywk" alt=""><figcaption></figcaption></figure>

### Monitoring

On certain switchers such as the ATEM Mini Extreme ISO G2, there may be an option called Monitoring to configure Output Loudness Metering.&#x20;

<figure><img src="/files/NQ2otwQFF608vCzhqw37" alt=""><figcaption></figcaption></figure>

### Audio Routing

Some switchers support the ability to route audio sources to SDI outputs. If your switcher supports that, an Audio Routing button will appear that will take you to the [Audio Routing](/explore/audio-routing) section.

<figure><img src="/files/XmoTMbgWinkkBTjYPOHt" alt=""><figcaption></figcaption></figure>

***

## Display

### Multiview

You can adjust most Multiview settings in MixEffect, including:

* View Control
* Audio Meters On/Off
* Opacity
* Window Input

<figure><img src="/files/o3cc8ooZI1eFNKzEwPQ7" alt=""><figcaption></figcaption></figure>

#### View Control

Change the layout of the Multi View by tapping on the desired layout. This open only appears if your switcher supports changing layouts.

#### Audio Meters On/Off

Tap to enable the visual audio meters on all windows.

#### Opacity

If your switcher supports it, a slider will appear below the audio meter toggle.

#### Window Input

Tap on the input for each window that you want to change. Select the source that should be displayed in the Multiview.

#### Additional Multiview Options

On supported switchers, additional options to control Frame Guides, Borders, Border Color, and Label visibility will be displayed in the Multiview section.&#x20;

Supported switchers include the ATEM Mini Pro, ATEM Mini Pro ISO, ATEM Mini Extreme, ATEM Mini Extreme ISO, and the ATEM Constellation 4K lineup when updated to the latest version of the ATEM firmware (9.5 or later).

<figure><img src="/files/MZtGb0vWWlSef8UF0fBb" alt=""><figcaption></figcaption></figure>

### Source Labels

Change the labels shown in the Program, Preview, Select Bus, and Aux switcher panels, along with the source popup menus shown throughout MixEffect.

* **Name**: A string no longer than 44 characters.
* **Label**: A string no more than four characters long.

Tap Reset to revert the source name and label back to its original settings. Tap Save to save your changes back to the ATEM switcher.

<div><figure><img src="/files/xzl36daNlLwz2Y6e7HZE" alt=""><figcaption></figcaption></figure> <figure><img src="/files/AsA1BBFd3mgohXPxdWYT" alt=""><figcaption></figcaption></figure> <figure><img src="/files/5dAIVmX2g12mmBE2zPhl" alt=""><figcaption></figcaption></figure></div>

### Bus Mapping

Certain ATEM switchers provide access to Bus Mapping, which lets you link one or more follower mix effects buses to a primary M/E so they stay in sync during cuts and transitions. When the primary M/E switches sources, the follower M/Es follow automatically. Learn more about b[Bus Mapping](/explore/bus-mapping).

### Tally

Certain switchers allow you to configure how tally is displayed across the various mix effect buses.

<figure><img src="/files/TsHbBaATJot4CCg9ZrCl" alt=""><figcaption></figcaption></figure>

***

## Control

### HyperDeck

You can control up to four HyperDecks from within MixEffect. Refer to the documentation in the HyperDeck section for more details.

### Remote

Some switchers have an RJ12 remote port on the rear for RS-422 control. You can choose to disable remote control or use VISCA or DVD100 interfaces to control the switcher remotely.

![Adjusting HyperDeck and Remote settings.](/files/HQw03dmOk0bQDMcw6vuQ)

## Macros

### Delete All Macros

Tapping this button will ask you twice if you want to delete all used macros in the currently selected switcher. This operation cannot be undone if you choose to delete your macros.

## Startup State

### Save Startup State

Saves the current state of you ATEM switcher to its non-volatile memory store. When you turn off and on, your ATEM switcher will be restored to the exact state where you last saved its settings.

### Clear Startup State

Returns your ATEM switcher back to its factory settings.


# Automations Overview

Automations is an advanced feature of MixEffect that lets you control your ATEM switcher automatically based on audio levels, voice commands, or external triggers.

* OSC
* Shortcuts
* Video Follows Audio

In the following sections in MixEffect, Automation links appear allowing you to quickly create shortcuts and OSC actions for the current state of your switcher. Some automations can be configured to be animated over time and with a custom animation style.

* [Color Generators](/explore/color-generators)
* [Downstream Keyers](/automate/osc/messages/downstream-keyers)
* [SuperSource](/explore/supersource)
* [Transitions](/explore/transitions)
* [Upstream Keyers](/explore/upstream-keyers)

## OSC

You can control certain functions of MixEffect via Open Sound Control (OSC) clients. This allows you, for instance, to use the popular Stream Deck (when powered by Companion) to assign buttons to set SuperSource presets, activate Video Follows Audio, or to run shortcuts.

Read the section on [OSC](/automate/osc) for more details.

## Shortcuts

iOS comes with a built-in application and system-wide method for automating tasks on your device called Shortcuts. It's tied heavily into the Siri system for using your voice to perform some action. Maybe you've used it to call someone or send a text message.

With MixEffect, you can control your ATEM switchers with just your voice or through a shortcut.

Read the [Shortcuts](/automate/shortcuts) section for more details.

## Video Follows Audio

MixEffect allows you to set up an auto-switcher system based on audio levels from your audio input sources.

For instance, you can instruct your switcher to change automatically to Input 1 whenever the Mic 1 audio level passes -20dB. You can have it hold there for 5 seconds before allowing another audio input to trigger another camera change.

This is useful if you are doing a production as a one-man team and want to automate the switching aspects of your show.

Learn more about [Video Follows Audio ](/automate/video-follows-audio)here.


# OSC

Control MixEffect using devices capable of sending OSC messages, such as an Elgato Stream Deck running Companion.

* [Enabling OSC in MixEffect](/automate/osc/enabling-osc-in-mixeffect)
* [Configuring Companion](/automate/osc/companion)
* [Supported OSC Messages](/automate/osc/messages)

{% embed url="<https://www.youtube.com/embed/otkEDN7mO-c>" %}


# Enabling OSC in MixEffect

Activating OSC support is a three-step process.

1. Enable OSC support in MixEffect.
2. Configuring the OSC server for each switcher in MixEffect.
3. Setting up your OSC-capable device to communicate with MixEffect.

### **Enable OSC Support**

This turns on OSC support throughout all of MixEffect.

1. Tap **Settings** (gear icon) from the **MixEffect Home**.
2. Tap **Automations**.
3. Tap **Enable OSC**.

### Enable OSC Server and Port for a Switcher

Each switcher connection can have its own OSC server. For instance, if you use MixEffect with an ATEM Mini Pro and an ATEM Extreme, you can have both respond to OSC calls when running MixEffect in Split View on an iPad.

> **IMPORTANT**: If you plan to run MixEffect with multiple switchers at the same time, it is recommended to specify a unique port number for each switcher.

1. From the **MixEffect Home**, tap on a switcher.
2. Tap **Edit**.
3. Change the **OSC Port** number. Choose a number over 40000 and less than 65535 to ensure no conflicts with other ports. The default is 49990.
4. Tap **Save**.
5. Tap **Enable OSC Server** to start the server.

The OSC server is now configured and active for your switcher.

<div><figure><img src="/files/FzFslfJPSKfWd1abBZMu" alt=""><figcaption></figcaption></figure> <figure><img src="/files/HXD1xb1BdvWK5pNf4QCL" alt=""><figcaption></figcaption></figure></div>

### Determining your iOS Device's IP address

In MixEffect version 1.4.0, the current list of IP addresses assigned to your device will be listed next to the OSC Port number in the Switcher Connection detail page. You can also find the IP address or addresses listed in MixEffect Settings > Automation next to the Enable OSC toggle.

You can also find the IP address of your device by following these steps:

1. Go to the Home screen.
2. Tap **Settings**.
3. Tap either **Wi-Fi** or **Ethernet**, depending on which network your device and the ATEM switcher are connected to.
4. Tap the **i** button.
5. Copy the **IP Address** and enter it into your OSC client like Companion.

![](/files/keie98MqpopFEBDhERLp)

OSC commands will be interpreted **only** when MixEffect is in the foreground of your iOS device.

MixEffect OSC server listens on the port you specified for your switcher. Make sure you have configured your OSC clients to send commands to MixEffect on the correct port.

> **NOTE**: If the OSC server does not appear to respond, try disabling and enabling the server from the Switcher Detail page.


# Companion

If you plan to use MixEffect with a Stream Deck, you'll want to download the free [Companion application from Bitfocus.io](https://bitfocus.io/companion/).

Next, configure the Companion app to communicate with MixEffect. There are currently two ways to control MixEffect from Companion:

* [Generic OSC Module](/automate/osc/companion/generic-osc-module)
* [Native MixEffect Companion Module](/automate/osc/companion/native-module)


# Generic OSC Module

To configure the Generic OSC Module in Companion to communicate with MixEffect, perform the following steps:

1. Open the **web admin interface** to Companion Running on your computer.
2. Tap **Instances**.
3. Enter `OSC generic` in the search field to add a new module.
4. Tap **Add**.
5. Give your module a name like `MixEffect Extreme` or `Extreme (MixEffect)`.
6. Set the **IP address** to the IP address of the device running MixEffect.
7. Set the **port number** to the correct port you entered for your switcher in MixEffect.
8. Tap **Apply Changes**.

![](/files/y0FomqOyuc3OXLvJpw75)

![](/files/eTSQygOHXZ3c99HBmKi2)

### Adding a Button

This section covers adding a button to Companion. It assumes that you are familiar with how Companion works.

1. Tap the **Buttons** tab.
2. Navigate to the **page** where you want to add a MixEffect button.
3. Click on a **button**.
4. Set the button type to **Regular button**.
5. Enter the name for your button.
6. Click **Add key down/on action**.
7. In the list that appears, choose the appropriate action from the list below:<br>
   * MixEffect Extreme: Send message without arguments
   * MixEffect Extreme: Send integer
   * MixEffect Extreme: Send float
   * MixEffect Extreme: Send string
   * MixEffect Extreme: Send message with multiple arguments

Which option you choose depends on the message you are planning to send. Review the next section to determine what kind of message to use.

1. Enter the **OSC Path** corresponding to the message you want to send. For instance: `/mixeffect/ssrc/preset` will instruct MixEffect to run a SuperSource preset.
2. Enter the name of the preset in the **Value** field. For instance, enter `"Four Grid"` if you chose Send message with multiple arguments. If you chose Send string, enter `Four Grid` without quotes.
3. Tap **Test actions** to see MixEffect run the preset.

![Setting the SuperSource to the "Four Grid" preset.](/files/8OOLk8hCcYA2ilhe1vLO)

If nothing happens, check the following:

1. **Enable OSC** is enabled in MixEffect Settings.
2. **Enable OSC Server** is enabled in your Switcher Detail page.
3. The **port number** you specified for your switcher is the same one you entered in Companion.


# Native Module

The native Companion module for MIxEffect exposes many functions of MixEffect through drop-down menus, sliders, and input fields, obviating the need to remember the OSC path and argument order.

> **NOTE**: Not all OSC commands are supported in the module, so it's also recommended that you create a new Generic OSC module in your Companion instance.

## Download

The 3.1.x stable candidate for Companion includes the native MixEffect module.&#x20;

<figure><img src="/files/C5k9sxXip2B6u83rzBWB" alt=""><figcaption></figcaption></figure>

## Installation

To install the Companion module, follow these steps:

1. Double-click the EXE or DMG file and follow the on-screen instructions to install Companion.
2. Open Companion.
3. In the **Connections** tab of Companion Admin, search for`MixEffect` and click **Add**.\
   \
   ![](/files/F08aVFeCJLSr4wmjZuMZ)
4. For the **Label** field, enter a name by which you'll identify the module (i.e. `mixeffect`).
5. For the **Target IP** field, enter the IP address of MixEffect running on your iPhone, iPod touch, iPad, or Apple Silicon Mac. On MixEffect 1.4 and higher, you'll see the IP address of your device in the Switcher Connection detail screen. \
   \
   ![](/files/u9H25RRNbgf5Ffl9eZdI)<br>
6. For the **Target Port** field, enter the port number of MixEffect, as defined in the Switcher Connection detail screen.\
   \
   ![](/files/yN0Dxy8gF8RZ0Z1FCWHg)<br>
7. Make sure that **Enable Automations** and **Enable OSC** are turned on in MixEffect Settings > Automations and that **Enable OSC Server** is turned on in your Switcher Connection detail screen.\
   \
   ![](/files/DxOaRGtiwYhMOpcf9YlJ)<br>
8. Select the type of ATEM switcher you have in the **Model** drop-down menu.
9. If you want to take advantage of feedback, check **Enable Feedback Polling**. If so, you'll have to configure the HTTP Feedback Server in MixEffect.
10. Click **Save** in Companion.

{% hint style="warning" %}
Do not enter the IP address of your ATEM switcher here. The MixEffect Module for Companion works by communicating to your ATEM switcher via MixEffect.
{% endhint %}

### Creating a Test Button

1. Go to the Buttons tab.
2. Create a new button.
3. Enter a name for the button.
4. Click the green Regular Button button.
5. Click `+ Add key down/on action` in the Press actions section.
6. Enter the label you enter in Installation Step 4. A list of available actions will appear.
7. Choose an action.
8. Enter all relevant fields.
9. Click the `Test Actions` button to test your button.

If everything is configured properly, the action will take place on MixEffect and your ATEM switcher. If nothing happens, verify that your IP Address and Port Number are set properly and that OSC is enabled in MixEffect.

## Release Video

Watch the [announce video and interview with the developer](https://www.youtube.com/watch?v=ElhBOvzVylQ).

{% embed url="<https://www.youtube.com/embed/ElhBOvzVylQ>" %}
MixEffect Native Companin Module
{% endembed %}

Visit this page for links to the current beta build of Companion that includes the MixEffect module.


# 32 Button Profiles

If you are using an ATEM Mini, ATEM Mini Pro, ATEM Mini Pro ISO, ATEM Mini Extreme or ATEM Mini Extreme ISO, you can [purchase a pre-made 32 button Companion profile](https://mixeffect.app/companion-profiles) for the MixEffect Native Companion Module. This profile features over 70 pages of buttons to control nearly every aspect of your switcher.

![The starting point for the MIxEffect 32 Button Companion Profile](/files/yeVqWvBqoanTaumMxECN)

{% hint style="info" %}
**NOTE**: This profile currently works with the 1.1.0 and higher release of the MixEffect Native Companion Module.
{% endhint %}

### English Names for SuperSource Presets in 32 Button Profiles

MixEffect has been localized in several languages. If you use MixEffect in a language other than English, note that the default SuperSource Presets that come with MixEffect have been localized. The SuperSource Preset references, however, in the 32 Button Profiles, are all in English. In order to use the SuperSource Preset buttons, you will have to change the names of the Presets, either in MixEffect or in Companion, to match each other.


# Sample Configuration Files

Download these sample MixEffect Companion configuration files that work with the generic OSC module. These sample files are designed to work with MixEffect 1.2.3 and higher.

* [Aux 1](https://mixeffect.app/assets/files/aux-1.companionconfig)
* [Aux 2](https://mixeffect.app/assets/files/aux-2.companionconfig)
* [Chroma Sample Green](https://mixeffect.app/assets/files/chroma-green-sample.companionconfig)
* [Color Generators](https://mixeffect.app/assets/files/color-generators.companionconfig)
* [DSK 1](https://mixeffect.app/assets/files/dsk-1.companionconfig)
* [DVE Mask, Size, and Position](https://mixeffect.app/assets/files/dve-mask-size-position.companionconfig)
* [Flying Key](https://mixeffect.app/assets/files/flying-key.companionconfig)
* [Macros](https://mixeffect.app/assets/files/macros.companionconfig)
* [Mic 1](https://mixeffect.app/assets/files/mic-1.companionconfig)
* [Multiview](https://mixeffect.app/assets/files/multiview.companionconfig)
* [Preview Bus](https://mixeffect.app/assets/files/preview-bus.companionconfig)
* [Sample Show Controls](https://mixeffect.app/assets/files/sample-show.companionconfig)
* [SuperSource](https://mixeffect.app/assets/files/mixeffect-companion-page-example.companionconfig)
* [SuperSource Box Positioning](https://mixeffect.app/assets/files/box-positioning.companionconfig)
* [SuperSource Box Swap, Size, Style, and Speed](https://mixeffect.app/assets/files/box-swap-size-style-speed.companionconfig)
* [Switcher Section and Switcher Pages](https://mixeffect.app/assets/files/switcher-section-and-page.companionconfig)
* [Transition Wipe with Patterns](https://mixeffect.app/assets/files/transitions-wipe.companionconfig)
* [USK Mask](https://mixeffect.app/assets/files/usk-mask.companionconfig)

![](/files/vVCkzl11qlghkq4KWZNk)


# Saving Preset Icons

The most common use case for running MixEffect and Companion is to run SuperSource presets from a Stream Deck. MixEffect makes it easy to download a thumbnail of a preset that you can upload to Companion.

1. From the **MixEffect Home**, tap **SuperSource**.
2. Tap **View All** in the upper-right.
3. Long-press on the desired preset.
4. In the menu that appears, tap **Save Preset Icon**.
5. Choose **Companion (73x41)**.
6. Repeat steps 3-5 for other presets.

If you are using this feature for the first time, a prompt from iOS will appear asking you for permission to access your Photos Library. If you décline permission, you must enable it in iOS Settings > MixEffect > Photos > Add Photos Only.

<div><figure><img src="/files/qrZLfIOIyUd13D8h9UgI" alt=""><figcaption></figcaption></figure> <figure><img src="/files/Axm7h0ZPK9DSpBhjwt6M" alt=""><figcaption></figcaption></figure> <figure><img src="/files/li3fOxQKAooLNQYXuBHC" alt=""><figcaption></figcaption></figure></div>

After a moment, the thumbnail will be saved to your Photos Library.

1. Go to **Photos**.
2. Select the preset thumbnail or thumbnails.
3. Tap **Share**.
4. Send the file to your computer running Companion. AirDrop works great.
5. Add the thumbnail to your buttons in Companion.

You can also export multiple preset thumbnails at a time by going into List mode on the View All Presets page:

1. Tap **Edit**.
2. Select the **presets** you wish to export.
3. Tap the **photo icon** in the export bar.
4. Choose your export size.

After a few moments, your thumbnails will have been added to your Photo Library.

<div><figure><img src="/files/pdx1fuSOXPkMHwXXKvFT" alt=""><figcaption></figcaption></figure> <figure><img src="/files/APafaU4asdtgKMGWQcZF" alt=""><figcaption></figcaption></figure> <figure><img src="/files/HcK0kFzRBhIE37b0m6lF" alt=""><figcaption></figcaption></figure></div>


# Adding Thumbnails

Use AirDrop, Messages, Email, or another sharing option to transfer your thumbnails to your Companion computer. When editing a button, click Browse underneath the button icon. Select your thumbnail, and you will have an accurate representation of your SuperSource preset in Companion and on your Stream Deck!

**Shortcut to Resize Icon from 72x41 to 72x58**

Some versions of Companion do not allow uploading of icons that are not 72x58 in size. If this happens to you, use this shortcut to resize your 72x41 icons to 72x58:

* [Companion 72x58 Shortcut](https://www.icloud.com/shortcuts/d84b3456c809437398f62cd9ac414e16)


# Messages

This section covers all of the OSC messages supported by MixEffect.


# MixEffect


# Connect

Closes the current switcher connection and tries to connect to the selected switcher.

| Message              | Description                                                                           | Arguments |
| -------------------- | ------------------------------------------------------------------------------------- | --------- |
| `/mixeffect/connect` | Closes the current switcher connection and tries to connect to the selected switcher. | String    |

| Argument                 | Type   | Description                                    |
| ------------------------ | ------ | ---------------------------------------------- |
| Switcher Connection Name | String | The exact name for the switcher to connect to. |

![](/files/VS4gO3bZvqpBTDYLkWbW)


# Remote Webview

Toggles the Remote Webview window in MixEffect.

| Message                     | Description                                     | Arguments |
| --------------------------- | ----------------------------------------------- | --------- |
| `/mixeffect/remote-webview` | Toggles the Remote Webview window in MixEffect. | None      |

> **NOTE**: Tap the ellipsis icon and tap Edit to configure the Remote Webview if nothing appears in the Remote Webview window.


# Run Shortcut

Opens the Shortcuts app and runs the selected shortcut.

| Message     | Description                                             | Arguments |
| ----------- | ------------------------------------------------------- | --------- |
| `/shortcut` | Opens the Shortcuts app and runs the selected shortcut. | Multiple  |

| Argument      | Type   | Description                            |
| ------------- | ------ | -------------------------------------- |
| Shortcut Name | String | The exact name of the shortcut to run  |
| Input         | String | Optional input to pass to the shortcut |

> **Note**: If the shortcut does not exist, Shortcuts will raise an error that you will have to dismiss manually.


# Run Shortcut and Return

Opens the Shortcuts app, runs the selected shortcut, and tries to return back to MixEffect

| Message            | Description                                                                                | Arguments |
| ------------------ | ------------------------------------------------------------------------------------------ | --------- |
| `/shortcut/return` | Opens the Shortcuts app, runs the selected shortcut, and tries to return back to MixEffect | Multiple  |

| Argument      | Type   | Description                            |
| ------------- | ------ | -------------------------------------- |
| Shortcut Name | String | The exact name of the shortcut to run  |
| Input         | String | Optional input to pass to the shortcut |

In the screenshot above, we will be running the shortcut named "Speak Text" with the input parameter, "Hello, World".

If the shortcut does not exist, Shortcuts will raise an error that you will have to dismiss manually.

After running, the shortcut will try to return back to MixEffect.

![](/files/okQsuTMoZjHEjggcW58x)


# Send Companion Feedback

Sends to the Companion OSC Server a JSON file describing the current state of the ATEM switcher.

| Message                              | Description                                                                                      | Arguments |
| ------------------------------------ | ------------------------------------------------------------------------------------------------ | --------- |
| `/mixeffect/send-companion-feedback` | Sends to the Companion OSC Server a JSON file describing the current state of the ATEM switcher. | None      |

The following settings must be set for each switcher connection.

* **Enable Companion Feedback**: Toggle to enable sending of feedback to Companion.
* **Companion IP address**: The IP address that is running Companion with the MixEffect native Companion module.
* **Companion Port**: The port number associated with the MixEffect native Companion module.

The JSON file delivered to Companion will have the following format. Depending on the model of your switcher, more or less informatiom will be sent in the feedback object.

```
{
	"aux": [
		{
			"index": 0,
			"source": 4
		},
		{
			"index": 1,
			"source": 1
		}
	],
	"colorGenerators": [
		{
			"hue": 0,
			"saturation": 0,
			"luminance": 49.2,
			"index": 0
		},
		{
			"hue": 25.4,
			"saturation": 100,
			"luminance": 9.6,
			"index": 1
		}
	],
	"dsk": [
		{
			"index": 0,
			"keySource": 3011,
			"isAutoTransitioning": false,
			"invertKey": false,
			"inTransition": false,
			"tie": false,
			"isTowardsOnAir": true,
			"fillSource": 3010,
			"onAir": false,
			"masked": false,
			"rate": 15,
			"preMultiplied": false
		},
		{
			"index": 1,
			"keySource": 3021,
			"isAutoTransitioning": false,
			"invertKey": false,
			"inTransition": false,
			"tie": false,
			"isTowardsOnAir": true,
			"fillSource": 3020,
			"onAir": false,
			"masked": false,
			"rate": 30,
			"preMultiplied": false
		}
	],
	"fairlight": {
		"vfaEnabled": false,
		"canVfa": true,
		"sources": [
			{
				"mixOption": 1,
				"isMixedIn": false,
				"sourceId": -65280,
				"audioSource": 1
			},
			{
				"mixOption": 1,
				"isMixedIn": false,
				"sourceId": -65280,
				"audioSource": 2
			},
			{
				"mixOption": 1,
				"isMixedIn": false,
				"sourceId": -65280,
				"audioSource": 3
			},
			{
				"mixOption": 1,
				"isMixedIn": false,
				"sourceId": -65280,
				"audioSource": 4
			},
			{
				"mixOption": 1,
				"isMixedIn": false,
				"sourceId": -65280,
				"audioSource": 5
			},
			{
				"mixOption": 1,
				"isMixedIn": false,
				"sourceId": -65280,
				"audioSource": 6
			},
			{
				"mixOption": 1,
				"isMixedIn": false,
				"sourceId": -65280,
				"audioSource": 7
			},
			{
				"mixOption": 1,
				"isMixedIn": false,
				"sourceId": -65280,
				"audioSource": 8
			},
			{
				"mixOption": 2,
				"isMixedIn": true,
				"sourceId": -256,
				"audioSource": 1301
			},
			{
				"mixOption": 2,
				"isMixedIn": true,
				"sourceId": -255,
				"audioSource": 1301
			},
			{
				"mixOption": 1,
				"isMixedIn": false,
				"sourceId": -65280,
				"audioSource": 1302
			}
		]
	},
	"macros": {
		"isLooping": false,
		"isRunning": false,
		"isWaiting": false,
		"isRecording": false,
		"macros": [
			{
				"index": 0,
				"name": "Auto"
			},
			{
				"index": 1,
				"name": "Lengthy Macro"
			},
			{
				"index": 2,
				"name": "Six Left (USK)"
			},
			{
				"index": 3,
				"name": "TEST"
			},
			{
				"index": 4,
				"name": "TEST Set All Setting"
			},
			{
				"index": 5,
				"name": "TEST"
			},
			{
				"index": 6,
				"name": "USK 1 On Air"
			},
			{
				"index": 7,
				"name": "USK 1 Off Air"
			},
			{
				"index": 8,
				"name": "Companion USK On"
			},
			{
				"index": 9,
				"name": "Set Chroma Thirds U4"
			},
			{
				"index": 10,
				"name": "Chroma Sample"
			},
			{
				"index": 11,
				"name": "USK 4 Off"
			},
			{
				"index": 12,
				"name": "Notes DVE"
			},
			{
				"index": 13,
				"name": "Companion USK Off"
			},
			{
				"index": 14,
				"name": "DSK Auto"
			},
			{
				"index": 15,
				"name": "Companion USK1 Only "
			},
			{
				"index": 16,
				"name": "Source: Streaming"
			},
			{
				"index": 17,
				"name": "Source: Zoom"
			},
			{
				"index": 18,
				"name": "Config for Streaming"
			},
			{
				"index": 19,
				"name": "Config for Gaming"
			},
			{
				"index": 20,
				"name": "Config for ZoomISO"
			},
			{
				"index": 21,
				"name": "FTB"
			},
			{
				"index": 22,
				"name": "Reset MP2 ZoomISO"
			},
			{
				"index": 23,
				"name": "Intro Live"
			},
			{
				"index": 24,
				"name": "Gaming SuperSource"
			},
			{
				"index": 25,
				"name": "Reset SuperSource ar"
			},
			{
				"index": 26,
				"name": "Macro 27"
			},
			{
				"index": 27,
				"name": "Audio Live ZoomISO"
			},
			{
				"index": 28,
				"name": "Audio Off ZoomISO"
			},
			{
				"index": 29,
				"name": "Mac Mini DVE 1"
			},
			{
				"index": 30,
				"name": "iPad DVE"
			},
			{
				"index": 31,
				"name": "USK 1 Off Air"
			},
			{
				"index": 32,
				"name": "Stream Intro Start"
			},
			{
				"index": 33,
				"name": "Stream Intro End"
			},
			{
				"index": 34,
				"name": "Zoom Audio 1"
			},
			{
				"index": 35,
				"name": "Zoom Audio 1-2"
			},
			{
				"index": 36,
				"name": "Zoom Audio 1-3"
			},
			{
				"index": 37,
				"name": "Zoom Audio 1-4"
			},
			{
				"index": 38,
				"name": "Five Grid USK 1 (Z4)"
			},
			{
				"index": 39,
				"name": "Five Grid USK Off"
			},
			{
				"index": 40,
				"name": "Two Horizontal Title"
			},
			{
				"index": 41,
				"name": "DSK 1 Off"
			},
			{
				"index": 42,
				"name": "Six Grid (ZoomISO+)"
			},
			{
				"index": 43,
				"name": "Six Grid Off"
			},
			{
				"index": 44,
				"name": "Enable Chat Overlay"
			},
			{
				"index": 45,
				"name": "Disable Chat Overlay"
			},
			{
				"index": 46,
				"name": "Chroma Test"
			},
			{
				"index": 48,
				"name": "Long Macro"
			},
			{
				"index": 49,
				"name": "AUX: Mac Mini"
			},
			{
				"index": 50,
				"name": "AUX: MultiView"
			},
			{
				"index": 52,
				"name": "Macro 53"
			},
			{
				"index": 89,
				"name": "6up USK3+4"
			},
			{
				"index": 90,
				"name": "Test"
			},
			{
				"index": 91,
				"name": "Macro 3"
			},
			{
				"index": 92,
				"name": "Macro 4"
			},
			{
				"index": 95,
				"name": "Save green"
			},
			{
				"index": 97,
				"name": "Audio Off"
			},
			{
				"index": 98,
				"name": "Test"
			},
			{
				"index": 99,
				"name": "Move Pattern USK"
			}
		]
	},
	"me": [
		{
			"transitionDve": {
				"logoRate": 25,
				"style": 34,
				"fillSource": 3020,
				"reverse": false,
				"rate": 25,
				"flipFlop": false,
				"keySource": 3020,
				"preMultiplied": true,
				"enableKey": false,
				"invertKey": false
			},
			"preview": 3010,
			"transitionDip": {
				"dipSource": 0,
				"rate": 45
			},
			"transitionMix": {
				"rate": 30
			},
			"index": 0,
			"inTransition": false,
			"transitionSting": {
				"source": 1,
				"triggerPoint": 34,
				"clipDuration": 73,
				"mixRate": 5,
				"preMultiplied": true,
				"preRoll": 2,
				"invertKey": false
			},
			"ftbInTransition": false,
			"backgroundState": 1,
			"transitionWipe": {
				"pattern": 2,
				"flipFlop": false,
				"fillSource": 0,
				"reverse": false,
				"rate": 85
			},
			"usk": [
				{
					"keyState": 0,
					"left": -16,
					"right": 16,
					"index": 0,
					"keySource": 3011,
					"chromaAdvanced": {
						"sampleCb": 41.34,
						"blue": -34,
						"red": -27.5,
						"flareSuppression": 30.8,
						"sampleY": 172.07,
						"green": 26.2,
						"foreground": 35.9,
						"background": 18.9,
						"spillSuppression": 26.7,
						"saturation": 120.7,
						"sampleCr": 25.88,
						"contrast": -26.5,
						"brightness": 16.9,
						"keyEdge": 52.8
					},
					"flyEnabled": false,
					"fillSource": 5,
					"type": 3,
					"dve": {
						"borderHue": 111.8,
						"masked": false,
						"borderInnerSoftness": 34,
						"borderInnerWidth": 12.1,
						"lightSourceAltitude": 25,
						"borderOuterWidth": 13,
						"top": 0,
						"right": 0,
						"borderBevelSoftness": 0,
						"borderBevelPosition": 0,
						"borderEnabled": true,
						"shadow": false,
						"borderSaturation": 100,
						"posX": 12.5,
						"sizeY": 0.169,
						"borderOpacity": 52,
						"borderLuma": 51.6,
						"left": 0,
						"bottom": 0,
						"borderOuterSoftness": 39,
						"sizeX": 0.169,
						"borderStyle": 0,
						"lightSourceDirection": 360,
						"posY": -3.5
					},
					"canFlyKey": true,
					"pattern": {
						"symmetry": 50,
						"pattern": 6,
						"size": 50,
						"posX": 0.5,
						"softness": 83,
						"invertPattern": false,
						"posY": 0.5
					},
					"bottom": -9,
					"masked": false,
					"onAir": false,
					"luma": {
						"invertKey": false,
						"preMultiplied": true
					},
					"top": 9
				},
				{
					"keyState": 0,
					"left": -16,
					"right": 16,
					"index": 1,
					"keySource": 3011,
					"chromaAdvanced": {
						"sampleCb": 41.34,
						"blue": 0,
						"red": 0,
						"flareSuppression": 0,
						"sampleY": 172.07,
						"green": 0,
						"foreground": 0,
						"background": 0,
						"spillSuppression": 0,
						"saturation": 100,
						"sampleCr": 25.88,
						"contrast": 0,
						"brightness": 0,
						"keyEdge": 50
					},
					"flyEnabled": false,
					"fillSource": 6,
					"type": 3,
					"dve": {
						"borderHue": 0,
						"masked": false,
						"borderInnerSoftness": 0,
						"borderInnerWidth": 0.2,
						"lightSourceAltitude": 25,
						"borderOuterWidth": 0,
						"top": 0,
						"right": 0,
						"borderBevelSoftness": 0,
						"borderBevelPosition": 0,
						"borderEnabled": false,
						"shadow": false,
						"borderSaturation": 0,
						"posX": 12.5,
						"sizeY": 0.169,
						"borderOpacity": 100,
						"borderLuma": 0,
						"left": 0,
						"bottom": 0,
						"borderOuterSoftness": 0,
						"sizeX": 0.169,
						"borderStyle": 0,
						"lightSourceDirection": 360,
						"posY": -7
					},
					"canFlyKey": true,
					"pattern": {
						"symmetry": 50,
						"pattern": 6,
						"size": 50,
						"posX": 0.5,
						"softness": 83,
						"invertPattern": false,
						"posY": 0.5
					},
					"bottom": -9,
					"masked": false,
					"onAir": false,
					"luma": {
						"invertKey": false,
						"preMultiplied": true
					},
					"top": 9
				},
				{
					"keyState": 0,
					"left": -16,
					"right": 16,
					"index": 2,
					"keySource": 3011,
					"chromaAdvanced": {
						"sampleCb": 41.34,
						"blue": 0,
						"red": 0,
						"flareSuppression": 0,
						"sampleY": 172.07,
						"green": 0,
						"foreground": 0,
						"background": 0,
						"spillSuppression": 0,
						"saturation": 100,
						"sampleCr": 25.88,
						"contrast": 0,
						"brightness": 0,
						"keyEdge": 50
					},
					"flyEnabled": false,
					"fillSource": 1,
					"type": 3,
					"dve": {
						"borderHue": 0,
						"masked": false,
						"borderInnerSoftness": 0,
						"borderInnerWidth": 0.2,
						"lightSourceAltitude": 25,
						"borderOuterWidth": 0,
						"top": 0,
						"right": 0,
						"borderBevelSoftness": 0,
						"borderBevelPosition": 0,
						"borderEnabled": true,
						"shadow": false,
						"borderSaturation": 0,
						"posX": 8.232,
						"sizeY": 0.414,
						"borderOpacity": 100,
						"borderLuma": 0,
						"left": 0,
						"bottom": 0,
						"borderOuterSoftness": 0,
						"sizeX": 0.414,
						"borderStyle": 0,
						"lightSourceDirection": 360,
						"posY": 4.048
					},
					"canFlyKey": true,
					"pattern": {
						"symmetry": 50,
						"pattern": 6,
						"size": 50,
						"posX": 0.5,
						"softness": 83,
						"invertPattern": false,
						"posY": 0.5
					},
					"bottom": -9,
					"masked": false,
					"onAir": false,
					"luma": {
						"invertKey": false,
						"preMultiplied": true
					},
					"top": 9
				},
				{
					"keyState": 0,
					"left": -16,
					"right": 16,
					"index": 3,
					"keySource": 3011,
					"chromaAdvanced": {
						"sampleCb": 41.34,
						"blue": 0,
						"red": 0,
						"flareSuppression": 0,
						"sampleY": 172.07,
						"green": 0,
						"foreground": 0,
						"background": 0,
						"spillSuppression": 0,
						"saturation": 100,
						"sampleCr": 25.88,
						"contrast": 0,
						"brightness": 0,
						"keyEdge": 50
					},
					"flyEnabled": false,
					"fillSource": 3010,
					"type": 0,
					"dve": {
						"borderHue": 0,
						"masked": false,
						"borderInnerSoftness": 0,
						"borderInnerWidth": 0.2,
						"lightSourceAltitude": 25,
						"borderOuterWidth": 0,
						"top": 0,
						"right": 0,
						"borderBevelSoftness": 0,
						"borderBevelPosition": 0,
						"borderEnabled": true,
						"shadow": false,
						"borderSaturation": 0,
						"posX": 12.5,
						"sizeY": 0.2,
						"borderOpacity": 100,
						"borderLuma": 0,
						"left": 0,
						"bottom": 0,
						"borderOuterSoftness": 0,
						"sizeX": 0.2,
						"borderStyle": 0,
						"lightSourceDirection": 360,
						"posY": 7
					},
					"canFlyKey": true,
					"pattern": {
						"symmetry": 50,
						"pattern": 6,
						"size": 50,
						"posX": 0.5,
						"softness": 83,
						"invertPattern": false,
						"posY": 0.5
					},
					"bottom": -9,
					"masked": false,
					"onAir": false,
					"luma": {
						"invertKey": false,
						"preMultiplied": true
					},
					"top": 9
				}
			],
			"ftb": false,
			"program": 1,
			"transition": {
				"style": 0,
				"rate": 1
			}
		}
	],
	"mediaPool": {
		"stills": [
			{
				"index": 0,
				"filename": "companion-profile-title"
			},
			{
				"index": 1,
				"filename": "network-settings"
			},
			{
				"index": 8,
				"filename": "Capture 1"
			},
			{
				"index": 9,
				"filename": "Capture 2"
			},
			{
				"index": 10,
				"filename": "Two-Horizontal-Titles 2"
			},
			{
				"index": 11,
				"filename": "MixEffectLogo 17"
			},
			{
				"index": 13,
				"filename": "MixEffectLogo 2"
			},
			{
				"index": 14,
				"filename": "gaming-overlay 2"
			},
			{
				"index": 15,
				"filename": "title-20210919_113205.png"
			},
			{
				"index": 16,
				"filename": "10-3"
			},
			{
				"index": 17,
				"filename": "10-4"
			},
			{
				"index": 18,
				"filename": "11-0-Color-Day"
			},
			{
				"index": 19,
				"filename": "11-0-Big-Sur-Color-Night"
			}
		],
		"mp": [
			{
				"stillIndex": 11,
				"clipIndex": 0,
				"type": 1,
				"index": 0
			},
			{
				"stillIndex": 16,
				"clipIndex": 0,
				"type": 1,
				"index": 1
			}
		],
		"audioClips": [],
		"clipCapacity": 0,
		"clips": [],
		"stillCapacity": 20
	},
	"model": 17,
	"multiview": [
		{
			"index": 0,
			"layout": 13
		}
	],
	"name": "ATEM Mini Extreme ISO",
	"output": {
		"isoRecordAllInputs": false,
		"streaming": false,
		"recording": false,
		"recordInAllCameras": false,
		"useLowLatency": false
	},
	"section": "switcher",
	"sources": [
		{
			"id": 0,
			"outputSource": true,
			"keySource": true,
			"longName": "Black",
			"inputSource": false,
			"shortName": "BLK",
			"mediaSourceFillOnly": false,
			"me2AndFillSources": false,
			"auxSource": true,
			"superSourceBoxSource": true,
			"me1AndFillSources": true,
			"me4AndFillSources": false,
			"superSourceArtSource": true,
			"mediaSource": false,
			"inputSourceForHyperDeck": false,
			"multiviewSource": true,
			"me3AndFillSources": false
		},
		{
			"id": 1,
			"outputSource": false,
			"keySource": true,
			"longName": "5D Mark IV",
			"inputSource": true,
			"shortName": "5DIV",
			"mediaSourceFillOnly": false,
			"me2AndFillSources": false,
			"auxSource": true,
			"superSourceBoxSource": true,
			"me1AndFillSources": true,
			"me4AndFillSources": false,
			"superSourceArtSource": true,
			"mediaSource": false,
			"inputSourceForHyperDeck": true,
			"multiviewSource": true,
			"me3AndFillSources": false
		},
		{
			"id": 2,
			"outputSource": false,
			"keySource": true,
			"longName": "iPad",
			"inputSource": true,
			"shortName": "IPAD",
			"mediaSourceFillOnly": false,
			"me2AndFillSources": false,
			"auxSource": true,
			"superSourceBoxSource": true,
			"me1AndFillSources": true,
			"me4AndFillSources": false,
			"superSourceArtSource": true,
			"mediaSource": false,
			"inputSourceForHyperDeck": true,
			"multiviewSource": true,
			"me3AndFillSources": false
		},
		{
			"id": 3,
			"outputSource": false,
			"keySource": true,
			"longName": "iPhone",
			"inputSource": true,
			"shortName": "IOS",
			"mediaSourceFillOnly": false,
			"me2AndFillSources": false,
			"auxSource": true,
			"superSourceBoxSource": true,
			"me1AndFillSources": true,
			"me4AndFillSources": false,
			"superSourceArtSource": true,
			"mediaSource": false,
			"inputSourceForHyperDeck": true,
			"multiviewSource": true,
			"me3AndFillSources": false
		},
		{
			"id": 4,
			"outputSource": false,
			"keySource": true,
			"longName": "Mac Mini",
			"inputSource": true,
			"shortName": "MAC",
			"mediaSourceFillOnly": false,
			"me2AndFillSources": false,
			"auxSource": true,
			"superSourceBoxSource": true,
			"me1AndFillSources": true,
			"me4AndFillSources": false,
			"superSourceArtSource": true,
			"mediaSource": false,
			"inputSourceForHyperDeck": true,
			"multiviewSource": true,
			"me3AndFillSources": false
		},
		{
			"id": 5,
			"outputSource": false,
			"keySource": true,
			"longName": "ZoomISO 4",
			"inputSource": true,
			"shortName": "ZOM4",
			"mediaSourceFillOnly": false,
			"me2AndFillSources": false,
			"auxSource": true,
			"superSourceBoxSource": true,
			"me1AndFillSources": true,
			"me4AndFillSources": false,
			"superSourceArtSource": true,
			"mediaSource": false,
			"inputSourceForHyperDeck": true,
			"multiviewSource": true,
			"me3AndFillSources": false
		},
		{
			"id": 6,
			"outputSource": false,
			"keySource": true,
			"longName": "ZoomISO 3",
			"inputSource": true,
			"shortName": "ZOM3",
			"mediaSourceFillOnly": false,
			"me2AndFillSources": false,
			"auxSource": true,
			"superSourceBoxSource": true,
			"me1AndFillSources": true,
			"me4AndFillSources": false,
			"superSourceArtSource": true,
			"mediaSource": false,
			"inputSourceForHyperDeck": true,
			"multiviewSource": true,
			"me3AndFillSources": false
		},
		{
			"id": 7,
			"outputSource": false,
			"keySource": true,
			"longName": "ZoomISO 2",
			"inputSource": true,
			"shortName": "ZOM2",
			"mediaSourceFillOnly": false,
			"me2AndFillSources": false,
			"auxSource": true,
			"superSourceBoxSource": true,
			"me1AndFillSources": true,
			"me4AndFillSources": false,
			"superSourceArtSource": true,
			"mediaSource": false,
			"inputSourceForHyperDeck": true,
			"multiviewSource": true,
			"me3AndFillSources": false
		},
		{
			"id": 8,
			"outputSource": false,
			"keySource": true,
			"longName": "ZoomISO 1",
			"inputSource": true,
			"shortName": "ZOM1",
			"mediaSourceFillOnly": false,
			"me2AndFillSources": false,
			"auxSource": true,
			"superSourceBoxSource": true,
			"me1AndFillSources": true,
			"me4AndFillSources": false,
			"superSourceArtSource": true,
			"mediaSource": false,
			"inputSourceForHyperDeck": true,
			"multiviewSource": true,
			"me3AndFillSources": false
		},
		{
			"id": 1000,
			"outputSource": true,
			"keySource": true,
			"longName": "Color Bars",
			"inputSource": false,
			"shortName": "BARS",
			"mediaSourceFillOnly": false,
			"me2AndFillSources": false,
			"auxSource": true,
			"superSourceBoxSource": true,
			"me1AndFillSources": true,
			"me4AndFillSources": false,
			"superSourceArtSource": true,
			"mediaSource": false,
			"inputSourceForHyperDeck": false,
			"multiviewSource": true,
			"me3AndFillSources": false
		},
		{
			"id": 2001,
			"outputSource": true,
			"keySource": false,
			"longName": "Color 1",
			"inputSource": false,
			"shortName": "COL1",
			"mediaSourceFillOnly": false,
			"me2AndFillSources": false,
			"auxSource": true,
			"superSourceBoxSource": true,
			"me1AndFillSources": true,
			"me4AndFillSources": false,
			"superSourceArtSource": true,
			"mediaSource": false,
			"inputSourceForHyperDeck": false,
			"multiviewSource": true,
			"me3AndFillSources": false
		},
		{
			"id": 2002,
			"outputSource": true,
			"keySource": false,
			"longName": "Color 2",
			"inputSource": false,
			"shortName": "COL2",
			"mediaSourceFillOnly": false,
			"me2AndFillSources": false,
			"auxSource": true,
			"superSourceBoxSource": true,
			"me1AndFillSources": true,
			"me4AndFillSources": false,
			"superSourceArtSource": true,
			"mediaSource": false,
			"inputSourceForHyperDeck": false,
			"multiviewSource": true,
			"me3AndFillSources": false
		},
		{
			"id": 3010,
			"outputSource": false,
			"keySource": true,
			"longName": "Media Player 1",
			"inputSource": false,
			"shortName": "MP1",
			"mediaSourceFillOnly": true,
			"me2AndFillSources": false,
			"auxSource": true,
			"superSourceBoxSource": true,
			"me1AndFillSources": true,
			"me4AndFillSources": false,
			"superSourceArtSource": true,
			"mediaSource": true,
			"inputSourceForHyperDeck": false,
			"multiviewSource": true,
			"me3AndFillSources": false
		},
		{
			"id": 3011,
			"outputSource": false,
			"keySource": true,
			"longName": "Media Player 1 Key",
			"inputSource": false,
			"shortName": "MP1K",
			"mediaSourceFillOnly": false,
			"me2AndFillSources": false,
			"auxSource": true,
			"superSourceBoxSource": true,
			"me1AndFillSources": true,
			"me4AndFillSources": false,
			"superSourceArtSource": true,
			"mediaSource": true,
			"inputSourceForHyperDeck": false,
			"multiviewSource": true,
			"me3AndFillSources": false
		},
		{
			"id": 3020,
			"outputSource": false,
			"keySource": true,
			"longName": "Media Player 2",
			"inputSource": false,
			"shortName": "MP2",
			"mediaSourceFillOnly": true,
			"me2AndFillSources": false,
			"auxSource": true,
			"superSourceBoxSource": true,
			"me1AndFillSources": true,
			"me4AndFillSources": false,
			"superSourceArtSource": true,
			"mediaSource": true,
			"inputSourceForHyperDeck": false,
			"multiviewSource": true,
			"me3AndFillSources": false
		},
		{
			"id": 3021,
			"outputSource": false,
			"keySource": true,
			"longName": "Media Player 2 Key",
			"inputSource": false,
			"shortName": "MP2K",
			"mediaSourceFillOnly": false,
			"me2AndFillSources": false,
			"auxSource": true,
			"superSourceBoxSource": true,
			"me1AndFillSources": true,
			"me4AndFillSources": false,
			"superSourceArtSource": true,
			"mediaSource": true,
			"inputSourceForHyperDeck": false,
			"multiviewSource": true,
			"me3AndFillSources": false
		},
		{
			"id": 6000,
			"outputSource": true,
			"keySource": true,
			"longName": "SuperSource",
			"inputSource": false,
			"shortName": "SSRC",
			"mediaSourceFillOnly": false,
			"me2AndFillSources": false,
			"auxSource": true,
			"superSourceBoxSource": true,
			"me1AndFillSources": true,
			"me4AndFillSources": false,
			"superSourceArtSource": false,
			"mediaSource": false,
			"inputSourceForHyperDeck": false,
			"multiviewSource": true,
			"me3AndFillSources": false
		},
		{
			"id": 10010,
			"outputSource": true,
			"keySource": false,
			"longName": "Program",
			"inputSource": false,
			"shortName": "PGM",
			"mediaSourceFillOnly": false,
			"me2AndFillSources": false,
			"auxSource": true,
			"superSourceBoxSource": false,
			"me1AndFillSources": false,
			"me4AndFillSources": false,
			"superSourceArtSource": false,
			"mediaSource": false,
			"inputSourceForHyperDeck": false,
			"multiviewSource": true,
			"me3AndFillSources": false
		},
		{
			"id": 10011,
			"outputSource": true,
			"keySource": false,
			"longName": "Preview",
			"inputSource": false,
			"shortName": "PVW",
			"mediaSourceFillOnly": false,
			"me2AndFillSources": false,
			"auxSource": true,
			"superSourceBoxSource": false,
			"me1AndFillSources": false,
			"me4AndFillSources": false,
			"superSourceArtSource": false,
			"mediaSource": false,
			"inputSourceForHyperDeck": false,
			"multiviewSource": true,
			"me3AndFillSources": false
		},
		{
			"id": 9001,
			"outputSource": true,
			"keySource": false,
			"longName": "Multi View",
			"inputSource": false,
			"shortName": "MVW",
			"mediaSourceFillOnly": false,
			"me2AndFillSources": false,
			"auxSource": true,
			"superSourceBoxSource": false,
			"me1AndFillSources": false,
			"me4AndFillSources": false,
			"superSourceArtSource": false,
			"mediaSource": false,
			"inputSourceForHyperDeck": false,
			"multiviewSource": false,
			"me3AndFillSources": false
		},
		{
			"id": 7001,
			"outputSource": true,
			"keySource": false,
			"longName": "Clean Feed",
			"inputSource": false,
			"shortName": "CFD",
			"mediaSourceFillOnly": false,
			"me2AndFillSources": false,
			"auxSource": true,
			"superSourceBoxSource": false,
			"me1AndFillSources": false,
			"me4AndFillSources": false,
			"superSourceArtSource": false,
			"mediaSource": false,
			"inputSourceForHyperDeck": false,
			"multiviewSource": true,
			"me3AndFillSources": false
		},
		{
			"id": 11001,
			"outputSource": false,
			"keySource": false,
			"longName": "5D Mark IV Direct",
			"inputSource": true,
			"shortName": "DIR1",
			"mediaSourceFillOnly": false,
			"me2AndFillSources": false,
			"auxSource": true,
			"superSourceBoxSource": false,
			"me1AndFillSources": false,
			"me4AndFillSources": false,
			"superSourceArtSource": false,
			"mediaSource": false,
			"inputSourceForHyperDeck": false,
			"multiviewSource": false,
			"me3AndFillSources": false
		},
		{
			"id": 11002,
			"outputSource": false,
			"keySource": false,
			"longName": "iPad Direct",
			"inputSource": true,
			"shortName": "DIR2",
			"mediaSourceFillOnly": false,
			"me2AndFillSources": false,
			"auxSource": true,
			"superSourceBoxSource": false,
			"me1AndFillSources": false,
			"me4AndFillSources": false,
			"superSourceArtSource": false,
			"mediaSource": false,
			"inputSourceForHyperDeck": false,
			"multiviewSource": false,
			"me3AndFillSources": false
		},
		{
			"id": 8001,
			"outputSource": true,
			"keySource": false,
			"longName": "Output 1",
			"inputSource": false,
			"shortName": "AUX1",
			"mediaSourceFillOnly": false,
			"me2AndFillSources": false,
			"auxSource": false,
			"superSourceBoxSource": false,
			"me1AndFillSources": false,
			"me4AndFillSources": false,
			"superSourceArtSource": false,
			"mediaSource": false,
			"inputSourceForHyperDeck": false,
			"multiviewSource": true,
			"me3AndFillSources": false
		},
		{
			"id": 8002,
			"outputSource": true,
			"keySource": false,
			"longName": "Output 2",
			"inputSource": false,
			"shortName": "AUX2",
			"mediaSourceFillOnly": false,
			"me2AndFillSources": false,
			"auxSource": false,
			"superSourceBoxSource": false,
			"me1AndFillSources": false,
			"me4AndFillSources": false,
			"superSourceArtSource": false,
			"mediaSource": false,
			"inputSourceForHyperDeck": false,
			"multiviewSource": true,
			"me3AndFillSources": false
		},
		{
			"id": 9101,
			"outputSource": true,
			"keySource": false,
			"longName": "Recording Status",
			"inputSource": false,
			"shortName": "REC",
			"mediaSourceFillOnly": false,
			"me2AndFillSources": false,
			"auxSource": false,
			"superSourceBoxSource": false,
			"me1AndFillSources": false,
			"me4AndFillSources": false,
			"superSourceArtSource": false,
			"mediaSource": false,
			"inputSourceForHyperDeck": false,
			"multiviewSource": true,
			"me3AndFillSources": false
		},
		{
			"id": 9102,
			"outputSource": true,
			"keySource": false,
			"longName": "Streaming Status",
			"inputSource": false,
			"shortName": "LIVE",
			"mediaSourceFillOnly": false,
			"me2AndFillSources": false,
			"auxSource": false,
			"superSourceBoxSource": false,
			"me1AndFillSources": false,
			"me4AndFillSources": false,
			"superSourceArtSource": false,
			"mediaSource": false,
			"inputSourceForHyperDeck": false,
			"multiviewSource": true,
			"me3AndFillSources": false
		},
		{
			"id": 9103,
			"outputSource": true,
			"keySource": false,
			"longName": "Audio Status",
			"inputSource": false,
			"shortName": "AUDI",
			"mediaSourceFillOnly": false,
			"me2AndFillSources": false,
			"auxSource": false,
			"superSourceBoxSource": false,
			"me1AndFillSources": false,
			"me4AndFillSources": false,
			"superSourceArtSource": false,
			"mediaSource": false,
			"inputSourceForHyperDeck": false,
			"multiviewSource": true,
			"me3AndFillSources": false
		}
	],
	"superSource": {
		"cascade": false,
		"ssrc": [
			{
				"index": 0,
				"boxes": [
					{
						"boxId": 0,
						"highlighted": false,
						"enabled": true,
						"cropped": true,
						"source": 1
					},
					{
						"boxId": 1,
						"highlighted": false,
						"enabled": true,
						"cropped": true,
						"source": 2
					},
					{
						"boxId": 2,
						"highlighted": false,
						"enabled": true,
						"cropped": true,
						"source": 1000
					},
					{
						"boxId": 3,
						"highlighted": false,
						"enabled": true,
						"cropped": true,
						"source": 3020
					}
				],
				"art": {
					"borderEnabled": false,
					"placeIn": true,
					"invertKey": false,
					"preMultiplied": false,
					"borderBevel": 0
				}
			}
		],
		"animationSpeed": 2,
		"interpolationStyle": 5
	}
}
```


# Send Companion Feedback Filtered

Sends to the Companion OSC Server a JSON file describing one specific state of the ATEM switcher.

| Message                              | Description                                                                                      | Arguments |
| ------------------------------------ | ------------------------------------------------------------------------------------------------ | --------- |
| `/mixeffect/send-companion-feedback` | Sends to the Companion OSC Server a JSON file describing the current state of the ATEM switcher. | Multiple  |

| Argument | Type                      | Description                                                                                                                                                                    |
| -------- | ------------------------- | ------------------------------------------------------------------------------------------------------------------------------------------------------------------------------ |
| Filter   | Command, delimited string | <ul><li>dsk</li><li>supersource</li><li>output</li><li>fairlight</li><li>legacyaudio</li><li>colorgenerators</li><li>mediapool</li><li>aux</li><li>me</li><li>macros</li></ul> |
| Log      | Integer                   | <p>Optional.<br><br>Specify 1 to send output to console (debugging only)</p>                                                                                                   |

The JSON returned will be similar to that described in the [Send Companion Feedback](/automate/osc/messages/mixeffect/send-companion-feedback) action except blank or empty values will be returned in the section not being filtered. Additional a filter key will be present with the string used to filter (i.e. `dsk`).

**NOTE**: For the Filter variable, **do not** add spaces in the comma-delimited list of feedback parameters. Use this:

`dsk,me,supersource`

and not this:

`dsk, me, supersource`

See screenshot below:

![](/files/8iBURJPbfXWn4cpNyUx5)

### Requirements

MixEffect 1.4.4 or higher


# Switcher Page

Moves to the next or previous Switcher Page for the current switcher.

| Message           | Description                                                           | Arguments |
| ----------------- | --------------------------------------------------------------------- | --------- |
| `/mixeffect/page` | Moves to the next or previous Switcher Page for the current switcher. | String    |

| Argument        | Type   | Description                                                                                   |
| --------------- | ------ | --------------------------------------------------------------------------------------------- |
| Command or Name | String | The exact switcher page name or `next` for the next page or `previous` for the previous page. |

MixEffect will cycle through your pages if you reach the end or beginning of your pages when using the next and previous commands.

The switcher page command is case-insensitive.

![](/files/ruodtNmVqutArSRIAr1l)


# Switcher Section

Switches to the following section in MixEffect for the current switcher.

| Message              | Description                                                              | Arguments |
| -------------------- | ------------------------------------------------------------------------ | --------- |
| `/mixeffect/section` | Switches to the following section in MixEffect for the current switcher. | String    |

| Argument | Type   | Description                                                                                                                                                                                                          |
| -------- | ------ | -------------------------------------------------------------------------------------------------------------------------------------------------------------------------------------------------------------------- |
| Section  | String | <p>audio<br>auxiliary<br>camera-control<br>color-generators<br>downstream-keyers<br>hyperdecks<br>macros<br>media<br>output<br>settings<br>supersource<br>switcher<br>transitions<br>upstream-keyers<br>view-all</p> |


# Video Follows Audio

Turns on, off, or toggles the Video Follows Audio feature. Automatically switches to the Audio section in MixEffect.

| Message          | Description                                                                                                          | Arguments         |
| ---------------- | -------------------------------------------------------------------------------------------------------------------- | ----------------- |
| `/mixeffect/vfa` | Turns on, off, or toggles the Video Follows Audio feature. Automatically switches to the Audio section in MixEffect. | Integer or String |

| Argument | Type   | Description                                                                           |
| -------- | ------ | ------------------------------------------------------------------------------------- |
| VFA      | String | <p>0 = Off<br>1 = On<br>2 = Toggle<br><br>off = Off<br>on = On<br>toggle = Toggle</p> |

> **NOTE**: Your switcher must support Fairlight Audio for Video Follows Audio to work.


# View Only Mode

Turns on View Only Mode for the connected switcher.

| Message          | Description                                         | Arguments |
| ---------------- | --------------------------------------------------- | --------- |
| `/mixeffect/vom` | Turns on View Only Mode for the connected switcher. | None      |

![](/files/E3PkYVFv3pEIAbZsWCXL)


# Auxiliary/Output

Messages that operate on the auxiliary outputs in a switcher.


# Aux/Output Source

Sets the source for an auxiliary output.

<table><thead><tr><th width="286.61458846722525">Message</th><th>Description</th><th>Arguments</th></tr></thead><tbody><tr><td><code>/mixeffect/aux/source</code></td><td>Sets the source for an auxiliary output.</td><td>Multiple</td></tr></tbody></table>

| Argument        | Type    | Description                                                                            |
| --------------- | ------- | -------------------------------------------------------------------------------------- |
| Video Source ID | Integer | The video source ID.                                                                   |
| Aux             | Integer | <p>(Optional)</p><p>One-based index that is the Auxiliary output ID. Default is 1.</p> |

Note that Aux sources can have other values than just the video sources, including SuperSource, Program, Preview, Multiview, and Camera 1 direct (only for Aux1) and Camera 2 direct (only for Aux2). Some of these values are dependent on the switcher.

```
public enum Base: UInt16 {
		case black = 0
		case input = 1
		case colorBars = 1000
		case color = 2001-2002
		case mediaPlayer = 3010-3040
		case mediaPlayerKey = 3011-3041
		case keyMask = 4010-4040
		case downStreamKeyMask = 5010-5040
		case superSource = 6000-6001
		case cleanFeed = 7001-700x
		case auxiliary = 8001-80xx
		case multiview = 9001-9004
		case program = 10_010-10_040
		case preview = 10_011-10_041
		case inputDirect = 11_001-11_0xx
}
```


# Color Generators


# Color Generator Parameter Adjust

Adjusts a single parameter for a color generator.

| Message                                       | Description                                       | Arguments |
| --------------------------------------------- | ------------------------------------------------- | --------- |
| `/mixeffect/color-generator/parameter/adjust` | Adjusts a single parameter for a color generator. | Multiple  |

<table><thead><tr><th width="207.33333333333331">Argument</th><th>Type</th><th>Description</th></tr></thead><tbody><tr><td>Parameter</td><td>Integer</td><td>0 = Hue<br>1 = Saturation<br>2 = Luminance</td></tr><tr><td>Adjustment Value</td><td>Float</td><td>-X to decrement the current parameter or Y to increment the current parameter by the adjustment value.</td></tr><tr><td>Color Generator Index</td><td>Integer</td><td><p>(Optional)</p><p>One-based index of the color generator. Default is 1.</p></td></tr><tr><td>Duration</td><td>Integer</td><td>(Optional)<br>0 = Off<br>1-10000 = Number of milliseconds to tween the parameters. Default is 0.</td></tr><tr><td>Style</td><td>Integer</td><td>(Optional)<br>0 = Cosine<br>1 = Cubed<br>2 = Inverse Cubed<br>3 = Inverse Squared<br>4 = Linear<br>5 = Sine<br>6 = Smooth Step<br>7 = Smoother Step<br>8 = Squared<br>9 = Ease In Out Elastic<br>10 = Ease Out Bounce<br>11 = Ease Out Elastic</td></tr></tbody></table>


# Color Generator Parameter Set

Sets a single parameter for a color generator.

| Message                                    | Description                                    | Arguments |
| ------------------------------------------ | ---------------------------------------------- | --------- |
| `/mixeffect/color-generator/parameter/set` | Sets a single parameter for a color generator. | Multiple  |

| Argument              | Type    | Description                                                                                                                                                                                                                                           |
| --------------------- | ------- | ----------------------------------------------------------------------------------------------------------------------------------------------------------------------------------------------------------------------------------------------------- |
| Parameter             | Integer | <p>0 = Hue<br>1 = Saturation<br>2 = Luminance</p>                                                                                                                                                                                                     |
| New Value             | Float   | The new value.                                                                                                                                                                                                                                        |
| Color Generator Index | Integer | <p>(Optional)</p><p>One-based index of the color generator. Default is 1.</p>                                                                                                                                                                         |
| Duration              | Integer | <p>(Optional)<br>0 = Off<br>1-10000 = Number of milliseconds to tween the parameters. Default is 0.</p>                                                                                                                                               |
| Style                 | Integer | <p>(Optional)<br>0 = Cosine<br>1 = Cubed<br>2 = Inverse Cubed<br>3 = Inverse Squared<br>4 = Linear<br>5 = Sine<br>6 = Smooth Step<br>7 = Smoother Step<br>8 = Squared<br>9 = Ease In Out Elastic<br>10 = Ease Out Bounce<br>11 = Ease Out Elastic</p> |


# Set Color Generator

Set the color of a color generator.

| Message                      | Description                         | Arguments |
| ---------------------------- | ----------------------------------- | --------- |
| `/mixeffect/color-generator` | Set the color of a color generator. | Multiple  |

| Argument              | Type    | Description                                                                                                                                                                                                                                           |
| --------------------- | ------- | ----------------------------------------------------------------------------------------------------------------------------------------------------------------------------------------------------------------------------------------------------- |
| Hue                   | Float   | Value from 0-360.0.                                                                                                                                                                                                                                   |
| Saturation            | Float   | Value from 0-100.0                                                                                                                                                                                                                                    |
| Luminance             | Float   | Value from 0-100.0                                                                                                                                                                                                                                    |
| Color Generator Index | Integer | <p>(Optional)</p><p>One-based index of the color generator. Default is 1.</p>                                                                                                                                                                         |
| Duration              | Integer | <p>(Optional)<br>0 = Off<br>1-10000 = Number of milliseconds to tween the parameters. Default is 0.</p>                                                                                                                                               |
| Style                 | Integer | <p>(Optional)<br>0 = Cosine<br>1 = Cubed<br>2 = Inverse Cubed<br>3 = Inverse Squared<br>4 = Linear<br>5 = Sine<br>6 = Smooth Step<br>7 = Smoother Step<br>8 = Squared<br>9 = Ease In Out Elastic<br>10 = Ease Out Bounce<br>11 = Ease Out Elastic</p> |


# Counter Overlay

The Counter Overlay is a feature of the following ATEM switchers:

* ATEM 1 M/E Constellation HD
* ATEM 2 M/E Constellation HD
* ATEM 4 M/E Constellation HD

It displays a countdown or countup clock on Output 1.


# Counter Enable

Turns on, off, or toggles the Counter Overlay on supported switchers.

| Message                     | Description                                                           | Arguments |
| --------------------------- | --------------------------------------------------------------------- | --------- |
| `/mixeffect/counter/enable` | Turns on, off, or toggles the Counter Overlay on supported switchers. | Integer   |

<table><thead><tr><th width="207.33333333333331">Argument</th><th>Type</th><th>Description</th></tr></thead><tbody><tr><td>Enable</td><td>Integer</td><td>0 = Disable<br>1 = Enable<br>2 = Toggle</td></tr></tbody></table>


# Counter Full

Sets all the settings for the Counter Overlay.

| Message                   | Description                                    | Arguments |
| ------------------------- | ---------------------------------------------- | --------- |
| `/mixeffect/counter/full` | Sets all the settings for the Counter Overlay. | Multiple  |

<table><thead><tr><th width="207.33333333333331">Argument</th><th>Type</th><th>Description</th></tr></thead><tbody><tr><td>Enabled</td><td>Integer</td><td>0 = Disable<br>1 = Enable<br>2 = Toggle</td></tr><tr><td>Size</td><td>Integer</td><td>0 to 100</td></tr><tr><td>Opacity</td><td>Integer</td><td>0 to 100</td></tr><tr><td>Position X</td><td>Float</td><td>-16.0 to 16.0</td></tr><tr><td>Position Y</td><td>Float</td><td>-9.0 to 9.0</td></tr><tr><td>Hide When Elapsed</td><td>Integer</td><td>0 = Disable<br>1 = Enabled<br>2 = Toggle. </td></tr><tr><td>Hour</td><td>Integer</td><td>0 to 23</td></tr><tr><td>Minute</td><td>Integer</td><td>0 to 59</td></tr><tr><td>Second</td><td>Integer</td><td>0 to 59</td></tr><tr><td>Mode</td><td>Integer</td><td>0 = Countdown<br>1 = Countup<br>2 = Toggle</td></tr><tr><td>Duration</td><td>Integer</td><td>(Optional)<br>0 = Off<br>1-10000 = Number of milliseconds to tween the parameters. Default is 0.</td></tr><tr><td>Style</td><td>Integer</td><td>(Optional)<br>0 = Cosine<br>1 = Cubed<br>2 = Inverse Cubed<br>3 = Inverse Squared<br>4 = Linear<br>5 = Sine<br>6 = Smooth Step<br>7 = Smoother Step<br>8 = Squared<br>9 = Ease In Out Elastic<br>10 = Ease Out Bounce<br>11 = Ease Out Elastic</td></tr></tbody></table>


# Counter Position Size Opacity

Sets the position, size, and opacity for Counter Overlay.

| Message                                    | Description                                               | Arguments |
| ------------------------------------------ | --------------------------------------------------------- | --------- |
| `/mixeffect/counter/position-size-opacity` | Sets the position, size, and opacity for Counter Overlay. | Multiple  |

<table><thead><tr><th width="207.33333333333331">Argument</th><th>Type</th><th>Description</th></tr></thead><tbody><tr><td>Position X</td><td>Float</td><td>-16.0 to 16.0</td></tr><tr><td>Position Y</td><td>Float</td><td>-9.0 to 9.0</td></tr><tr><td>Size</td><td>Integer</td><td>0 to 100</td></tr><tr><td>Opacity</td><td>Integer</td><td>0 to 100</td></tr><tr><td>Duration</td><td>Integer</td><td>(Optional)<br>0 = Off<br>1-10000 = Number of milliseconds to tween the parameters. Default is 0.</td></tr><tr><td>Style</td><td>Integer</td><td>(Optional)<br>0 = Cosine<br>1 = Cubed<br>2 = Inverse Cubed<br>3 = Inverse Squared<br>4 = Linear<br>5 = Sine<br>6 = Smooth Step<br>7 = Smoother Step<br>8 = Squared<br>9 = Ease In Out Elastic<br>10 = Ease Out Bounce<br>11 = Ease Out Elastic</td></tr></tbody></table>


# Counter Hide When Elapsed

Turns on, off, or toggles the Hide When Elapsed setting of the Counter Overlay.

| Message                                | Description                                                                     | Arguments |
| -------------------------------------- | ------------------------------------------------------------------------------- | --------- |
| `/mixeffect/counter/hide-when-elapsed` | Turns on, off, or toggles the Hide When Elapsed setting of the Counter Overlay. | Integer   |

<table><thead><tr><th width="207.33333333333331">Argument</th><th>Type</th><th>Description</th></tr></thead><tbody><tr><td>Enable</td><td>Integer</td><td>0 = Disable<br>1 = Enable<br>2 = Toggle</td></tr></tbody></table>

**Note**: This setting has no effect when the Counter Overlay mode is set to countup.


# Counter Mode

Sets the mode for the Counter Overlay.

| Message                   | Description                            | Arguments |
| ------------------------- | -------------------------------------- | --------- |
| `/mixeffect/counter/mode` | Sets the mode for the Counter Overlay. | Integer   |

<table><thead><tr><th width="207.33333333333331">Argument</th><th>Type</th><th>Description</th></tr></thead><tbody><tr><td>Mode</td><td>Integer</td><td>0 = Countdown<br>1 = Countup<br>2 = Toggle</td></tr></tbody></table>


# Counter Opacity

Sets the opacity of the Counter Overlay.

| Message                      | Description                              | Arguments |
| ---------------------------- | ---------------------------------------- | --------- |
| `/mixeffect/counter/opacity` | Sets the opacity of the Counter Overlay. | Multiple  |

<table><thead><tr><th width="207.33333333333331">Argument</th><th>Type</th><th>Description</th></tr></thead><tbody><tr><td>Opacity</td><td>Integer</td><td>0 to 100</td></tr><tr><td>Duration</td><td>Integer</td><td>(Optional)<br>0 = Off<br>1-10000 = Number of milliseconds to tween the parameters. Default is 0.</td></tr><tr><td>Style</td><td>Integer</td><td>(Optional)<br>0 = Cosine<br>1 = Cubed<br>2 = Inverse Cubed<br>3 = Inverse Squared<br>4 = Linear<br>5 = Sine<br>6 = Smooth Step<br>7 = Smoother Step<br>8 = Squared<br>9 = Ease In Out Elastic<br>10 = Ease Out Bounce<br>11 = Ease Out Elastic</td></tr></tbody></table>


# Counter Opacity Adjust

Adjusts the opacity of the Counter Overlay.

| Message                             | Description                                 | Arguments |
| ----------------------------------- | ------------------------------------------- | --------- |
| `/mixeffect/counter/opacity/adjust` | Adjusts the opacity of the Counter Overlay. | Multiple  |

<table><thead><tr><th width="207.33333333333331">Argument</th><th>Type</th><th>Description</th></tr></thead><tbody><tr><td>Value</td><td>Float</td><td>The value to adjust the opacity by.</td></tr></tbody></table>


# Counter Opacity Set

Sets the opacity of the Counter Overlay.

| Message                          | Description                              | Arguments |
| -------------------------------- | ---------------------------------------- | --------- |
| `/mixeffect/counter/opacity/set` | Sets the opacity of the Counter Overlay. | Multiple  |

<table><thead><tr><th width="207.33333333333331">Argument</th><th>Type</th><th>Description</th></tr></thead><tbody><tr><td>Value</td><td>Float</td><td>The value to set the opacity to.</td></tr></tbody></table>


# Counter Position

Sets the position of the Counter Overlay.

| Message                       | Description                               | Arguments |
| ----------------------------- | ----------------------------------------- | --------- |
| `/mixeffect/counter/position` | Sets the position of the Counter Overlay. | Multiple  |

<table><thead><tr><th width="207.33333333333331">Argument</th><th>Type</th><th>Description</th></tr></thead><tbody><tr><td>Position X</td><td>Float</td><td>-16.0 to 16.0</td></tr><tr><td>Position Y</td><td>Float</td><td>-9.0 to 9.0</td></tr><tr><td>Duration</td><td>Integer</td><td>(Optional)<br>0 = Off<br>1-10000 = Number of milliseconds to tween the parameters. Default is 0.</td></tr><tr><td>Style</td><td>Integer</td><td>(Optional)<br>0 = Cosine<br>1 = Cubed<br>2 = Inverse Cubed<br>3 = Inverse Squared<br>4 = Linear<br>5 = Sine<br>6 = Smooth Step<br>7 = Smoother Step<br>8 = Squared<br>9 = Ease In Out Elastic<br>10 = Ease Out Bounce<br>11 = Ease Out Elastic</td></tr></tbody></table>


# Counter Position Adjust

Adjusts the X or Y position of the Counter Overlay.

| Message                              | Description                                         | Arguments |
| ------------------------------------ | --------------------------------------------------- | --------- |
| `/mixeffect/counter/position/adjust` | Adjusts the X or Y position of the Counter Overlay. | Multiple  |

<table><thead><tr><th width="207.33333333333331">Argument</th><th>Type</th><th>Description</th></tr></thead><tbody><tr><td>Type</td><td>String</td><td>x = Adjust the X position<br>y = Adjust the Y position</td></tr><tr><td>Value</td><td>Float</td><td>The value to adjust the position by.</td></tr></tbody></table>


# Counter Position Set

Sets the X or Y position of the Counter Overlay.

| Message                           | Description                                      | Arguments |
| --------------------------------- | ------------------------------------------------ | --------- |
| `/mixeffect/counter/position/set` | Sets the X or Y position of the Counter Overlay. | Multiple  |

<table><thead><tr><th width="207.33333333333331">Argument</th><th>Type</th><th>Description</th></tr></thead><tbody><tr><td>Type</td><td>String</td><td>x or y</td></tr><tr><td>Value</td><td>Float</td><td>The value to set the position to.</td></tr></tbody></table>


# Counter Size

Sets the size of the Counter Overlay.

| Message                   | Description                           | Arguments |
| ------------------------- | ------------------------------------- | --------- |
| `/mixeffect/counter/size` | Sets the size of the Counter Overlay. | Multiple  |

<table><thead><tr><th width="207.33333333333331">Argument</th><th>Type</th><th>Description</th></tr></thead><tbody><tr><td>Size</td><td>Integer</td><td>0 to 100</td></tr><tr><td>Duration</td><td>Integer</td><td>(Optional)<br>0 = Off<br>1-10000 = Number of milliseconds to tween the parameters. Default is 0.</td></tr><tr><td>Style</td><td>Integer</td><td>(Optional)<br>0 = Cosine<br>1 = Cubed<br>2 = Inverse Cubed<br>3 = Inverse Squared<br>4 = Linear<br>5 = Sine<br>6 = Smooth Step<br>7 = Smoother Step<br>8 = Squared<br>9 = Ease In Out Elastic<br>10 = Ease Out Bounce<br>11 = Ease Out Elastic</td></tr></tbody></table>


# Counter Size Adjust

Adjusts the size of the Counter Overlay.

| Message                          | Description                              | Arguments |
| -------------------------------- | ---------------------------------------- | --------- |
| `/mixeffect/counter/size/adjust` | Adjusts the size of the Counter Overlay. | Multiple  |

<table><thead><tr><th width="207.33333333333331">Argument</th><th>Type</th><th>Description</th></tr></thead><tbody><tr><td>Value</td><td>Float</td><td>The value to adjust the size by.</td></tr></tbody></table>


# Counter Size Set

Sets the size of the Counter Overlay.

| Message                       | Description                           | Arguments |
| ----------------------------- | ------------------------------------- | --------- |
| `/mixeffect/counter/size/set` | Sets the size of the Counter Overlay. | Multiple  |

<table><thead><tr><th width="207.33333333333331">Argument</th><th>Type</th><th>Description</th></tr></thead><tbody><tr><td>Value</td><td>Float</td><td>The value to set the size to.</td></tr></tbody></table>


# Counter Reset

Resets the Counter Overlay.

| Message                    | Description                 | Arguments |
| -------------------------- | --------------------------- | --------- |
| `/mixeffect/counter/reset` | Resets the Counter Overlay. | None      |

If a counter is running, calling reset will stop the counter and reset the starting time.


# Counter Run

Starts, stops, or toggles the Counter Overlay.

| Message                  | Description                                    | Arguments |
| ------------------------ | ---------------------------------------------- | --------- |
| `/mixeffect/counter/run` | Starts, stops, or toggles the Counter Overlay. | Integer   |

<table><thead><tr><th width="207.33333333333331">Argument</th><th>Type</th><th>Description</th></tr></thead><tbody><tr><td>Run</td><td>Integer</td><td>0 = Stop<br>1 = Start<br>2 = Toggle</td></tr></tbody></table>

**Note**: If the Counter Overlay is in the reset state, toggling will start the Counter.


# Counter Time

Sets the time for the Counter Overlay.

| Message                   | Description                            | Arguments |
| ------------------------- | -------------------------------------- | --------- |
| `/mixeffect/counter/time` | Sets the time for the Counter Overlay. | Multiple  |

<table><thead><tr><th width="207.33333333333331">Argument</th><th>Type</th><th>Description</th></tr></thead><tbody><tr><td>Hour</td><td>Integer</td><td>0 to 23</td></tr><tr><td>Minute</td><td>Integer</td><td>0 to 59</td></tr><tr><td>Second</td><td>Integer</td><td>0 to 59</td></tr></tbody></table>


# Downstream Keyers


# DSK Auto

Performs an auto transition with the selected downstream keyer.

<table><thead><tr><th width="258.3333333333333">Message</th><th>Description</th><th>Arguments</th></tr></thead><tbody><tr><td><code>/mixeffect/dsk/auto</code></td><td>Performs an auto transition with the selected downstream keyer.</td><td>Integer</td></tr></tbody></table>

| Argument  | Type    | Description                                                                    |
| --------- | ------- | ------------------------------------------------------------------------------ |
| DSK Index | Integer | <p>(Optional)</p><p>One-based index of the downstream keyer. Default is 1.</p> |


# DSK Full

Sets all values of the selected Downstream Keyer.

<table><thead><tr><th width="263.3333333333333">Message</th><th>Description</th><th>Arguments</th></tr></thead><tbody><tr><td><code>/mixeffect/dsk/full</code></td><td>Sets all values of the selected Downstream Keyer.</td><td>Multiple</td></tr></tbody></table>

| Argument       | Type    | Description                                                                                                                                                                                                                                           |
| -------------- | ------- | ----------------------------------------------------------------------------------------------------------------------------------------------------------------------------------------------------------------------------------------------------- |
| Rate           | Integer | The number of frames from 1 to 250.                                                                                                                                                                                                                   |
| Fill Source ID | Integer | Integer that is the fill video source ID.                                                                                                                                                                                                             |
| Key Source ID  | Integer | Integer that is the key video source ID.                                                                                                                                                                                                              |
| Enable Mask    | Integer | <p>0 = Off<br>1 = On<br>2 = Toggle</p>                                                                                                                                                                                                                |
| Top            | Float   | Float from -9.0 to 9.0.                                                                                                                                                                                                                               |
| Bottom         | Float   | Float from -9.0 to 9.0.                                                                                                                                                                                                                               |
| Left           | Float   | Float from -16.0 to 16.0.                                                                                                                                                                                                                             |
| Right          | Float   | Float from -16.0 to 16.0.                                                                                                                                                                                                                             |
| Pre Multiplied | Integer | <p>0 = Off<br>1 = On<br>2 = Toggle</p>                                                                                                                                                                                                                |
| Clip           | Float   | Value from 0-100.0.                                                                                                                                                                                                                                   |
| Gain           | Float   | Value from 0-100.0                                                                                                                                                                                                                                    |
| Invert Key     | Integer | <p>0 = Off<br>1 = On<br>2 = Toggle</p>                                                                                                                                                                                                                |
| DSK Index      | Integer | <p>(Optional)<br>One-based index of the downstream keyer. Default is 1.</p>                                                                                                                                                                           |
| Duration       | Integer | <p>(Optional)<br>0 = Off<br>1-10000 = Number of milliseconds to tween the parameters. Default is 0.</p>                                                                                                                                               |
| Style          | Integer | <p>(Optional)<br>0 = Cosine<br>1 = Cubed<br>2 = Inverse Cubed<br>3 = Inverse Squared<br>4 = Linear<br>5 = Sine<br>6 = Smooth Step<br>7 = Smoother Step<br>8 = Squared<br>9 = Ease In Out Elastic<br>10 = Ease Out Bounce<br>11 = Ease Out Elastic</p> |


# DSK Key

Sets all of the key settings for the downstream keyer.

| Message              | Description                                            | Arguments |
| -------------------- | ------------------------------------------------------ | --------- |
| `/mixeffect/dsk/key` | Sets all of the key settings for the downstream keyer. | Multiple  |

| Argument       | Type    | Description                                                                    |
| -------------- | ------- | ------------------------------------------------------------------------------ |
| Pre Multiplied | Integer | <p>0 = Off<br>1 = On<br>2 = Toggle</p>                                         |
| Clip           | Float   | Value from 0-100.0.                                                            |
| Gain           | Float   | Value from 0-100.0                                                             |
| Invert Key     | Integer | <p>0 = Off<br>1 = On<br>2 = Toggle</p>                                         |
| DSK Index      | Integer | <p>(Optional)</p><p>One-based index of the downstream keyer. Default is 1.</p> |


# DSK Key Clip Adjust

Adjusts the Clip setting for the downstream keyer.

<table><thead><tr><th width="357.3333333333333">Message</th><th width="199">Description</th><th>Arguments</th></tr></thead><tbody><tr><td><code>/mixeffect/dsk/key/clip/adjust</code></td><td>Adjusts the Clip setting for the downstream keyer.</td><td>Multiple</td></tr></tbody></table>

| Argument         | Type    | Description                                                                                  |
| ---------------- | ------- | -------------------------------------------------------------------------------------------- |
| Adjustment Value | Float   | -X to decrease the value by a certain amount or Y to increase the value by a certain amount. |
| DSK Index        | Integer | <p>(Optional)</p><p>One-based index of the downstream keyer. Default is 1.</p>               |


# DSK Key Clip Set

Set the Clip setting for the downstream keyer.

<table><thead><tr><th width="334.3333333333333">Message</th><th>Description</th><th>Arguments</th></tr></thead><tbody><tr><td><code>/mixeffect/dsk/key/clip/set</code></td><td>Set the Clip setting for the downstream keyer.</td><td>Multiple</td></tr></tbody></table>

| Argument         | Type    | Description                                                                    |
| ---------------- | ------- | ------------------------------------------------------------------------------ |
| Adjustment Value | Float   | The new value.                                                                 |
| DSK Index        | Integer | <p>(Optional)</p><p>One-based index of the downstream keyer. Default is 1.</p> |


# DSK Key Clip Gain

Sets the Clip and Gain settings for the downstream keyer.

<table><thead><tr><th width="346.3333333333333">Message</th><th>Description</th><th>Arguments</th></tr></thead><tbody><tr><td><code>/mixeffect/dsk/key/clip-gain</code></td><td>Sets the Clip and Gain settings for the downstream keyer.</td><td>Multiple</td></tr></tbody></table>

| Argument  | Type    | Description                                                                    |
| --------- | ------- | ------------------------------------------------------------------------------ |
| Clip      | Float   | Value from 0-100.0.                                                            |
| Gain      | Float   | Value from 0-100.0                                                             |
| DSK Index | Integer | <p>(Optional)</p><p>One-based index of the downstream keyer. Default is 1.</p> |


# DSK Key Gain Adjust

Adjusts the Gain setting for the downstream keyer.

<table><thead><tr><th width="359.3333333333333">Message</th><th>Description</th><th>Arguments</th></tr></thead><tbody><tr><td><code>/mixeffect/dsk/key/gain/adjust</code></td><td>Adjusts the Gain setting for the downstream keyer.</td><td>Multiple</td></tr></tbody></table>

| Argument         | Type    | Description                                                                                 |
| ---------------- | ------- | ------------------------------------------------------------------------------------------- |
| Adjustment Value | Float   | -X to decrease the value by a certain amount or Y to increase the value by a certain amount |
| DSK Index        | Integer | <p>(Optional)</p><p>One-based index of the downstream keyer. Default is 1.</p>              |


# DSK Key Gain Set

Set the Gain setting for the downstream keyer.

<table><thead><tr><th width="365.3333333333333">Message</th><th>Description</th><th>Arguments</th></tr></thead><tbody><tr><td><code>/mixeffect/dsk/key/gain/adjust</code></td><td>Sets the Gain setting for the downstream keyer.</td><td>Multiple</td></tr></tbody></table>

| Argument         | Type    | Description                                                                    |
| ---------------- | ------- | ------------------------------------------------------------------------------ |
| Adjustment Value | Float   | The new value.                                                                 |
| DSK Index        | Integer | <p>(Optional)</p><p>One-based index of the downstream keyer. Default is 1.</p> |


---

[Next Page](/llms-full.txt/1)